
We all make mistakes, but most of us would prefer not to learn every gardening lesson the hard way. To help us avoid at least a few future blunders, we asked five horticultural and design professionals from around the country to tell us about a big garden mistake they’ve had to fix, along with their solution. The problems ran the gamut from plant and material choices to planning and design decisions. Each expert also contributed a favorite problem-solving tip. Here are the stories and ideas they shared in hopes of heading off similar pitfalls.
The mistake: Building a walkway that is slippery when wet
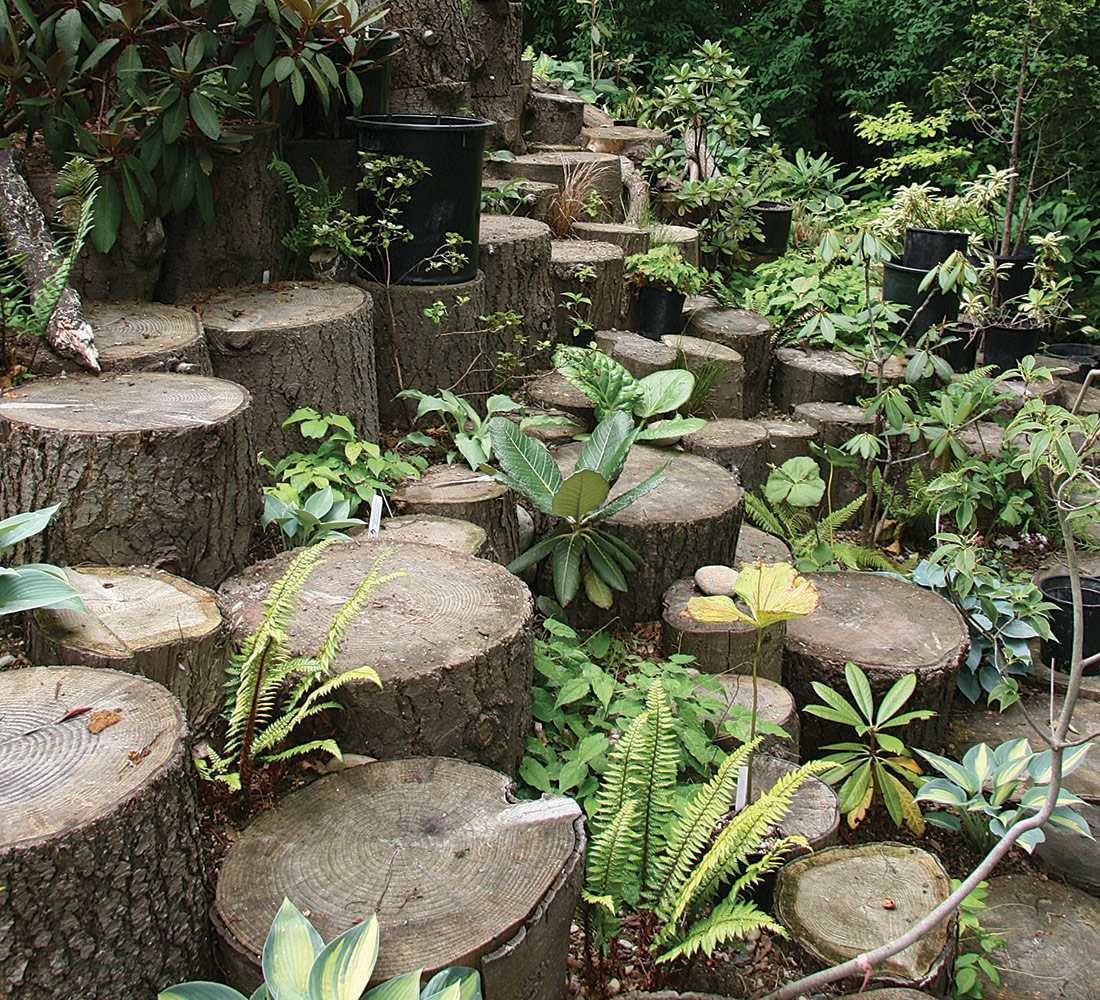
After a tree was removed, I was left with dozens of red cedar rounds and had no fireplace in which to burn them. It seemed like an ideal solution to set these beautiful, rot-resistant rounds into a sloped garden path, thereby creating a set of steps to traverse the hillside. From summer into fall I worked on installing the rounds, and the result was beautiful. Then our Pacific Northwest winter rains arrived. Within a month, the moisture-soaked wood had developed a thin layer of algae that was as slick as ice. My hillside staircase had become a beautiful and inviting death trap.
The solution: Add some texture for better traction
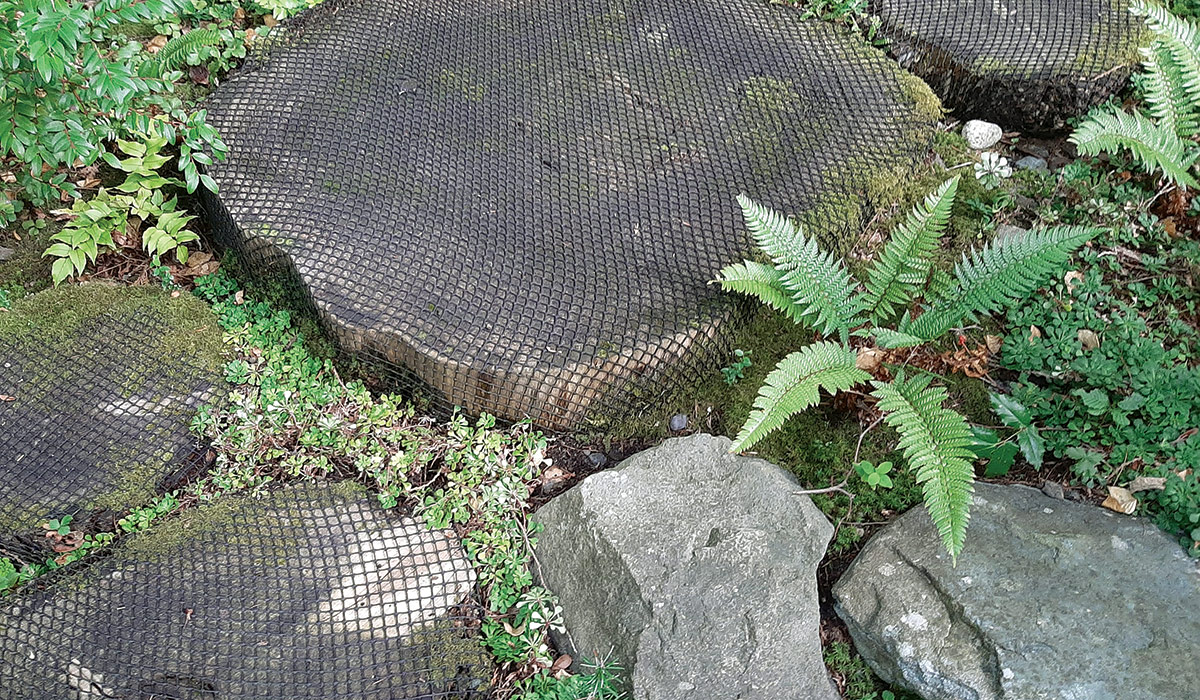
Soon after, I started working at the Elisabeth C. Miller Botanical Garden and learned that Mrs. Miller, who also loved the look of cedar rounds, had devised a clever solution to combat slippery surfaces. Before each cedar round was installed, workers would wrap a square of commercial-grade fish netting around the cedar, stapling it to the bottom side. After the round was placed, the netting stayed put and provided excellent grip. This tough, long-lasting material was easily obtained from one of Seattle’s nearby fishing docks. Once I learned about this fix, I knew my cedar steps were in for a redo.
The expert: Richie Steffen is a contributing editor and the executive director of the Elisabeth C. Miller Botanical Garden in Seattle.
The mistake: Impatiently planting a fast-growing species
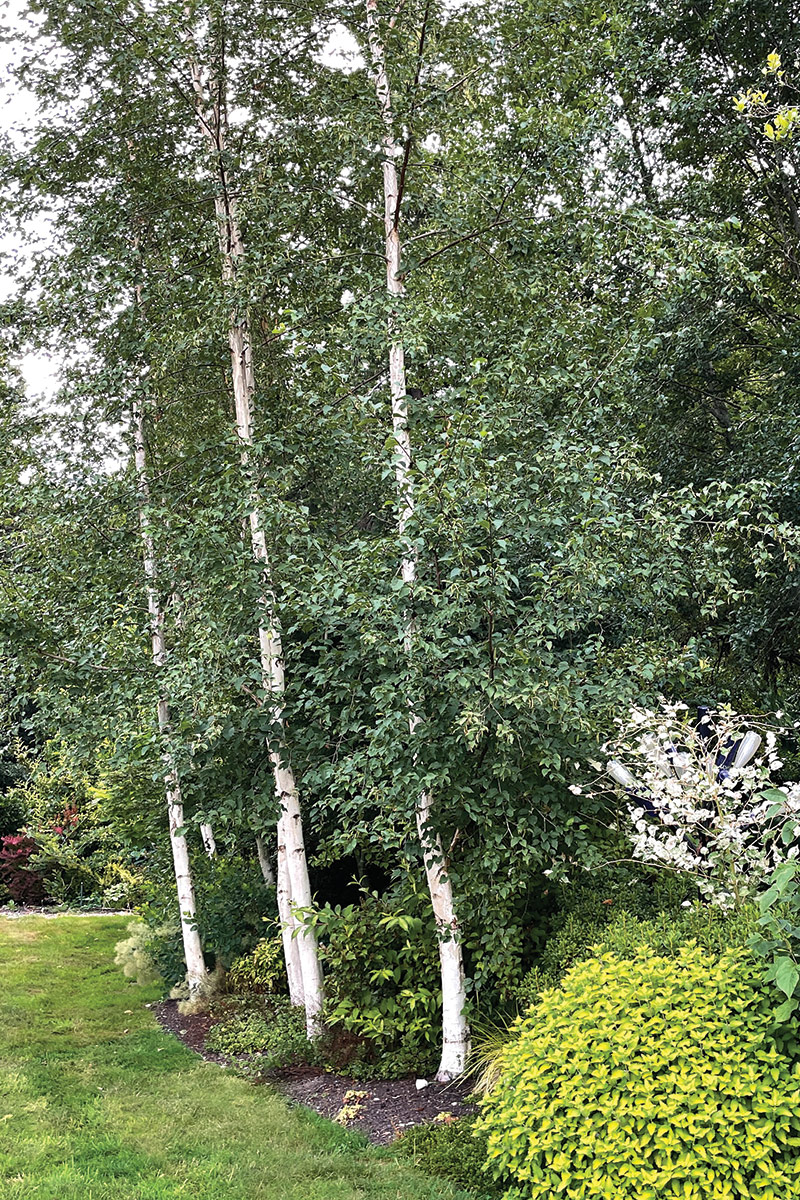
When I moved to my new property, many plants from my old garden needed to be put in right away. I cleared two long borders to the west of some mature trees, added great soil, and got to work planting. I soon realized that many of the plants I was moving needed full or partial shade to thrive. To create shade inexpensively, my solution was to add several young paper birches (Betula papyfera, Zones 2–7) that were 6 or 7 feet tall and sold in 5-gallon pots. I planted them along the southwest perimeter of the main bed to block the hot western sun. This did the trick, and I added some other small trees to complete the shade canopy.
Just five years later, the fast-growing birches had shot up to 30 feet tall and the border was becoming crowded. My ‘Black Tulip’ magnolia (Magnolia × soulangeana ‘Black Tulip’, Zones 5–9) wasn’t blooming well because it was in too much shade, and the birches leaned like they wanted to escape the lushness under them
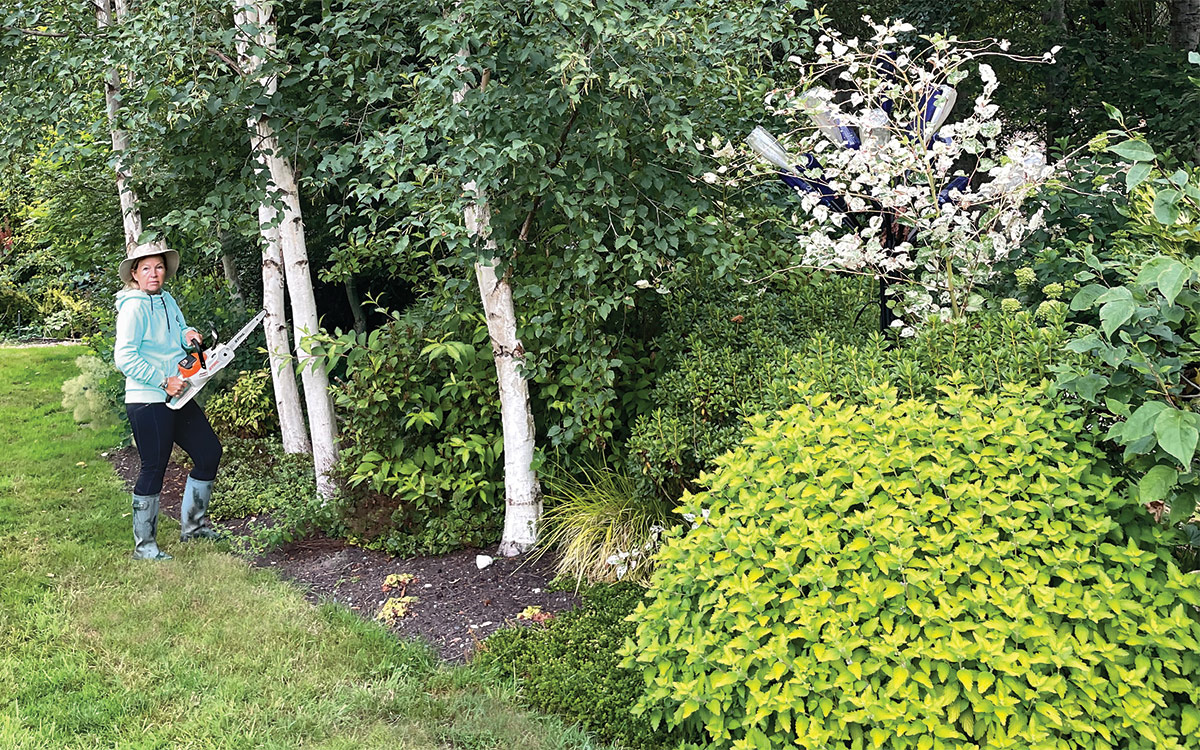
The solution: Remove the overgrown plants
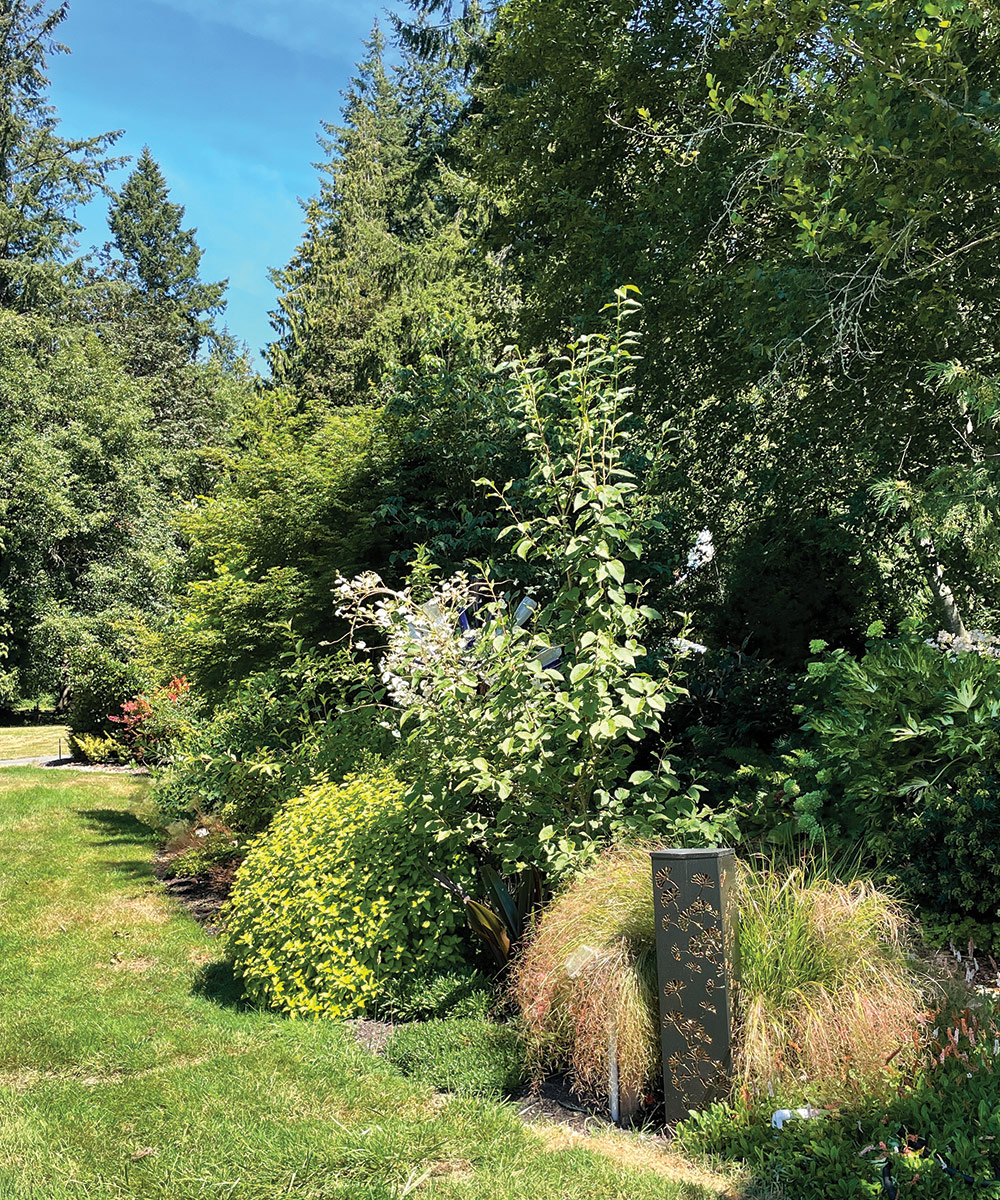
It was time to say goodbye to the paper birches, which made me sad. They are beautiful trees, with stunning fall color and blush-tinted white bark, but they had grown too big to move without uprooting many other plants in the border. I regretted not moving them about two or three years earlier, when it would have been easier. If I had been selective, moving one or two trees at a time, at least some of them could have been saved. Instead, they all had to come down.
The expert: Susan Calhoun is the owner of Plantswoman Design in Bainbridge Island, Washington.
The mistake: Putting a straight path from the front door to the street
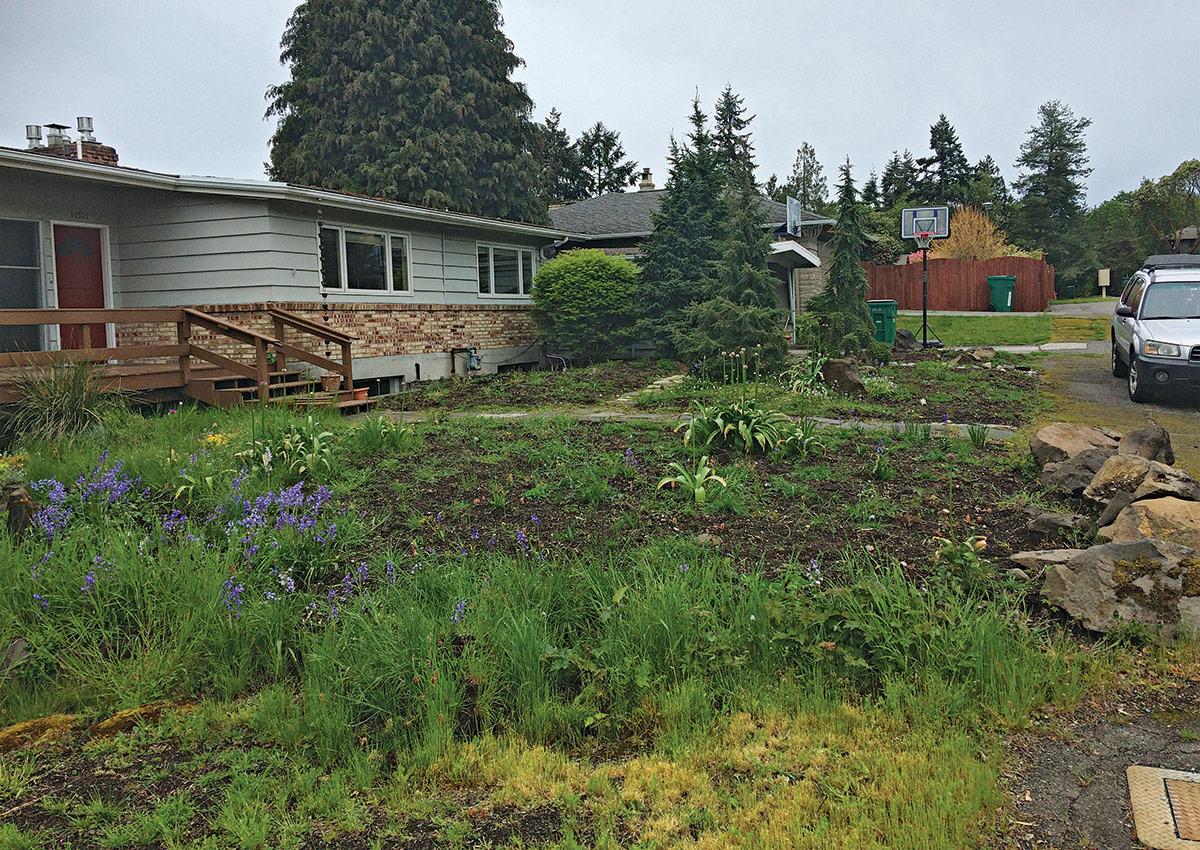
My primary role as a landscape designer is to maximize the beauty and functionality of an outdoor space, taking into consideration how that space will be used. I ask myself how people and pets will pass through the landscape. Are there screening issues, privacy concerns, views to open up, or potential key areas to connect?
When I visit a new project site, one of the most common opportunities for improvement that I notice is the chance to create a journey from the street or sidewalk to the front door.
The default is almost always a straight line or the quickest possible pass-through. The front garden is likely split down the middle with a path. Sometimes a direct path makes the most sense. The path from a garbage-bin storage area to the curb should be as short as possible; no one needs to be taking their trash on a journey.
However, the path a visitor takes to your front door? That’s a different story. Why not slow it down, offer a surprise around a turn in the form of a focal point, or provide a little privacy for the front door and windows?
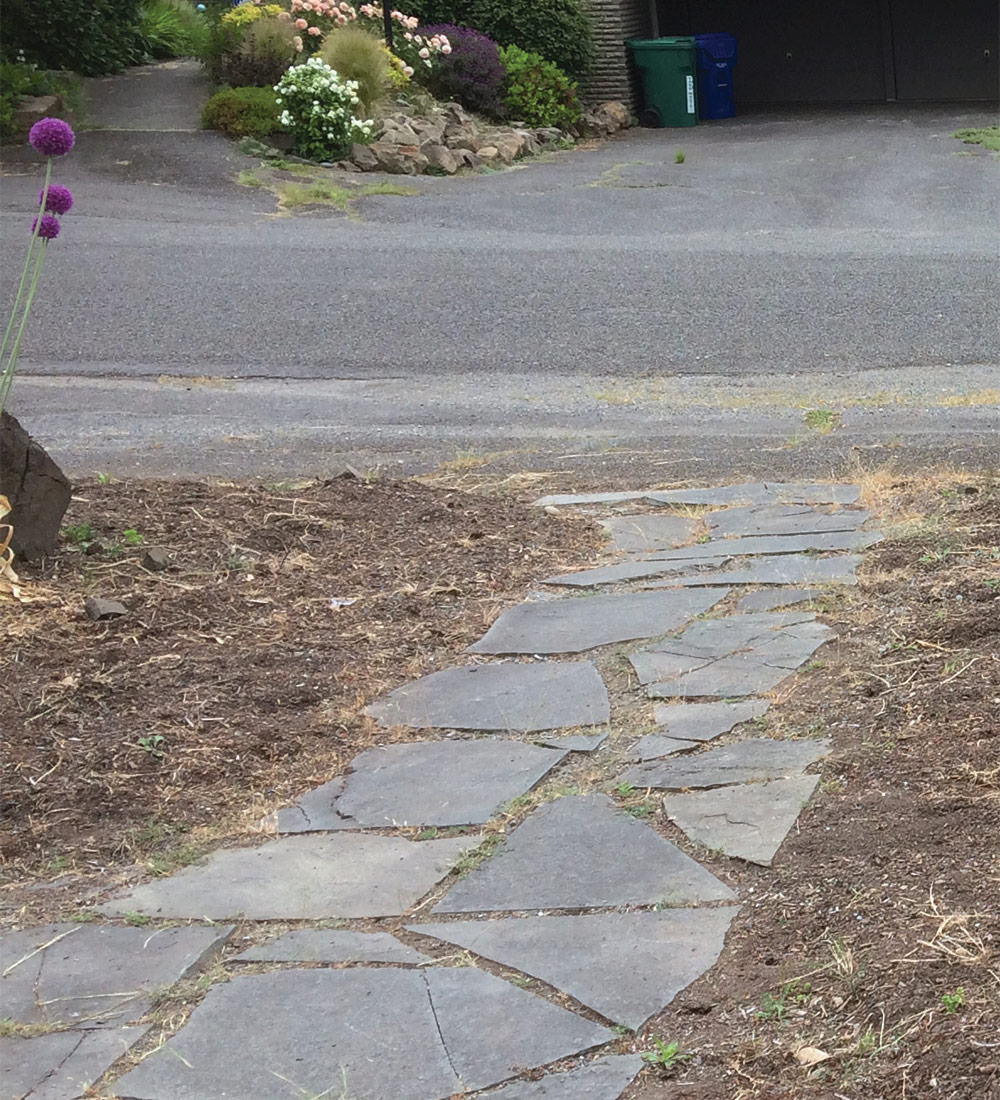
The solution: Add a jog in the path
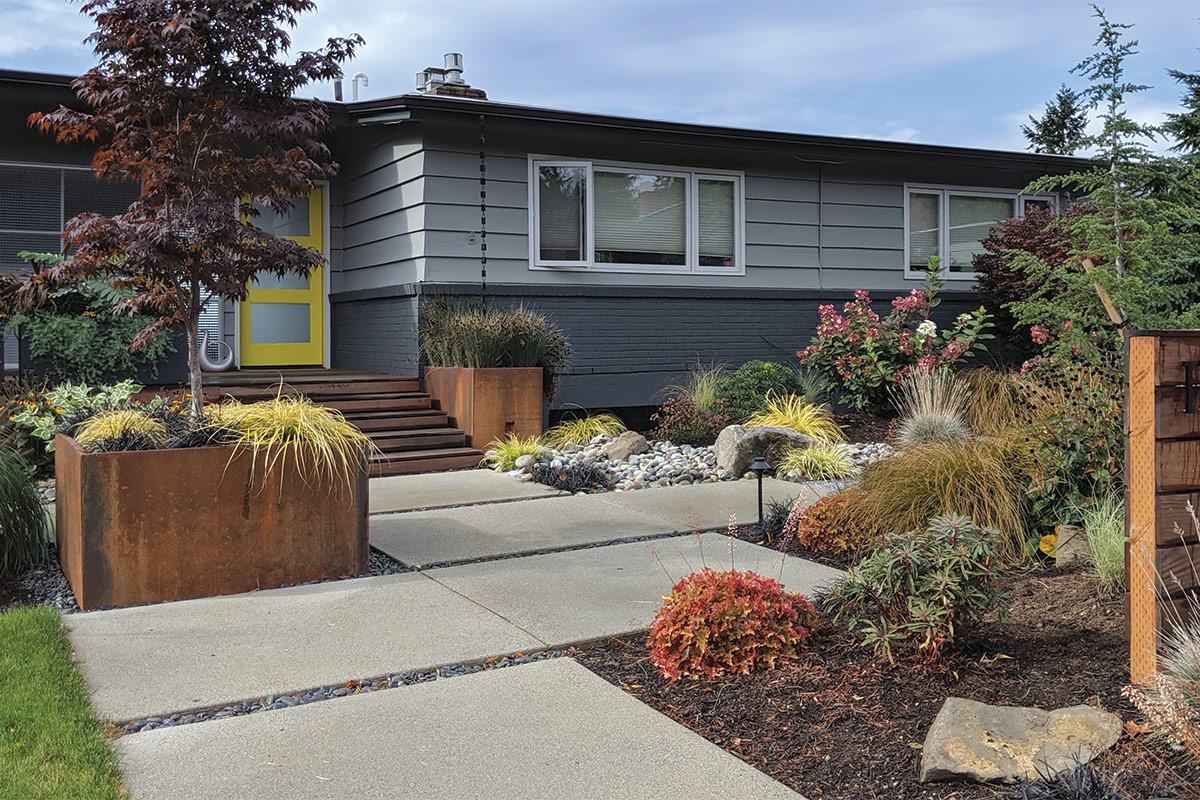
I like to bring an element of excitement to a ho-hum front walk by introducing a bend in the journey. An obstacle to move around—such as a wood panel, fountain, raised planter, decorative pot, boulder, or small tree—creates an opportunity to slow down and look around as you follow the path. If space permits, you might even be able to sneak in a little bench or bistro table, creating an informal place to visit with neighbors. A few thoughtful details can transform a straight shot to the front door into a small, semi-private courtyard with interesting planting pockets and views. How you mold your visitor’s first impression of your home is important, so maximize it.
The expert: Courtney Olander is a garden designer based in Seattle.
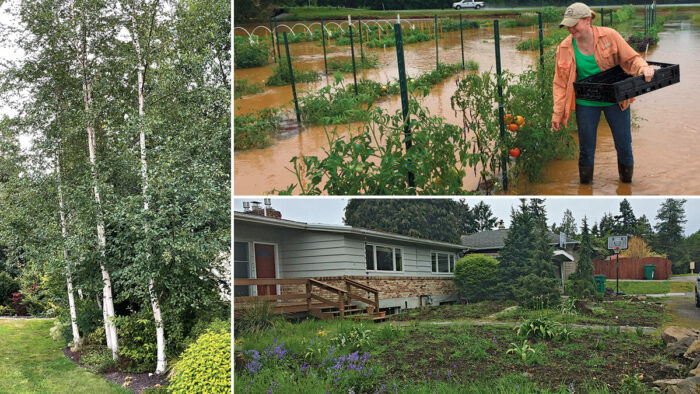
The mistake: Planting in a flood-prone area
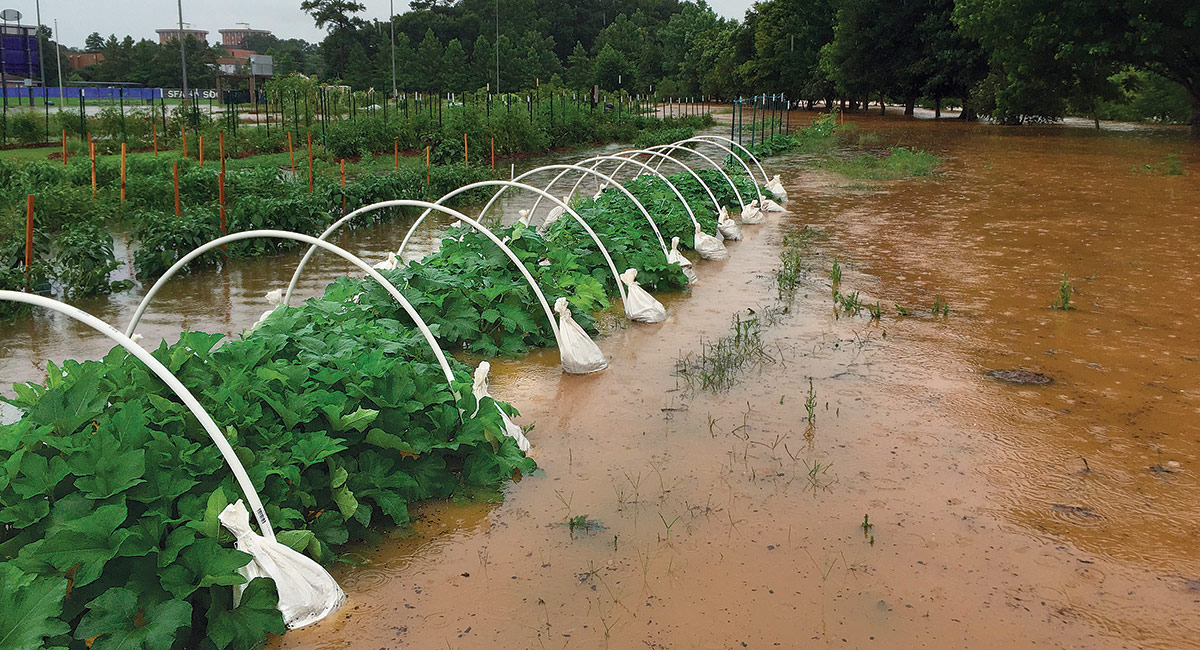
In my first year of teaching at Stephen F. Austin State University in Nacogdoches, Texas, my students and I installed a garden where they could learn to grow plants from seed to sale. We had 200 tomato plants loaded with fruit, 100 peppers ready to pick, countless cut flowers, and dozens of other plants to trial and evaluate. We were in the planning stages of putting up hammocks and building a firepit. Life was grand.
Then on the morning of June 18, 2015, Tropical Storm Bill dumped 6 inches of rain on our area overnight. La Naña Creek, which ran alongside the garden, began to break out of its banks. I’ll never forget the eerie feeling of standing on the highest spot in a mostly flat space, watching the ground beneath me vanish under a film of water.
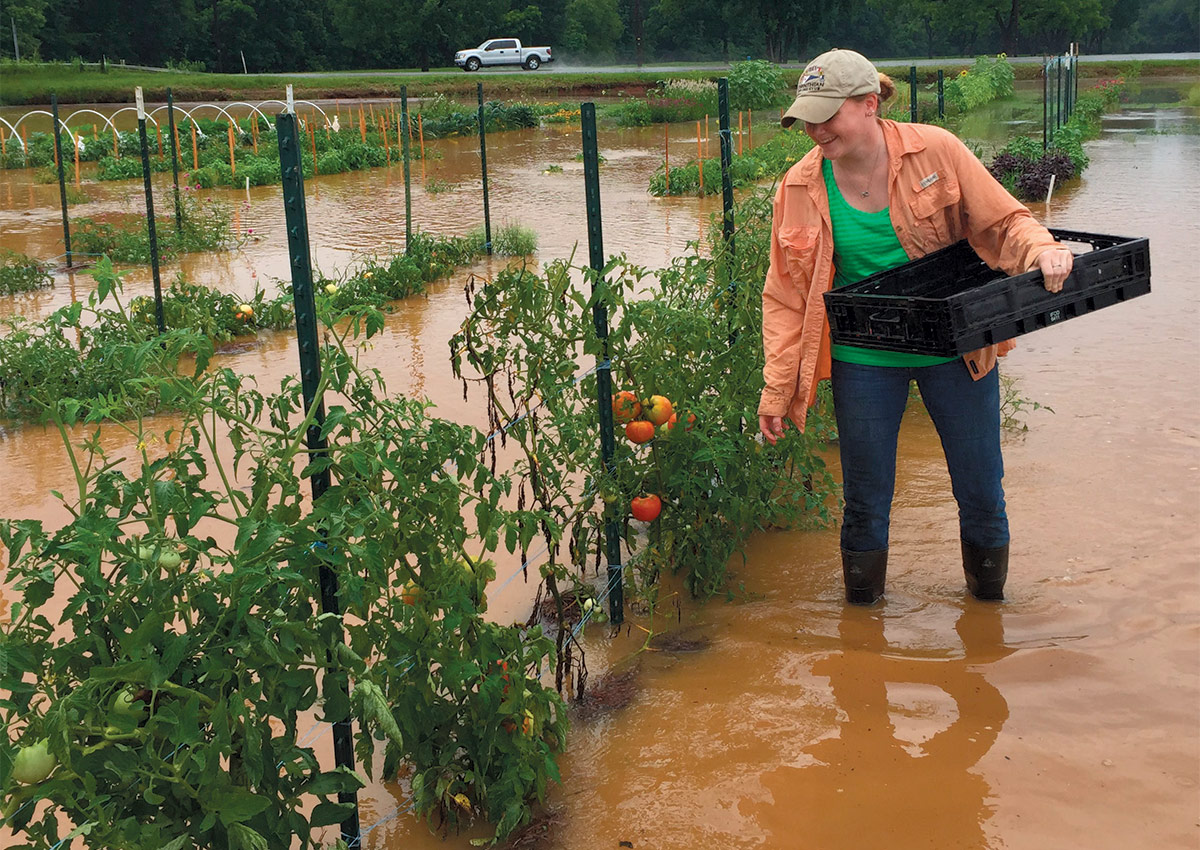
The students and I went out in knee-high boots to save what produce we could, but we had to leave when the water level rose to 3 feet and covered the whole garden. The water receded in less than 12 hours, but our summer was shot. Food safety rules dictated that we had to wait at least 60 days to replant because of the potential introduction of waterborne contaminants.
The solution: Rebuild on a new site
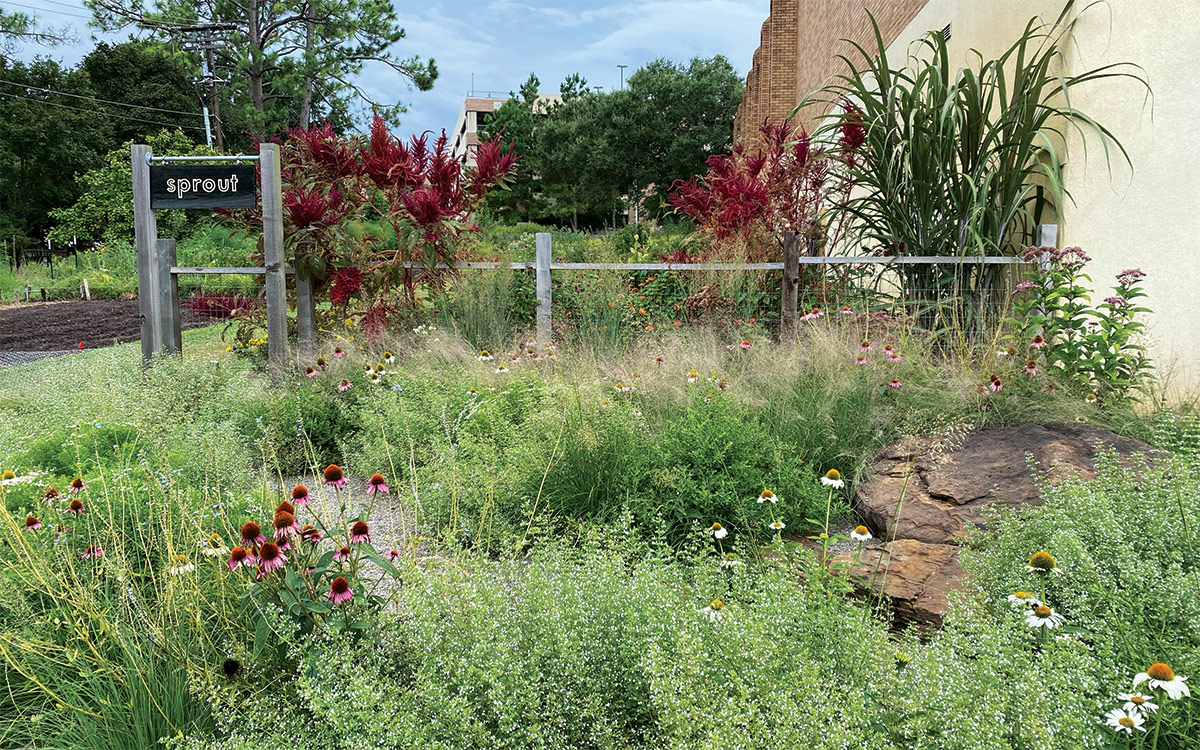
Failure is an opportunity to learn and to shift strategies. Our solution was to move the garden to higher ground. We overhauled the plantings around the agriculture building, and within a year we had an edible garden right outside my office that helps to recruit students. In subsequent years we were also able to incorporate teaching gardens and production facilities. I’m so glad we made the move. Our old garden site has flooded at least half a dozen times over the last eight years.
I share this experience in the hope that it will save someone out there some grief. I continue to hear stories from colleagues who have had their gardens or nurseries hit by flood waters. Data shows that storms and rain events are getting more extreme, and today’s gardeners must plan and plant for resiliency.
The expert: Jared Barnes, PhD, is an associate professor of horticulture at Stephen F. Austin State University in Nacogdoches, Texas.
The mistake: Letting a property’s boundaries dominate the view

Urban backyards have their own set of environmental considerations that belie their seeming simplicity. Unlike a large property that extends beyond the width of the house, the narrow, rectangular yards in a city neighborhood are often just a smidge wider than the buildings themselves. Add fencing around the back boundary lines, and the space is constricted even further. The observer’s eye is limited to a narrow focus in almost a straight line rather than taking in a sweeping, expansive view. This makes adding movement and drama much more difficult.
This particular backyard was a static, rectangular box, fenced in on two sides, with an untidy warehouse wall at the apex. A piece of timber had been used in an attempt to bisect the space, which created a step up to the back of the garden. A lonely bench and a Buddha statue were the main view from the back of the house and the patio. Visually the space looked forlorn, unloved, and uninviting.
The solution: Divide the space in a dynamic way
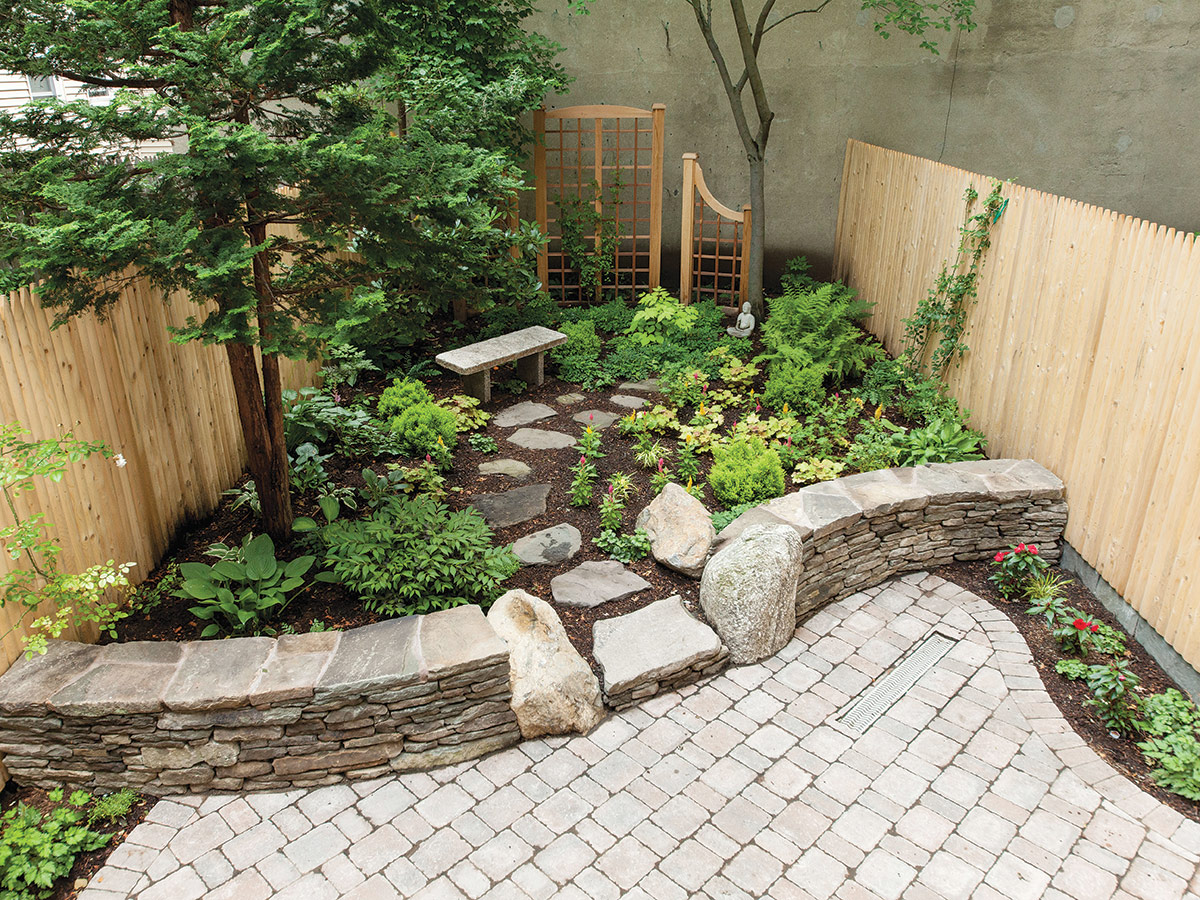
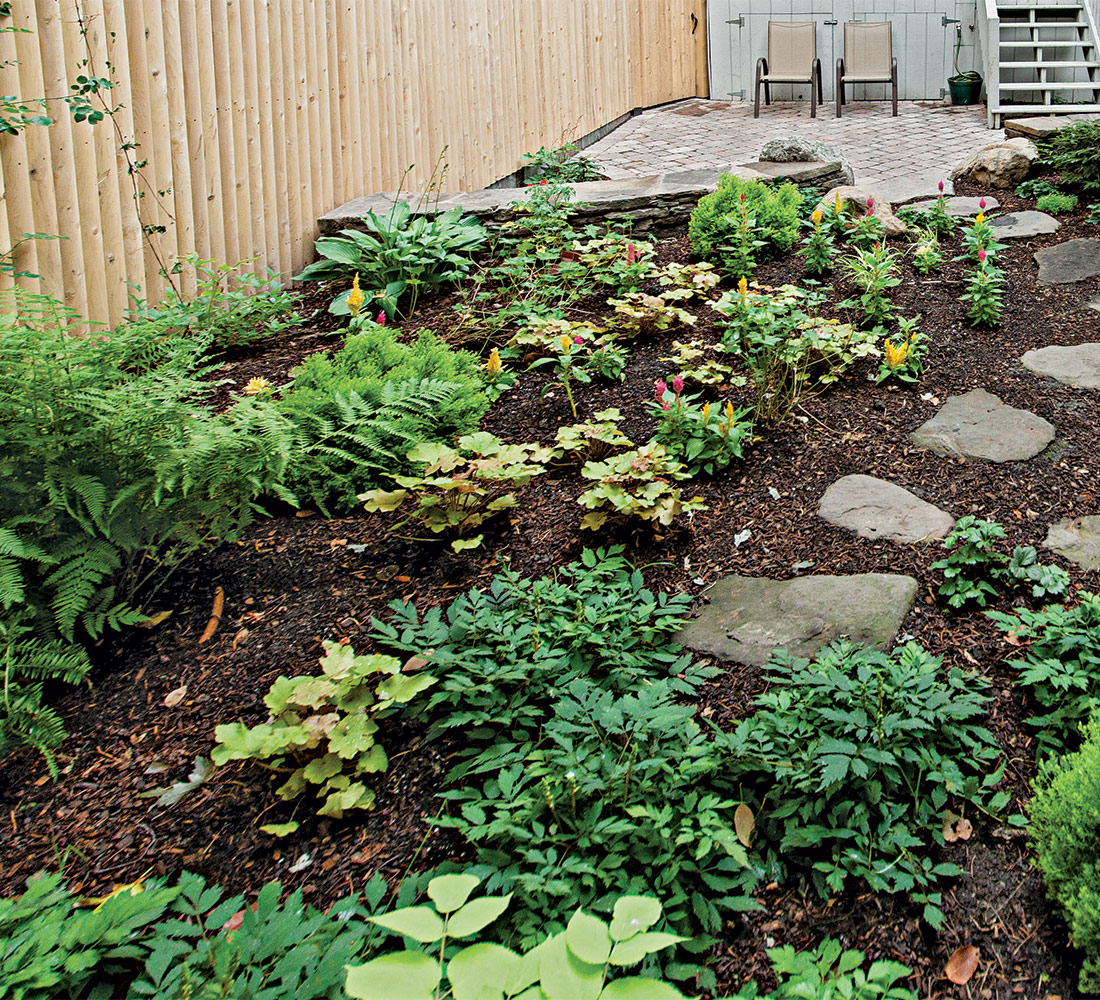
Still needing to manage the higher soil level of the back half of the garden, I pulled a curved wall through the space to define the new, larger patio. This retaining wall also efficiently adds seating to the area, since its wide capstones double as an inviting bench. This division of space “reads” much more energetically from the house windows, and the boulders on either side of the step give some gravitas to the wall. The meandering stepping-stone path guides visitors through the shade garden and out to a bench. A set of wooden panels creates a human-scale focal point and helps to screen the blank warehouse wall. Finally, the Buddha has a serene spot to sit and contemplate.
The expert: Christie Dustman is a horticulturist and landscape designer based in Hyde Park, Massachusetts.


Comments
Log in or create an account to post a comment.
Sign up Log in