

2 Smart Ways to Water Your Garden
Find out if a drip-irrigation system or soaker hose is better for your garden
If you’ve ever struggled through a dry summer with a hose in one hand and a watering can in the other, desperately trying to keep up so that your plants don’t wilt, you’ll be relieved to know that there are other options. A drip-irrigation system or soaker hoses will help you save both water and time. But which approach is right for you? On the following pages, you’ll learn the advantages of each system and what it takes to install them. Choose the one that’s right for you, and before you know it, you’ll be watering with just a twist of the spigot.
Drip irrigation is an efficient watering system for irregularly spaced plants
Freud would understand this comment: I blame my desire for drip irrigation on my mother. While I was growing up, she constantly worried about running out of water. Unlike other kids who lived with what seemed like an endless supply of “city water,” I was always reminded that our water was from a well and, consequently, finite. I thought of this every time I stood over my garden watering with a hose until the day I decided to install drip irrigation, a system that emits a trickle of water at precise spots. My impression of drip irrigation was of long, straight rows of tubing that watered evenly spaced vegetables. So I wondered whether a gardener with two oddly shaped and irregularly planted perennial beds could make this work. The catalogs said yes. Apparently, drip-irrigation systems can be built or adapted to suit any type of garden: vegetable or perennial, formal or informal, beds or borders. In my new garden, many of my plants are widely spaced. I would be able to customize a drip-irrigation system to emit water only where my plants are, something soaker hoses—my other option—couldn’t offer.
Drip irrigation has other advantages, as well. First, it’s easy: Turn it on, and it does the work. Second, it offers consistency, delivering water at the same rate to the last plant on the line as to the first. And I don’t have to pull up the system in winter; I just drain the water and remove the faucet attachments.
Drip-irrigation systems take a good deal of planning, so I measured my garden at its widest and longest points and drew up a rough sketch of where I wanted the irrigation lines to go. A lot of math goes into planning a drip-irrigation system: flow rates, water pressure, gallons per hour, length of run. Although numbers confuse me, I knew my two beds (one 25 feet long, the other 12 feet long) weren’t big enough to cause major problems, so I forged ahead without my calculator. I felt confident because the catalog that I was using was thorough and offered excellent customer service (DripWorks, 800-522-3747; www.dripworksusa.com).
A kit was available to meet most of my basic equipment needs (sidebar, facing page). To this, I added 100 feet of ¼-inch-diameter tubing, pressure-compensating (PC) emitters, more hold-downs, extra goof plugs, and additional connectors. I was sure all this would be expensive, so I was delighted when the cost came to only $75.00, plus shipping and handling.
The ¼-inch-diameter tubing, which comes with emitters spaced 12 inches apart, is flexible enough to snake through beds to provide precise watering for plants.
Single pressure-compensating (PC) emitters and ¼-inch-diameter tubing can be attached to the main-line tubing for accurate water dispersal wherever you need it.
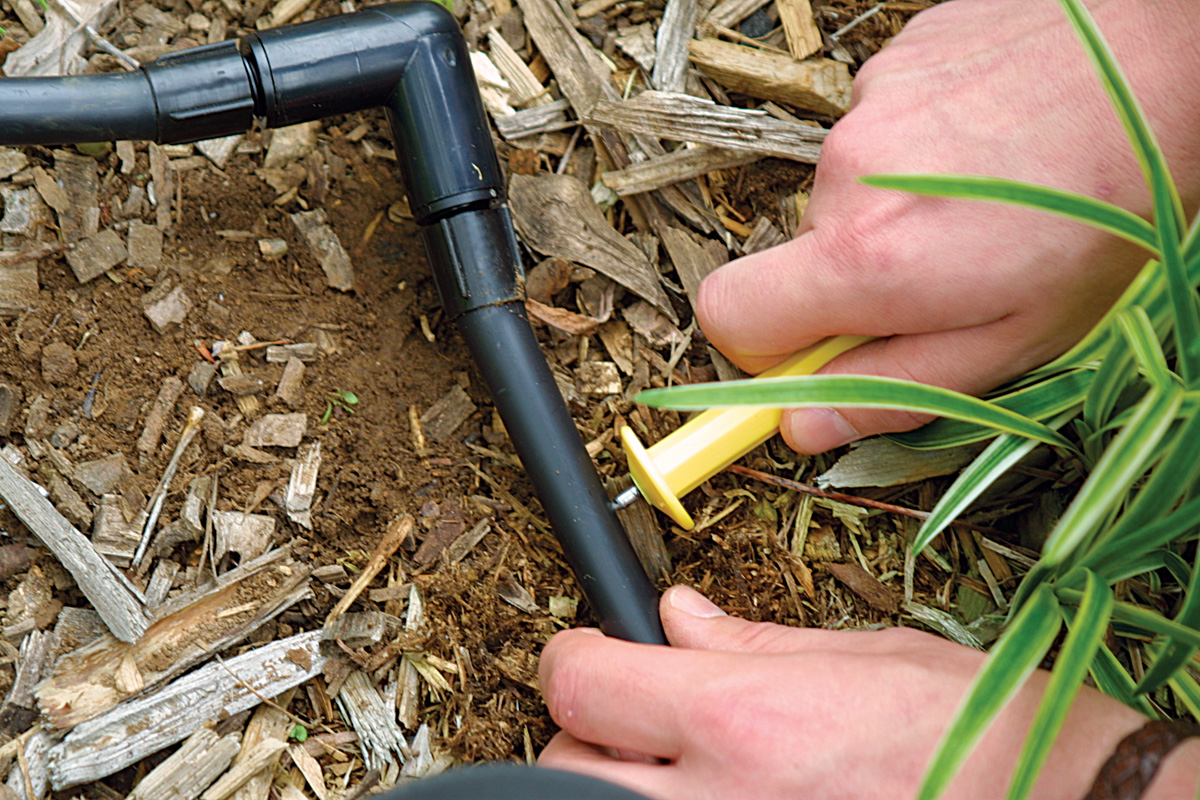
The first step of the installation was digging a trench for the main-line tubing to run underground from my spigot to my garden (step 1). Tubing won’t be harmed by winter temperatures as long as it’s drained, so I didn’t need to bury it to any specific depth. I dug a trench about 3 inches deep, setting the sod aside for easy replacement.
I needed the main-line tubing to split off into two opposite directions once it reached the garden, so I laid the tubing into the trench, cut it at the proper spot with a pair of hand pruners, and attached the T-shaped connector (step 2).
|
|
|


To make the main-line tubing easy to bury in the garden, I ran a trowel along the path it would take, making a shallow trench. In places where I had to make a 90-degree turn, I used L-shaped connectors. My plan for the tubing was to have the main line run to the end of each bed and have the ¼-inch-diameter tubing, which had built-in PC emitters every 12 inches, run to the individual plants. Think of the main-line tubing as a highway, carrying a great amount of water to the general area of the garden. The ¼-inch-diameter tubing would then be the back roads, delivering smaller amounts of water to the outlying plants.
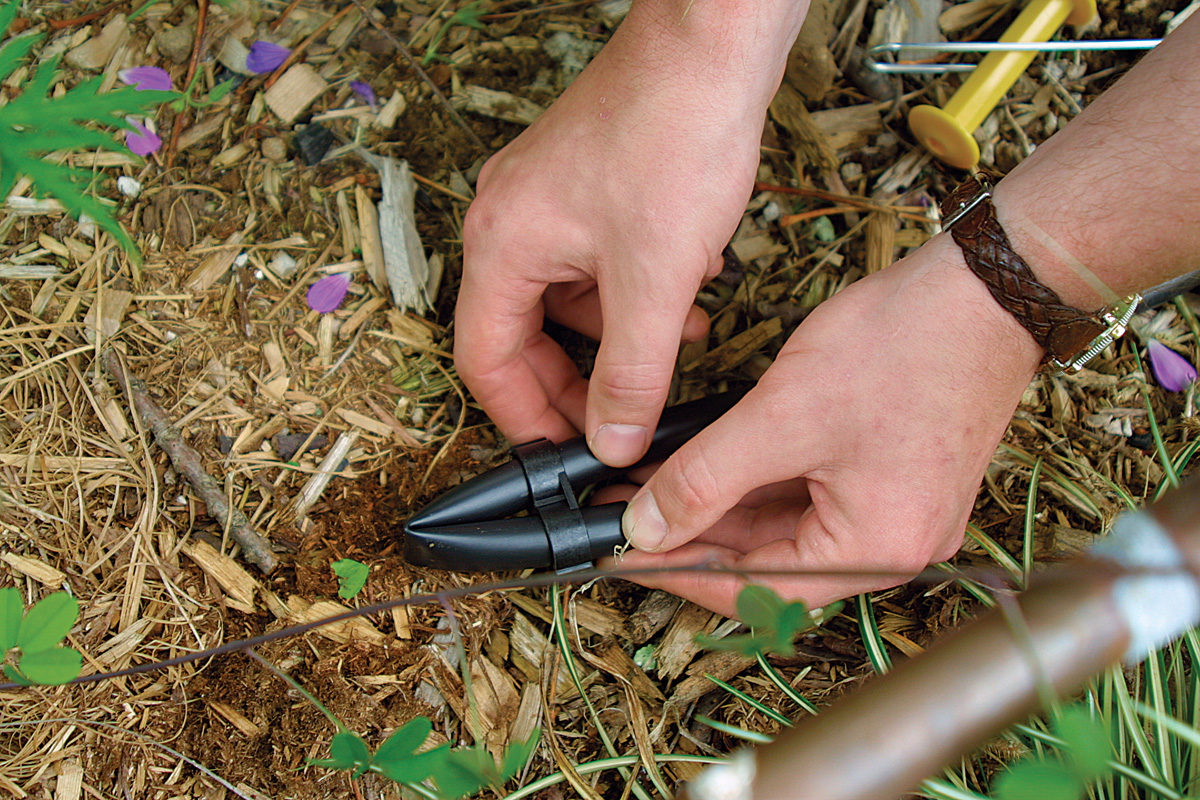
When the position of my plants didn’t match up well with the 12-inch space between emitters, I snaked it in an S shape or looped it around a plant, especially if the plant likes it wet. My main-line tubing didn’t come with PC emitters, so where it ran by a plant, I manually inserted an emitter by simply popping a hole in the tubing with the punch tool and inserting the emitter (step 3). PC emitters maintain even pressure regardless of the length of the run or, in my case, the uneven terrain. The hold-downs I had purchased kept all of the tubing in place, and the figure-eight tubing ends that slipped over the kinked end of the main-line tubing stopped water from running out (step 4).
|
|
|
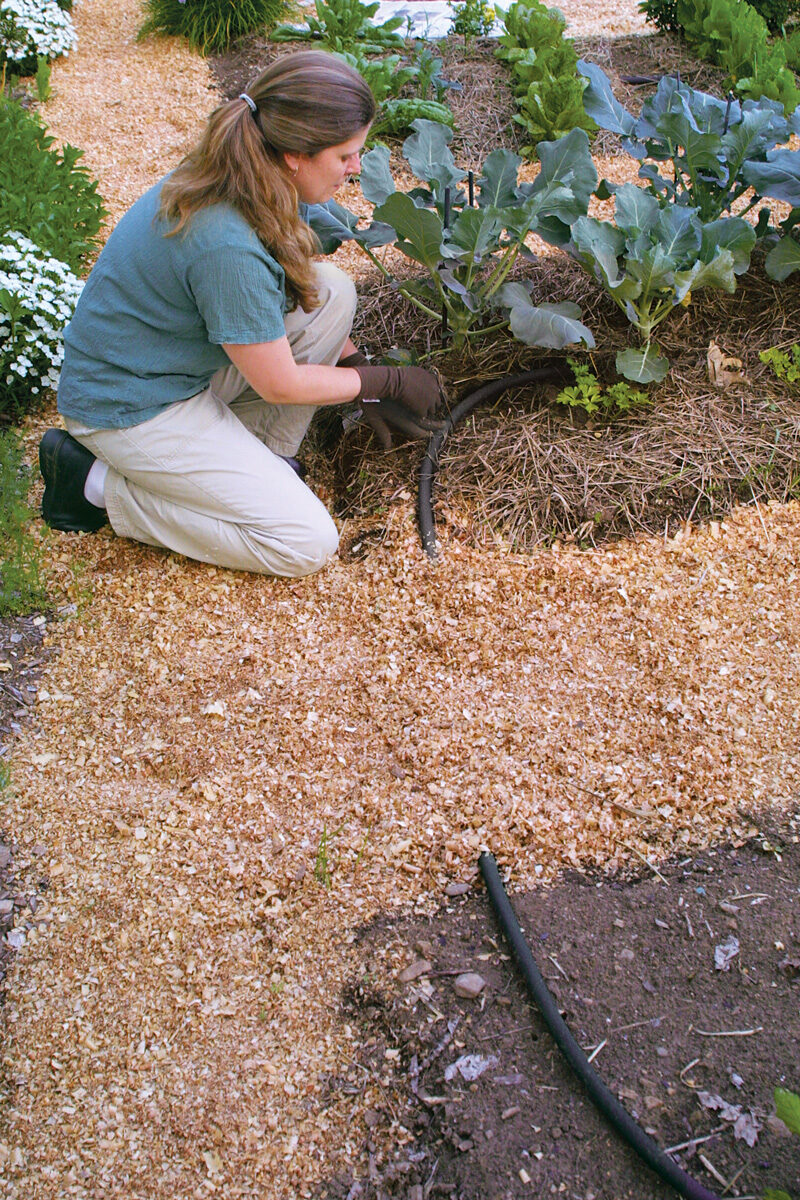
Once all the lines were run, I covered them with mulch and was ready to water. But I first had to attach a filter to the spigot to remove any particles from the water that could clog the emitters (step 5). At the end of the filter, I added a pressure regulator to reduce the water pressure to a level appropriate for the system. I then installed the female hose coupling to join the threaded end of the regulator to the smooth main-line tubing. With a twist of the spigot knob, I was in business.

The whole project worked according to plan. It took me six hours to install drip irrigation in my garden. The only drawback is that the system is so quiet I sometimes forget I have it on.
Stats
Source: DripWorks mail-order catalog
Materials:
- One drip-irrigation kit $36.95(One Y-type filter, one pressure regulator, 100 feet of ½-inch-diameter main-line tubing, ten 8-inch-long hold-downs, one punch tool, ten two-way goof plugs, one female hose coupling, one T-shaped connector, one repair coupler, two figure-eight tubing ends)
- 100 feet of ¼-inch-diameter tubing (with emitters 12 inches apart) $15.00
- Ten pressure-compensating (PC) emitters $ 2.60
- Fifty 8-inch-long hold-downs for main-line tubing $ 7.00
- Fifty 3-inch-long hold-downs for ¼-inch-diameter tubing $ 6.50
- Twenty two-way goof plugs $ 1.20
- Two elbow (L-shaped) connectors $ 2.60
- Twenty ½- to ¼-inch-diameter transfer barb connectors $ 2.90
- One figure-eight tubing end $ 0.25
- Shipping and handling $17.00
Total cost …..$92.00
Time to install: 6 hours
Winter storage: None required, as long as the system has been drained and the spigot attachments have been brought inside
Steve Aitken is the editor of Fine Gardening.
Soaker hoses are perfect for plants that are placed close together or in rows
We had a really dry summer a few years ago, and by the end of it, I felt as if I had a watering can permanently attached to my arm. I had to do all my watering by hand because the pressure of my well isn’t strong enough to power a sprinkler. Most of the vegetables I grew that summer were water hogs, so my plants didn’t produce well because I couldn’t keep up with the watering. These factors played a role in my decision to find an alternative watering method. After some research, I decided to install soaker hoses.
Soaker hoses are flexible, permeable rubber hoses that allow water to seep out and slowly moisten the ground beneath. While not for every situation, they are ideal for efficiently watering plants that are situated close together or in rows, as in my vegetable garden. I chose soaker hoses over other watering methods, such as drip irrigation, because they are readily available, inexpensive, and easy to install.
Soaker hoses dispense water for up to 2 feet on both sides of the hose. For fast-draining soil, place the hose closer to the base of the plant.
Water weeps from permeable soaker hoses to irrigate nearby plants efficiently.
I began my project by taking a trip to the hardware store to see what was for sale. I could get a 5⁄8-inch-diameter hose either 25 or 50 feet long. Because my vegetable garden measures 20 feet wide by 30 feet long, I purchased four 50-foot-long hoses, hoping I’d have enough to wind back and forth through the nine beds that fill the space. Had ½-inch-diameter hose been available, I would have chosen that because it might have worked better with my well’s low water pressure. I waited until I had a few plants in the ground before winding the hoses through my beds so that I could get them as close as possible to the base of each plant. Even though soaker hoses are supposed to soak the soil for up to 2 feet on both sides of the hose, I suspected that this would not be the case with my fast-draining soil. Placing the hoses close to the plants would help ensure that they would get enough water.
Soaker hoses, like standard garden hoses, have couplings at both ends that fit together to connect to other hoses. I didn’t connect my four hoses into one system because, with low water pressure, the water wouldn’t have made it through 200 feet of hose. I, instead, snaked the female end of each soaker hose through the wire-mesh fence that surrounds my garden. That way, I could attach each soaker hose to the garden hose coming from the spigot without having to drag it inside the fence
(step 1). I’d also be able to water some beds longer than others if they needed it. Laying out the hose was easy but a bit frustrating. As soon as I unrolled the first hose, it curled right back up. So I zipped back down to the hardware store and bought five packages of 10-inch-long landscape anchoring pins, which I used to hold the hoses in place (step 2).
|
|
|


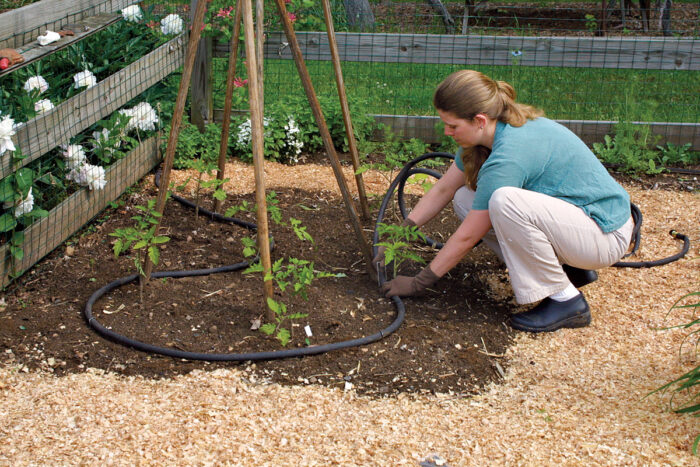
Because I had nine beds and four hoses, I knew I’d have to cross some paths. To do that, I pulled back the mulch in the path, pinned the hose down, and replaced the mulch. I did the same thing where I had to wind the hose around plants (step 3).
Because of each hose’s 50-foot length, one hose was able to cover a few beds, but I still came up short. Back to the store I went to buy one more hose. With a total of five hoses in my garden, it was ready to be watered. And it’s a good thing, too: That summer was even drier than the previous one. But I had healthier plants and better-tasting tomatoes, and spent a lot less time shuffling back and forth with the watering can.
Stats
Source: Garden center, home center, and hardware store (averages)
Materials:
- Five soaker hoses (each 50 feet long and 5⁄8 inch diameter) $84.95
- Five packs of landscape anchoring pins (ten pins per pack) $11.45
Total cost: $96.40
Time to install: 3 hours
Winter storage: Optional, although hose will last longer if stored inside over winter.
Jennifer Brown is a former associate editor of Fine Gardening.


Comments
Log in or create an account to post a comment.
Sign up Log in