

Get Serious About Compost: How to Make More, Better, Faster
If you never seem to have enough, use these five steps to increase your quantity and quality
Compost is not fertilizer. The sooner a gardener embraces this reality, the better. But gardener’s gold does have an undeniable importance in the garden: to feed the billions of critters in the soil whose activities create plant nutrients. Think of it as pet food for the legions of decomposers that eat it—and each other—and in the process add to the fertility of the soil. Compost also helps hold moisture and improves soil tilth. The problem most gardeners face is that we don’t have nearly enough compost—ever. I like to add about a 2-inch-deep layer of compost to every part of my garden, twice a year. That means that I need more than 6 cubic yards of compost for every 1,000 square feet, and this is five or six times more than a normal compost bin, pile, or tumbler can produce.
If you want enough compost to make a real difference in your garden, then some advance planning is required. Most compost piles get built—and increase their volume—from ingredients that are available only at specific times: leaves in fall, grass clippings in summer, kitchen waste here and there. And this, usually, does not amount to much. Here’s what you need to do to make sure that you’ll always have enough top-quality compost on hand.
1. Stockpile before you start
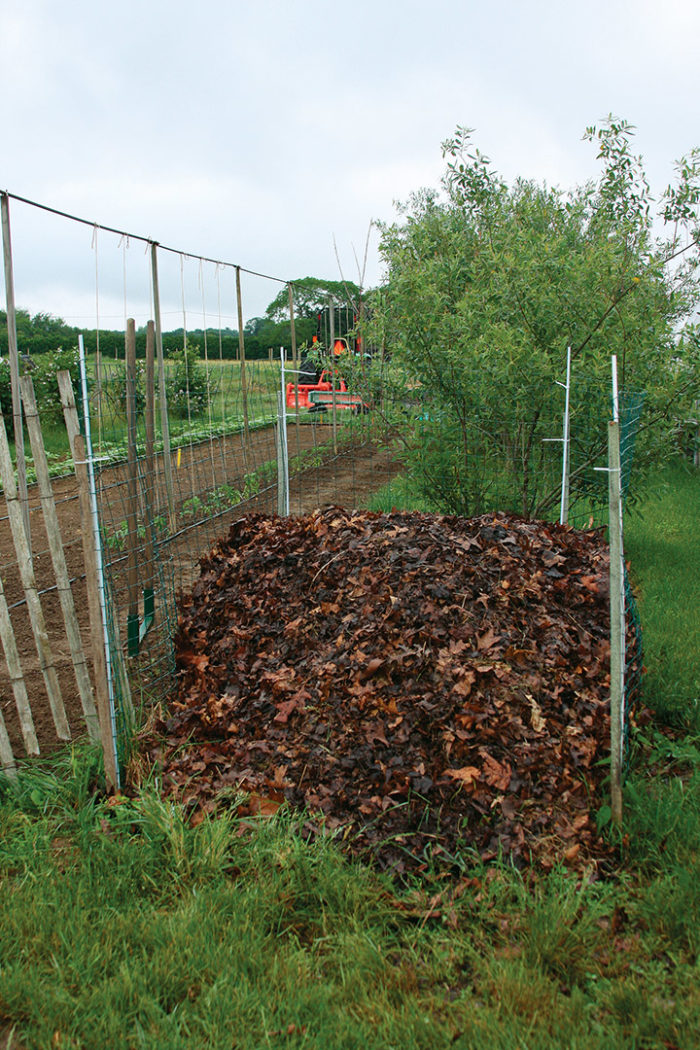
The first step to increasing the amount of compost you reap this year is stockpiling large quantities of dead leaves, the compost ingredient that is most freely available in many regions. Dead leaves are the principal source of carbon for my compost pile. I make big wire-mesh pens every fall in which I store my own—and my neighbors’—leaves. Most raked leaves come with twigs or bits of broken branches, which is good because they stop the piled leaves from collapsing into a matted mess. These leaves will be on standby until the following spring, when more compost components become readily available.
2. Become a ferocious chopper
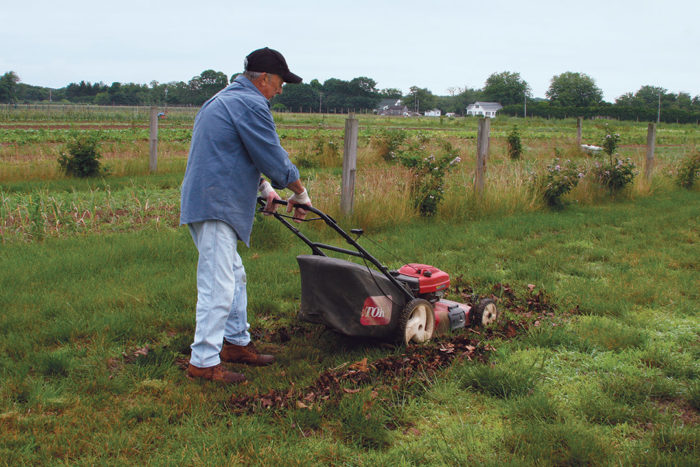
Compost is a mix of carbon (the fuel) and nitrogen (the fire), with help from oxygen and water. When the green stuff (which provides nitrogen) is freely available come spring and summer, it gets mixed with the brown stuff (which provides carbon). But first, everything should get chopped. The more surfaces that you can expose to the decomposers’ hungry jaws, the faster you will get usable compost. The best way to do this is to shred the material. A chipper/shredder is ideal, but a bagging lawn mower works almost as well. My neighbors, who already think I’m nuts for gathering their leaves every fall, are convinced of my mental instability when they see me casting vast armfuls of dead leaves over the weedy and grassy area I jokingly call a “lawn.” But by running my bagging lawn mower over the whole mess, I get bags full of chopped leaves and grass, nicely combined, that make superfast compost.
3. Forget the perfect ratio
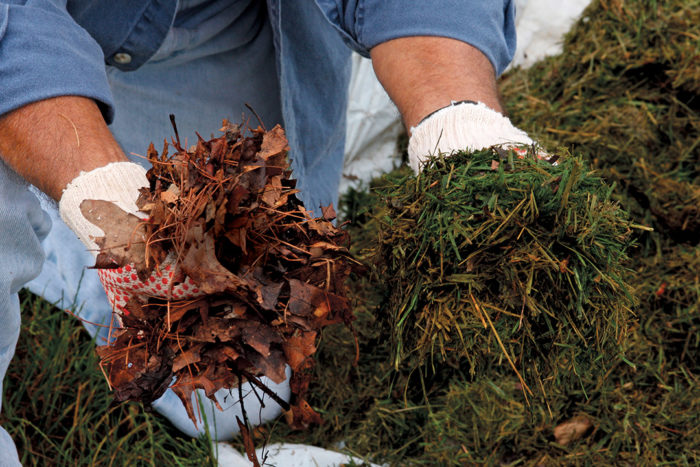
Many books and articles on composting lay down strict rules about the ratio of nitrogen (green stuff) to carbon (brown stuff). I’m sure that most of them are, technically, correct. But my advice is not to go crazy measuring the ratio. By volume, aim for six parts carbon to one part nitrogen. That’s the target, but don’t worry—a pile with too much carbon will just kind of sit there, not doing much. A pile with too much nitrogen may smell bad until you stir in some dry dead leaves or sawdust to correct the balance.
4. Turn only when it’s cool

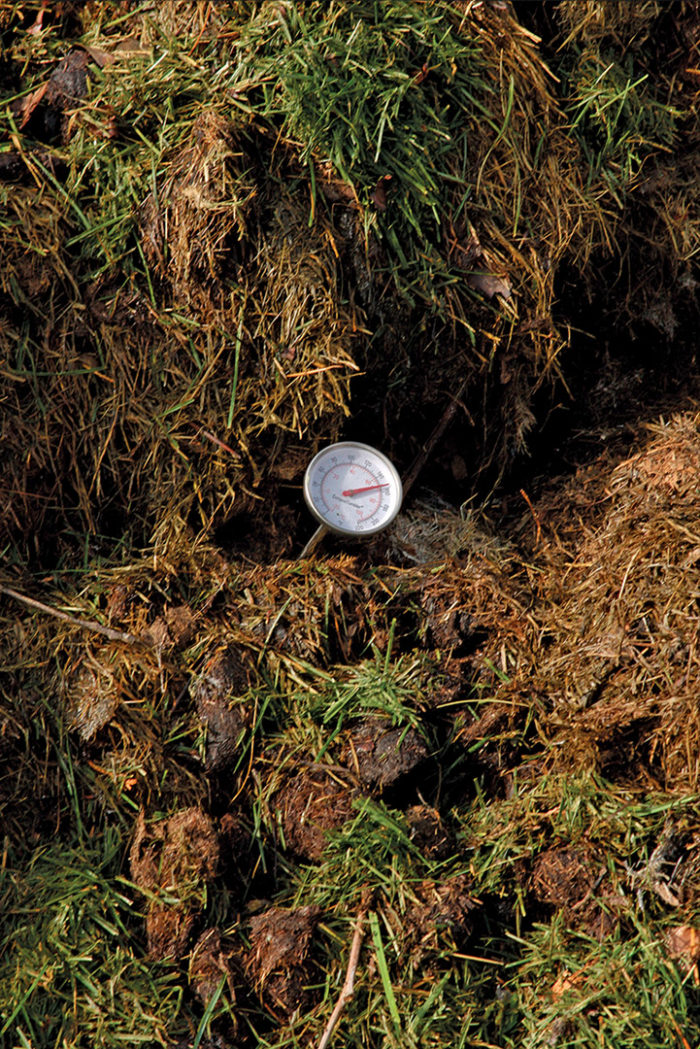
Compost is the result of decomposition by billions of little critters that compete for the food you have so thoughtfully provided. They compete by eating each other, just as their kin do when you add compost to the soil. A compost pile is a war zone where genocide is an ongoing process. All this activity creates heat, which tells you that the war is going well. Over a period of two days, a good compost pile can heat up to about 165°F (when measured with a soil thermometer), which helps kill weed seeds and pathogens.
Things calm down after about a week, when the pile cools to about 80°F to 100°F. That’s the time to turn the pile with a pitchfork or compost fork. Mix things up so that what was on the outside of the pile moves into the center and what was on the inside shifts to the outside. By mixing the pile, you add oxygen and provide fresh food for the organisms that just finished eating each other in the middle of the pile, which is why it cooled down. You’ll end up turning a pile two or three times before it remains consistently cool. This signals that all your tenants have eaten their fill and that you have lots of finished (but not yet fully mature or usable) compost.
5. Do a maturity test

If you spread compost that has not yet fully decomposed to the point where it is biologically stable, it will continue to decompose in your garden soil. Over winter, this might not be a problem, but during the growing season, you might wonder why all your plants have turned yellow. This is because the organisms that ought to be providing nutrients to your plants are too busy dealing with the immature compost, thus sucking up nitrogen that your plants need. A quick measure of maturity is when a well-turned and properly managed pile cools down for the last time and has sat for a month or so, nicely fluffed up and covered to protect it against the rain. A better method is to use a laboratory-style test kit, such as Solvita, available from Woods End Laboratories (solvita.com). It tests for carbon dioxide and ammonia, which at high levels signal that a pile is not mature and that the nitrogen has not stabilized. The kit comes with test strips, incubation jars, and instructions.
Now what do I do with the compost?
| It is a mistake to spread compost, then till it in. This mixes it too deeply into the topsoil and leaves much of it deeper than you want it. Spread it, instead, fairly evenly and then scratch it into the top 3 or 4 inches of soil. My favorite tool for this is a three-tooth cultivator (johnnyseeds.com). It puts the compost where plant roots live so that they will get the benefit of the nutrients and moisture-holding capacity it contains. |
|

How-to
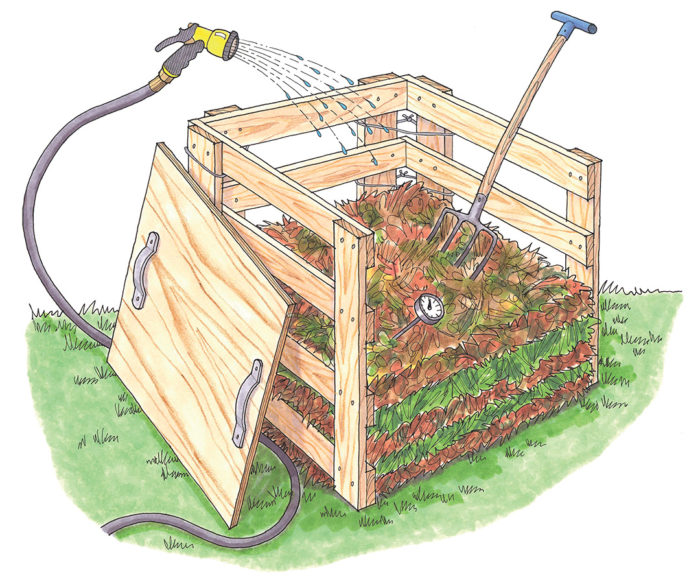
Step-by-Step: Build the Pile
Before doing anything else, choose a location that is easy to access with a cart or wheelbarrow. During the piling process, you’ll need to transport materials in and compost out. The compost pile, ideally, will be near the garden and within reach of a water source so that you can moisten it when necessary. Here’s my foolproof plan for the perfect compost pile.
1. Construct the enclosure.
This pen can be wood pallets standing on end and fastened together, wire-mesh fencing attached to steel fence posts, concrete blocks laid to form an open-front container, or a custom-built wood bin. It can be square, rectangular, round, or oval. There are two basic necessities: It must be at least 3 (preferably 4) feet high and wide, and it must have some sort of cover to protect the pile from rain, which leaches nutrients out of a pile.
2. Build lasagna layers.
Toss in six buckets of shredded leaves and spread them out (creating a brown layer), then sprinkle one bucket of grass clippings on top (creating a green layer). If you are using a chipper/shredder, you can tip the materials into the machine and shovel the chopped-up materials into your enclosure—no layers necessary. Carbon sources can also include sawdust, straw, and shredded paper. Popular nitrogen sources are grass clippings, kitchen waste, and animal manures; bear in mind, however, that chicken and rabbit manures are higher in nitrogen than horse or cow manures.
3. Moisten.
Wet down each layer with a hose as you go. The pile should not be crackly dry or sopping wet; the goal is the dampness of a wrung-out sponge. Too much water drives oxygen out of the pile, which will make it stink.
4. Toss it gently.
After every two or three layers of green and brown, use a pitchfork or compost fork to stir the ingredients together.
5. Keep piling, and cover.
Add layers until the pile is 4 feet deep. End with a layer of leaves, and give the pile a general stirring and light sprinkling of water. You don’t need to cover the pile at this stage, although some gardeners say that a cover helps hold in the heat. I worry about a cover, such as a tarp, melting or being set on fire by too much heat (really, it can happen). I prefer a piece of plywood laid on top of the enclosure because it keeps off most of the rain while allowing the pile to breathe.
6. Check the temperature.
After about 12 hours, you can use a long-stemmed compost thermometer ($26; johnnyseeds.com) to measure the temperature at the center of the pile, or you can (carefully) push your hand into the pile to feel the heat. If the pile has not heated up after 24 hours, it either is too dry (and, thus, needs to be moistened and stirred) or doesn’t have enough nitrogen (so add a little and mix it in). A sprinkling of dried blood is an easy way to add nitrogen, although it may attract rodents or other unwanted critters.
—Peter Garnham runs a 5-acre composting program as the manager of the East End Community Organic Farm in East Hampton, New York.


Comments
Log in or create an account to post a comment.
Sign up Log in