

Turn a Whiskey-Barrel Planter Into Art
Learn how to transform this plain vessel into a whimsical teacup

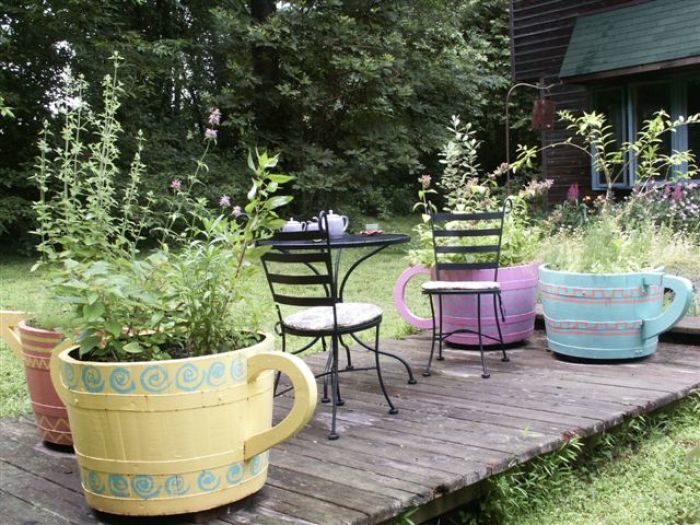
A few years ago, the Brooklyn Botanic Garden contacted me to see if I had any ideas for chapters for a new book Designing an Herb Garden. Tina Marie Wilcox and I proposed and then wrote two chapters—one was a “Grey-and-Green Garden of Mediterranean Herbs”—and the other was “An Herb Garden for Tea Time.” The latter garden that we designed was a tea party garden, and it was planted in the shape of a teapot. While researching and growing herb plants for tea, we were inspired by the Mad Hatter’s tea party in Alice in Wonderland. Tina Marie and friends created huge cups and saucers out of hypertufa for a tea party garden, and I decided to use the ready-made shape of whiskey barrels and fashion them into cups, a sugar bowl, and a creamer.
I bought and planted my first half–whiskey barrel as a container garden probably more than 20 years ago. Since then, I have had a number of them, and my daughters had their own first gardens in whiskey barrels when they were in nursery school. I’d say that a whiskey barrel exposed to the elements lasts as a plant container for about 10 years at most.
My idea was to make them pretty and decorative, and hopefully prolong the deterioration of the wood. Over the years, I have learned to place these large containers where I want them, before filling them with soil. Also, after having had them rot from sitting on the ground, I know that they should be placed on bricks or wood blocks to raise them off the ground and to have air circulation beneath them. Without extra holes drilled in the bottom, drainage can be a problem, and a constant moist bottom will rot or give way in a few seasons.
Generally whiskey barrels have been burned on the inside so they are black and charred and smell of charcoal and strongly of whiskey. The whiskey smell is so strong that I once thought of informing the owner of the feed store/garden center where I had bought four of them that his teenage employees who had wrestled them into the back of my van had been drinking on the job. I had to laugh at myself on the way home, as I was nearly overcome by the heavy whiskey scent permeating the vehicle. Charcoal is good for plants, so I don’t try to clean out the inside of the barrels (although I’m not sure about the alcohol fumes!)
The following step-by-step instructions are for cleaning up, priming, and painting these barrels to make colorful container gardens. The half-barrels are pretty heavy, so I get someone to help me lift and set them, or I sort of turn them up on their bottom edge and roll them to move them (only when empty). You’ll need to do this work in a place where it doesn’t matter if you get things dirty or drip paint; alternatively, you can spread a drop cloth, old shower curtain, sheet, or tarp to work on. It takes a few days from start to finish—waiting for the paint to dry—so check the weather forecast, or be prepared to spread a protective cover overall if need be.
Note: For the wire brushing and drilling, wear protective goggles and a dust mask.
Instructions for creating a tea-party container garden from half–whiskey barrels
1. When you bring the barrels home, place them in a workplace, setting them upside down on some boards, so that their top rims are raised off the ground.
2. Generally the metal barrel hoops are rusted and rough, so use a wire brush to clean them off and smooth them out. Wire brushing removes rust flakes, rough surfaces, and pockmarks from the metal hoops and excess dirt and splinters from the wood surface.
3. After wire brushing the entire outside of the barrel, use a tack cloth to remove excess residue.
4. Secure the metal hoops to the wooden barrel staves with self-tapping screws, which have a drill-tip point.
5. Drill extra drainage holes in the bottom of the barrel; use at least a 1-inch-diameter spade bit for wood. Make three to five holes.
6. Prime the metal barrel hoops first to cover all rust and coat the metal well. (I use a water-based primer and sealer applied with a fairly wide brush.) Be sure to get the primer in the cracks where the metal meets the wood surface. After coating the metal, prime the wood. Do not paint the bottom of the barrel; let it breathe.
7. Once dried, turn the primed barrels right-side up and neatly paint the rims. (A messy job will show.) Touch up the spots that you have missed once the barrels are inverted. (Tip: Sitting on a large rubber ball can help you when working on barrels at ground level; it is comfortable and easily rolls around the outside of the barrel as you work.)
8. When you are ready to paint, place the barrels, bottom-up, on a covered surface. It is easier to paint on a higher level, and there is less chance of dirt splashing up on them when they are off the ground. I chose bright pastel Easter-egg colors for the outdoor garden and used a latex-acrylic exterior trim and siding paint (which has more breathability than an oil-based paint). If you have enough paint, apply two coats for a more durable finish.
9. Sketch designs for your barrels. At first I considered something floral or viney, but I decided to use ancient elemental symbols. Then I played with color combinations and designs.
10. Make cardboard templates for handles, which will allow you to fool around with different shapes and sizes. Once I figured out the right design for my barrels, I positioned it to make sure that it fit in the right place. (I couldn’t attach these to the metal hoops, so I had to attach them to the wood.)
11. Lay the finalized cardboard templates for handles on scraps of 1½-inch-thick birch or maple wood, trace the shapes, and then cut out the shapes with a jigsaw.
12. After priming the shaped handles, cover them with two coats of paint. When the paint is dry, attach them from the inside with stainless or galvanized flat-head screws 2½ to 3 inches long.
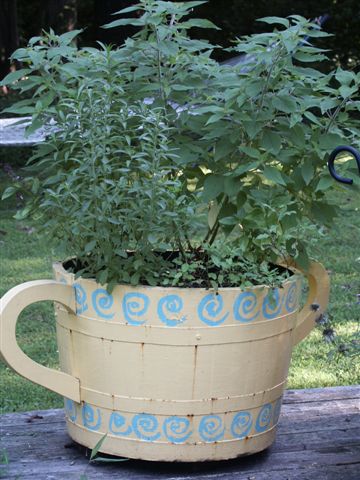
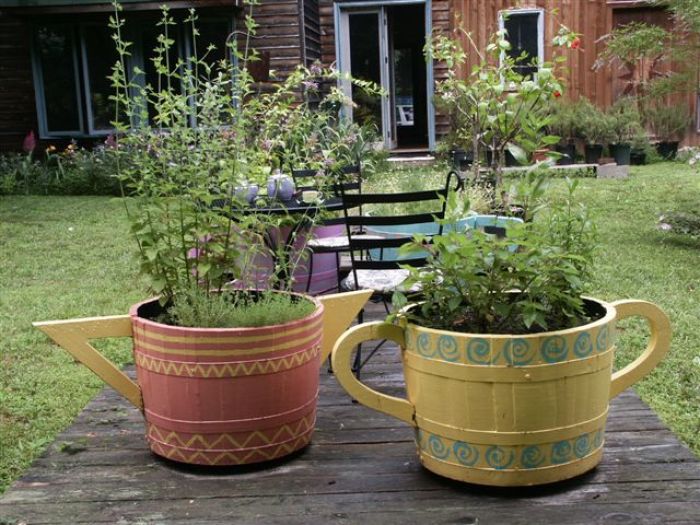
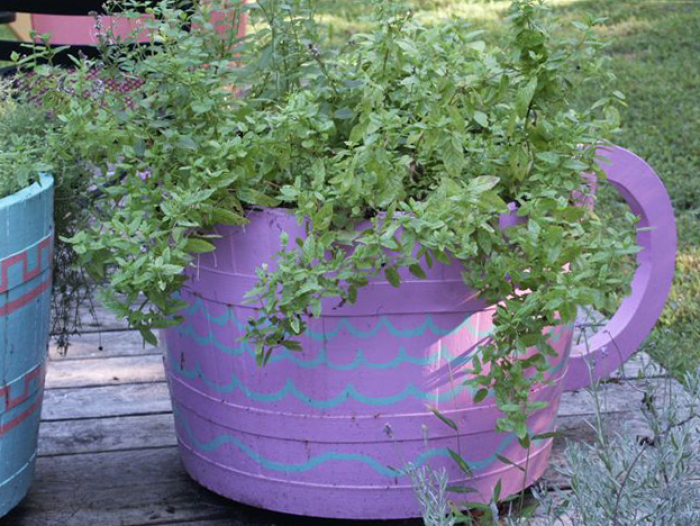
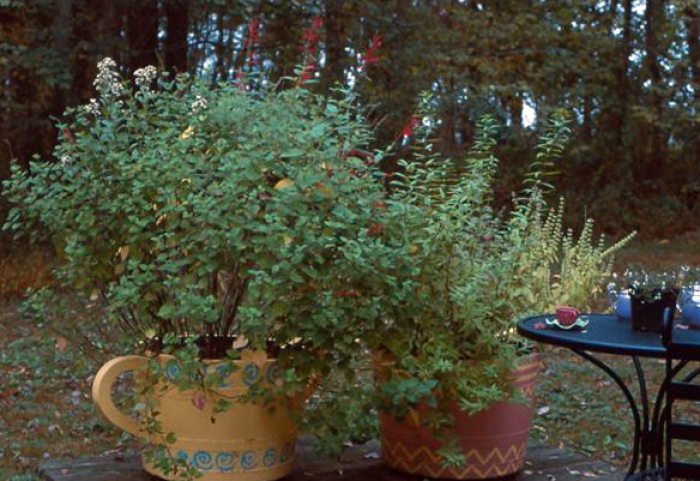
13. You can test designs and colors with paint and various brushes on wood scraps. I chose four colors for the four containers: the sugar bowl is yellow with turquoise air symbols; the creamer is orange with yellow fire symbols; the teacups are fuchsia with turquoise earth signs and turquoise with orange water signs.
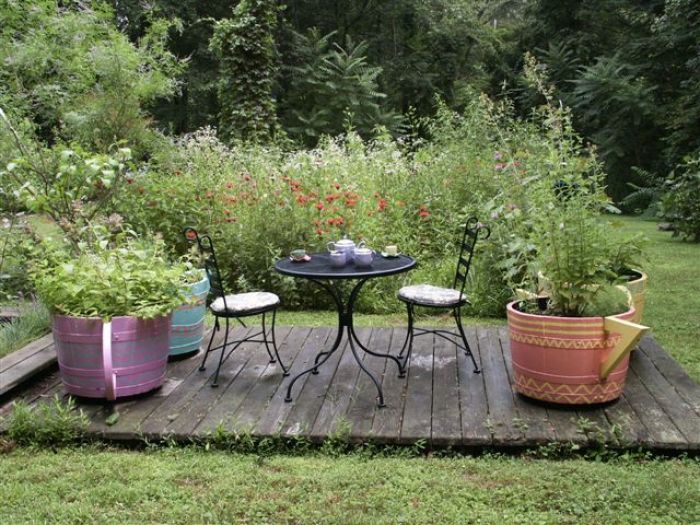
14. Once the paint has dried, place the empty tea-party barrels where you want them. I raised mine off the deck by placing three bricks under the outer edge. This allows the barrels to breathe and drain, so the bottoms will not rot as quickly.
15. Place a broken cinderblock in the bottom of each barrel; it fills the barrel and adds drainage and lime.
16. Combine Pro-mix and potting soil with humus and amendments to fill the barrels; it takes a lot of soil to fill one of these! Now you are ready to plant your tea-party garden with tea herbs.
Tea herbs for containers
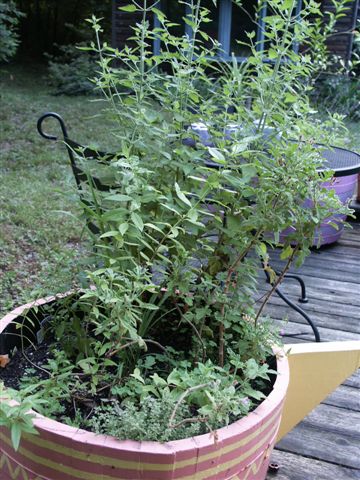
Herbs for the tea garden are chosen for their flavor and fragrance in making tea. There are many herbs that make delicious tea, but not all of them are suitable for growing in a whiskey barrel. Although I love having bee balm, rose petals, and Echinacea petals floating in a cup of tea, those herb plants are a bit too large for these containers. I figure about five to six plants per whiskey barrel is comfortable, depending on the plants and their size. Since these plants are in a container, they will be dependent on you for water, and I recommend fertilizing at least once a month. Most of these herbs are perennial herb plants—some are tender—so they need to be brought indoors for the winter in my Zone 7 garden. I replant the annuals every year. One teacup is planted with all lemon herbs. And of course, the sugar bowl has stevia in it. Here are some of the other herbs that are planted in my tea barrels:
- Lemon basil and cinnamon basil — Ocimum basilicum ssp.
- Calendula — Calendula officinalis
- Catnip — Nepeta cataria
- Chamomile, German — Matricaria recutita
- Chamomile, Roman — Chamaemelum nobile
- Lemon balm — Melissa officinalis
- Lemongrass — Cymbopogon citratus
- Lemon thyme — Thymus × citriodorus
- Lemon verbena — Aloysia citriodora
- Mints — Mentha ssp.
- Orange mint — Mentha aquatica
- Peppermint — Mentha × piperita ‘Mitcham’
- Red mint or doublemint — Mentha × gracilis ‘Madalene Hill’
- Spearmint — Mentha spicata ‘Kentucky Colonel’
- Pineapple sage — Salvia elegans
- Rosemary — Rosmarinus officinalis
- Sage — Salvia officinalis ssp.
- Scented geranium — Pelargonium ssp.
- Stevia — Stevia rebaudiana


Comments
Log in or create an account to post a comment.
Sign up Log in