How to Start Basil Off Right
When growing this herb from seed, it's important to follow a few essential steps

The first time I tasted pesto was on a warm summer night while dining al fresco at a restaurant in Fiesole, Italy. I inquired about the trenette al pesto on the menu, and one of my companions insisted that I try it. My plate of pasta arrived with a bright-green aromatic herb sauce that tasted rich, savory, sweet, and pungent all at the same time. I couldn’t figure out what the main ingredient of the sauce was, so with some amusement, my Italian friends explained to me that the key ingredient in this sauce called pesto was basil. That dish changed my life.
Before I left Italy my friends taught me how to make my own pesto, and the next year I started growing basil in my garden so I could have fresh basil available to make this dish whenever I wanted it.
I discovered that basil is an easy plant to grow, its only major requirements being full sun and consistent water. Its delicious flavor has made it the most useful herb in my summer kitchen. Although most varieties are grown for their culinary uses, several varieties have compact habits or purple foliage and are useful as ornamental plants too.
For the best variety, start from seed
Most garden centers sell transplants of basil (typically the Italian varieties bred for culinary use) in the spring. But to get the most interesting varieties, I start mine from seed indoors, four to six weeks before I plan to transplant them into the garden. I sprinkle the seeds on the surface of a soilless medium in small flats or seed-starting pans and cover them with plastic wrap. I keep the flats warm but out of direct sun.

When the first seed sprouts, I remove the plastic and place the flat either in direct light or 2 to 3 inches below grow lights. Since basil seedlings cannot tolerate overwatering, I don’t water them the first day after removing the plastic, and I’m careful to allow the growing medium to almost dry out between waterings.
As the plants grow, I feed them with a liquid fertilizer once a week. When the seedlings have developed their first set of true leaves, usually two to three weeks after germination, I transplant them into 2- or 2½-inch pots. Two to three weeks later I begin hardening off the plants, which means putting them outside during the day when temperatures are warmest to get them used to outdoor temperatures and weather. Eventually I will leave them outside overnight, but only when I’m sure there won’t be any frost.
Transplant once the soil has warmed
I transplant my basil plants into the ground in mid to late May, well after the last frost in my Maryland garden. I plant them in full sun, fertilizing and watering each one well at planting time. I continue to fertilize the plants every two to three weeks, and I water them if we don’t get regular rain, because basils don’t like to dry out.
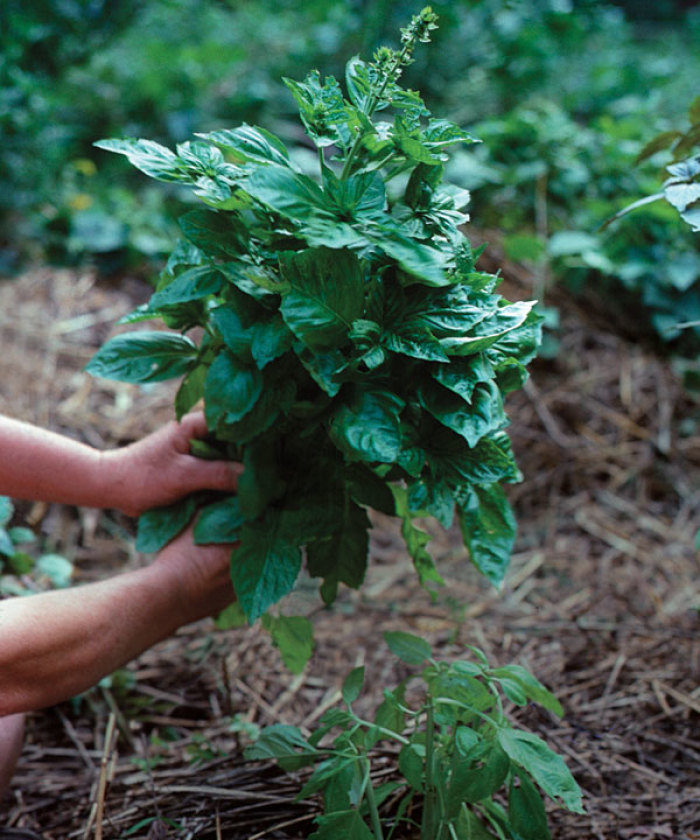
It is important to keep basils cut back so you have a continual harvest of fresh leaves throughout the season. I am diligent about pruning my plants, and as a result I get 15 to 25 cups of leaves from each plant per season. It is also important not to let the plants slated for culinary use flower, or the leaves will begin to taste bitter.
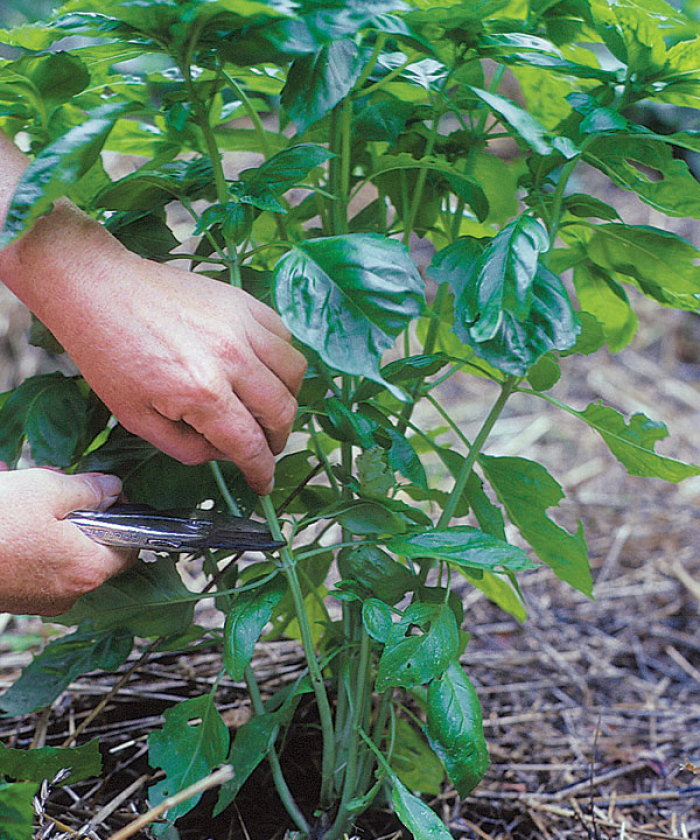
Immediately after planting, I prune my basils by cutting them back to just above the bottom two sets of leaves. This early pruning may seem drastic, but it actually stimulates growth. Depending on the weather and how quickly the plants are growing, I prune the plants back again to just above the bottom two sets of leaves about every four weeks, or sooner if they show any sign of flowering.
My passion for basil has continued to grow over the years. Last summer I grew more than 40 basil plants of assorted varieties, and each one had a delectable fragrance and flavor to offer. Who would have known that a dinner in Italy years ago could have started such a love affair?


Comments
Log in or create an account to post a comment.
Sign up Log in