

How to Grow Peas Easily
If you think you know everything about this spring staple, these tips and tricks may surprise you
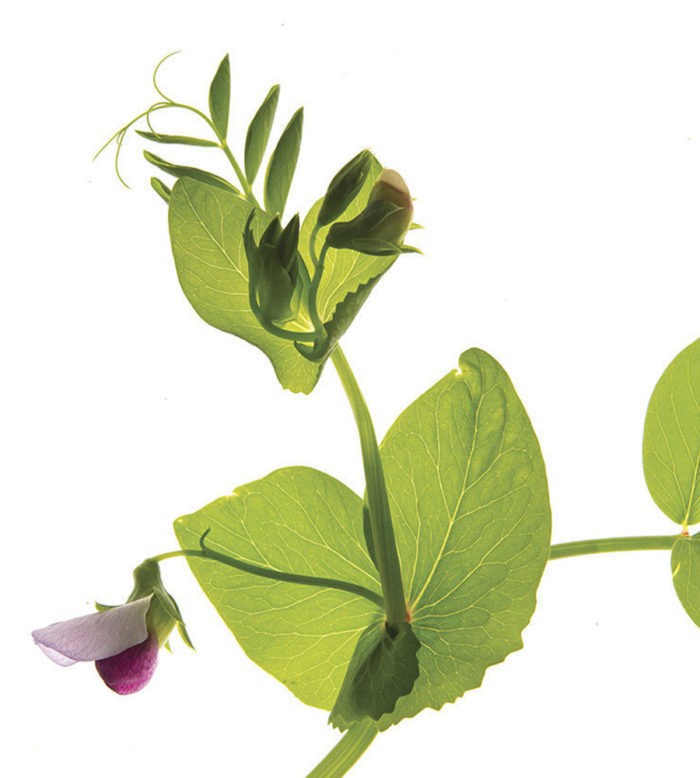
Peas are the star of the cool-season vegetable garden. Unfortunately, many gardeners grow them simply because they’re one of the earliest vegetables that can be sown into the soil, not because they expect great things from them. That needn’t be the case. Succulent peas taste amazing when eaten right out of the garden before the sugars turn to starch—far better than the frozen or wax-covered options at the grocery store. They’re also one of the most nutritious veggies you can grow. With a little effort, planning, and good timing, you, too, can have a robust pea harvest.
Pick a variety based on your space constraints and tastes
Peas have great varietal variability but can be sorted into three major pod types: shelling, snow, and sugar snap. Thanks to the skilled work of heirloom seed savers and plant breeders alike, you can now pick a pod type with an ideal growth habit for your garden: low-growing (also called bush or dwarf) or tall-vining (also called climbing). Low-growing peas tend to stay between 18 and 30 inches tall, whereas tall-vining varieties can reach upward of 6 feet or more. Each variety will produce pods at a different time during the season, too: early, mid-, or late spring. There’s a perfect pea (or three) for every garden, and the savvy gardener grows several to spread out the harvest.
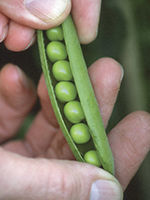
Shelling peas, also called garden or English peas, are shucked (seeds removed) because the pods are fibrous and inedible. The seeds of shelling peas are either wrinkled or smooth, the latter containing more starch. Generally, wrinkled seeded varieties are sweeter and used for steaming fresh, shortly after harvest, to be frozen. Smooth-seeded garden peas are harvested later in their maturity to dry and be used in soups.
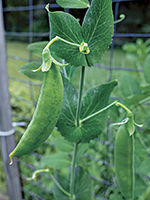
Sugar snap peas are edible podded peas in rounded, nearly string-less pods, aptly named because they audibly snap when bent. The plants are generally loaded with 2- to 3-inch-long sweet, crunchy pods. You’ll be lucky to get any of them into the kitchen, but if you’re able, they’re delicious with a splash of sesame oil and a sprinkle of black sesame seeds.
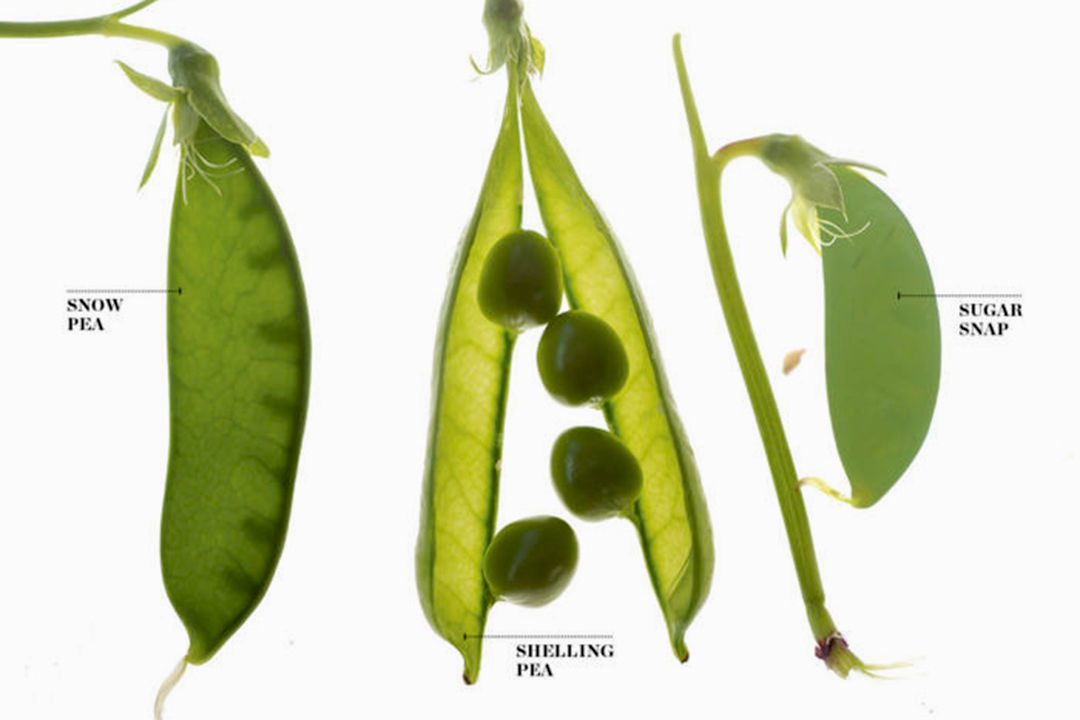
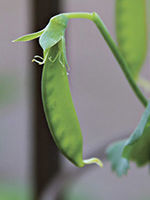
Snow peas may be spring’s most delicate crop with their thin, nearly see-through pods, which is ironic given their name. Snow peas usually eat up a lot of garden space because most varieties require trellising as the peas use their tendrils to climb ever higher. The shoots, flowers, and thin translucent pods can all be eaten. Growing vining snow peas on a fence can be a space-saving trick.
Direct-sow when the temps are cool and the soil is moist
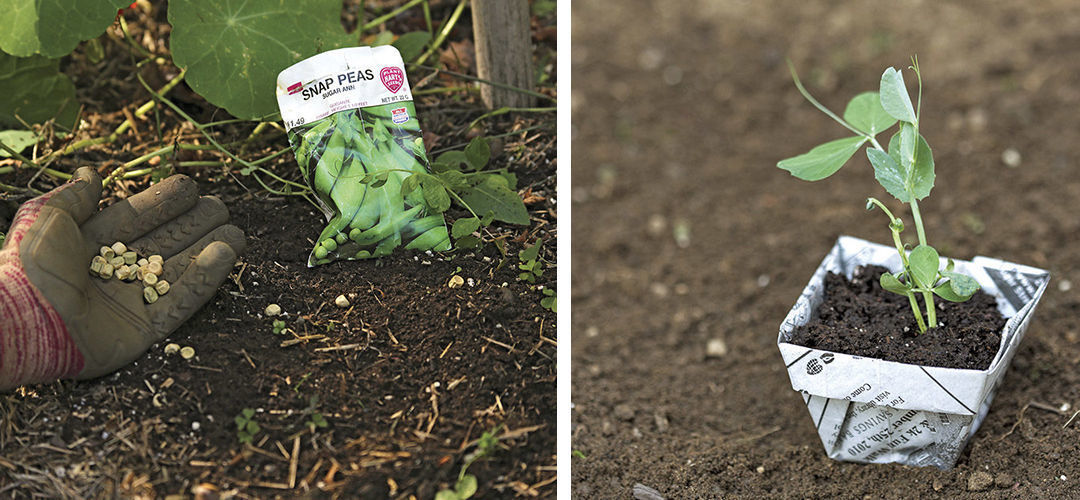
Peas grow well in fertile, well-drained soil in areas with long, cool, moist spring seasons. They can be direct-sown when soil temperatures reach 45°F and the wettest part of spring has passed. Germination can be slow in cold, wet soil—as long as 30 days in 40°F soil—so don’t rush to plant. As the weather warms up, peas will emerge 13 days after sowing in 50°F soil and in six days in 60°F soil.
At the Chicago Botanic Garden, we both direct-sow peas and transplant seedlings that have been started in our greenhouses. This allows us to successively harvest, staggering maturity dates. Seed viability is three years if stored in a cool, dry spot. We sow in 2-inch by 2-inch pots/cells, so there isn’t a need to pot up after germination. With a little bit of bottom heat, peas pop up after six days. We allow for good air circulation and avoid too much moisture in the greenhouse when starting our peas. We sow them inside around St. Patrick’s Day and allow them to grow for three to four weeks before moving them into cold frames to harden off. In mid-April, the seedlings are then planted in the garden. Peas grow best in soil with a good, loose structure. I like to prep pea beds by amending with compost in fall. This alleviates the need to muck around in the garden and compact the soil in the early spring when I’m planting the peas.
Choose a staking method based on pea type
Depending on what type of pea variety you choose, it’s usually a good idea to plant with your support system already in place. Since pea germination can be sluggish, you may forget where they’re planted until it’s too late to sneak a trellis into place. Peas roots don’t like to be disturbed once they’re planted.
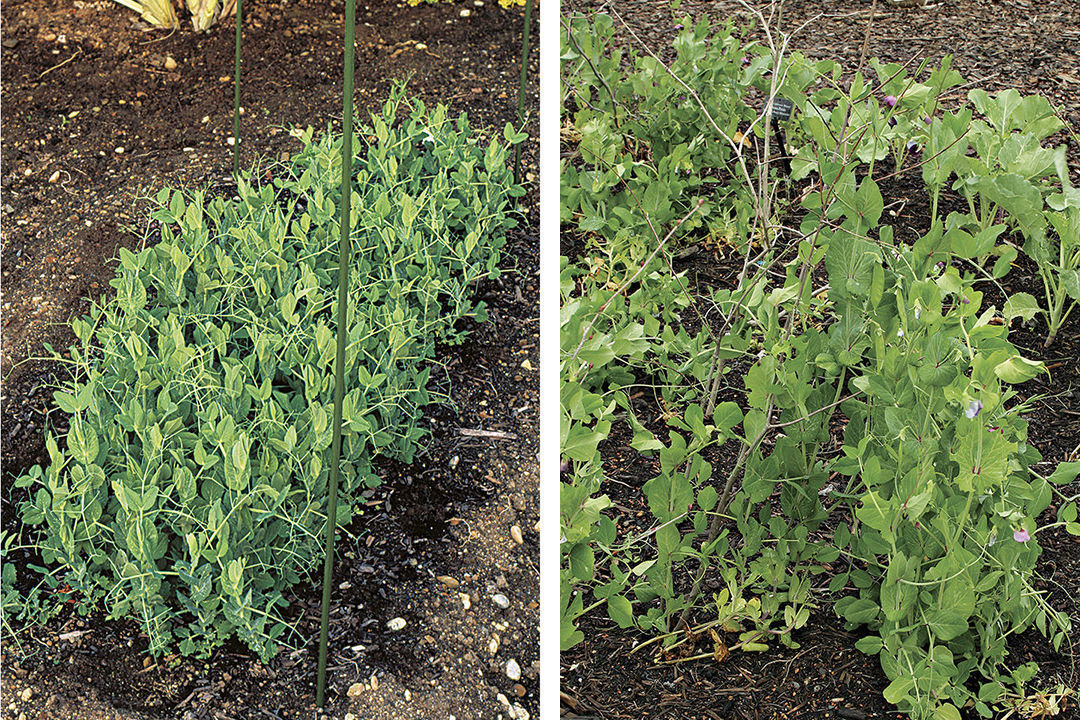
In the block method, which is often used by raised-bed gardeners, peas are planted intensively (at a 4-inch spacing in a grid), so low-growing peas are best. Powdery mildew, an airborne fungus in climates with warm, dry days and cool nights, can be a problem in block plantings. Because the plants are so close together, air circulation is inhibited. It’s wise to choose powdery-mildew resistant cultivars for this method. The peas end up supporting themselves as they prop each other up. Yields can be high with this method, but harvesting can be a challenge depending on how visible the peas are and how long the gardener’s arms are.
Pea brush is sustainable and cost effective and is created simply by saving the branches pruned from shrubs that need yearly trimming. The gleanings are inserted into the ground so that shorter pea vines can scale them. This staking method has a natural Old World feel.
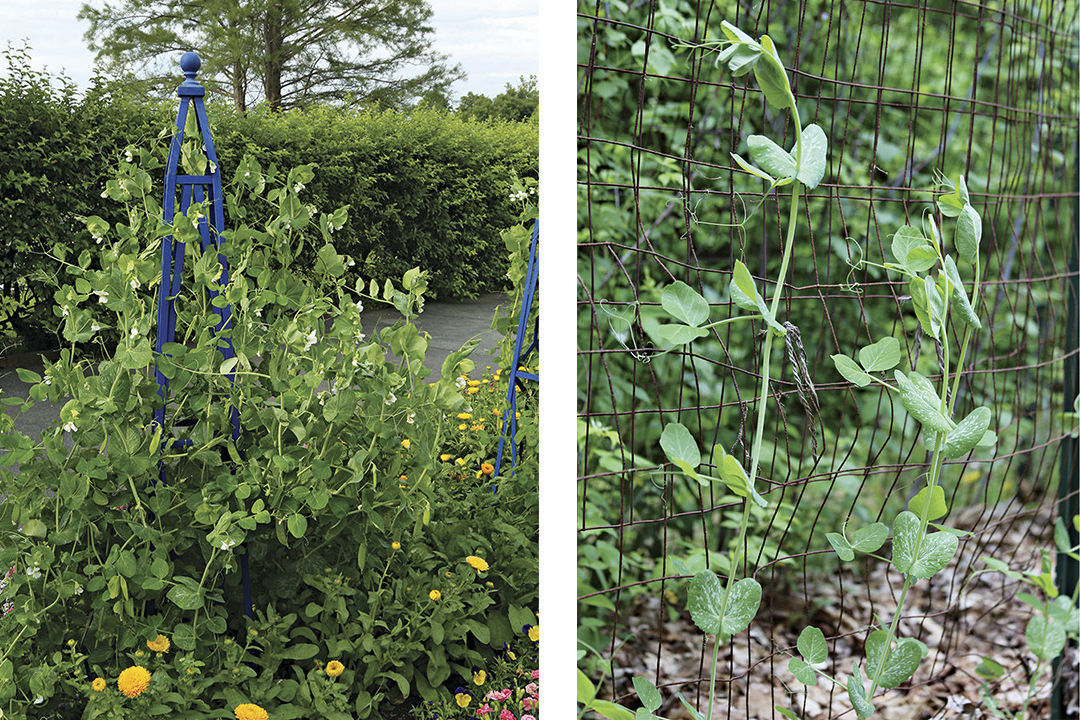
The beauty of trellising peas is multifaceted, although it does require a bit of planning. Tall-vining peas are not self-supporting; they need something to climb on. They’re plants that respond to mechanical touch, which in plant physiology is called thigmotropism. It means that pea tendrils, which are slim, flexible stems, can quickly wrap themselves around what they touch, grasping the support for climbing. Vining peas appreciate narrow netting to curl around, enabling them to clamber up quickly. Trellising allows for comfortable waist-high harvesting of vines. Growing vertically has additional advantages. Plants receive more exposure to light and enhanced air circulation, which helps control disease and pests.
Tepees are fun to build out of metal or wooden/bamboo stakes tethered together with twine. Wrapping twine horizontally between the stakes at different heights gives vining peas something to climb on. The initially utilitarian appearance softens once the tepee is covered in vines. It eventually becomes an architectural element, adding dimension to the garden. Shorter tepees can be installed in jumbo terra-cotta containers for a dramatic display. This allows urban container gardeners to grow peas efficiently, too.
Examine the pods before you pick
Edible-podded sugar snaps and snow peas should be harvested every one to three days before their pods become fibrous. A good indicator for sugar snaps is that their fattening pods give a nice crisp “snap” when bent in half (but before the seeds get too large). If you wait too long, the pod will be unappetizingly tough, and the peas will need to be removed from their shell. Snow peas can be harvested five to seven days after flowering, when the pods reach their mature length (check the variety specifications) but are still delicate and flat. The tiny peas will be visible through the translucent pod. Snow peas should be cooled promptly post-harvest and can be stored for two weeks in the refrigerator. Overripe snow peas should be removed to keep the plants productive.
Shelling peas are ready to be picked when the pods fill and look rounded. Check the lowest peas on the plant often as maturity draws near. Immature shelling peas are more delicious than starchy peas left on the plants too long. Harvest shelling peas as close to mealtime as possible, because they lose their sweetness quickly.
When I plant peas, I think about my Grandma Johnson, who had it made because she had five children to shuck her peas. My mother, however, says there were still never enough peas for the dinner table because her big brother hogged them all, although I’ve never confirmed that with him.
Tip: Is inoculant worth it?

Inoculant is a microbial dust applied to pea seeds to boost yields. It’s relatively inexpensive, easy to do, and boosts plant nutrition—so yes, it’s worth the effort. Inoculants encourage the formation of nitrogen-fixing nodules on pea roots, which accelerates nutrient availability and assimilation. The powdery substance can be shaken or stirred with your seeds before sowing. Inoculant is the jump start peas need, which is particularly important in new garden beds.
Varieties that won’t let you down
The following is a sampling of my favorite shelling, sugar snap, and snow peas.
Shelling
‘Blue Podded Shelling’ is a beautiful ornamental edible. With steely blue-green foliage and magenta flowers, this is my favorite pea, with vines that reach heights of 4 to 6 feet. ‘Blauwschokkers’ is another name for it. I often transplant this pea as four-week starts and then direct-sow seeds at the same time. This extends the harvest window for this 80-to-85-days-to-maturity pea.
‘Green Arrow’ is an heirloom pea noted for its resistance to powdery mildew and wilt. Producing pairs of plump, densely packed pods on manageable 2-foot-tall plants makes harvesting easy. ‘Green Arrow’ requires 68 days to mature. We’ve transplanted this pea to get a head start on an extra-early crop in spring. This variety is productive and reliable, making it a farm market standard.
‘Little Marvel’ is ready to harvest in 60 days and is a wise selection for compact spaces. Plants top out at a petite 18 inches tall. Pure white flowers yield succulent shelling peas. ‘Little Marvel’ is a turn-of-the-century heirloom with delicious eating quality on uniform, self-supporting plants, and it’s resistant to fusarium wilt and pea enation mosaic virus.
|
|
|
|


Snow
‘Dwarf Grey Sugar’ is a stellar performer, producing 2½-inch flat pods on manageable 30- to 36-inch-tall plants. Many snow peas have a tall-vining habit and require trellising, but the smaller stature of ‘Dwarf Grey Sugar’ allows gardeners to grow it equally well with or without a support system. Rosy, bicolored pink and red blossoms produce pods in 57 to 65 days, though the pea shoots (which are edible) are ready for harvest 10 days after germination.
‘Golden Sweet’ receives honorable mention for the allure of its colorful pods. The purple flowers are beautiful, but the vigorous 5- to 6-foot vines require more work because they need to be trellised. The eating quality isn’t as good as ‘Dwarf Grey Sugar’ because the yellow pods are not quite stringless, but it’s still a good heirloom to grow.
|
|
|

Sugar Snap
‘Sugar Sprint’ was bred for earlier production than the better-known ‘Sugar Snap’. It’s a dwarf pea with crisp, stringless pods that snap in half when bent. The peas are ready to harvest in as little as 58 days, so this makes ‘Sugar Sprint’ a good selection for successive plantings. I like to direct-sow in blocks or double rows, allowing the 2-foot-tall plants to provide each other with support. ‘Sugar Sprint’ is resistant to powdery mildew.
‘Sugar Ann’ is a compact 2-foot-tall plant, making it a perfect selection for small space gardening. It’s a dependable, prolific producer. The superior flavor of ‘Sugar Ann’ helps mitigate the fact there’s the extra step of removing the string from the pod. Billed as the earliest sugar snap pea, I find that ‘Sugar Ann’ becomes productive in 70 days.
|
|
|

Sources
- Baker Creek Heirloom Seed Co., Mansfield, MO; 417-924-8917; rareseeds.com
- Johnny’s Selected Seeds, Winslow, ME; 877-564-6697; johnnyseeds.com
- W. Atlee Burpee & Co., Warminster, PA; 800-888-1447; burpee.com
Lisa Hilgenberg is the horticulturist for the Regenstein Fruit and Vegetable Garden at the Chicago Botanic Garden in Glencoe, Illinois.
Photos: Danielle Sherry, courtesy of Robin Carlson/Chicago Botanic Garden, Scott Phillips, courtesy of johnnyseeds.com, Adam Gibbs, Pernilla Bergdahl/gapphotos.com, Steve Aitken


Comments
Log in or create an account to post a comment.
Sign up Log in