

A Bright Idea for Spring Containers
This approach makes planting and pest control a snap
After the long gray of winter when most of us are desperate for color in the landscape, bulbs in containers can add a splash of brilliance anywhere it is needed.
Bulbs can perform their magic in containers as well as they do in the ground. They can be potted up and overwintered in an out-of-the way spot, then moved to their display location after they break dormancy. Potted bulbs are easier to plant and protect from rodent pests than those in the ground, and when the show is done, simply pull the pots out to make way for new plants.
Which bulbs you choose is up to you. The standards are tulips, daffodils, hyacinths, crocus, and grape hyacinths, but don’t be afraid to experiment with less traditional choices. The right mix can give you a container that blooms from February to June.
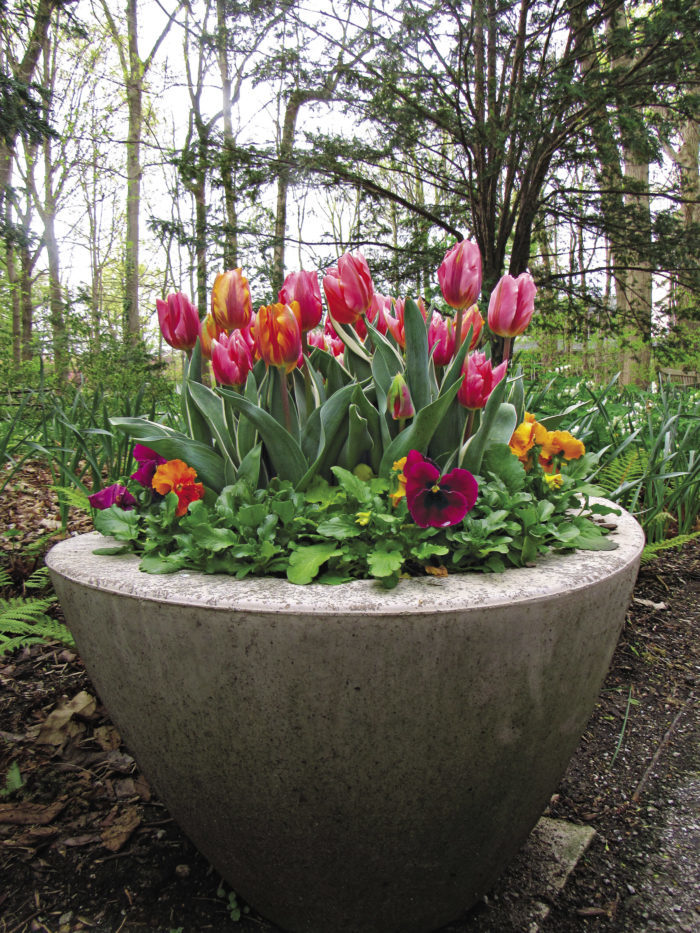
Create a shimmering color combination 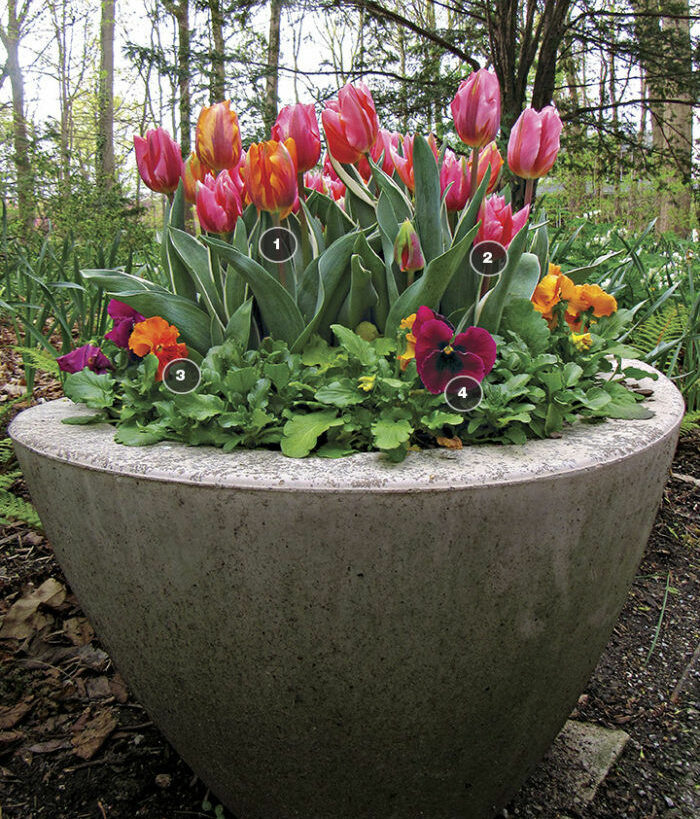
Layering two closely related tulips produces a royal flush of color when both varieties burst into bloom.
1. ‘Princess Irene’ tulip (Tulipa ‘Princess Irene’, Zones 3–8)
2. ‘Pretty Princess’ tulip (Tulipa ‘Pretty Princess’, Zones 3–8)
3. Frizzle Sizzle Orange pansy (Viola × wittrockiana, annual)
4. Matrix® Rose Blotch pansy (Viola × wittrockiana, annual)
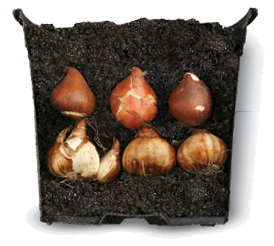
Use plastic pots to start bulbs behind the scenes
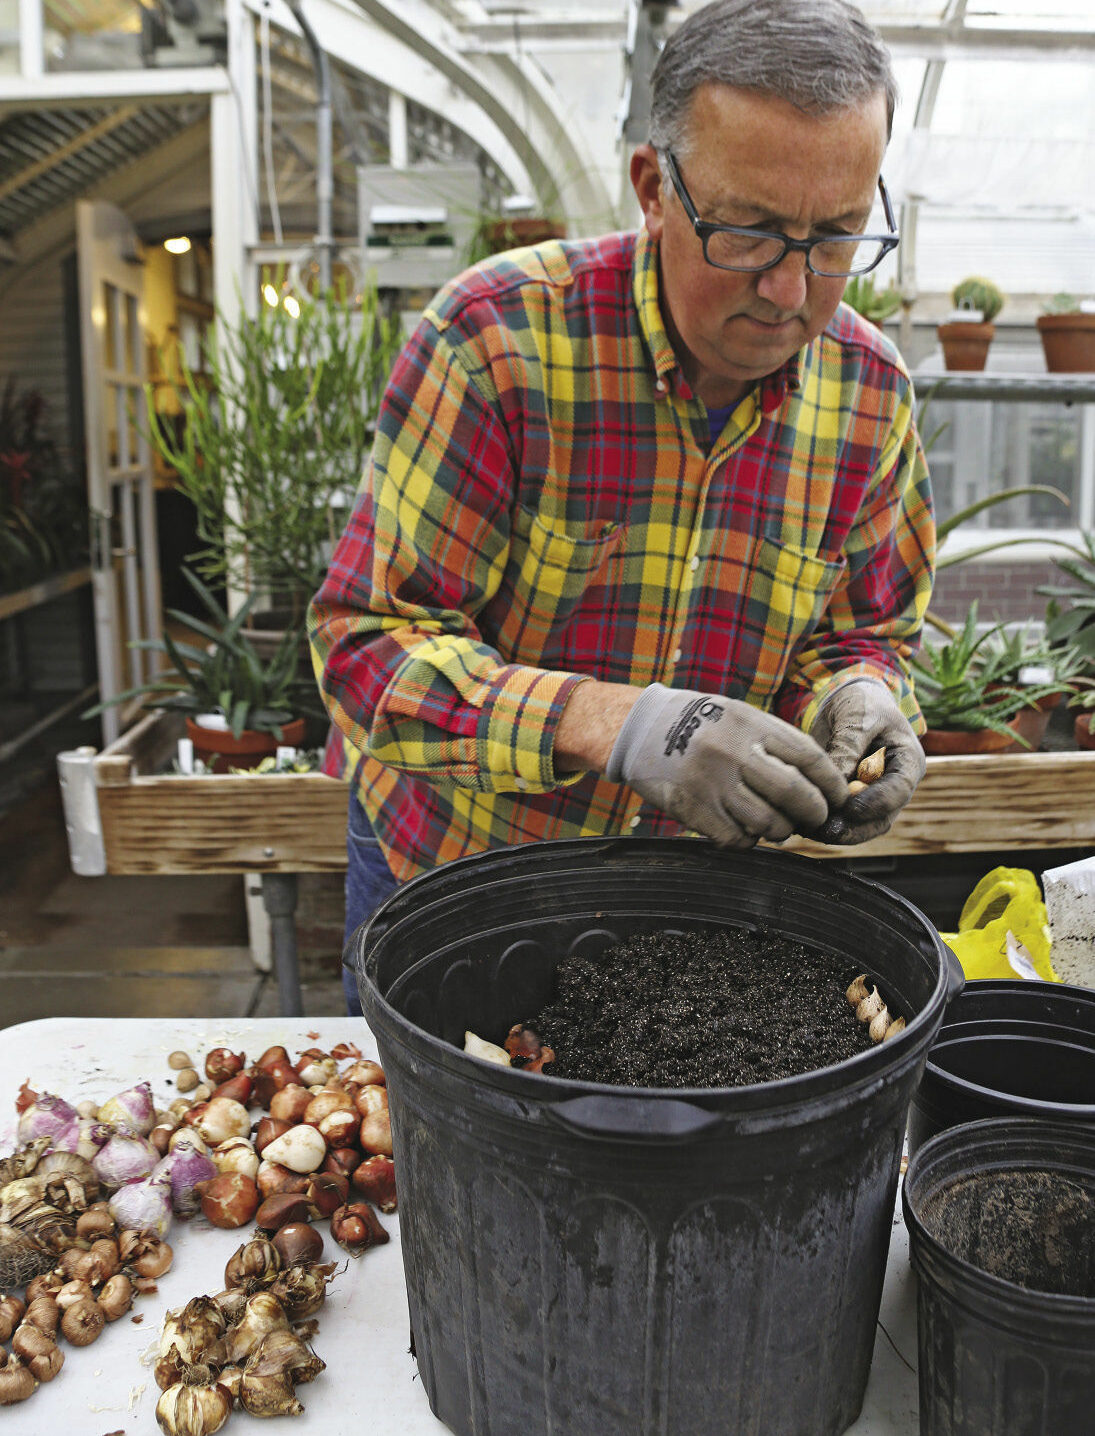
For the Indianapolis Museum of Art’s spring container displays, we plant bulbs in plastic nursery pots, overwinter them under mulch, then move them into decorative planters in spring. The nursery pots are readily available, come in many sizes, and are reusable. You can use one pot or several to fill a decorative container.
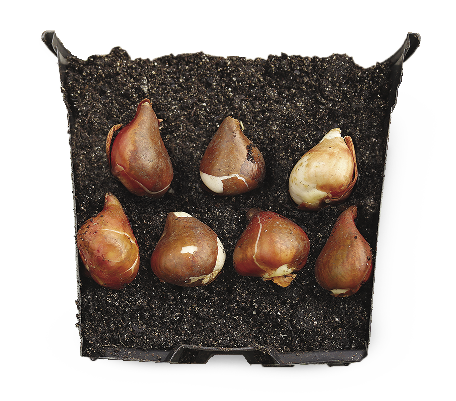
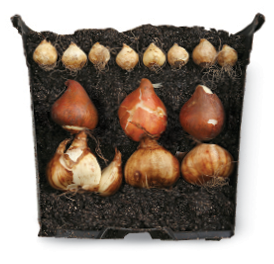
Bulbs don’t like to be wet, so select a high-quality planting mix with good drainage. Put a few inches of mix in the bottom of the pot, and place the bulbs “shoulder to shoulder” in a solid layer. If you are planting just one layer of bulbs, fill the pot with more soil, leaving a 1-inch lip at the top of the pot. If planting a second layer, cover your first layer of bulbs with an inch or two of soil, then add the next layer (which should have fewer bulbs than the first layer) with some space between. If the top layer is a minor bulb like crocus, you can plant a solid layer without a problem.
Once the pots are planted, bury them under mulch to give them protection from the winter weather, and use a repellent to keep away hungry critters.
To prevent plants from getting floppy, remove them from the mulch as soon as the first growth appears. When spring temperatures start to rise, check the pots weekly for emerging foliage. Try to get all the mulch off your pots by the time the top growth is a couple of inches tall.
After removing the pots from the mulch, move them to their decorative containers as soon as possible. The top of each plastic pot should be about an inch below the lip of the container that it sits in. Backfill voids between pots with soil, and cover the tops of the pots with a layer of soil or mulch.
A bulb blend extends bloom time
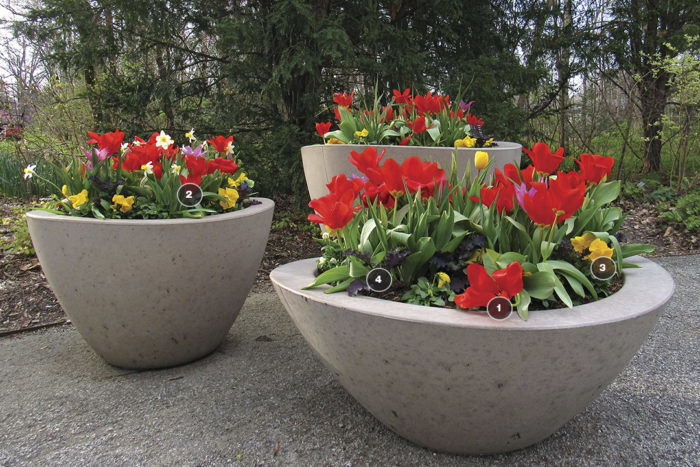
A mix of early-, mid-, and late-season tulips anchors a colorful display that will last from early to mid-spring.
1. Trifecta™ tulips (Tulipa cvs., Zones 3–8)
2. ‘Jack Snipe’ daffodil (Narcissus ‘Jack Snipe’, Zones 3–8)
3. Colossus Yellow pansy (Viola × wittrockiana, annual)
4. ‘Scarlet’ kale (Brassica oleracea ‘Scarlet’, annual)
Use minor bulbs for another layer of color
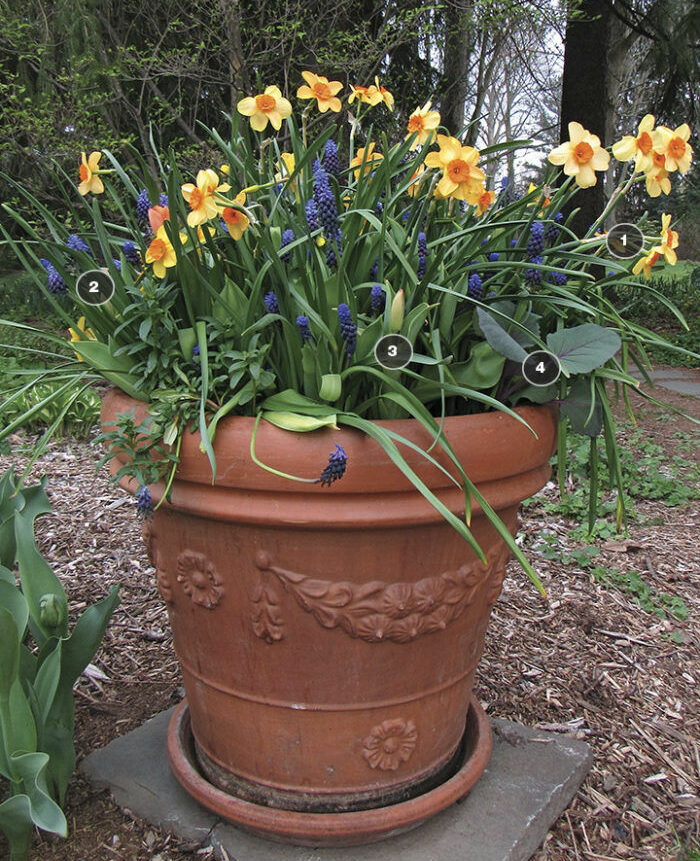
Grape hyacinths complement this two-toned daffodil perfectly. Soon, apricot-orange tulips will join in, providing a color echo.
1. ‘Kedron’ daffodil (Narcissus ‘Kedron’, Zones 3–8)
2. Grape hyacinth (Muscari latifolium, Zones 4–8)
3. ‘Stunning Apricot’ tulip (Tulipa ‘Stunning Apricot’, Zones 3–8)
4. ‘Mammoth Red Rock’ cabbage (Brassica oleracea ‘Mammoth Red Rock’, annual)
Colorful companions add interest
Bulbs put on quite a show, but their bloom time is short, and there’s a limit to how many bulbs you can add to extend the display. Annuals, perennials, woody plants, or even twigs can be tucked into empty spaces to keep a container looking fresh for much longer.
I like to use reliable flowering spring annuals; leafy vegetables such as mustard, cabbage, lettuce, kale, and Swiss chard; and perennials that have colorful foliage, such as heucheras (Heuchera cvs., Zones 3–8).
There won’t be room in your nursery pots for annuals or perennials, so plant them around and between the pots. If the planting space is narrow, I have been known to rip a root ball in half or squeeze a root ball down to half its size.
The real key to success with your bulb container is to not be hard on yourself. Remember, imperfect is better than not trying at all, and as with any type of gardening, there’s always next year. So get out there and pot up some bulbs!
Technique: Tips for overwintering bulbs
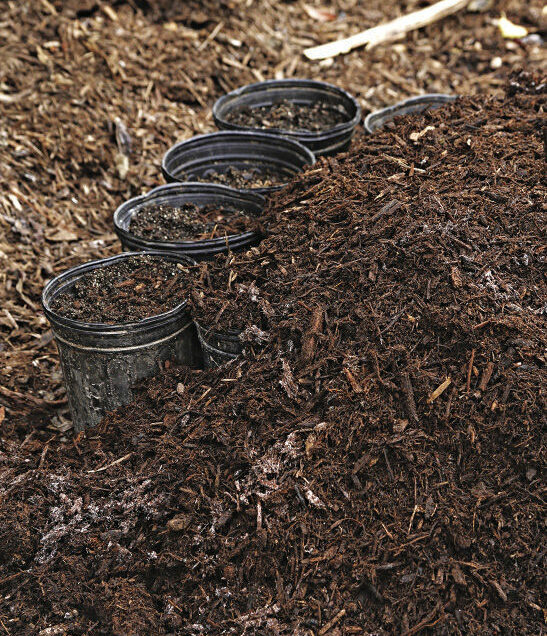
Bulbs in nursery pots can be buried in garden soil, but I prefer placing them on top of the ground and burying them in mulch. Place the pots side by side, with edges touching. Cover them with about a foot of mulch around the outside of the pots, and 4 to 6 inches over the top. Since I am not trying to force the bulbs into early bloom, the pots remain in their overwintering spot until growth emerges in spring. Plant. Bury. Walk away.
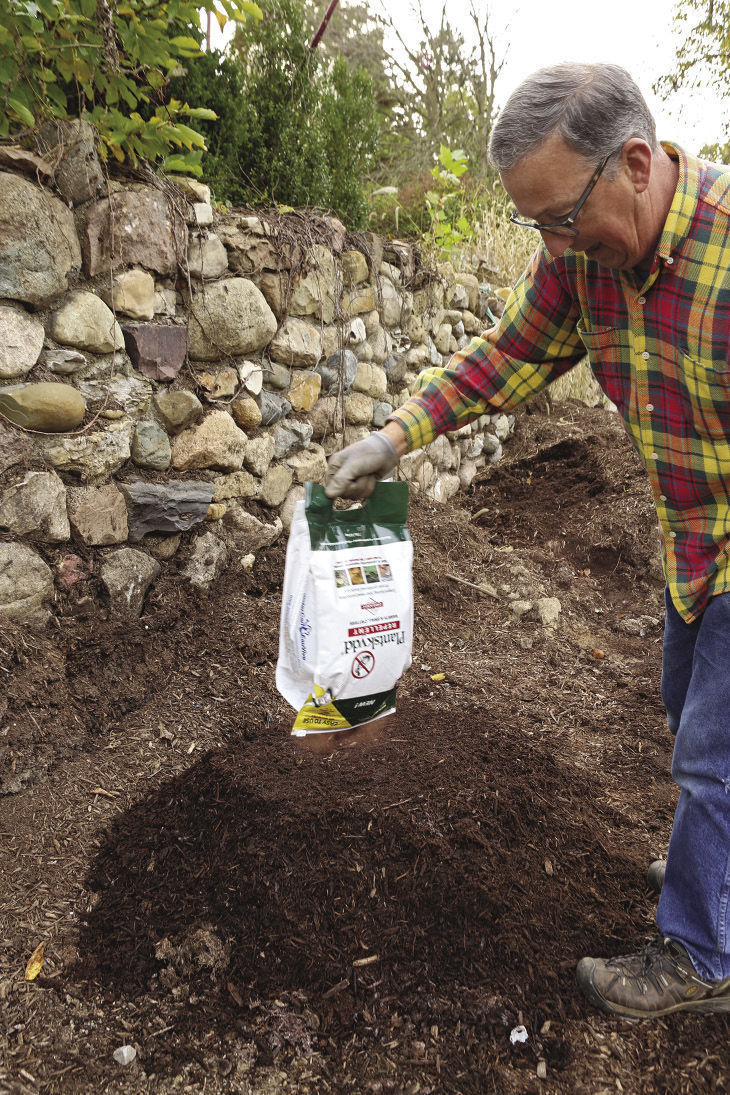
To deter squirrels, chipmunks, voles, and mice, we sprinkle Plantskydd Rabbit and Small Animal Repellent (plantskydd.com) over our pots, and then we bury the pots with mulch and sprinkle the top of the mulch with more repellent. You can also dip bulbs in liquid repellent before planting, or sprinkle hot pepper powder or flakes over your pots and mulch. While there’s no guarantee that repellents will work every time, they should work most of the time.
 |
 |
Irvin Etienne is horticultural display coordinator at the Indianapolis Museum of Art, where he, the horticulture staff, and many volunteers planted more than 150,000 flowering bulbs for their spring 2017 displays.
Photos: Irvin Etienne and Carol Collins


Comments
Log in or create an account to post a comment.
Sign up Log in