

4 Simple Upgrades That Make a Big Difference in the Garden
Take your beds from blah to beautiful with one of these effective measures
Have you always wondered what makes a garden truly stunning? Sometimes the solution is simple: Spread some mulch, pull some weeds, or add some interesting plants. But other times, these minor adjustments don’t do the trick. Over the years, I’ve noticed that successful garden beds have a lot in common: neat edges, bold focal points that direct the eye, beds that are in scale with their surroundings, and plants that are the appropriate size. If your beds seem to be missing that “wow” factor, it’s possible that they are lacking one of these four things. So what should you do? Diagnose the problem, commit to solving it, and invest in making the correction. Yes, these fixes are labor intensive, but they will ultimately give you the garden you’ve always dreamed of. Here’s how to start.
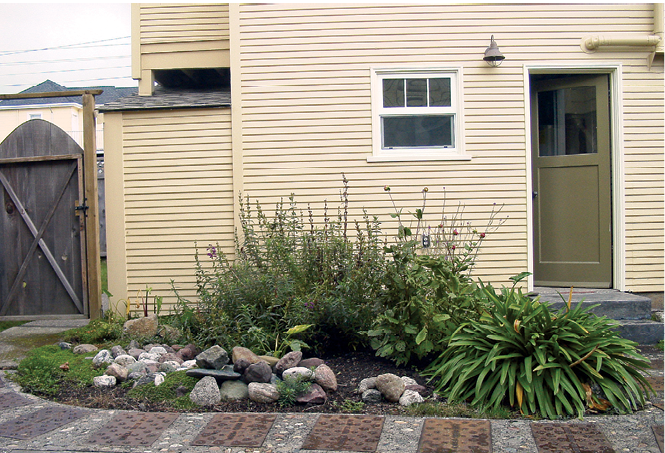
1. Permanently define the edges
When lawn creeps into garden beds, it causes a wavy, messy line that’s hard to keep neat. Until you install permanent edging, the grass and weeds will continue to creep in. Manufactured landscape edging saves time and maintenance (because you only have to install it once) and is one of the easiest ways to make your garden look well kept. Even if you haven’t weeded lately, a defined border can fool the eye into seeing the bed as tidier than it actually is.
• Research the edging options
There are three main options for permanent edging. Bender board is my favorite because it is the least noticeable. Brick and stone are pricey, but they can be installed in a weekend. Concrete curbing is the most expensive because it is usually installed by a licensed contractor.
• Dig, clear, and install
Before installing your edging of choice, use a mattock or spade to cut a trench along the edge of your bed, clearing away the sod and weeds as you go. Be sure your edging rests about 1½ inches above soil level so that the edging will stop the rogue weeds and grass from “jumping the fence” into your beds. After installation, backfill with soil to secure the edging.
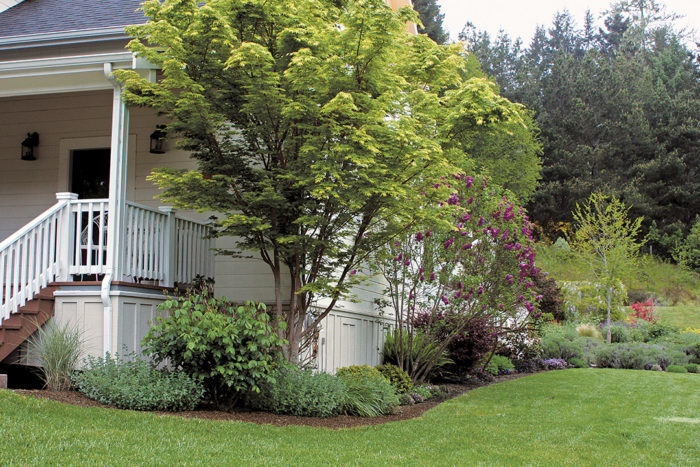
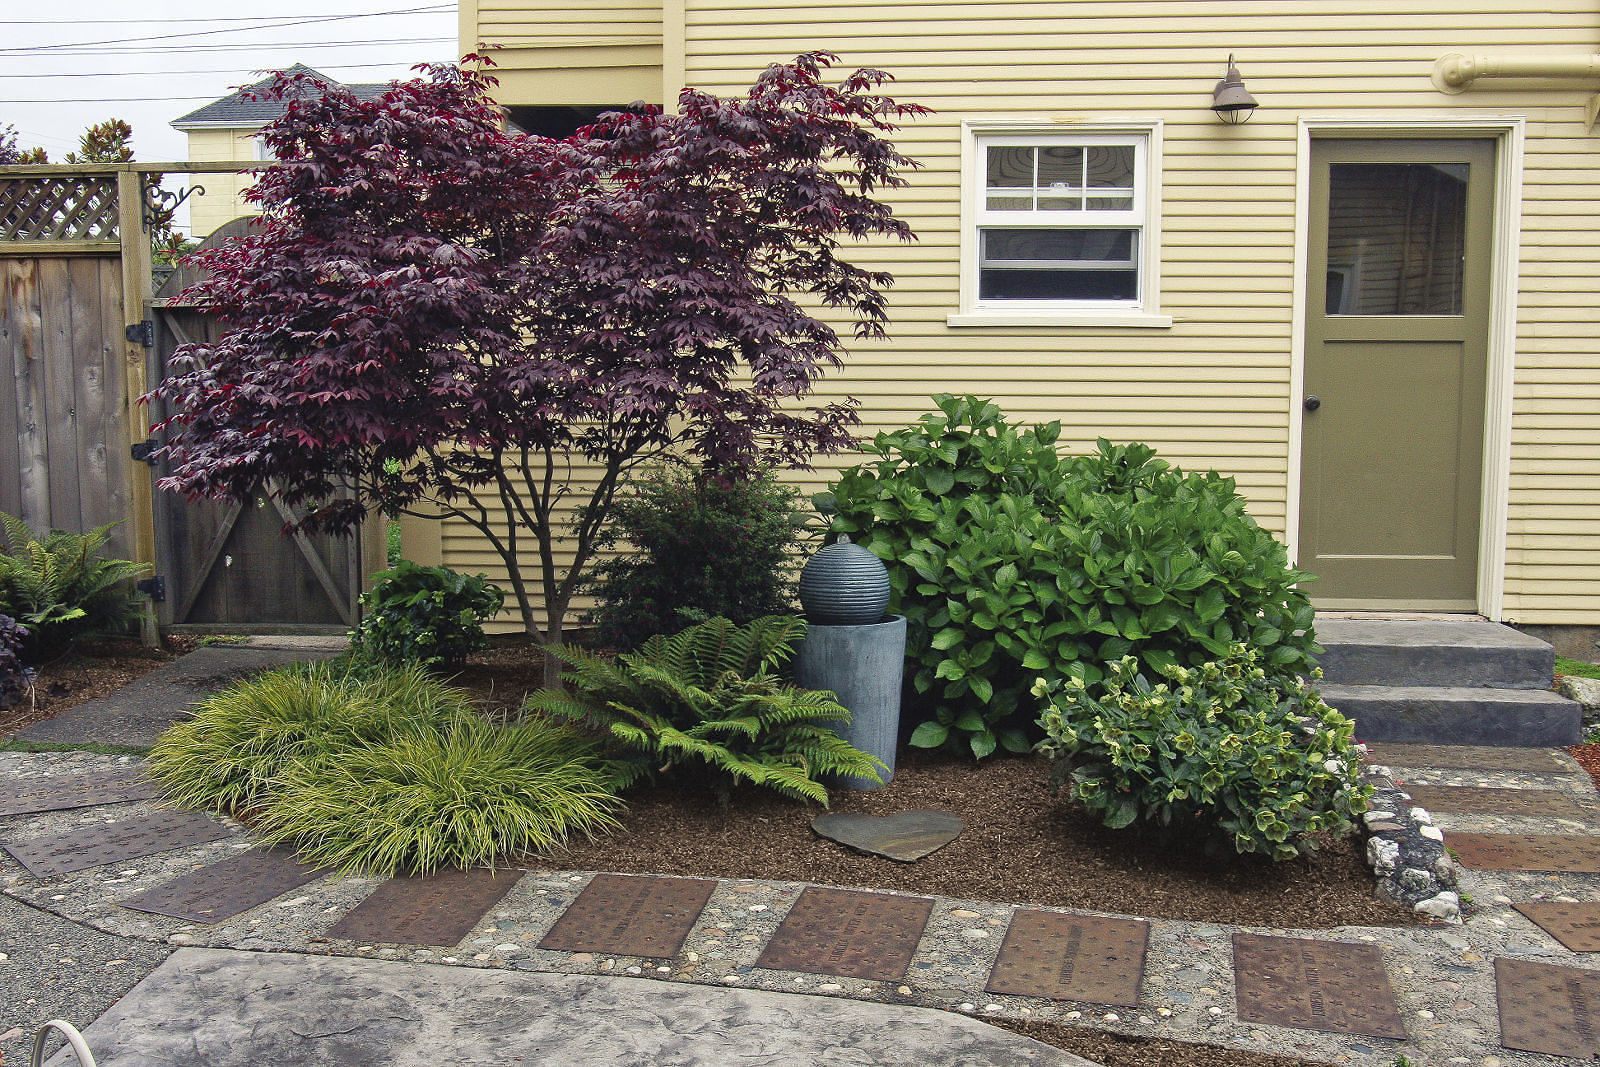
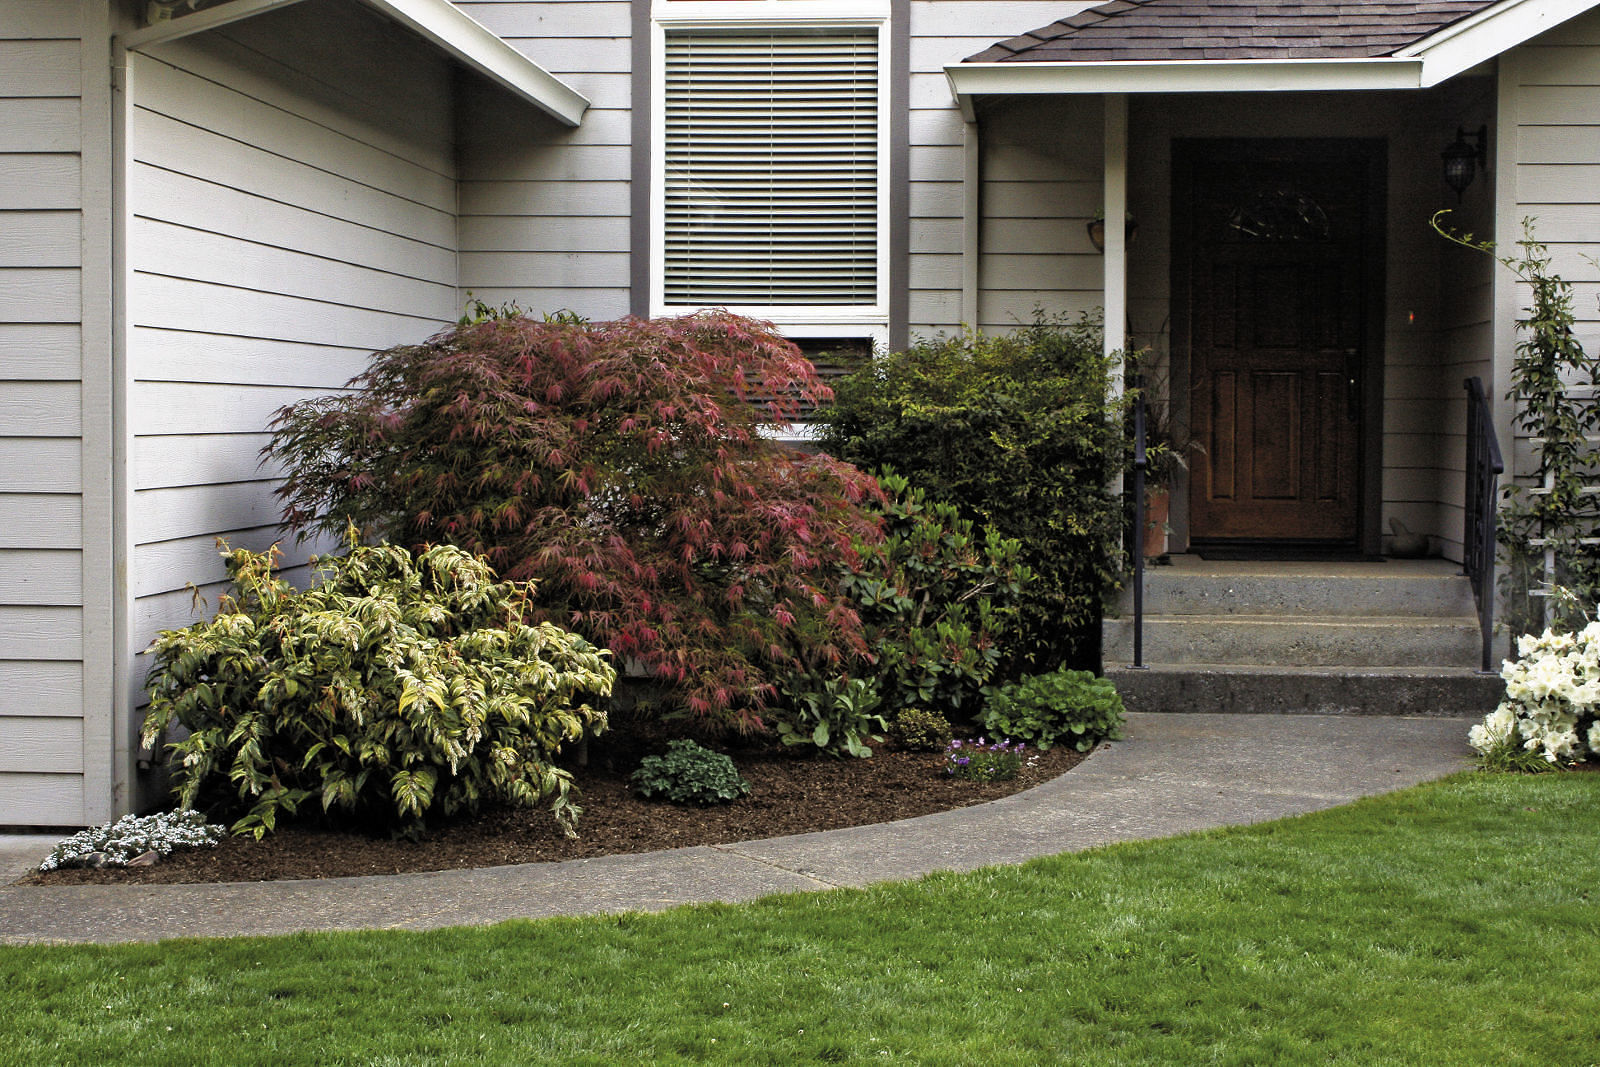
2. Make the garden the focus
A garden should always have focal points that draw the eye toward standout plants or interesting objects while diverting attention away from the more functional areas of a property, like the side of a house. If a garden lacks any attention-grabbing elements, you tend to notice the background, which may be unattractive, and not the bed. This is a big problem if the poorly designed bed is located in a prominent area of the landscape.
• Choose the type
Small trees or interesting shrubs make ideal focal points because they can grow large enough to make a bold statement and redirect attention away from large eyesores. In established beds, however, using a tree as a focal point usually means having to remove smaller plants to make room. If you don’t want to remove anything, you can instead add objects, such as garden-art pieces, a water feature, some pottery, or a birdbath; these can be nestled in among what’s already there. Although a focal point is often the largest element in a garden bed, it doesn’t have to be; it just has to be interesting.
• Determine where it fits best
When choosing a location for a focal point, the first thing to consider is from what vantage point you actually view your garden. Do you look out the window while doing dishes, or is there a comfy chair on your patio that you like to sit in? Stand in those spots and let your eyes wander; if an area is all right but isn’t drawing attention, considering placing a focal point there.
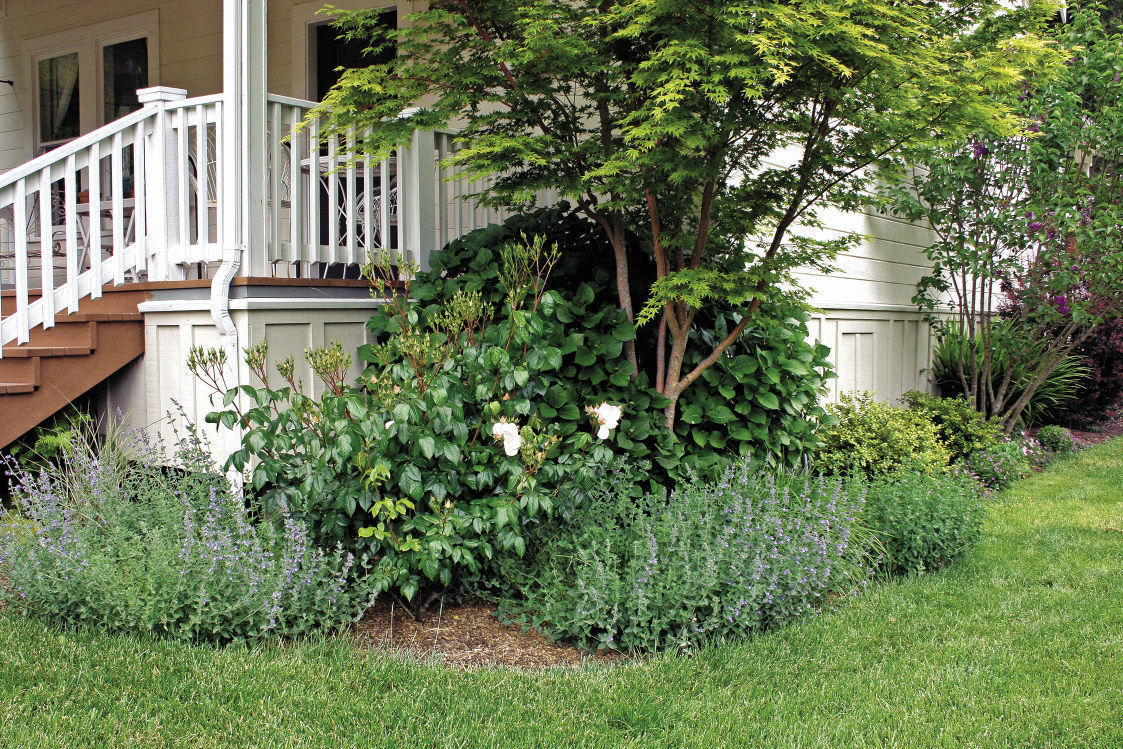
3. Upsize your bed
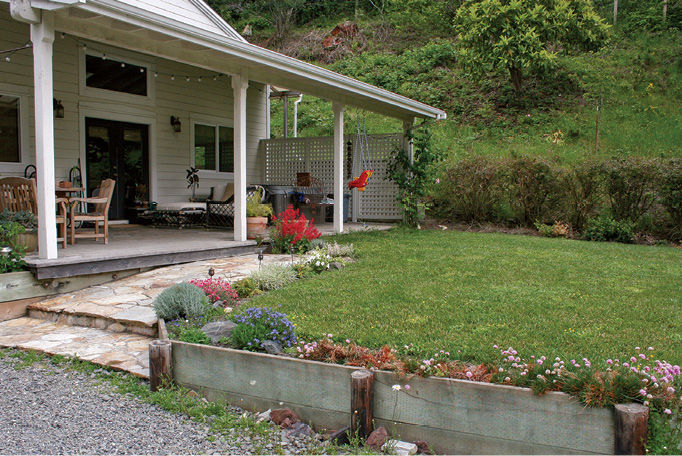
One of the most common mistakes gardeners make is underestimating how large a garden bed should be. A garden bed looks best when its depth is about one-third the height of the nearest and tallest visual element (such as a tree or your house). Applying this rule of thirds ensures that your garden beds are in scale with their surroundings, and helps your home and landscape fit together visually.
• Figure out if an increase is in order
If your garden bed is overflowing with living treasures, widening it can ease the maintenance needed to keep these plants in check. Also, if your garden appears too flattened out, you may need to widen the bed to get enough room to place a focal-point plant that is large enough to complement the strong lines of your home.
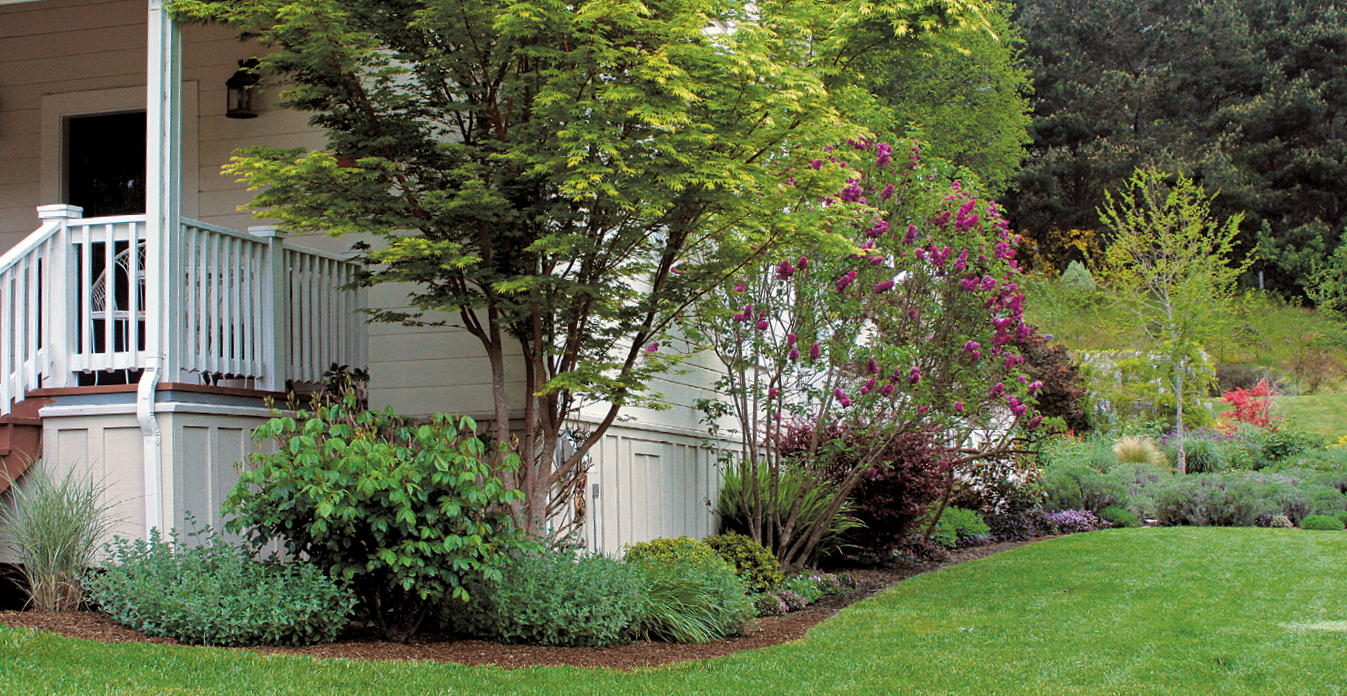
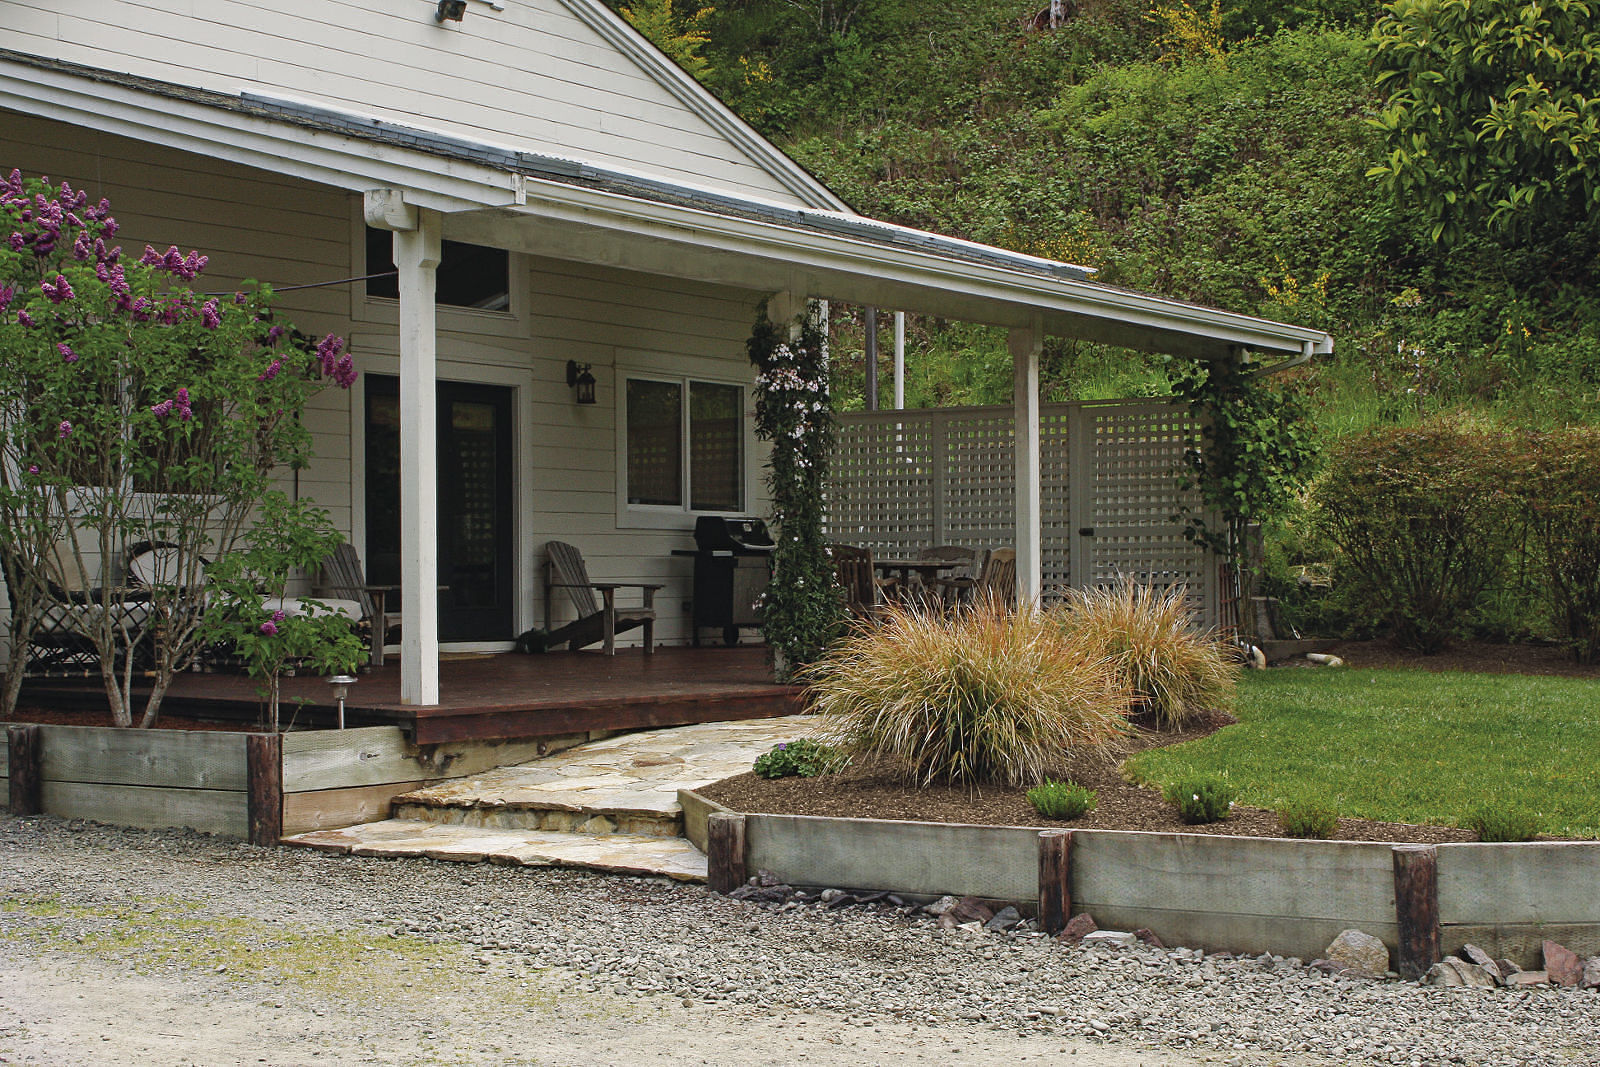
• Widen, then replant
Start by visually estimating the height of the nearest tall element. For a foundation planting, this is most likely the roof of your house. If the roof peak is, for example, 21 feet tall, then, using the rule of thirds, you should increase the size of the bed to 7 feet deep. Remove any lawn inside the new border, and add compost to give the soil a boost. Once your bed is prepared, you can move around existing plants and add new ones to fill in the wider shape. The best time to resize a garden bed is in fall, when your plants are going into dormancy.
4. Overhaul an overgrown tree or shrub
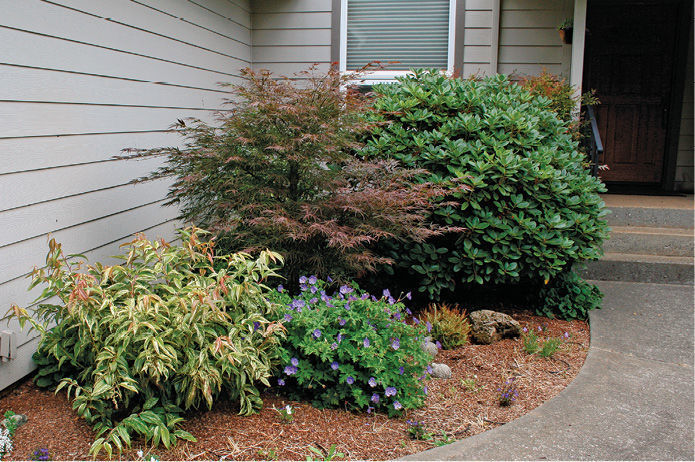
Sometimes a single plant can begin to dominate a garden bed, and it’s hard to decide whether to prune it or remove it. But when a plant starts leaning on its neighbors or growing over a walkway, it’s time to take action. If the plant has behaved well in an area for many years and has just grown too big over time, then rejuvenation pruning can get things back under control. If, however, your shrub seems to explode with new growth each year or its natural habit is one that no longer works in the spot, it’s best to cut your losses and replace the plant with something more appropriate for the site.
• Decide if you should prune …
Plants respond differently to pruning, so start by researching whether your plant resprouts easily when cut back or whether it should be pruned a little at a time. Rhododendrons (Rhododendron spp. and cvs., Zones 3–9) respond extraordinarily well to vigorous pruning. Cut the plant back by at least half its overall height so that it no longer dominates the bed.
• ... or just remove it
Some plants, unfortunately, don’t like to be pruned. If you have a rock rose (Cistus spp. and cvs., Zones 8–11), juniper (Juniperus spp. and cvs., Zones 2–9), lavender (Lavandula spp. and cvs., Zones 5–9), or rosemary (Rosmarinus officinalis and cvs., Zones 8–11) that is overgrowing its space, consider removing it, because these plants resent drastic pruning and will never fully recover. While it can be sad to remove a plant, look at it as a great excuse to visit the nursery and research slower-growing alternatives. If you think you’ll miss your old plant, you can always take a cutting and put it in another area of the garden. While you wait for the replacement to fill in (or for the severely pruned plant to recover), you can use fast-growing annuals or tropicals to fill the visual hole.
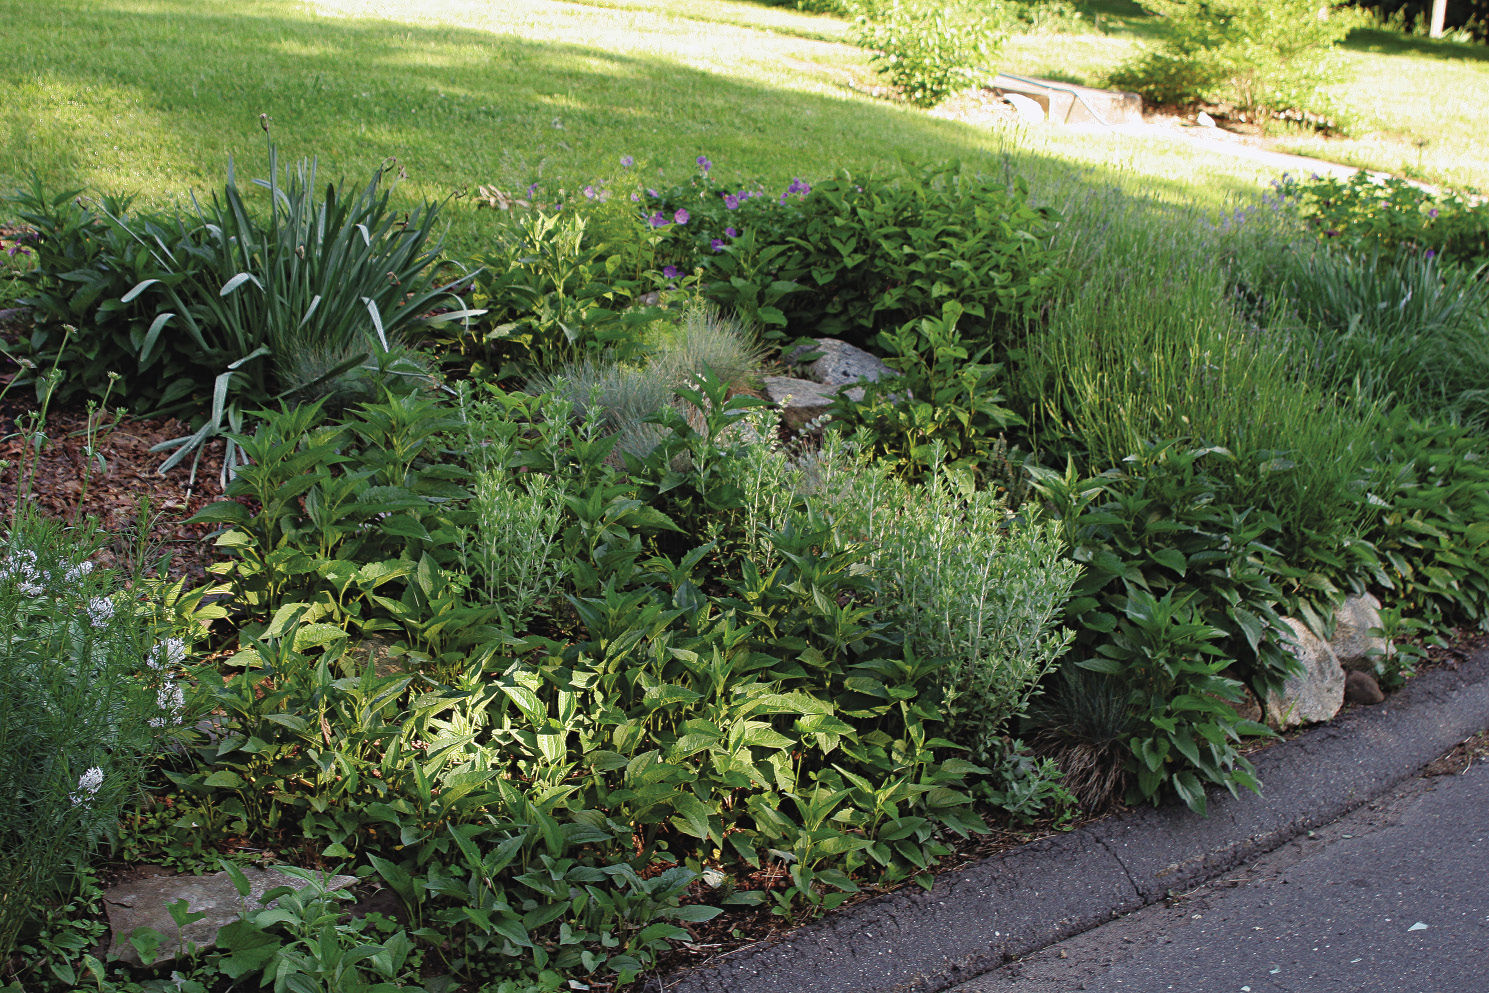
Take Your Garden Back
How to get garden thugs under control
A common issue in established gardens is the existence of “problem plants”: perennials that a gardener intentionally plants but that soon begin taking over a bed, making it look messy. In the bed below, a black-eyed Susan (Rudbeckia cv., Zones 3–9) is overstepping its bounds. Here’s how to get things back in check.
Identify the cause, and remove the offender
Whether your garden thug is reseeding or spreading underground, the first step in getting rid of it is to figure out what the roots look like. Gently dig around the periphery of the offending plant with a soil knife or trowel, and take note of the thickness and color of the roots. Once you know what to look for, follow each series of roots as far as it goes and remove every bit you can find, taking special care not to disturb the roots of the well-behaved plants nearby.
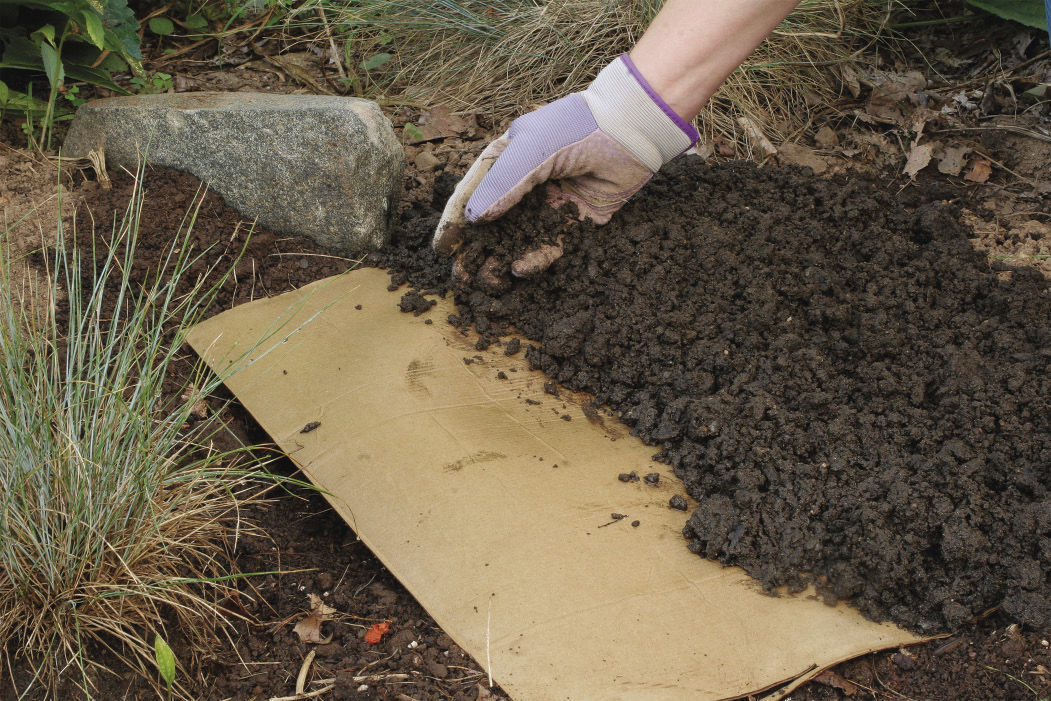
Keep it from coming back
When you’ve removed as much of the rogue plant as you can, the next step is to prevent it from coming back. Chances are, you won’t be able to remove every bit of the roots. Cardboard is an excellent solution for keeping problem plants from returning because it prevents both seeds and roots from sprouting. Place a layer of dampened cardboard on top of the soil (in the areas where you removed the plant), and cover it with a 3- to 4-inch-deep layer of compost to keep it in place. You can cut the cardboard to fit any size or shape you need. Once the cardboard has broken down—usually in three to six months, depending on weather conditions—it should be safe enough for you to plant nonaggressive plants in the empty spaces.
A WARNING FOR THE FUTURE
Many plant thugs are handed over the garden fence. Be wary of anything offered up by a neighbor; if it is vigorous enough to share, it could have thug potential.
Genevieve Schmidt is a landscape designer in Arcata, California.
Photos, except where noted: Danielle Sherry; Steve Aitken; courtesy of Genevieve Schmidt


Comments
Log in or create an account to post a comment.
Sign up Log in