
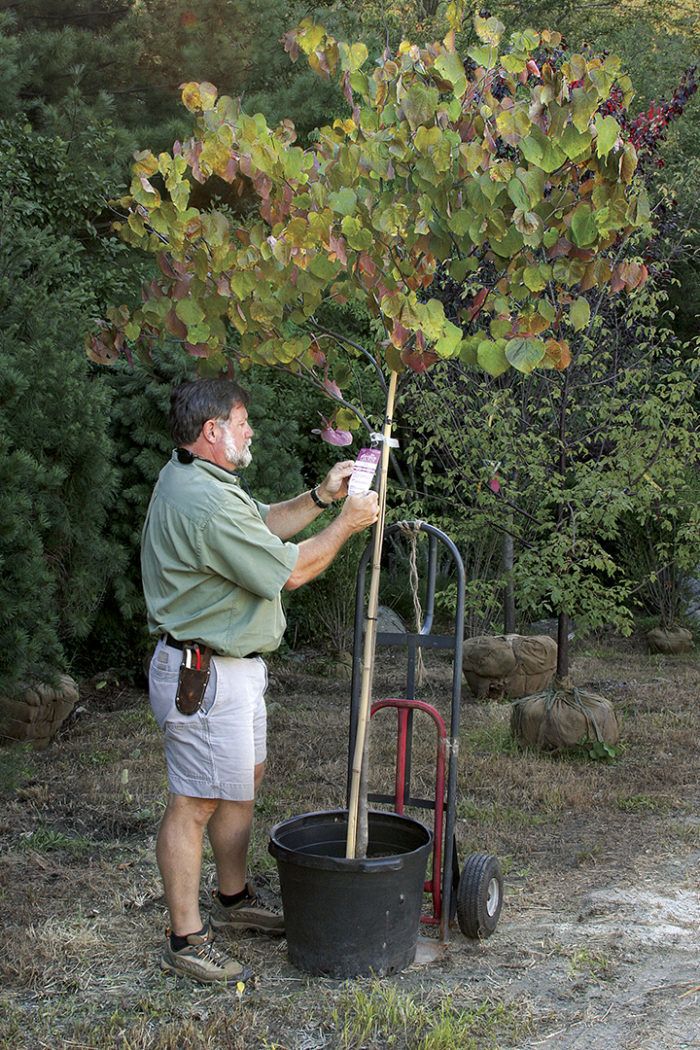
Trees are generally the priciest and most permanent plants gardeners will buy in their lifetime, so most of us want to ensure that the one we select at the nursery is a winner. Although there is no such thing as a perfect tree, there are some that are better than others. Trees live for generations, and selecting a poor one can be a burden for decades—not just a few seasons. Inspecting your trees before you buy them is the key to avoiding major pitfalls.
Regardless of where you purchase your trees, it’s best to have an idea of how the type of tree you want is supposed to grow. Trees can be sold as single stem, as multistem, or in clump form. Some trees are even “built”. They can also be packaged in various ways: balled and burlapped, containerized, or bare root. A nursery tree’s form and packaging are areas where many troubles pop up, and they need to be critically inspected before you make your purchase. Your goal should be to choose a tree that needs the least TLC. Here are some tips on what to look for and what to watch out for.
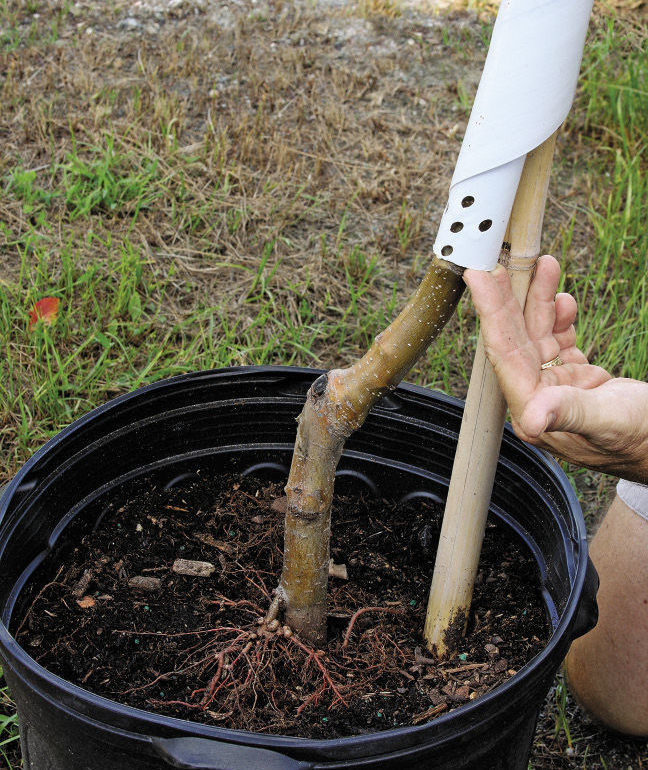
1. Ensure graft points are smaller than a dime
Many trees today are grafted to create a plant with the best possible characteristics. A tree might have, for instance, cold-hardy roots from one plant, attached to a trunk with pretty bark from another plant, and topped with a plant that has a weeping habit. Be sure to inspect all graft points because faulty ones can be areas of weakness or perfect entry points for diseases or pests. Start at the base of the trunk and look for the cutoff scar; this is where the top of the rootstock was removed after the grafted part took hold. That scar should always be smaller than a dime, and there shouldn’t be any nubs sticking out of it. The shank (or graft union) should be as straight as possible and should not look like the base of a golf club.
Check for any other graft unions to make sure that they have meshed well. Any oozing, bulbous-looking growths or concave dark spots at these points will cause trouble down the road. On young plants, you might see remnants of wax or paint, which isn’t a cause for concern. On the other hand, pieces of tape or rubber bands coming out of the graft point are bad because they could cause the graft point to weaken and eventually break.
2. Walk away if there are wounds

Check for large or deep wounds on the trunk and major branches because they can be a front door for insects and diseases to enter and attack a tree. Pull crossing branches apart to check for wounds, too. Also check for dark blotches or concave bark areas; they can be an indicator of disease, as well. Minor rub spots on small branches are nothing to be concerned about because you can just cut those branches out.
3. Pull off the pot to assess the roots
 |
 |
If a tree sits in a container too long, it will become root-bound and will inevitably develop girdling roots, which may strangle a tree as it grows. Don’t be shy: If possible, pull the pot off a containerized tree to get a better look at the root system. Ideally, you’re looking for a 50/50 soil-to-root ratio. Any more root mass than that and the plant has likely got some circling roots, which can lead to girdling. Any less than that and the plant may not be well rooted.
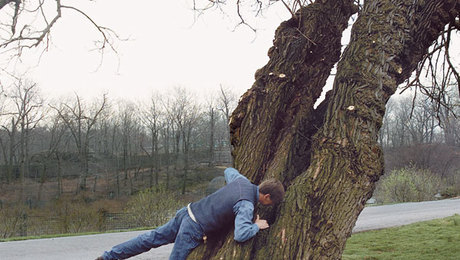
4. Strive for a single straight leader
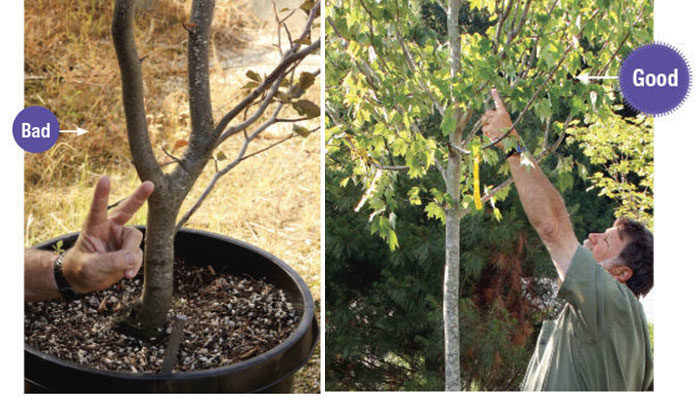
When selecting a typical single-stem tree, look for one that has one straight central leader from top to bottom. Avoid trees with a double leader. Heavy rains, ice, and snow will eventually cause trees with double leaders to split and peel open like a banana. On young trees, a minor double leader can be pruned out; this is especially true for certain evergreens, like arborvitae (Thuja spp. and cvs., USDA Hardiness Zones 2–9), Leland cypress (Cuprocyparis leylandii and cvs., Zones 6–9), and pines (Pinus spp. and cvs., Zones 3–10), which bounce back quickly from this horticultural surgery.
Tip: The caliper determines the price range
The caliper of an average tree is the diameter of the trunk taken at 6 inches off the ground. This measurement often determines the price of the plant: the bigger, the more expensive.
5. Check under the trunk protector
Pull off any trunk protector you see, and carefully inspect the area it covers. Trees that sit at the nursery with tree wraps on for extended periods of time will have trunks that are pale and possibly misshapen. This means that the bark will be prone to sunscald once the wrap is removed. This isn’t a deal breaker, but be warned that these trees (if planted in full sun) may suffer scald. The condition won’t kill the tree but can leave ugly scarring on smooth-barked plants. Trunk wraps also may be a hiding spot for insects.
6. Look for signs of trouble

Be wary of discolored or drooping foliage, malformed twigs, and holes in the bark. Look for these signs over the whole tree because they are indications of stress; of insects, like pine shoot beetle; or of disease. If your tree-to-be has any of these red flags, put it back. Be sure to inspect the trunk near branch intersections and under leaves, where scale-type insects like to hang out.
7. Watch out for “coat hangers”

A good indication of overpruning is a bunch of stubs, or “coat hangers,” along each major branch. These are small dead twigs or a single stub that appear in between two healthy branches. Follow a major branch from the trunk to its tip and count the number of coat hangers. More than five indicates that the tree has undergone too much pruning and could be weakened from all the stress.
8. Avoid poor crotches

Overly acute angled branches that look like slingshots or have Y crotches may split over time, so avoid trees that have them. These branches will eventually intersect with others and cause harmful rubbing and wounds.
9. Avoid even numbers for multistems

Multistem trees are formed by cutting a single-stem tree to the ground, causing suckers to emerge from the roots. As these suckers grow, they expand in caliper, giving the effect of a clump of trees. One stem will be dominant, with a second being codominant, leaving the others at various diameters. Because our eyes tend to move in a triangular fashion, plants with odd-numbered trunks are more visually pleasing than ones with even numbers
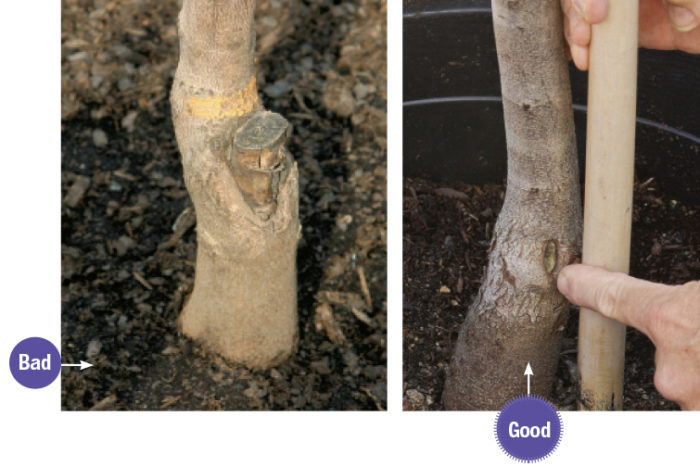
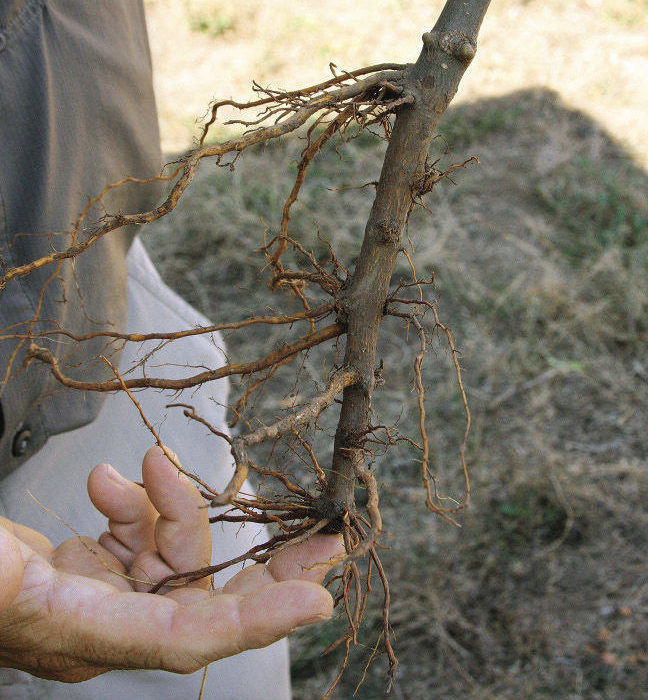
10. If the flare is too high or too low, the tree is a no

Planting depth is critical when it comes to trees; if it’s not right, the tree suffocates and dies. Inspect the base of the tree where it hits the soil line. Look for a flare (or what looks like an upside-down funnel) where the trunk hits the soil (photo, above left). If the trunk goes into the soil without a flare, dig down a bit into the soil until you find a root. If the flare is more than 2 inches below or above the soil with exposed roots (photo, above right), walk away.
11. Give the ball a thorough inspection
 |
 |
Balled-and-burlapped trees need special attention because their packaging can cause a whole set of problems. Make sure the lacing twine is not cutting into the trunk; good growers will place burlap between the twine and trunk to prevent strangulation. Check that the ball size is large enough for the size of the tree: One foot wide in ball size for every 1 inch caliper is the rule of thumb. Inspect the ball for major tears and indented areas because this indicates that there was some root disruption in shipping or handling. If a good portion of the roots are exposed, look for another tree. Check to see that the top of the ball is firm, and wiggle the trunk a bit; if the top is squishy or the trunk is loose, the root system may be weak.
12. Check for even spacing with clumps

Clump trees are formed by taking multiple single-stem trees and planting them together. The most common trees grown this way are birch (Betula spp. and cvs., Zones 2–9), crape myrtle (Lagerstroemia spp. and cvs., Zones 7–9), and maple (Acer spp. and cvs., Zones 3–9). Choose clumps with trunks that are evenly spaced and close in size because they tend to be the most visually appealing. They should be spaced far enough apart so that they don’t inhibit the growth of each other. The farther apart, the better, but a good rule of thumb is a distance that is about three to five times the diameter of the largest stem. Knowing the mature size of the tree is important here.
The “Building” of a Tree

It can take an average of 10 years for a tree to go from a seed to a salable plant. The care during that time is expensive and is, therefore, passed on to the consumer. Modern horticultural methods are enabling growers to get more full-size trees to market each year, which you would think would make the trees less expensive. These trees are built with a rootstock, an interstock, and top grafts (scions). This process, though, often doesn’t have a quicker timetable, and the labor it takes is tenfold. Here’s a quick look at how a tree is built and a window into understanding why these grafted options are still so pricey.
Establish a rootstock
This is the portion of the manufactured tree that is planted in the ground and can be obtained using a few different methods. It can come from a layering bed (where long branches are bent to the ground—while still attached to the parent tree—and soil is layered on top of them, stimulating root growth). Growers can also get a rootstock from a rooted cutting or by sprouting a seed.
 |
 |
Cut a notch to make room for a bud
Once the rootstock is well established, a small knife is used to make a shallow notch in the main stem. The notch is made as close to soil level as possible. This is where the first graft union will be.
Insert a bud of a new plant
A bud from another type of plant (sometimes the same genus, sometimes not) is inserted into the notch on the rootstock stem. The bud is taken from a branch that closely matches the diameter of the rootstock stem.
 |
 |
Wrap it up, then top it off with yet another type of plant
The graft is wrapped with special tape. When the bud takes (or has meshed), it’s forced to grow straight up with stakes and ties. This section is known as the interstem, and once established, the rootstock stem is cut off. After a year or so, a small portion of a different type of plant (often one with a weeping habit)—with a caliper width equal to that of the interstem—is grafted onto the top of the tree. This part (the scion) will produce the plant’s shoots.
Ed Gregan takes care of all types of trees at his garden in New London, Connecticut. He also works for Carlton Plants, a wholesale tree grower in Dayton, Oregon.
Photos: Danielle Sherry; and courtesy of Ed Gregan. Illustration: Carol Collins


Comments
Log in or create an account to post a comment.
Sign up Log in