

Two Ways to Prune New Fruit Trees
The key to the best harvests in the future is making the right cuts at the start

Pruning is an art and a science. And with fruit trees, it is essential for health and robust harvests. Mature fruit trees are pruned annually to maintain their size and shape, to balance vegetative and reproductive (fruiting) growth, and to allow light distribution throughout the tree canopy. All the pruning you’ll need to do with your full-grown fruit trees, however, is largely dictated by how you train and cut them in their first three years. If you don’t get things right at the start, you’ll find yourself having to take drastic pruning measures to correct the mistakes made years earlier. And if you think massive renovation pruning won’t negatively affect your mature tree, you’re wrong. Heavily pruned trees produce small, poorly colored fruit with low sugar levels and a limited number of flower buds the following year. Training at the start of a tree’s life is, therefore, essential for the harvest of your dreams.
 |
 |
| Central-leader system | Open-center system |
Several training systems are used for fruit trees, but two of the easiest ones that produce sturdy, healthy trees are the central-leader system, which creates a Christmas-tree shape (illustration above, left), and the open-center system, which creates a vase shape (illustration above, right). Both of these regimens produce trees with well-positioned branches and strong frameworks capable of supporting large crops. When properly trained, mature trees have moderate vigor and require only moderate annual pruning.
Central-leader system
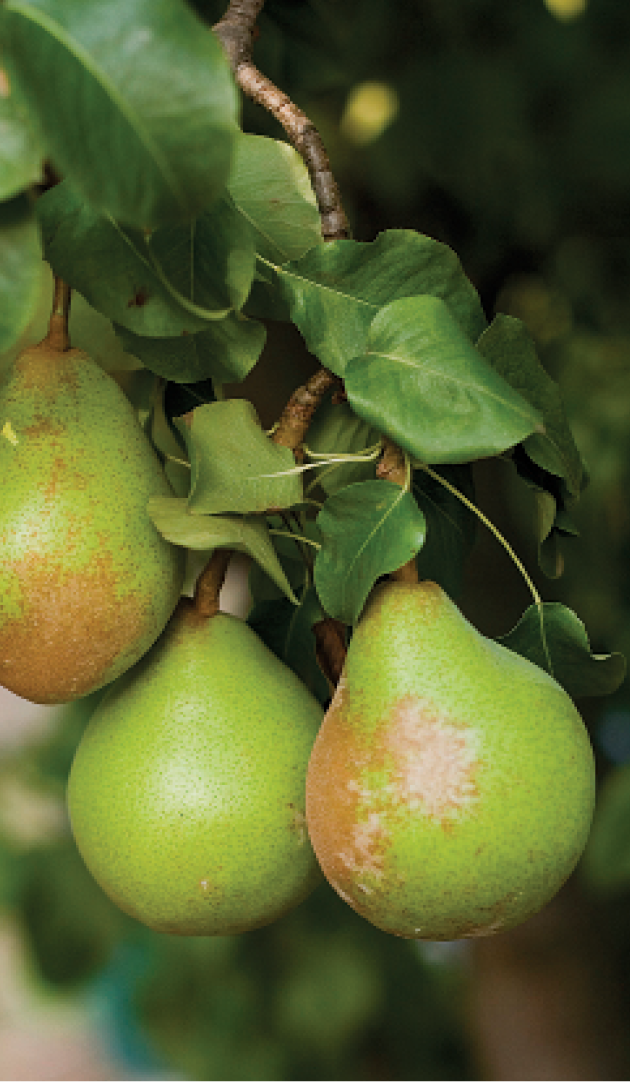
This approach creates a sturdy, perfectly proportioned tree and is ideal for apples, pears, and sweet cherries (on dwarf rootstocks).
 |
 |
 |
| Pears | Apples | Cherries |
At planting

1. Give the tree some support with a stake
Sink a post (that is at least 6 feet long) 2 feet into the ground next to the tree, and tie the trunk to the stake for support. This is especially important for trees on dwarf and semi-dwarf rootstocks, which have weak roots.
2. Remove bad branches
Cut out branches that are too low; 30 to 36 inches above the ground is ideal because that height allows you to mow easily underneath the tree. Also, remove branches with narrow crotch angles (less than 60 degrees from vertical). Narrow crotches are weak, and branches might break as the tree ages. Keep branches with wide crotch angles that arise on different sides of the trunk. After pruning, the ideal tree will have two to four branches radiating out in different directions.
3. Trim long branches and the leader
Head (cut back) branches that are longer than 30 inches by about one-third to stiffen and strengthen them. Cut back the leader about 10 inches above the highest remaining branch to encourage the development of new shoots.
Season 1

1. Pick a new leader, and cut out the competition
Buds should develop 4 to 8 inches below the heading cut on the leader, forcing new shoots to sprout. About two months after growth begins (generally in midsummer), select the most vertical and hearty of these shoots as the new leader, and remove competing shoots (anything similar in height and width to the leader) and any branches with narrow crotches. Removing the top of the leader yearly improves the sturdiness of the tree framework below.
2. Cut out or spread errant branches
In late winter or early spring, remove any low-growing branches that have appeared, as well as any branches with narrow crotch angles. Branches that are growing a little too upright should be reoriented to about 60 degrees from horizontal. They can be spread by placing strips of wood between the trunk and the branch or by tying the branches down with special rubber bands. Head the leader by about one-quarter to stiffen the trunk (making it sturdier) and to encourage new branch development below the heading cut. Do not head the other branches because heading will reduce your yield.
Season 2

1. Establish a new leader again
Shoots will develop once again below the heading cut you made on the leader. As you did the first season, keep the most vigorous upright shoot as the new leader, remove competing shoots and those with narrow crotch angles, and head the new leader by about one-quarter.
2. Spread, but don’t head
Any branches that are too upright around the rest of the tree should be redirected using spreaders. To encourage early fruiting, young trees should be pruned as little as possible during this season.

Season 3

1. Remove the fruit, and cut the water sprouts
In subsequent years, treat the tree in the same manner as you did the second season. By the third or fourth year, though, the trees might bloom. Be sure to remove the fruit from the central leader and young branches in the upper part of the tree to avoid drooping limbs and possible breakage. Water sprouts (vigorous, unfruitful upright shoots developing from horizontal sections of branches) should be removed in summer.
2. Keep the height in check
Trees can generally be maintained at a desired height by removing the top of the tree just below a moderately vigorous lateral shoot (on a two-year-old section of the central leader).
| Tip: What if my tree is branchless? Sometimes all the branches on a new tree are too high or too low to adhere to the standard pruning methods; at other times there are only one or two usable branches on a new tree. In these cases, remove all the branches and head the leader 6 inches higher than the height of the lowest desired branch. Buds below this heading cut will develop into strong shoots, and you’ll be able to prune accordingly. |
Open-center system
With this pruning method, less cutting is needed to get a sturdy, well-shaped tree. Try it for peaches, plums, and nectarines.
 |
 |
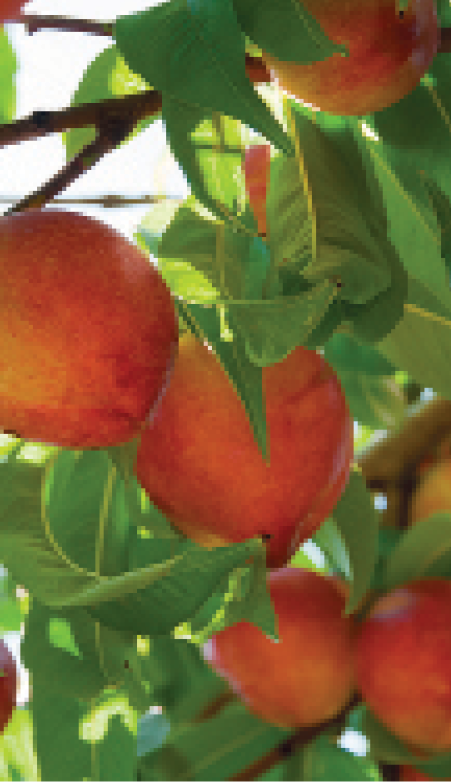 |
| Peaches | Plums | Nectarines |
At planting

1. Trim the top before it blooms
Prune your new tree for the first time two to four weeks before blooming. If you prune it any earlier, the tree might be susceptible to late-spring frost; if you prune it any later, the tree might already be setting fruit. Head the top of the tree so that it is 24 to 30 inches above the ground; new branches will develop from buds along the main trunk about 4 to 6 inches below the point where the main leader is cut. Also, remove branches that are broken or damaged.
2. Remove bad branches
Cut out any branches with narrow crotches (less than 60 degrees from the point of attachment). Branches with wide crotch angles or those that are longer than 2 feet should be shortened to about 6 inches to strengthen them. Weak branches—those that are thin, short, or not growing vigorously—should be shortened because desirable shoots often develop from small buds around the stub that is left behind.
Season 1

1. Head vigorous shoots
During the summer, several vigorous upright shoots with narrow crotch angles will develop just below the heading cut on the trunk. About two months after bloom time, shorten these shoots by about one-third. (These branches will eventually be removed in winter.) This suppresses the growth of the shoots that have been headed but encourages the growth of lower, more desirable shoots. At the end of the first summer, the tree should have several shoots with narrow crotches that have been headed and, lower on the trunk, will have two to four branches with wide crotches that will have been retained as permanent scaffold branches.
2. Develop the framework
The first winter is the most critical time to select what will develop into strong permanent branches capable of carrying heavy future crops. Remove branches on the trunk that are less than 2 feet above the ground. Take the top out of the tree by cutting the trunk just above the highest branch with a wide crotch to remove the branches that were headed during summer. One branch will sometimes develop just above another and should be removed because the top branch will shade the lower branch. Remove horizontal limbs because they bend downward with the weight of a crop and can break.
3. Stiffen the branches with heading cuts
The ideal branch is oriented about 50 to 60 degrees from the point of attachment. The tree should now consist of three or four branches radiating in different directions from the trunk. Remove about one-quarter of the length of each of these scaffolding branches by heading them. If the tree has only two desirable branches, be patient because new branches often develop along the trunk during the second season; if they don’t, you can still develop a tree with only two main branches.
Season 2

1. Remove or redirect shoots
In spring, any vigorous upright shoots developing in the center of the tree that will shade the interior should be removed. The tips of other new shoots tend to grow upward and can be redirected outward by removing the shoot tip just above an outward-growing secondary shoot. This is known as a bench cut.
2. Cut out branches that are too low or too upright
You’ll also need to perform a little dormant pruning in winter. Remove any low-growing branches or vertically oriented shoots that are more than 2 feet long that will shade the tree’s interior. Remove any shoots or branches that rub together. Encourage outward growth of the scaffolding branches by bench-cutting each of the secondary branches to outward-growing shoots. At the end of the second season, the tree will be about 4 feet tall and have several scaffold branches.

Season 3

1. Bench-cut the shoots but not the branches
Trees should be pruned the same as in the second season, except that the scaffold branches shouldn’t be bench-cut. If trees grow well, they will produce a small crop of fruit in the third season. About two months after blooming, remove the vigorous upright shoots that will shade the tree’s interior. Upright shoots can be pruned to outward-growing shoots with a bench cut. Trees can usually be maintained at 7 or 8 feet tall by cutting taller branches back to outward-growing shoots.
2. Shorten drooping limbs
Cut the ends of smaller, sagging branches back to shoots that are growing above the horizontal. Shoots that grew during summer will have flower buds and will produce fruit the following year. Fruiting shoots that are less than 6 inches long produce small fruit and should be removed each year. Fruiting shoots that are longer than 2 feet are too vigorous and should be removed.
Rich Marini is a professor and the head of the Department of Horticulture at Pennsylvania State University.
Photos: Danielle Sherry, JJHarrison/courtesy of commons.wikimedia.org, Adam Gibbs, Luckydoor/dreamstime.com, Erin Silversmith/courtesy of commons.wikimedia.org, Olgavolodina/dreamstime.com. Illustrations: Brittany Leandra, colorized by Bill Godfrey


Comments
Log in or create an account to post a comment.
Sign up Log in