

Broccoli: Not Glamorous, but Very Productive
Broccoli comes to a tender head, then keeps producing sideshoots deep into fall
Some people ask why I bother to grow broccoli at all. Compared to tomatoes, peppers, or sweet corn, broccoli is a homely crop. No charisma. And why waste garden space when you think you can get pretty good heads at the supermarket? Well, simply put, broccoli is much better from the garden. Eaten just after cutting, it’s not only tastier than anything you can buy, but the stems are far more tender and its renowned vitamin strength is at the fullest.
As a beginning gardener some 45 years ago, I tried every vegetable, and broccoli quickly caught on with me for its productivity. While I admire the glorious head that tops the center stalk, I learned to appreciate even more the uninterrupted flow of baby-size florets that follow on the stalk’s sides. These make my broccoli season a jackpot lasting five months or longer.
A long season needs a good start
I get a jump on the season by sowing indoors under lights. With heat, light, and moisture under my control, seeds sprout in just a few days. Broccoli seeds are tiny round pellets, so small they’re often hard to pick up with your fingers.
I spill some out of the packet onto my palm, then pick them up one at a time with tweezers. I plant at least two seeds just below the soil surface of each cell of the six-pack, and pat them in. Be sure to place the perforated six-packs into a container—I use plastic trays from supermarket mushrooms—to catch the water that leaks out.
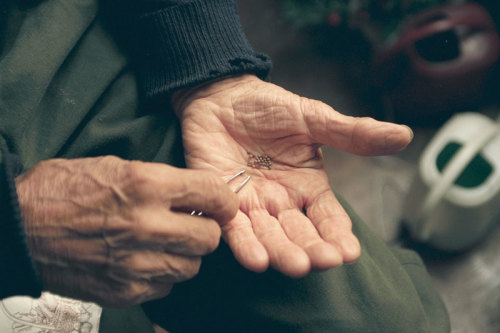 |
Tiny seeds? No problem. Tweezers make picking up and sorting seeds for planting easy. |
If you’re growing seedlings under fluorescent lights, place them just an inch or two below the light tubes; otherwise, they will become spindly and frail, making it obvious they’re not getting enough light. The plants need this close proximity because lights are far less powerful than the sun.
After the seedlings are an inch or so tall and have formed true leaves, I thin the six-packs to one plant per cell. I also give them a splash of all-purpose liquid fertilizer. By the time I’m ready to transplant, the seedlings have become at least 4 in. tall.
If you don’t have fluorescent lights and want to sow seeds directly into the ground, you can do it before the last frost because broccoli is fairly hardy. The soil should be loose, just moist, and about neutral pH. I use a 5-10-10 N-P-K fertilizer, broccoli requiring more phosphorus and potassium than nitrogen. Sow the seeds ¼ in. deep about 4 in. apart. Later thin the plants to stand 18 in. to 2 ft. apart. Of course, you can skip both indoor and outdoor sowing by buying plants at a nursery, but that greatly limits your choice of variety.
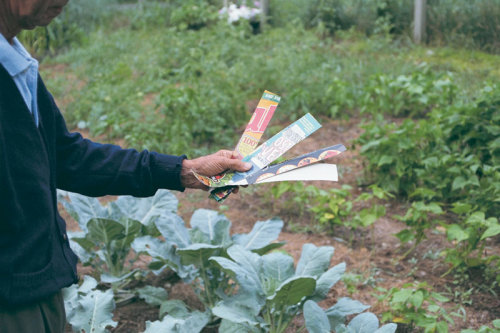
There’s more than one kind of broccoli. Within the broccoli clan, descended from ancient wild cabbages of the Mediterranean area and farther north, there are old-time sprouting varieties, like ‘De Cicco’ and ‘Calabrese’, featuring an abundance of small sprouts. And there are those forming sizable central heads, followed by florets, such as ‘Goliath’, ‘Emperor’, ‘Green Valiant’, and ‘Premium Crop’.
If you’re sowing around a hot summer, ‘Marathon’, ‘Waltham 29’, and ‘Emperor’ are touted for the fall, and ‘Packman’ gets good notices for early spring. But it’s wise to check with your agricultural extension agent for varieties suitable to your area in any season.
Over the years, I’ve tried many kinds and have settled on ‘Premium Crop’ and ‘Green Valiant’ for their excellent floret production after the central heads are cut. I also grow Romanesco, a temperamental Italian heirloom with exceptional taste and beautiful chartreuse color (see sidebar, next page). How much broccoli to grow depends on your needs. For my wife and me, 9 to 12 plants are plenty.
Transplant broccoli with confidence. Before transplanting my broccoli into the garden, I put the flats outdoors in the cold frame for five or six days to acclimate, or harden off, to the ups and downs of outside temperatures. To plant them immediately would subject them to such shock they might not survive. The first couple of days, I put shade netting over the frame to let the plants gradually get used to the sun.
When I’m ready to transplant, I dig 6-in.-deep holes in the garden about 2 ft. apart in a row and fill them with compost from my compost heap. Then I hollow out the compost in the hole, put in a couple of teaspoons of 5-10-10 fertilizer, and cover up the fertilizer lightly. The site is now ready to receive a plant. I make sure the six-pack is thoroughly watered before I remove a plant from its cell. This prevents the soil around the root mass from crumbling off and exposing the roots to shock. I then put the plant in the hole, cover up the root ball with the compost, firm it down, and water it.
Broccoli debugged
Pests can trouble broccoli, especially at the beginning. When I put in seedlings, I immediately put around each plant a 2-in.-wide cardboard collar cut from an old cereal box. The collar provides protection from the cutworm, which can zap your young plant in a jiffy. I also spread wood ashes around each plant as a defense against maggots and slugs.
 |
To protect your plants against cutworms, cut strips from cardboard cereal boxes. |
 |
Notch the two short edges and fasten them together to form a collar. |
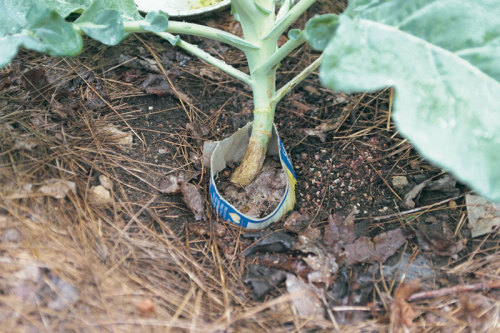 |
Place the collar around the broccoli when it’s a seedling to provide a barrier. |
Broccoli leaves are also prey to cabbage worms and loopers. I fight these by spraying or dusting the plants periodically with Bacillus thuringiensis (Bt), making sure I get the underside of the leaves as well. A duster with a long extension tube and nozzle that can be turned upwards lets me get good coverage. The pesticide is reputedly harmless to humans and animals. If aphids show up, I zap them with a sharp squirt of water from the hose.
The first few days after transplanting are critical for the plants and, in my experience, they always suffer some infant mortality. Whether it be a cutworm that gets through, a bird that swoops down, or a fatal weakness, two or three out of a dozen plants usually die early. So I keep a reserve flat of seedlings for fill-ins. After the plants take hold, there’s not much to do except water regularly, fertilize every three weeks or so, and deal with any insect problems.
I spread mulch around each plant to preserve moisture, using salt hay I buy in bales from a nursery, or dead leaves, or both. When I fertilize, I push the mulch aside and spread a ring of 5-10-10 around each stalk, then pull the mulch back on.
Beheading broccoli begets florets
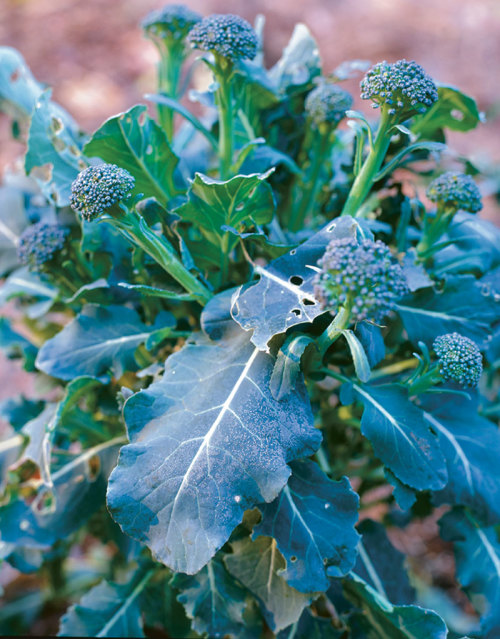
If all goes well, by the middle of June a little button of green appears on a central stalk deep within the leaves and in a week or so this has broadened into a fine head, 3 in. to 6 in. in diameter, ready to eat.
A head may be left on the plant for several days, but the sooner it is cut—and cooked—the better the taste. So I cut when a head is most compact and uniformly green. Once individual buds begin to turn yellow, the head is past its prime and the taste becomes bitter.
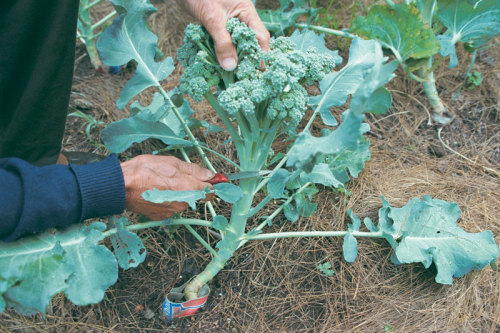 |
Harvest heads while they’re green. Broccoli heads will reach 6 in. or more across, but make sure you harvest before they start to turn yellow and bitter. |
I usually harvest by cutting through the stalk 3 in. or 4 in. below the head, making sure I leave plenty of the main stem for the subsidiary heads, or florets, to form. This will start to happen in a week or so.
As with the main heads, florets should be harvested while the buds are still tight and green. Again, you want to preserve the stalk to allow more florets to form. The taste is the same as that of the central heads, and the stems, being thinner, are even more tender. I’m always surprised at the number of florets I get, making broccoli, for me, a real horn of plenty.
This article originally appeared in Kitchen Gardener #17.


Comments
Log in or create an account to post a comment.
Sign up Log in