

Build Your Own Indoor Worm Farm
This simple plan will have you turning kitchen scraps into compost in no time
In keeping with Murphy’s Law, it seemed that whenever it was time to take the kitchen scraps out to my backyard compost pile, it was raining or snowing or was pitch dark. I would have to thread my way across the backyard, juggling a bucket overflowing with ripe compostables and either an umbrella, a shovel, or a flashlight. Consequently, the scraps were usually well aged and rather ripe before they even left their nook under the kitchen sink. (Explore other types of composting.)
I now have a bin in my basement filled with thousands of worms. Yes, worms. The worms eat both kitchen scraps and torn-up newspapers, and they excrete an odor-free, nutrient-rich, organic compost known as worm castings. You might think that worms and garbage are things you don’t want to spend a lot of time dealing with, but imagine this: Worm castings contain five to 10 times more available phosphorus, nitrogen, and potassium than the compost you get from your outside bin.
I have a handy supply of finished compost in midwinter when my peppers and onions are ready for transplanting. In the past, I would trudge through the snow to my outdoor compost heap and hack off hunks of frozen compost to bring inside to thaw. Or I would search the empty shelves at the local garden center, hoping to find a bag of manure left from the previous season.
Get the right worm and bin for the job
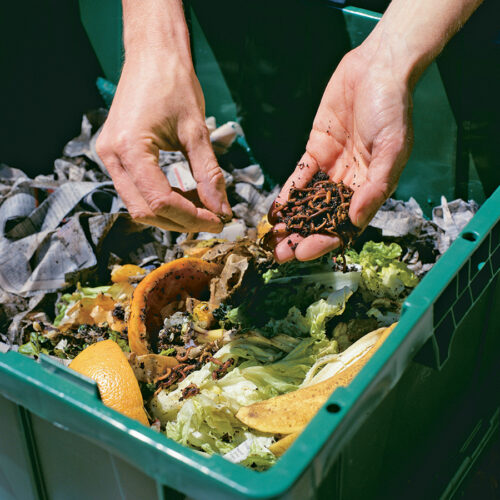
Red wrigglers, or Eisenia foetida, are the worms of choice. They are small worms, and in nature, they feed on the surface, just under a layer of leaf litter. They have a high metabolism and digest their food with amazing speed. In a worm-composting bin, red wrigglers quickly transform kitchen scraps into castings. Even grapefruit halves and melon rinds, always the last to disappear in my backyard compost pile, vanish in the worm bin.
Most suppliers will sell you worms along with a bin, but you can also buy worms separately. To decide how many you need, you need an idea of how much compostable garbage your household produces. I keep a 1-gallon bucket under my kitchen sink, and I fill it up about three times a week. For my bin, I ordered 2½ pounds of worms. I don’t know who’s counting, but the literature says that’s about 5,000 worms. If you don’t have too many kitchen scraps each week, you can save some money and start out with 1 pound of worms. Ordering worms is not an exacting process. If you buy too few or too many, the worms will reproduce or die back to a population that fits the amount of food available to them and the size of the area they inhabit.
Ready-made, plastic worm bins are available through mail-order sources, and they may be found at local garden centers. Most plastic worm bins are about the size of a curbside recycling bin. Worms aren’t fussy tenants; all they really want is a home with a cover and a couple of ventilation and drainage holes. If you are reasonably handy, it wouldn’t be hard to make a worm bin out of plywood. Occasionally, some water may seep through the bottom, so setting the bin on a waterproof tray is a good idea if you don’t want your floor to get damp. Most ready-made bins come with a bottom tray or a drain tap. Any temperate spot will do for the worm bin—a heated porch, a garage, a basement, wherever you have a couple of square feet in a heated space. Keep in mind that red wrigglers cannot survive temperatures below 50°F, and they prefer not to be warmer than 80°F.
|
|
|
|
|
|


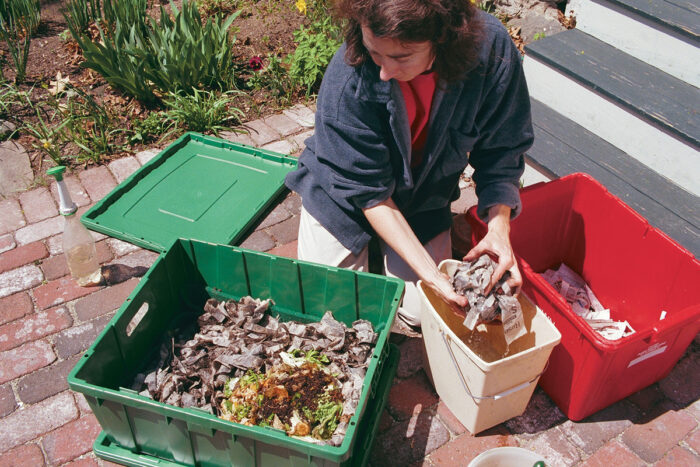
Build the proper home in steps
With bin, worms, and a week’s worth of garbage at hand, grab a 1-inch-thick stack of newspaper, then rip it into strips 1 to 2 inches wide for the worm bedding. Avoid paper with colored ink because it may harm the worms. While your hands are dirty, continue shredding newsprint until you have a plump garbage bag of dry, shredded paper. Hold this supply in reserve, and use it to replenish the top layer in your bin as the older stuff is used up and transformed into castings. Immerse the newspaper strips in a bucket of water until they are thoroughly wet. Remove the strips, and squeeze until the paper is soaked but no longer streaming wet. Fill the bin loosely with the damp bedding.
Mix in 2 cups of potting soil. Worms need grit from the soil for their gizzards, a part of their digestive tract that is similar to a chicken’s. Add the kitchen scraps, then add the worms, and top the bin with a fresh layer of dampened newspaper bedding about 2 inches deep. Lay a sheet of plastic or a garbage bag over the surface to help the bin retain moisture, and secure the cover. It’s that easy.
You can expect to harvest your first batch of worm castings in about eight weeks. I’ve heard some people say that it’s a good idea to run your kitchen scraps through a blender before giving them to the worms. I’ve never done this, though, and my worms have never complained nor have they gone on a hunger strike and refused to make compost from nonblendered scraps. I think it’s an unnecessary step; the worms really don’t need teeth to tackle the big stuff.
|
|
|


Tip: Use it to fight disease
In addition to providing essential nutrients to plants, worm castings also have fungicidal properties that can fight mildew, scab, and other plant diseases.
Prevent problems, and utilize the castings
Keeping a wet layer of newspaper on top of the kitchen scraps is critically important to prevent infestations of fruit flies in your worm bin. Once the bin is set up, it’s all too easy to dump kitchen scraps into the bin without adequate coverage of newspaper or finished compost. After all, who has time to stop and shred newspapers at dinnertime? That’s where the garbage bag full of already shredded newspapers comes in handy.
Every time you add scraps, cover them with a handful of wet, shredded paper. The price you pay for uncovered garbage will be fruit flies hovering over your fruit bowl. If you should slip up and inadvertently start breeding fruit flies, hang a few old-fashioned fly-paper strips near the bin, and vacuum the flies out of the air and off surfaces. If you add a thick new layer of damp bedding to the bin, the flies should disappear within a few days.
Every time I add kitchen scraps to the bin I sprinkle everything with a little water. Too much or too little water will keep the system from operating efficiently and will kill off some of your worms. If the worm population dips—it’s easy to tell because you’ll simply see fewer worms moving around—cut back on the volume of kitchen scraps added until the population is restored. Worms are efficient processors of scraps, but if there’s too much garbage in the bin for the number of worms residing there, it might start to rot before it can be digested. You will quickly learn to keep a balance of moisture, worms, kitchen scraps, and bedding.
When adding kitchen scraps, don’t mix them evenly throughout the bin. Bury the scraps, instead, in half of the bin, and cover them with newspapers. Alternate which sides of the bin to use, selecting a different half each week. After cycling through the two halves for a few months, a layer of worm castings will form on the bottom of the bin. Once a layer of castings 3 to 4 inches deep has accumulated, I stop using half the bin so that the upper layers of partially finished kitchen scraps will be polished off by the worms. After a few weeks with no fresh kitchen scraps added, that half of the bin is ready to be harvested.
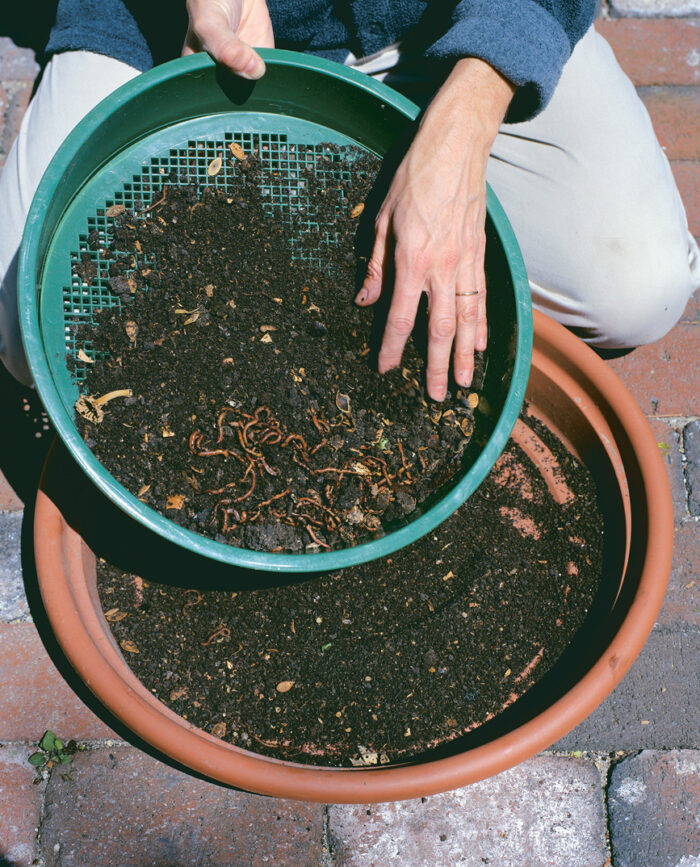
I use a compost screen to sift the finished worm castings into a container. I dump the screened-out worms back into the bin and discard the melon seeds, labels from banana peels, and any other chunky pieces I don’t want in my soil. The worm castings make a mild, balanced fertilizer that is gentle enough to use for transplanted seedlings. The compost works best when blended with potting soil and sand in the following proportions: 2 parts compost, 2 parts soil, and 1 part sand.
—Laura McGrath lives with her husband and a cat, a rabbit, and 5,000 worms in Watertown, Massachusetts.


Comments
Log in or create an account to post a comment.
Sign up Log in