

Keep Your Veggie Garden Going
Make the most of the growing season with succession planting

Most gardeners are used to growing or buying spring seedlings to establish their vegetable gardens. But what happens when spring is over and early crops have been harvested? After the rush of the spring planting season has passed, most nurseries don’t sell fresh vegetable seedlings for succession planting. This is where a grow light comes in handy. I use ordinary shop lights to produce seedlings that can be “plugged in” to open garden spaces, maximizing yield and reducing the amount of time required between crops.
Not all succession crops need to be started indoors. Some, like quick-growing radishes, bush beans, and salad turnips, can be direct-seeded into garden beds. Growing your own plants gives you access to the extensive range of varieties found in seed catalogs. When placing late-winter seed orders, remember to order enough for a full season of planting.
Time seed-starting so that plants are ready to set out when space becomes available. To figure out your start date, check the seed packet or catalog for days to maturity, the amount of time a crop needs to grow before harvest. Read carefully because the number of days listed may either be from seed or from transplant.
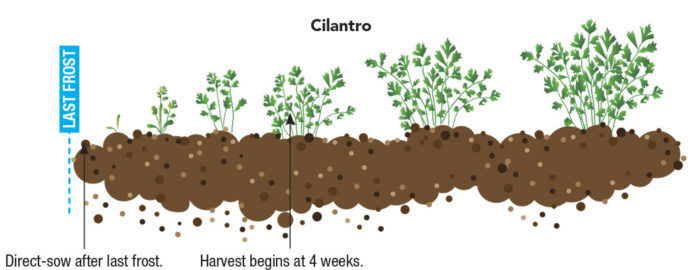
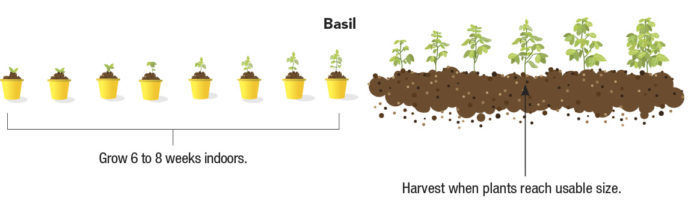
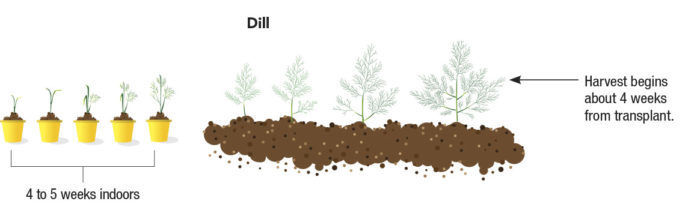
On the following pages are some of my favorite crops for succession planting. The illustrations will help you to visualize how long it takes to grow each crop, with each plant in the “timeline” representing one week of growth, either indoors or out in the garden. Before you know it, you will be plugging new plants into your garden all season long.
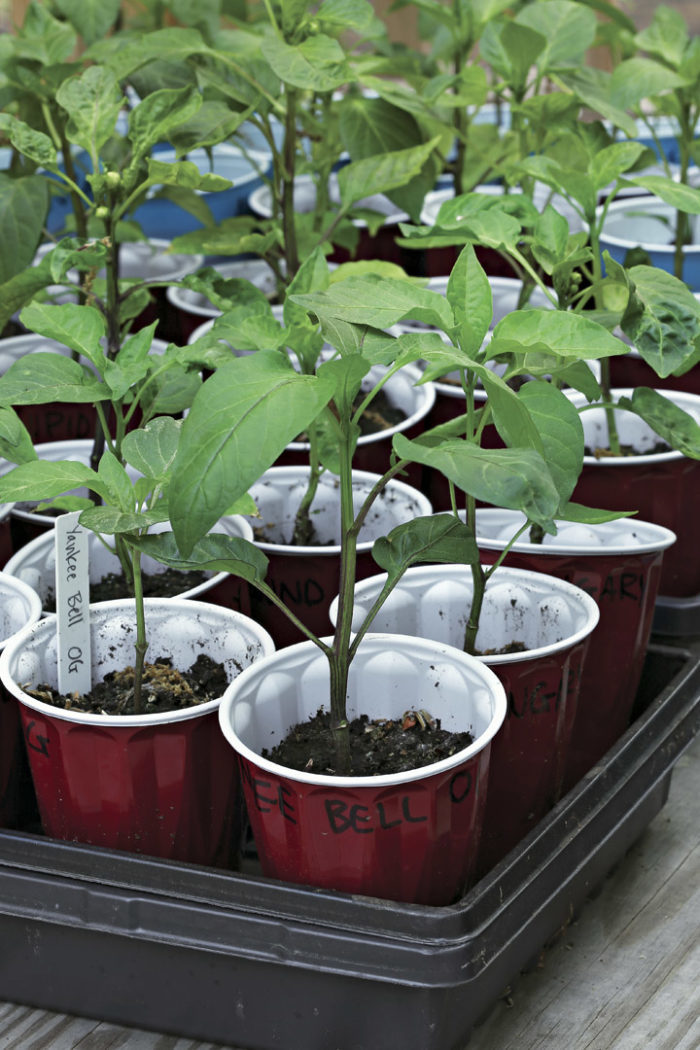
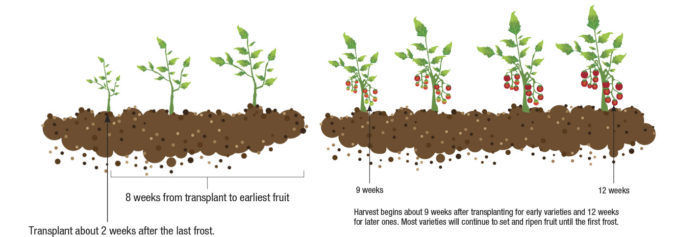
Give tomatoes, peppers, and eggplant an early start
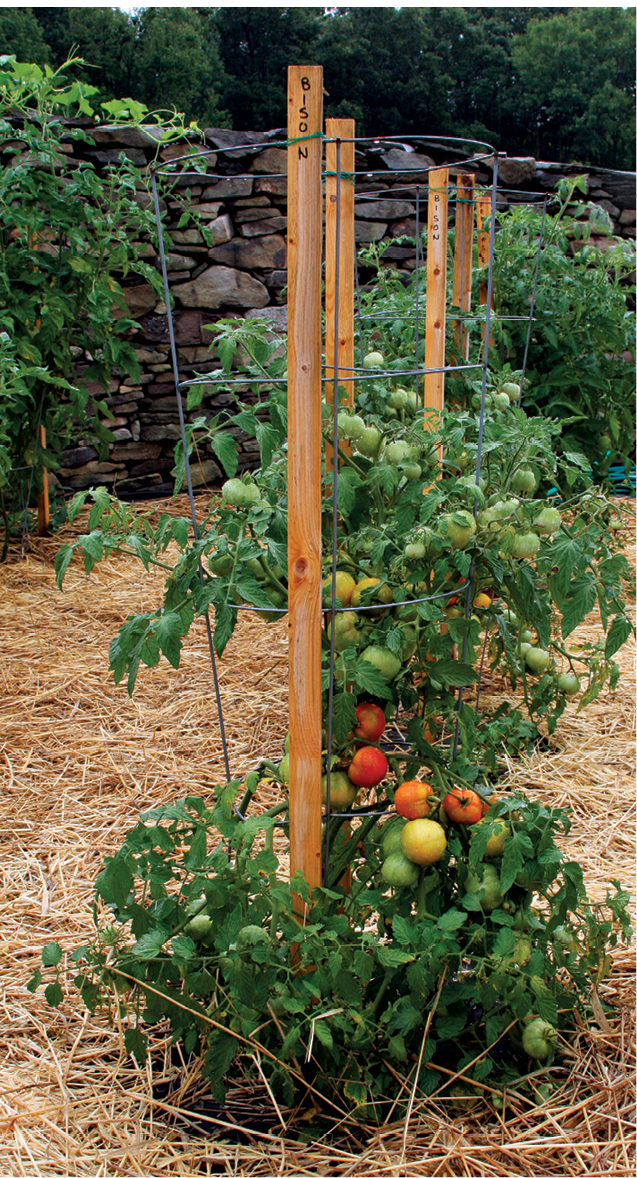
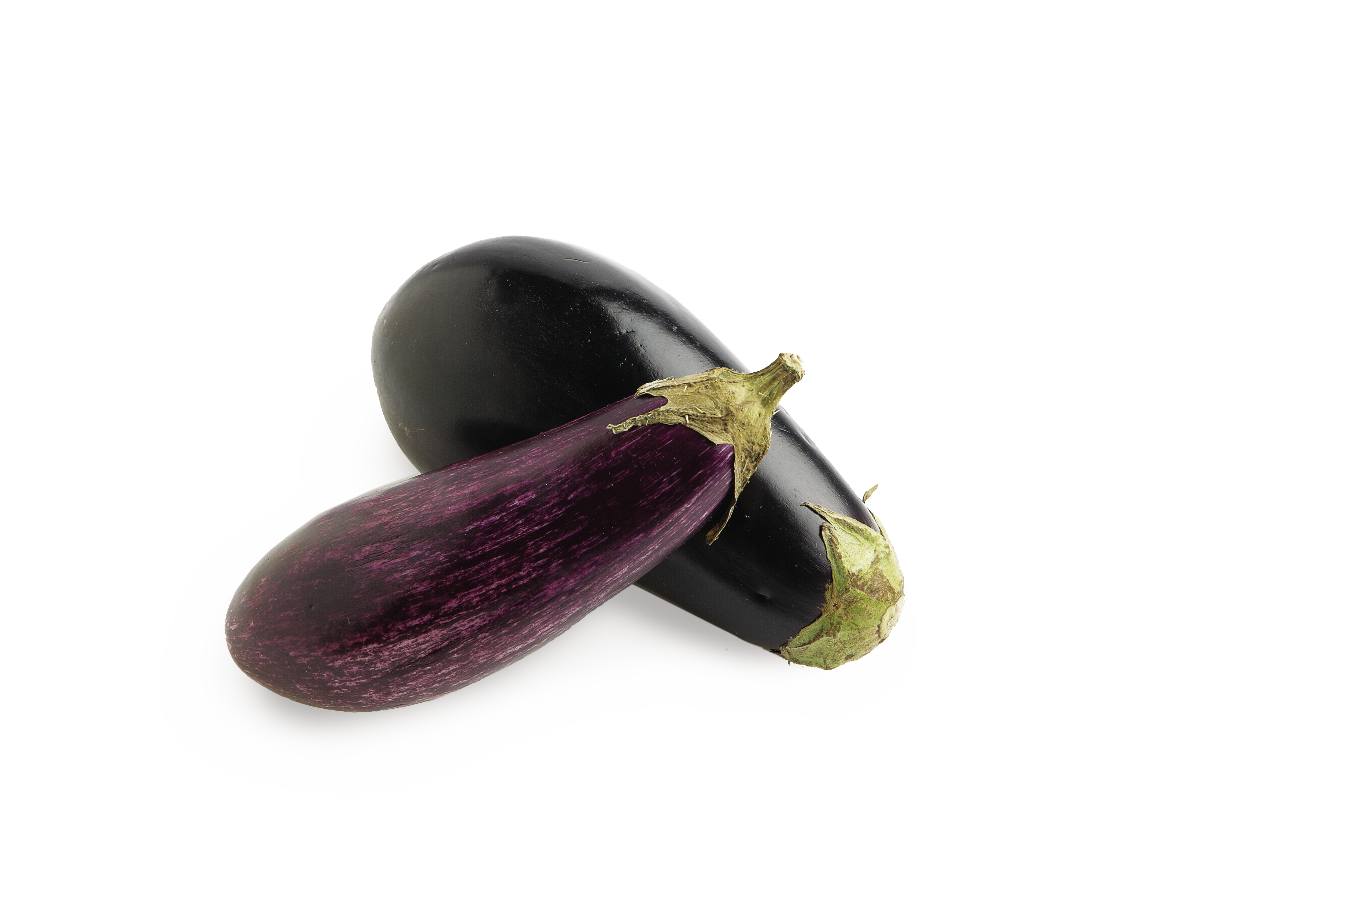 These heat lovers need a long season to mature. Tomato, pepper, and eggplant seedlings should be started indoors several weeks before the last frost and then can replace early crops of radishes, turnips, and greens in the garden. Once harvest begins, most varieties will continue to yield until the first fall frost. I like to mix and match heirloom and hybrid varieties from the boundless selection available in seed catalogs.
Timing: Start seeds indoors under grow lights six to eight weeks before the last spring frost. In southern regions, a second crop can be plugged in to the garden in midsummer to provide a fall harvest.
Spacing: Plant tomato and eggplant seedlings 2 feet apart, peppers 18 inches apart.
Growing tips: Indeterminate (vining) tomatoes should be staked or grown on trellises to support their vigorous growth. Peppers, eggplant, and bush varieties of tomatoes can be caged. Mulch to reduce the spread of soil-borne diseases. 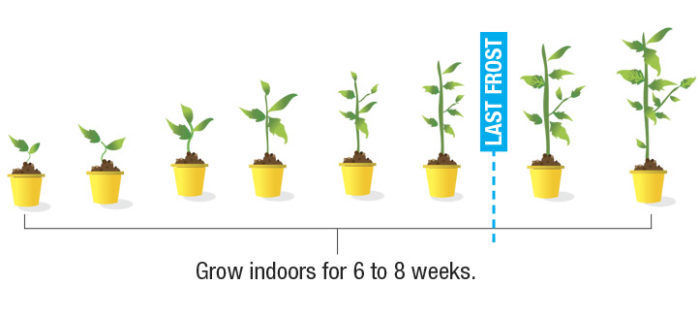
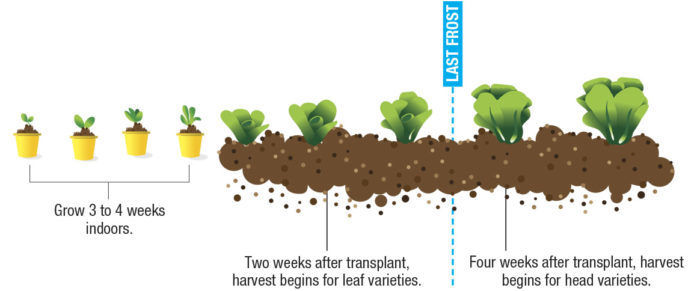
Lettuce matures quickly and can be harvested young
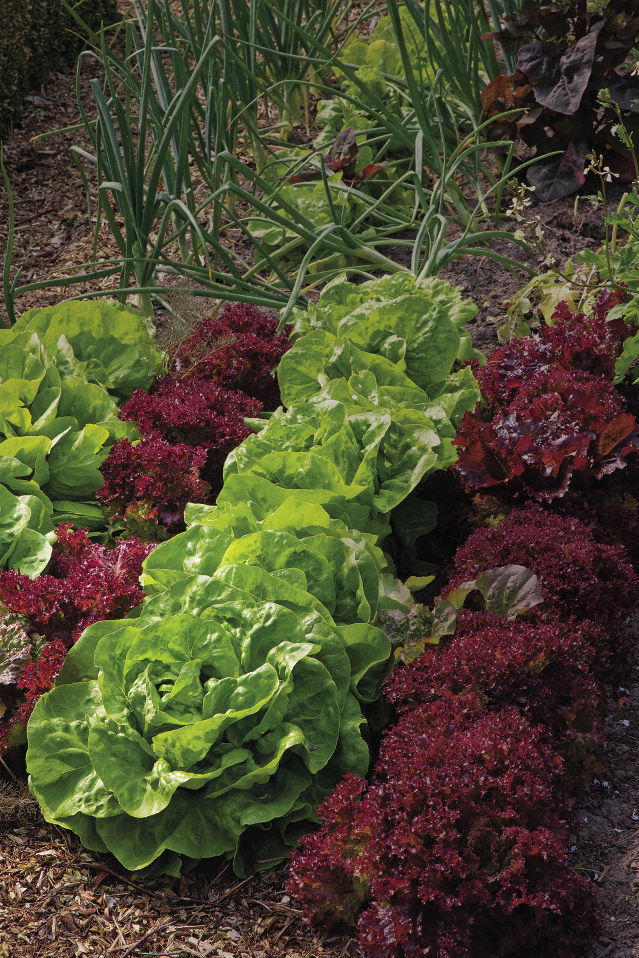
Lettuce is my go-to plug-in plant. Unlike many greens, it’s easy to start indoors under grow lights, and it’s ready to move to the garden just a few weeks after sowing. Once planted out, lettuce grows quickly, with the harvest beginning around a month after transplanting.
Timing: Lettuce can be transplanted into garden beds from midspring until six weeks before the first fall frost. Start the seeds indoors three to four weeks before transplanting, continuing to sow fresh seed every few weeks.
Spacing: Space leaf lettuce 6 to 8 inches apart, heading types 10 to 12 inches apart.
Growing tips: The fastest harvest comes from baby crops of leaf lettuce. For early-maturing head lettuce, try oakleaf, butterhead, Bibb, or romaine. To grow lettuce in summer, plant in shade or under a low tunnel covered in shade cloth.
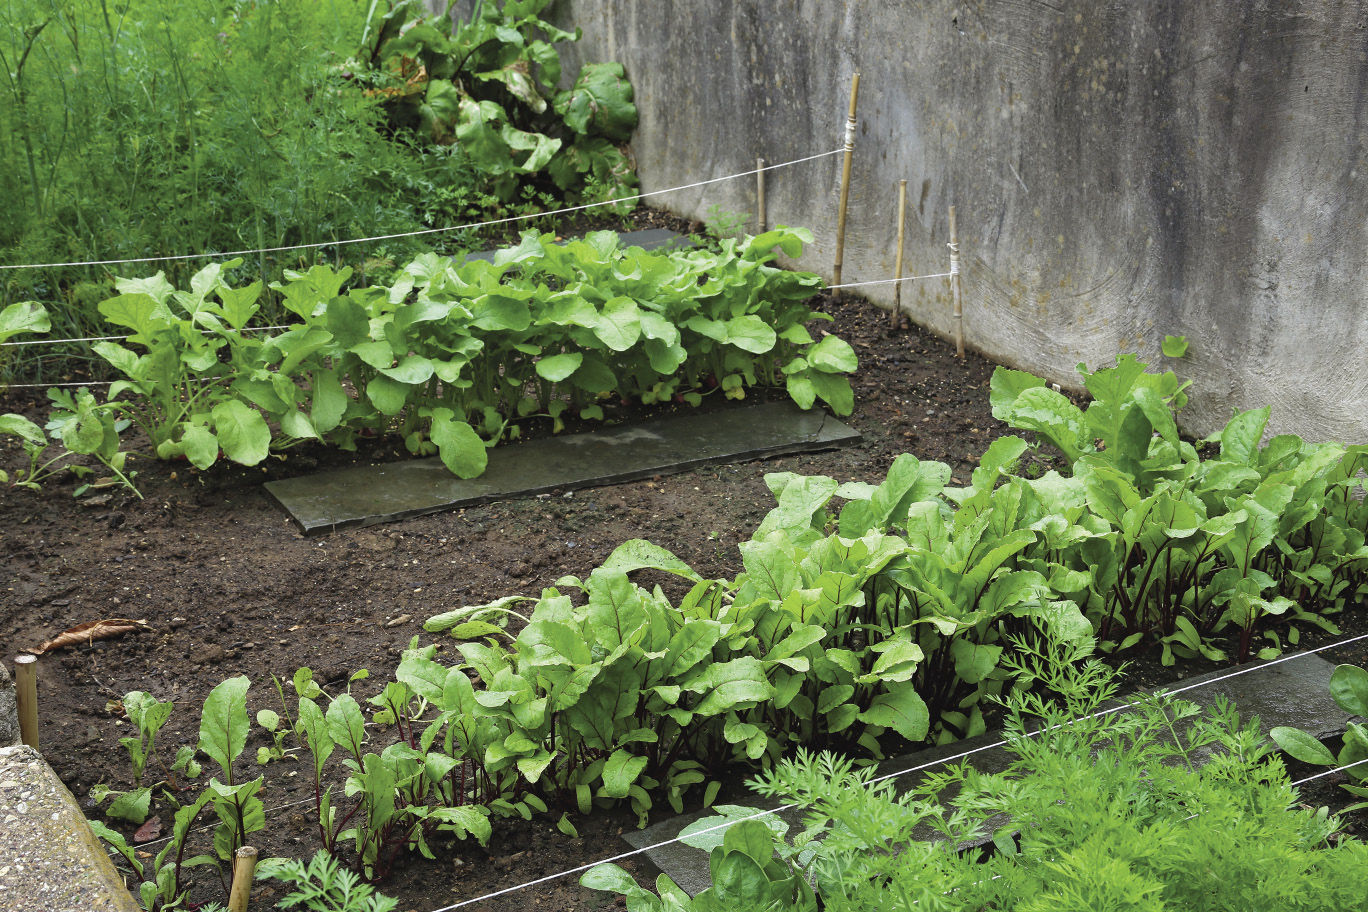
Direct-sow root crops in empty beds
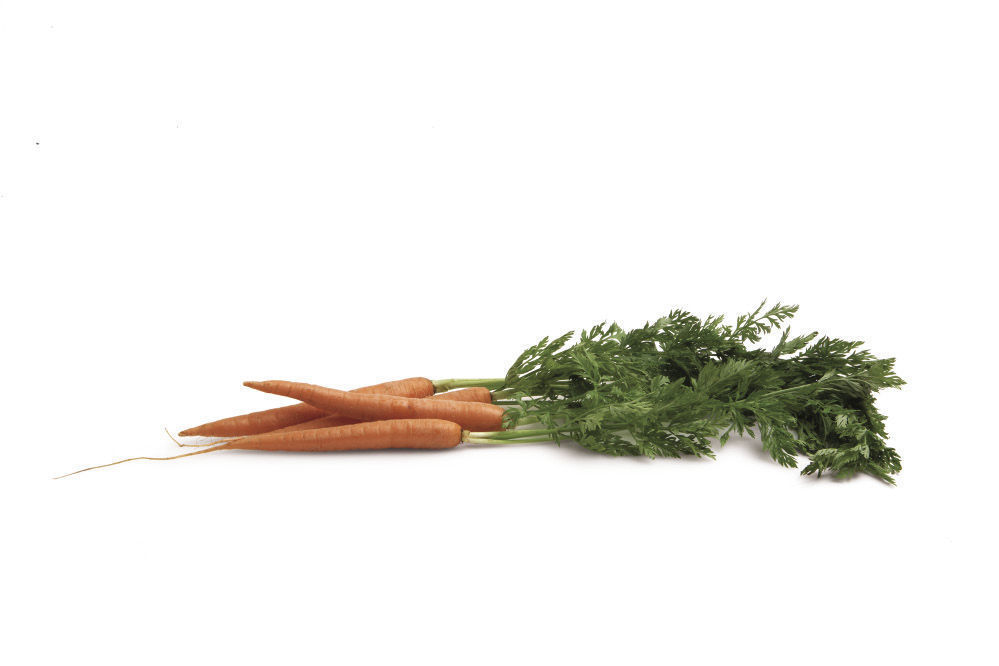
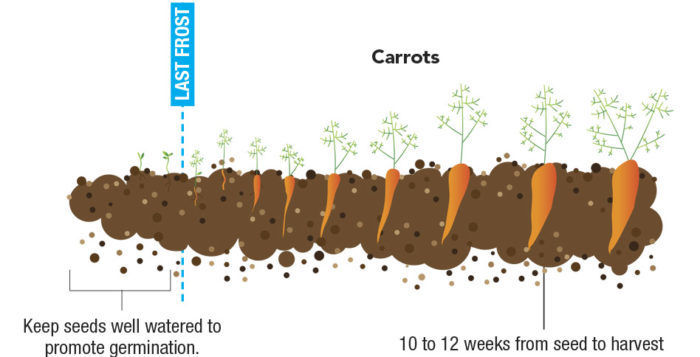
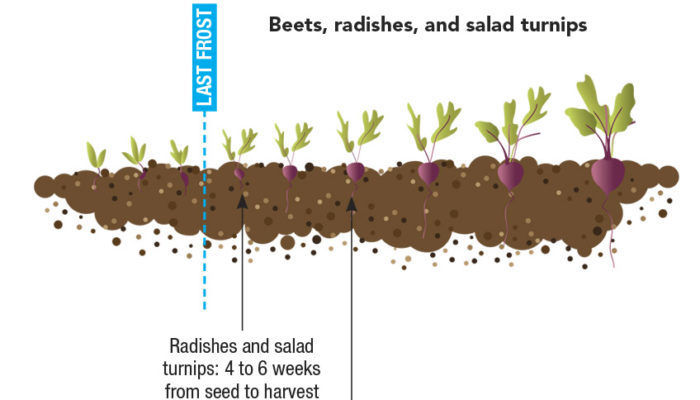
Unlike many plug-in plants, root crops need to be direct-seeded. Radishes and salad turnips like ‘Hakurei’ are quick to crop and are ready to pick just weeks from seeding. Beets and carrots require a bit more time from seed to harvest, but also take well to succession planting and can even be harvested into winter, with proper protection.
Timing: Start sowing seed for cool-season root crops two to three weeks before the last spring frost.
• Beets: Continue to plant more seed every three weeks until eight weeks before the first fall frost.
• Salad turnips: Sow seed every two weeks until six weeks before the first fall frost.
• Radishes (spring types): Plant seed every two weeks until four weeks before the first fall frost.
• Carrots: Sow seed every four weeks until eight to 10 weeks before the first fall frost.
Spacing: Plant seeds ¾ inch to 1 inch apart, thinning as necessary.
Growing tips: Keep the seed beds well watered until germination. Cover beds with a row cover to hold moisture for summer seedings.
For the freshest flavor, start herbs throughout the season
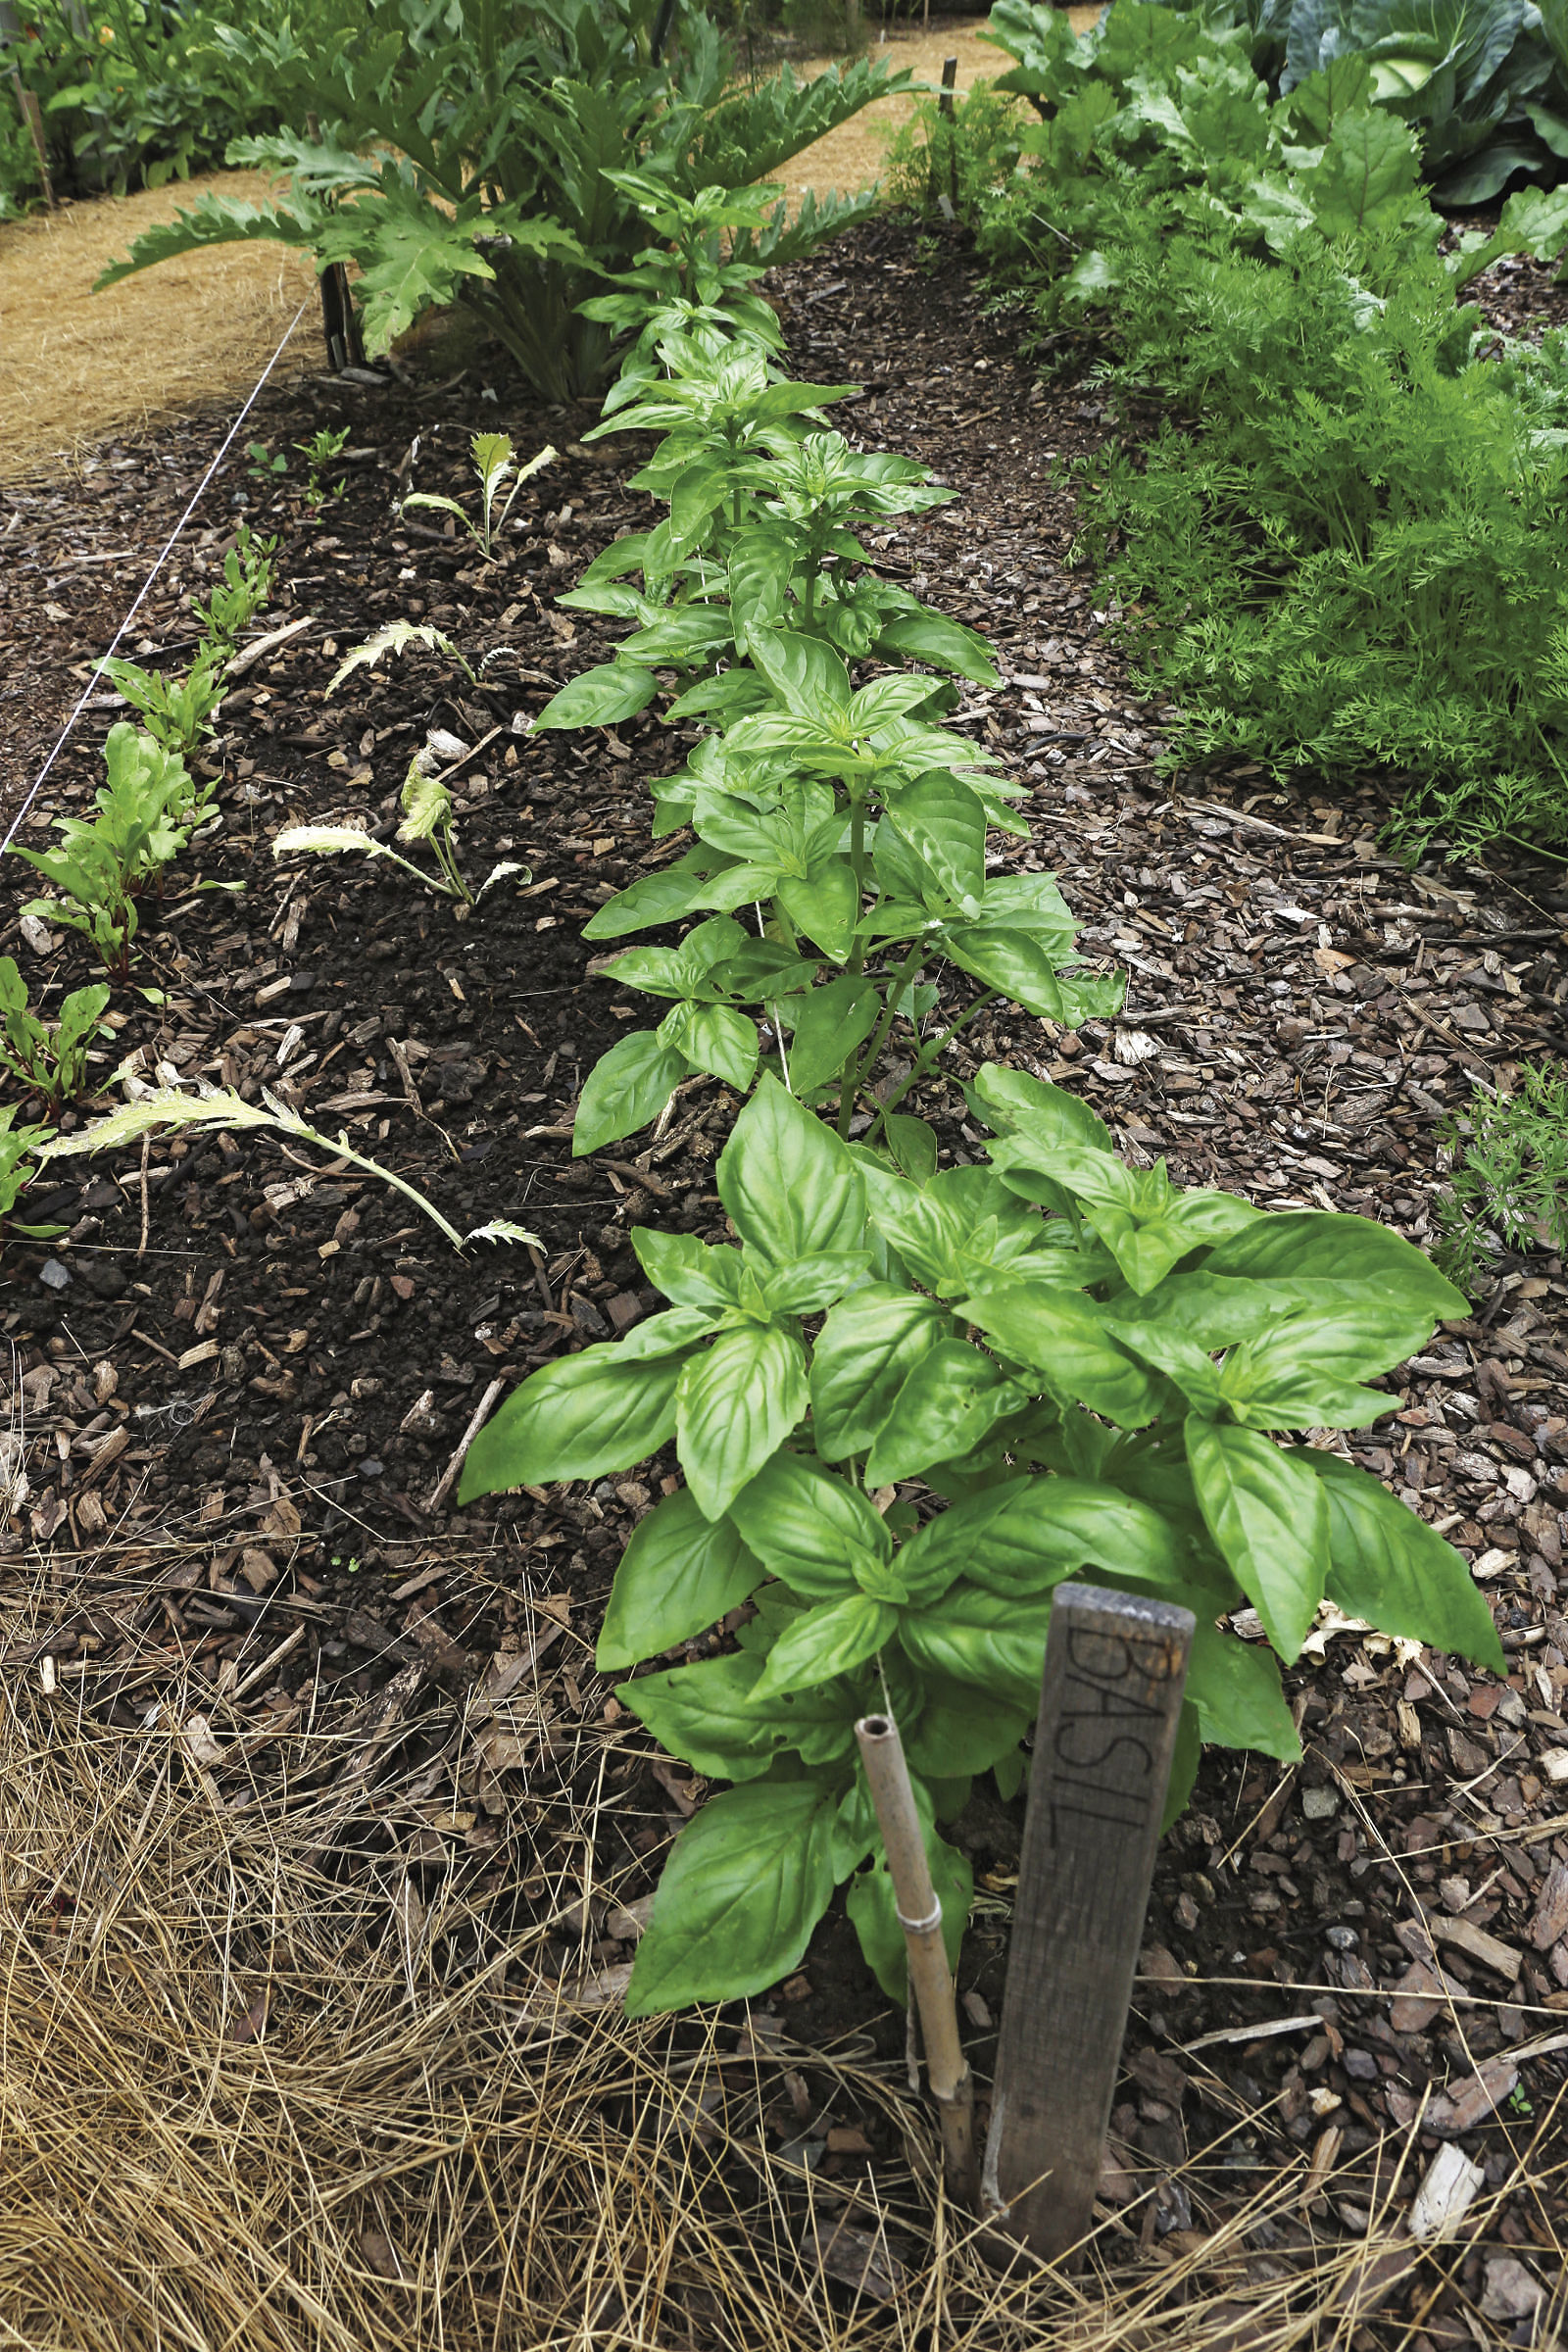
Basil, dill, and cilantro are popular culinary herbs that benefit from succession planting. The best flavor and leaf quality come from young, tender leaves. Several plantings over the course of the season will result in a nonstop supply of aromatic herbs.
Timing
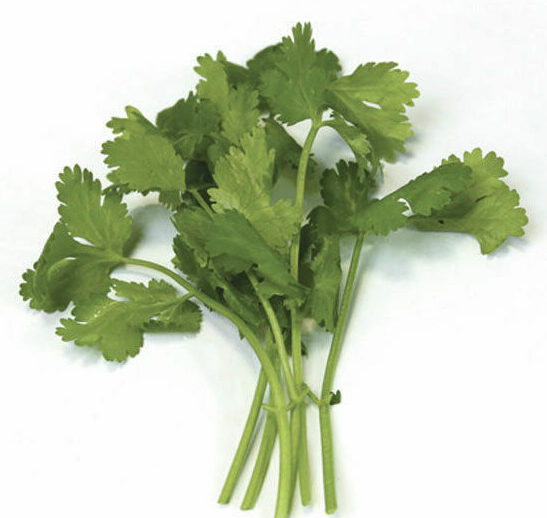 • Cilantro: Cilantro doesn’t transplant well and should be direct-seeded beginning in midspring. Continue to sow fresh seed every three to four weeks, until about three weeks before the first fall frost.
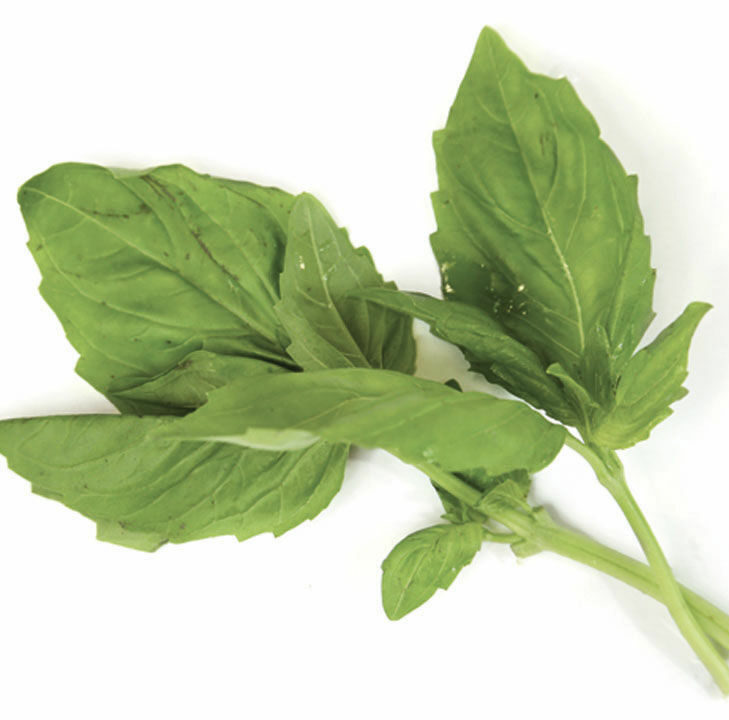 • Basil: Start basil seed indoors six to eight weeks before transplanting. Move seedlings to the garden once the spring weather has stabilized, about a week after the last expected frost. Once the first crop has been transplanted, sow more seed indoors. Repeat monthly for a continuous supply of high-quality basil.
 • Dill: Direct-sow dill in the garden two to three weeks before the last spring frost. For succession cropping, start additional seeds indoors, moving them to the garden after four to five weeks; repeat as needed.
Spacing
• Cilantro: Sow seeds 1 inch apart. There is no need to thin as cilantro grows well even when crowded.
• Basil: Space plug-in plants 6 to 8 inches apart in the garden.
• Dill: Sow seeds 1 inch apart, and thin to 4 inches. Transplant seedlings 4 inches apart.
Growing tips
• Cilantro: Cilantro grows best in the cool weather of spring and autumn. For a summer harvest, sow seed in the shade of taller crops.
• Basil: Don’t be shy about shearing plants back. This will force regrowth and boost yield.
• Dill: Dill appreciates a sunny location and grows well in most garden soils.
Stretch the cucumber and summer squash harvest with additional plantings
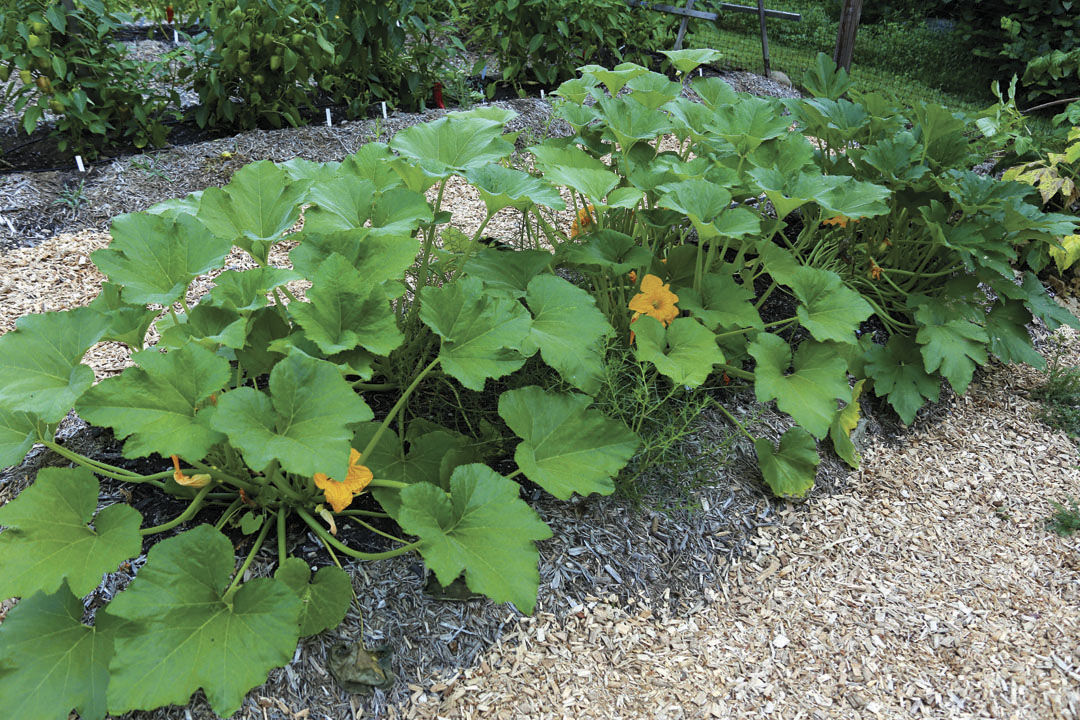
Summer squash and cucumbers are not typical succession crops. They’re usually planted just once, in late spring, after the risk of frost is over. However, I’ve learned that an additional planting (or two) in early to midsummer can stretch the harvest by four to six weeks and keep fruit quality high. Have fun with your plug-in plants, and grow several different varieties of squash and cukes.
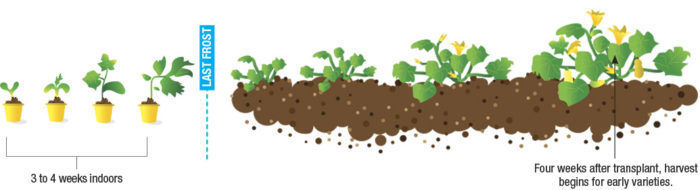
Timing: For both cucumbers and summer squash, start seeds indoors three to four weeks before last frost, or three to four weeks before transplanting. Continue to plant monthly, until 10 weeks before the first expected frost.
Spacing: Space summer squash seedlings 18 to 24 inches apart in rows 6 feet apart. Space cucumber plants 12 inches apart in rows 5 feet apart.
Growing tips: To save garden space, try planting midsummer plugs of bush cucumbers like ‘Parisian Gherkin’ and ‘Pick a Bushel’. Summer squash and cucumbers yield the highest-quality fruits when given a steady supply of water. Mulch to conserve soil moisture.
Basics
Get the most from your grow lights
Once the spring planting rush is over, continue to use your grow lights to produce healthy seedlings for succession planting. Here are some tips to help you succeed.
Plan for a productive season
Keep track of what’s growing in your garden, and estimate when you expect to harvest each crop. When you know that bed space will be available, count back from that date to figure out when to start a replacement crop. When starting a fall crop, count backward from your region’s last frost date to ensure that your veggies will have enough time to grow to maturity.
Get the light right
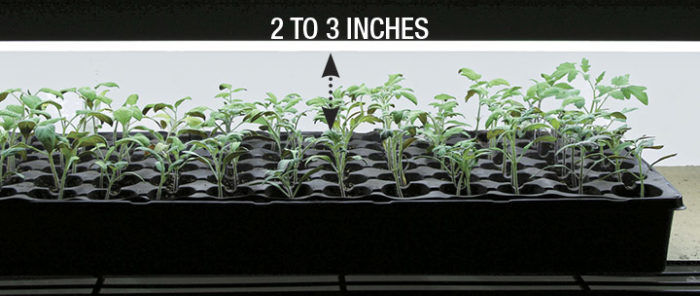
Seedlings need plenty of light to develop into strong, vigorous plants. Of the many grow lights available, my preferred setup is an ordinary fluorescent shop light hung with chains so that the height is adjustable. Keep lights 2 to 3 inches above your plants’ tallest leaves. Most seedlings grow best when given 16 hours of light per day, easily accomplished with an inexpensive timer to turn lights on and off.
Water well
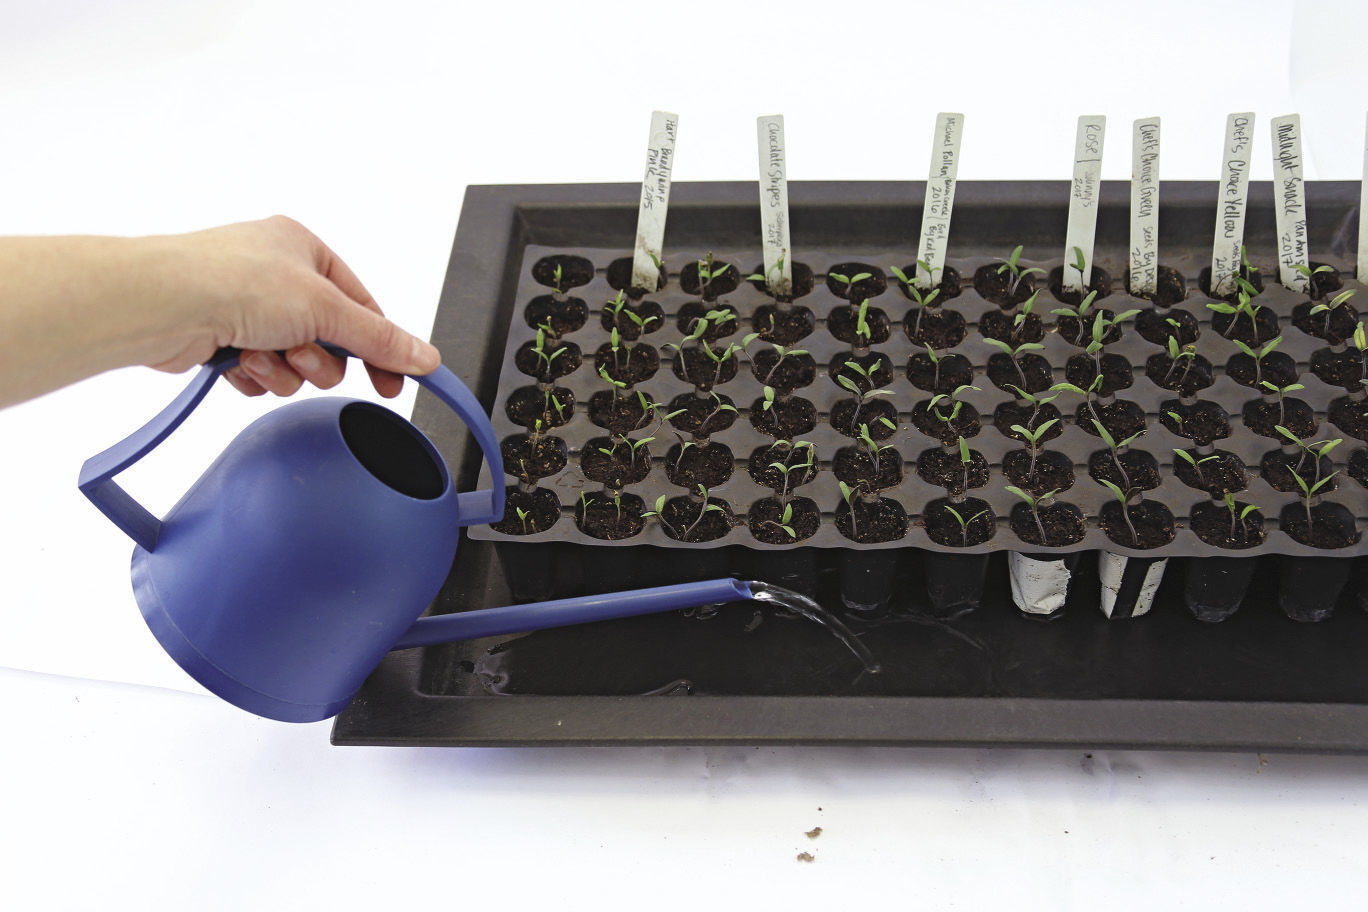
Bottom-watering is a gentle way to give young seedlings the moisture they need. Simply place your plug tray, cells, or pots in a waterproof tray, and add a few inches of water. Once the soil is consistently damp, move the plants to a dry tray. As the plants grow bigger, they will need more water. You may need to water every day in the last week or two before you move your plugs to the garden.
Match the plant to the pot
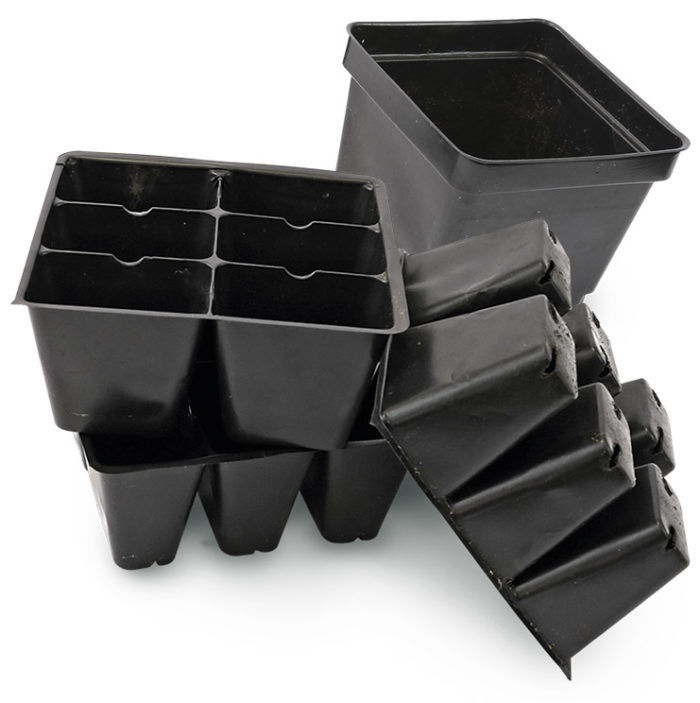
Most cell packs and plug flats are designed to fit into a standard 1020 nursery flat, a tray that is 22 by 11 inches, and 2½ inches deep. Two 1020 trays fit perfectly under a 48-inch-wide grow light. Smaller cells allow you to start more plants, but if plants outgrow their cells before it’s time to set them out, they can become rootbound and leggy.
Cell packs come in six-packs, which are great for lettuce, basil, and dill; and four-packs, which give larger seedlings like cucumbers and squash more space. Eight cell packs will fit in a 1020 flat.
Plug trays have cells connected together in a single sheet, making them easier to handle. Try a 72-plug tray for herbs and lettuce or a 36-plug tray for peppers and eggplant.
FOUR-inch pots are good for large seedlings like tomatoes, peppers, eggplant, cucumbers, and squash.
Grow strong, healthy seedlings
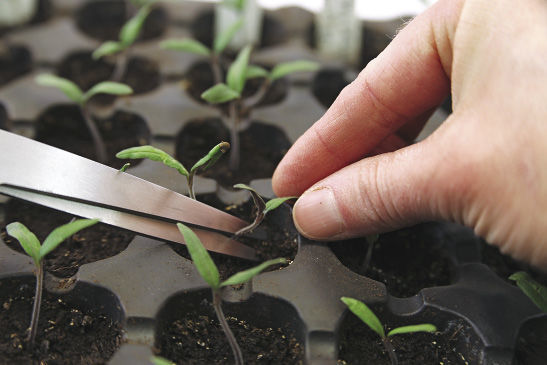
Plant an extra seed or two in each cell, thinning to one plant per cell after seedlings emerge. An oscillating fan will help to prevent fungal diseases and promote strong, stocky growth. Good air circulation causes soil to dry quickly, so remember to water often.
Prepare seedlings for their move to the garden
Plants grown indoors should be acclimatized to outdoor conditions before they are set out. One easy way to accomplish this is to place them outside in the shade for a few days, gradually introducing them to areas with more sunlight. After about a week, they will be ready to plant. Give them a deep drink of water the day before you transplant and a diluted dose of liquid organic fertilizer just before planting. If possible, transplant on a cloudy or drizzly day, holding off if the weather is hot and dry. If you can’t wait for cloudy or damp weather, shade newly transplanted seedlings with shade cloth, newspapers, or cardboard.
Niki Jabbour is the author of Niki Jabbour’s Veggie Garden Remix, which features hundreds of the global, unusual, and heirloom veggies and herbs she grows.


Comments
Log in or create an account to post a comment.
Sign up Log in