

Learn to Can Tomatoes, Step by Step
This comprehensive guide will help you preserve and store your harvest

Canning high-acid vegetables, like tomatoes, using the hot-water-bath method is easy, fast, and very safe.
Early autumn is a time of year when my wife and I look forward to canning time. JoAnn loves to can peaches, pears, peppers, and especially tomatoes. Those bright red harbingers of great sauces fill our garden baskets for a few precious weeks, and a flurry of canning makes winter a bit easier to face; we have summer in jars.
First, of course, you’ll need to make the sauce, and you probably already have a favorite recipe. If you’re in search of one, try this fresh tomato purée (video).
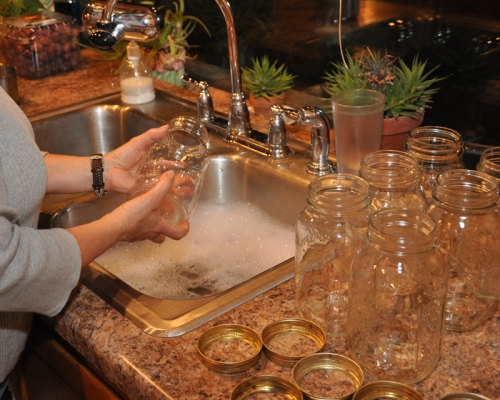
TASK 1: Prepare the jars
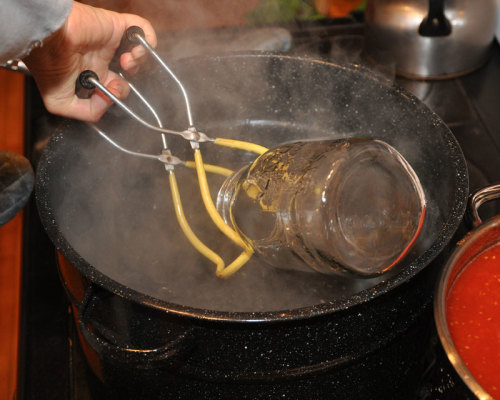
Start the process by checking the jars for any chips around the top edge of the rim where the jar and lid meet. Anything less than a smooth rim will cause the seal to fail. Wash the jars with dish soap and water. Be sure to rinse the jars thoroughly.
Bring a canner full of water to a rapid boil, then dip the jars into the water for about 10 seconds to sterilize them. Place the hot jars inverted on a clean cotton dish towel.
We sterilize as many jars as we plan to use during the canning session. Once the water in the canner has been used for sealing the jars, it isn’t clean enough to use for sterilizing jars.
 |
 |
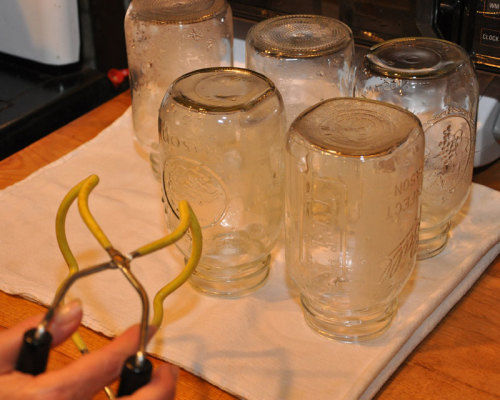 |
| 1. Wash the jars thoroughly before you start. With canning, cleanliness is critical. | 2. Sterilize the jars by submerging them in a canner full of boiling water for about 10 seconds. A canning jar lifter with PVC-coated jaws makes the process easy and safe. | 3. Place the jars inverted on a clean cotton towel to keep any contaminants out. |
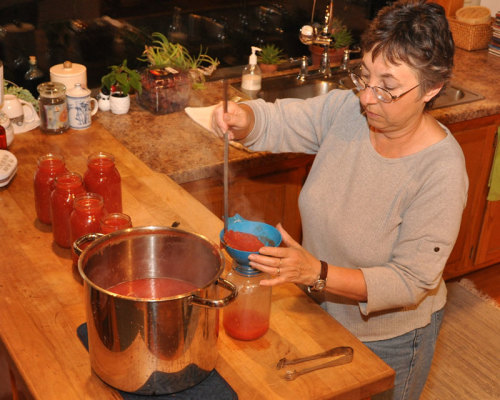
TASK 2: Fill the jars
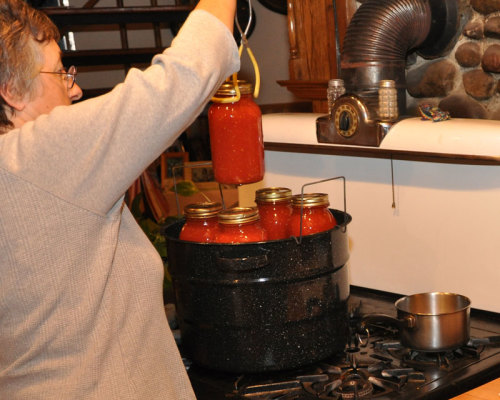
Working quickly is the key to good canning results. Heating the sauce before filling the jars will make the process go quicker and lessens the chance of the jars’ heat-cracking when lowered into the hot water bath. We try to start filling the jars while they’re still warm from the sterilizing process. We use a canning funnel that has a fill mark molded into the neck. About a 1/4 in. to 1/2 in. headspace (empty space between the top of the sauce and the rim of the jar) is necessary to keep the sauce from expanding out of the jar during the hot water bath and thereby ruining the seal.
 |
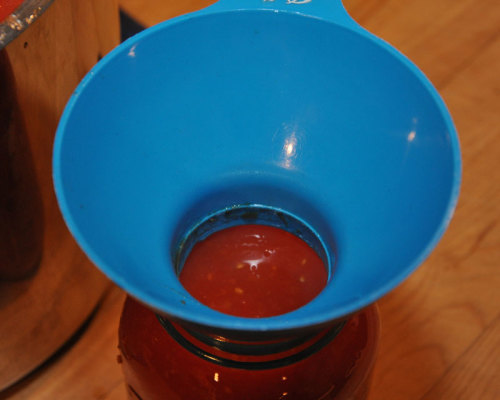 |
| 4. Heat the sauce before filling the jars. JoAnn is using a canning funnel for speed and accuracy. | 5. Fill the jars to the raised rib that’s visible in this photo just above the sauce. |
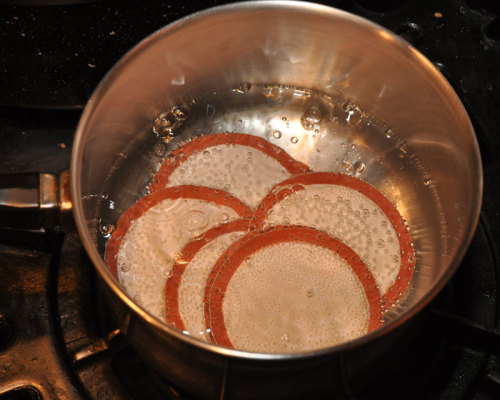
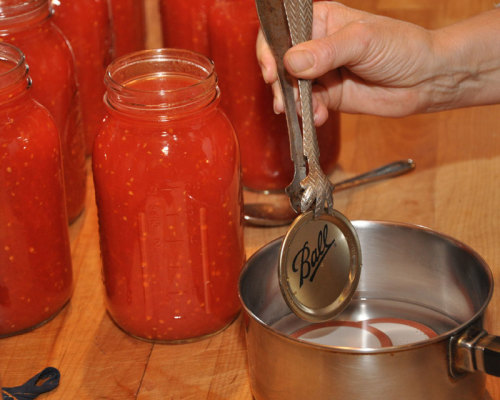
TASK 3: Prep the lids and rings
Sterilize the lids by tossing them into a pan of boiling water for a minute. Make sure you have enough rings handy. If they’ve been used before, check the inside edge of the ring, where it meets the lid, for dents or corrosion that could compromise a good seal.
Before placing the lid on the jar, wipe the rim of the jar clean with a wet paper towel. Sauce on the rim will result in a failed seal between the lid and jar.
 |
 |
| 6. Sterilize the lids in boiling water for one minute. | 7. Use a wet paper towel to wipe any sauce cleanly off the rim, assuring a good seal with the lid. |
 |
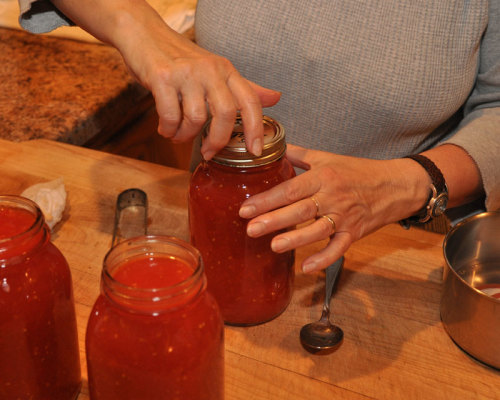 |
| 8. Retrieve the lids with a pair of tongs. Magnetic lifters are also available. | 9. Place the lid on the jar first, then carefully place a ring over the lid and tighten firmly. |
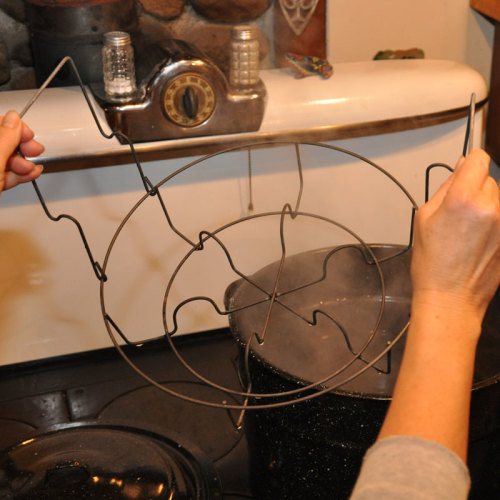
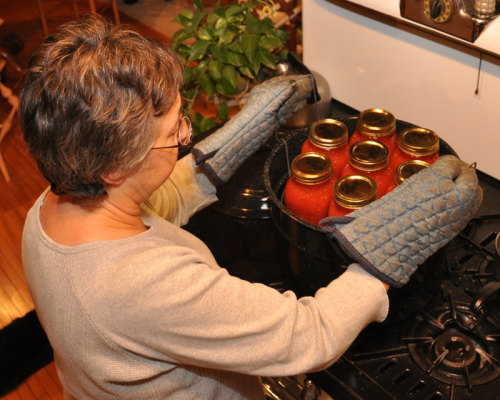
TASK 4: Do the water bath
Water-bath canners are inexpensive, long-lasting, and easy to use. A jar rack makes the process much safer and a whole lot easier. The rack will hold seven quart jars above the water for easy loading, and the handles make it easy to lower the jars into and out of the hot water.
 |
 |
| 10. Prepare the jar rack for loading into the canner. | 11. Place the rack in its high position in the canner. The water should be just shy of boiling hot. |
 |
 |
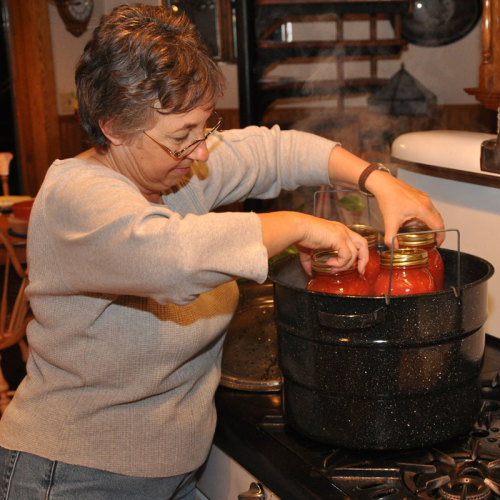
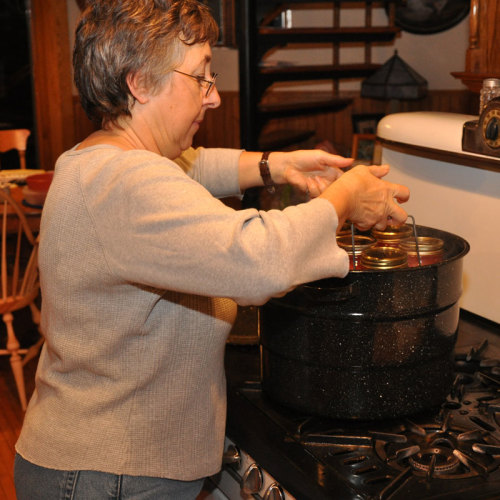
| 12. Load the jars in pairs, placing them in opposing positions to balance the rack and keep it from inadvertently tipping. | 13. Lower the loaded rack into the hot water. |
 |
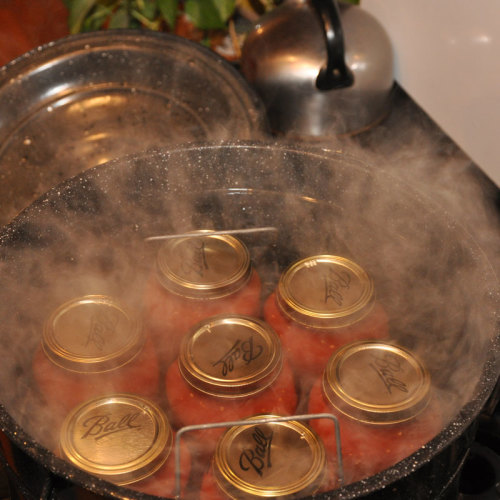 |
| 14. Make sure the jars are covered by at least 1 inch of water. | 15. Turn up the heat. |
 |
16. Cover the canner. When the water starts boiling, set the timer for 30 minutes. Adjust the burner heat to keep the water at a low boil. |
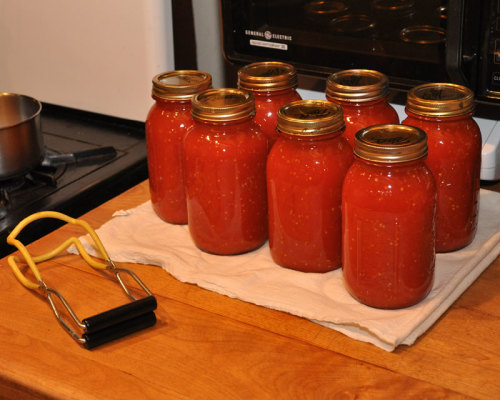
TASK 5: Lift and cool
When the timer sounds, turn off the burner and lift the jar rack to the high position. It’s a good idea to get the jars out of the canner immediately. Use the jar lifter to remove the jars, then place them on a cloth. I also immediately wipe the standing water off the lid. As the jars cool, a vacuum forms under the lids, pulling the center of the lids down and causing an audible click or snap; this sound ensures that a good seal has formed. After the jars have cooled, check to make sure the lids have sealed. The lids will be depressed in the center, and a light tap will result in a dull thud. If a lid isn’t sealed, you can simply put the jar in the fridge and either use it in the next few weeks or add it to the next batch of canning tomato sauce.
I use a fine-point marker to date the jars on the lid, making it easy to keep track of my pantry inventory; the oldest jars are used first.
Store your canned goods in a dry, cool, dark place. Properly stored tomatoes will keep for at least a couple of years, and I’ve had some that got lost in the pantry that were still fine after several years.
 |
 |
| 17. Lift the jar rack to its high position. This makes taking the jars out easier and safer. | 18. Lift the jars out of the water, with the jar lifter placed below the jar’s lid rim. |
 |
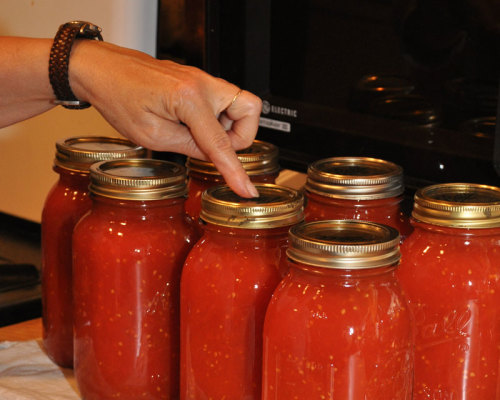 |
| 19. As the jars cool, the lids seal with an audible click or snap. Don’t worry—that’s the sound you want to hear. | 20. Tap the lids to make sure they are sealed. A dull-sounding tap means a good seal. |


Comments
Log in or create an account to post a comment.
Sign up Log in