
One of the greatest tasty treats of summer is a sweet, vine-ripened melon picked from your own garden. The quality is unsurpassed and will put to shame the bland shipping melons found in your local supermarket. Additionally, you have a much wider choice of varieties if you grow your own—from the tried-and-true cantaloupe to the more uncommon crenshaw, ananas, and galia. Lots of folks think that they can’t grow melons if they live in an area with short, cool summers, but that’s not the case. Melons can grow well in most parts of the lower 48 states. If I can successfully grow melons in central Maine, then almost anyone can do the same. The trick is picking the correct variety and getting your plants off to the right start.
Sow indoors, and use plastic mulch
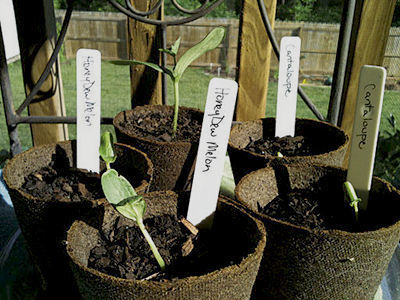
Start your seeds indoors to ensure that you kick off the season with the strongest plants possible. You can direct-sow if you have to, but germination issues are more common with direct-sown plants as are problems with pests—such as cutworms, which love to feast on new melon seedlings. Sow, instead, two or three seeds ¼ inch deep in 50-cell flats or in 2- to 3-inch-diameter pots. The trick is to start the seeds no more than a month before transplanting; it’s much better to wait than to have oversize plants, which are fragile and prone to transplant shock. Maintain a temperature between 80°F and 90°F (using a seedling heat mat), and keep the soil moist but not wet until the seeds germinate. Once they sprout, you can drop the heat-mat temperature down to 75°F until the plants have put on a couple of sets of true leaves, which lets you know that they’re ready to transplant outside.
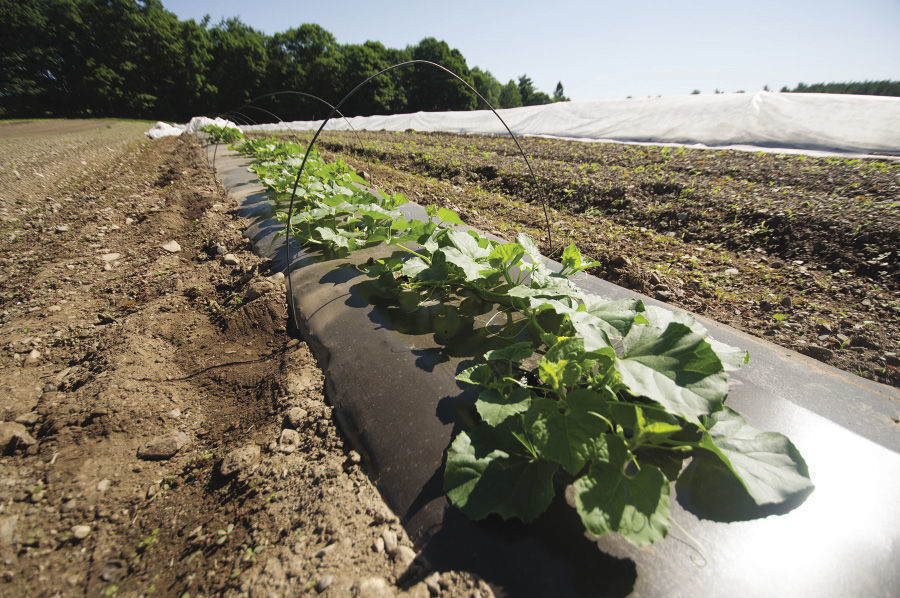
After the danger of frost has passed and the weather is warm and settled, set the transplants 18 inches apart in rows that are 6 feet apart. Immediately water the plants, preferably with a fish-emulsion fertilizer (which is a great organic option that won’t burn the tender transplants), to give them an extra boost. Many gardeners, including myself, plant their melons through black agricultural plastic or other dark-colored mulch options. These mulches warm the soil, hasten maturity, and reduce weed pressure—all of which are issues that can be the cause of melon-growing failure.
Watch for pests and signs that it’s time to harvest
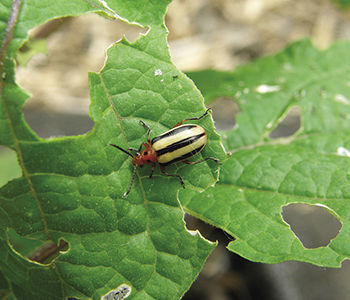
The most destructive pest of melons is the striped cucumber beetle. It can quickly destroy young plants as well as transmit bacterial leaf blight. The best control is to use floating row covers, which physically exclude the pest from your melon patch but allow rain and sunshine to reach the plants. Row covers should be installed immediately after planting, before the beetle can infest the plants. Hoops (to hold the covers aloft) are not needed. Using row covers is more effective and a lot less effort than spraying or handpicking insect pests. Additionally, they offer a few degrees of frost protection, and they accumulate heat—creating a mini greenhouse, of sorts—so the plants grow faster and mature earlier. This is key when growing melons in cool regions. Remove the covers when the plants begin flowering to allow bees and other insects to pollinate the crop.
In a couple of months, if everything goes right, you’ll start seeing beautiful melons appear and then ripen on your vines. Harvesting melons can be a bit tricky and is a combination of art and science. Some types of melons slip from the vine all on their own, and others must be cut. The information on your seed packet should specify what type of melon you are dealing with. When harvesting a new variety for the first time, however, it’s best to pick one fruit and test to see if it’s ripe before harvesting all of them.
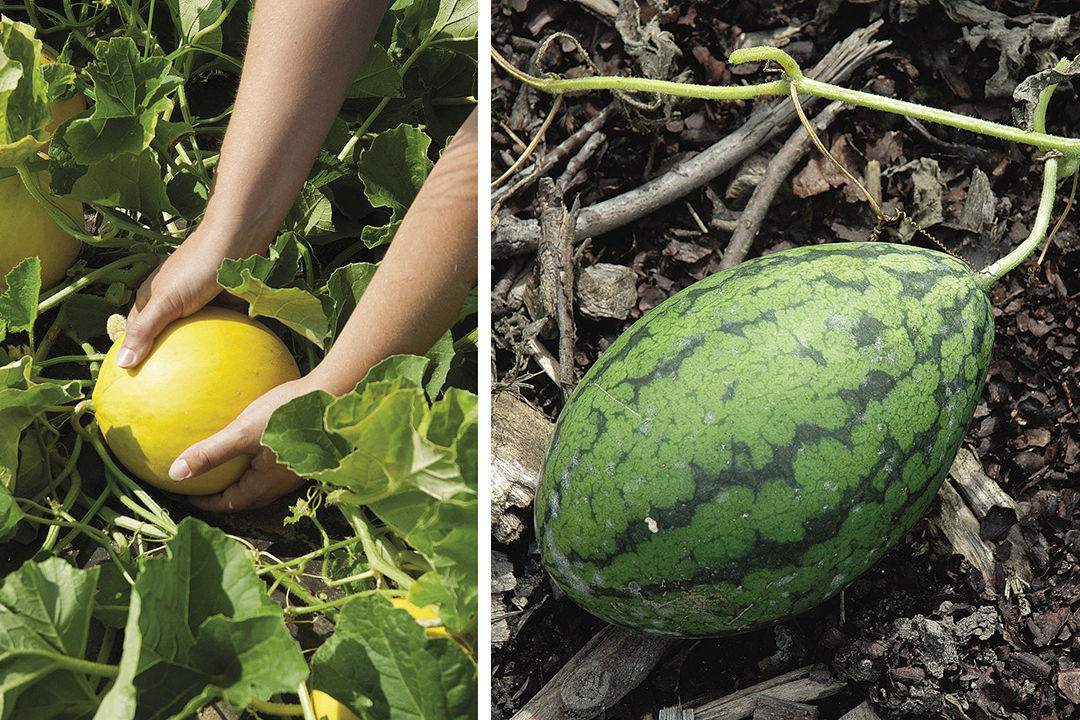
Slip varieties are melons from which the fruit can be detached from the vine with a slight tug or gentle push of the thumb; cantaloupe is one such type. Forced-slip varieties are ready when the fruit can be detached with a firm push of the thumb. Cut-from-the-vine types must be physically removed from the plant using shears, pruners, or a sharp knife as they won’t slip. They are generally ready when the leaf or tendril closest to the stem has turned brown and the skins of the fruit have “warmed,” or colored up slightly. After that, all that is left to do is decide who will share in your delicious summer harvest.
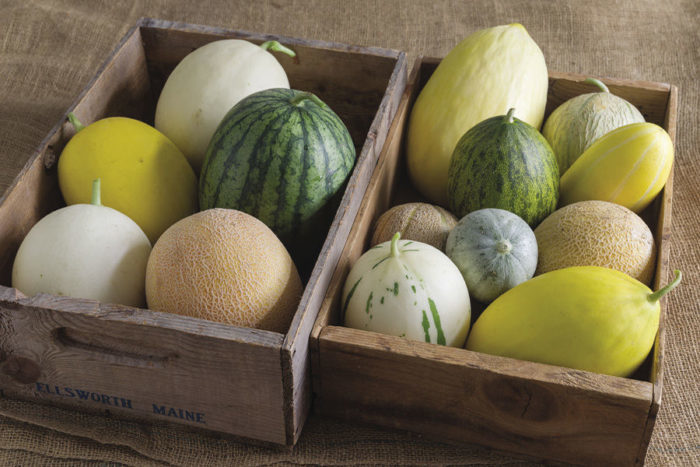
There’s a Variety for Every Taste and Place
One of the best reasons to grow melons at home is the wide range of varieties available, most of which are rarely seen at the supermarket. The following offer amazing flavor, and some are even especially suited for growing in the more challenging areas of the country:
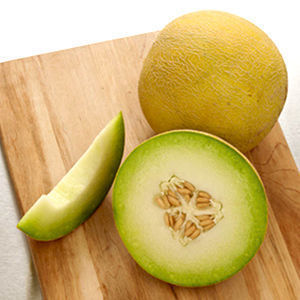
1. ‘Arava’
Type: Galia
Days to maturity: 77
Galias are commonly grown in the Mideast as a gourmet treat. The heavily netted fruit are ready to harvest when the skin turns yellow and the fruit slip from the vine. The thick, sweet green flesh of ‘Arava’ is particularly aromatic.
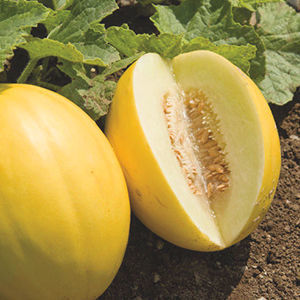
2. ‘Brilliant’
Type: Canary
Days to maturity: 75
The football-shaped, bright yellow canary melons average 4 pounds apiece and store well—up to two to three weeks in the refrigerator. The variety ‘Brilliant’ has particularly firm, sweet white flesh. Harvest at forced slip when the fruit become dark yellow.

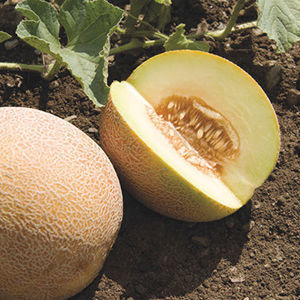
3. ‘Honey White’
Type: Honeydew
Days to maturity: 77
‘Honey White’ is particularly suited for gardeners in cool, wet, and cloudy locations. Its fruit will still be sweet under these conditions, whereas cantaloupes are often bland. Its pale flesh is very sweet and flavorful. Fruit average 3 to 3½ pounds apiece and store well for up to two to three weeks in the refrigerator. Cut the fruit from the vine when the skin warms to a yellowish white or the small leaf near where the fruit stem attaches to the vine yellows.
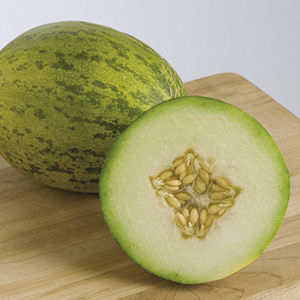
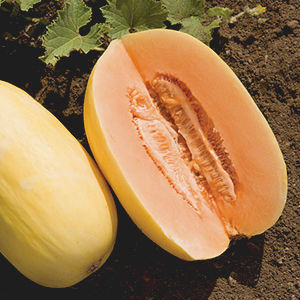
4. ‘Lambkin’
Type: Piel de sapo
Days to maturity: 75
Unlike most piel de sapo melons, which require a long growing season, ‘Lambkin’ matures early and performs well in short and long seasons. The 3-pound melons have a yellow skin with green mottling. This All-America Selections winner has a superb sweet flavor. Harvest when the fruit turn yellow and slip from the vine.
5. ‘Lilly’
Type: Crenshaw
Days to maturity: 78
The fruit of ‘Lilly’ are big (6 to 8 pounds apiece) and a pleasant pale yellow. Its orange flesh has a wonderful creamy consistency and is highly aromatic and sweet. ‘Lilly’ matures earlier than most crenshaws, which typically require a long growing season. Harvest at full or forced slip once the fruit become butter yellow.
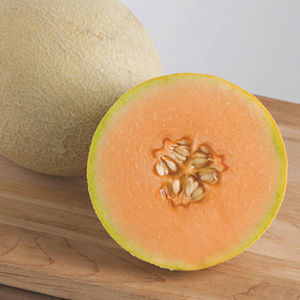
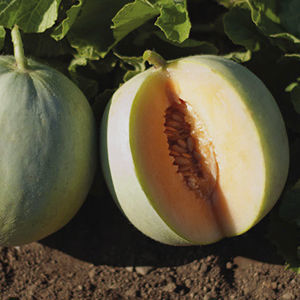
6. ‘Sarah’s Choice’
Type: Cantaloupe
Days to maturity: 76
‘Sarah’s Choice’ combines sweetness with the traditional musky flavor of a cantaloupe. The 3-pound fruit are ready to harvest when the skin is yellowish and the fruit slip from the vine.
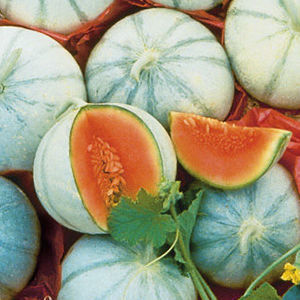
7. ‘Savor’
Type: Charantais
Days to maturity: 78
Charantais melons are of French origin and some of the finest melons for eating. The skin is a beautiful grayish color with dark green sutures. The flesh of ‘Savor’ is dark orange and very sweet and aromatic. Cut the fruit from the vine when the skin has a slight yellowish tinge and the small leaf near where the fruit stem attaches to the vine yellows.
8. ‘San Juan’
Type: Ananas
Days to maturity: 78
Ananas are finely netted, oval melons that weigh about 4½ pounds each. The white flesh of ‘San Juan’ is wonderfully aromatic, sweet, and reminiscent of pears. This variety performs well in short-season areas but shines in hot weather. Harvest when the skin is nearly all yellow and the fruit slip from the vine.
9. ‘Serenade’
Type: Butterscotch
Days to maturity: 78
You can expect the small fruit from ‘Serenade’ to average in size between that of a baseball and a softball. This makes them the ideal size for a single serving. The orange flesh is sweet and aromatic. Butterscotch melons are rarely seen in North America, which is a shame because they are delicious. Harvest at forced slip when the skin warms to a creamy yellow-green.
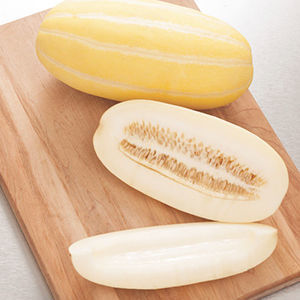
10. ‘Sun Jewel’
Type: Asian
Days to maturity: 68
Asian melons are unusual looking, like long oversize cucumbers. The skin is bright yellow with white stripes. The white flesh of ‘Sun Jewel’ is quite crisp and moderately sweet when ripe. Harvest when the fruit slip from the vine.
Steve Bellavia is a vegetable researcher at Johnny’s Selected Seeds in Winslow, Maine.
Photos, except where noted: courtesy of johnnyseeds.com
The following seed sellers offer the widest selection of the melons featured:
- Fedco Seeds, Waterville, Maine; 207-426-9900; fedcoseeds.com
- Johnny’s Selected Seeds, Winslow, Maine; 877-564-6697; johnnyseeds.com
- Territorial Seed Company, Cottage Grove, Ore.; 800-626-0866; territorialseed.com


Comments
Log in or create an account to post a comment.
Sign up Log in