

One of the defining characteristics of plants is immobility: they don’t move. But try telling that to all the plants in my garden that have been relocated multiple times in their short lives!
Moving a plant from one place to another doesn’t come naturally to all gardeners. If you’re a bit uneasy when contemplating it, you may be more in tune with plants than those of us eagerly wielding our spades. Transplanting is an unnatural situation. Except in extraordinary circumstances, like mudslides or eroding banks, there is no equivalent experience that happens to wild plants. Remembering this motivates me to mind my Ps and Qs when transplanting, because it does involve shock.
To minimize transplant shock, think like a plant
Imagine you are a plant rooted in the ground. Someone approaches with a spade, and two minutes later half your roots are gone. Stripped of almost all root hairs, you can no longer take up water, yet water loss from your leaves continues.
The effects of transplant shock can include wilting, damaged roots, and a slowdown of photosynthesis. To regain balance, a newly moved plant needs to grow callus on damaged tissue, initiate new roots, form thousands of tiny hairs from new root tips, and shift its metabolism.
Variables such as water availability, temperature, light, wind, soil conditions, and season can have a profound influence on a plant’s ability to move from shock to healing mode. So instead of trying to follow hard-and-fast rules, focus on a few fundamental principles of plant physiology to help in choosing or controlling the right transplanting conditions to reduce damage and encourage healing.
- It is always a good idea to start with as healthy a plant as possible. If conditions are dry, water the day before the big move to fully hydrate the plant before separating it from its water source. This watering will also help reduce root breakage, which is more likely in hard, dry soil.
- Reduce transpiration (water loss through the leaves) by avoiding the environmental factors that drive it: high temperatures, sunlight, and wind. The best time to transplant is on a cool, cloudy day, or in the late afternoon.
Careful handling prevents unnecessary stress when moving plants
Understand the soil differences between sites
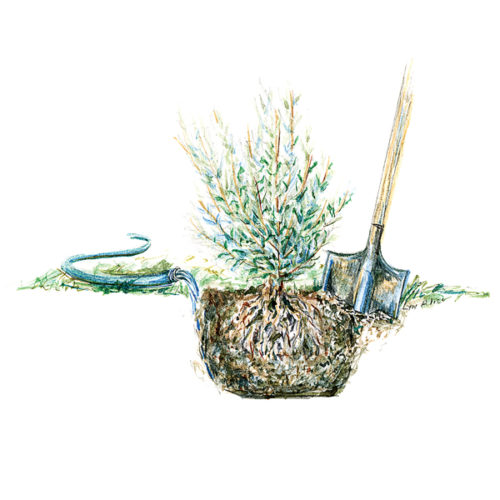
Roots and root hairs will be lost when you dig, but aim to keep as much of the root system as your back will bear. Depending on your soil, you could end up with a hefty root ball, and you may wonder if you should break it up or keep it intact. Both have potential advantages, but in different circumstances.
- If you’re moving the plant from like soil to like, it is fine to keep the root ball intact.
- If you’re moving it to a different soil type, soak the root ball briefly in a tub of water, and then gently massage it to remove the bulk of the existing soil. This extra step ensures contact between the roots and the new soil type and promotes uniform water movement through the root zone.
Tip: Good soil-to-root contact is the key to getting new root hairs growing, which allows the plant to access the film of moisture surrounding particles of soil.
Cleaning and protecting the root ball
Once a plant has been dug, don’t add more insult to the injury of uprooting.
- Use pruners to trim away damaged roots.
- Protect any exposed roots from drying air and sun by covering them with damp newspaper or compost.
The science here is common sense. Protect what healthy tissue you have so that it can provide the resources needed for repair and regrowth.
Steps for Replanting
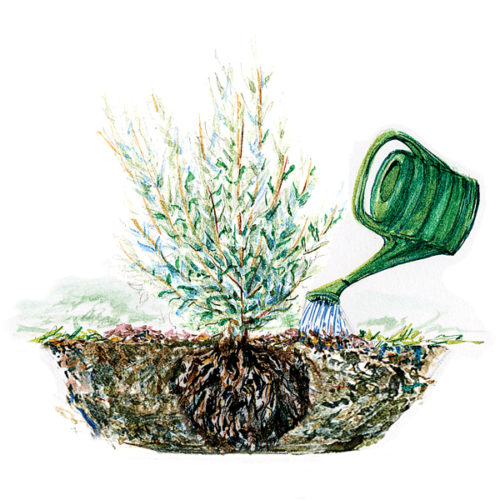
Tip: When replanting, dig a hole that is wider but not deeper than the root ball. This is because feeder roots tend to grow outward, not straight down.
- When you settle the plant into the hole, respect the crown. For most plants, this means the crown is neither buried nor sitting high and dry with root bases exposed. If you find that you have missed the mark after firming the soil in, dig the plant right back up and try again.
- Water slowly and deeply so that water penetrates the entire root ball and doesn’t scour soil away from roots that belong underground.
- Mulch with a natural material that does not resist water movement. Mulch moderates temperature extremes in the top layer of soil, optimizing the regrowth of feeder roots.
Your plant is now well placed, but it will be some time before it can take up water efficiently. It is up to you to make sure the water supply doesn’t dry up. Provide supplemental water, as needed, for three months. If a soil test indicates the need to fertilize, wait at least four months, when there are actually fine feeder roots present to take it up.
Should you cut back the top of the plant after moving it?
After you move a plant, you might be tempted to cut back the top. People do this hoping that it will relieve transpiration pressure from leaves while the plant has nonfunctioning roots. But pruning during the growing season may stimulate dormant buds to push out new growth. So resist the urge to prune after transplanting, unless the plant is so tall and gangly that it keeps tipping over and uprooting itself, or unless stem tips wilt beyond recovery.
Tip: Instead of pruning, consider shading your transplant for a week or so to reduce transpiration.
Transplant with confidence, my friends. Marvel in the botanical magic of repair and regrowth as you enjoy your plant in its “maybe this time just right” spot.
BASICS
Consider Time and Weather Before You Transplant
![]() You can transplant either in spring or fall, or both, depending on your region’s seasonal weather patterns. The science is simple. If you are going to damage roots, do it at a time of year when they are programmed to grow. In the temperate zones, roots generally grow actively in spring and fall when soil temperatures are above 35°F.
You can transplant either in spring or fall, or both, depending on your region’s seasonal weather patterns. The science is simple. If you are going to damage roots, do it at a time of year when they are programmed to grow. In the temperate zones, roots generally grow actively in spring and fall when soil temperatures are above 35°F.
Fall: Move plants at least five weeks before your first frost date to allow for root regrowth. If your region has especially hot or dry summers and relatively mild winters, fall transplanting provides the longest favorable period for root growth.
Spring: In zones with harsh winters and long, rainy springs, transplanting in spring makes sense. Factor in the possibility that fall transplants with minimal root growth to anchor them are prone to frost-heaving, and this is especially true. If in doubt about the prime transplanting time for your region, seek the advice of trusted local gardeners and institutions.
Steps to Move a Mature Plant
When it’s time to dig, follow these basic steps. The goal is to minimize root loss and provide optimal conditions for regrowth.
1. DIG THE PLANT
- Water the day before transplanting to reduce root breakage.
- Save as much of the root ball as you can.
- Trim damaged roots only.
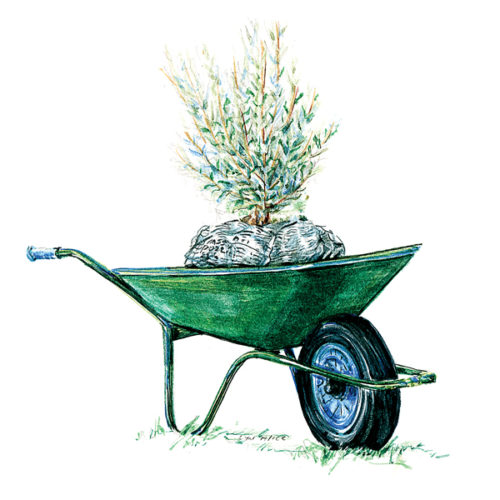
2. MOVE WITH CARE
- Protect the plant from sun and wind, and cover the roots so they don’t dry out.
- Minimize the amount of time the plant is out of the ground.
- If you’re moving the plant to a spot with a different soil type, gently remove soil from the roots.
3. SETTLE THE PLANT IN
- Dig a hole that is wider but not deeper than the root ball.
- The plant’s crown should be level with the soil surface, not too high or too low.
- Water regularly for at least three months.
Tip: Avoid pruning leaves or stems until after the plant has recovered from its move.
Transplanting the special cases
Moving each of the three plant types below throws its own curve ball. But if you apply what you know about roots and transpiration, you can do it.
-
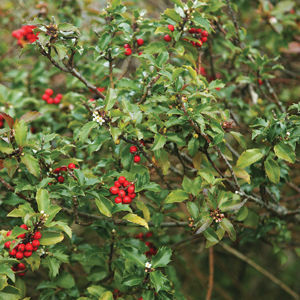
Evergreens are susceptible to water loss in winter. Because of the added transpiration pressure and possibility of a frozen, inaccessible water supply, it’s best to transplant them in early spring.
-
Marginally hardy plants growing at the lower limit of their hardiness zone should also be moved in spring. This helps prevent cold damage to roots and injuries from water collecting and freezing in the crown.

-
Spring flowering bulbs can either be transplanted in late spring when their foliage fades and they enter dormancy, or in fall when root growth resumes. The main advantage of spring is that you can see where they are!
Paula Gross is the former assistant director of the University of North Carolina Charlotte Botanical Gardens.
Photos: Carol Collins, Brittany Carlson, Michelle Gervais, Steve Aitken. Illustrations: Conor Kovatch, Lyn Alice


Comments
I will be selling a house in Northern Virginia this summer and moving them out to Virginia’s Piedmont. Not an optimal for plants and certainly not here in blistering heat of Virginia, even near the Blue Ridge. Any special emphasis or pointers for someone forced to move plants at the worst possible time?
I will try this again, with better proofreading! I will be selling a house in Northern Virginia this summer and will be moving many plants out to Virginia’s Piedmont. Many peonies will be part of this move. I am also eyeing a full grown Judd Viburnum for attempted transplant. Summer is not an optimal time for transplanting and certainly not here in the blistering heat of Virginia, even near the Blue Ridge. Any special emphasis or pointers for someone forced to move plants at the worst possible time? I know if they stay with the house for the sale, they will be plowed under for turf and “curb appeal.”
Log in or create an account to post a comment.
Sign up Log in