

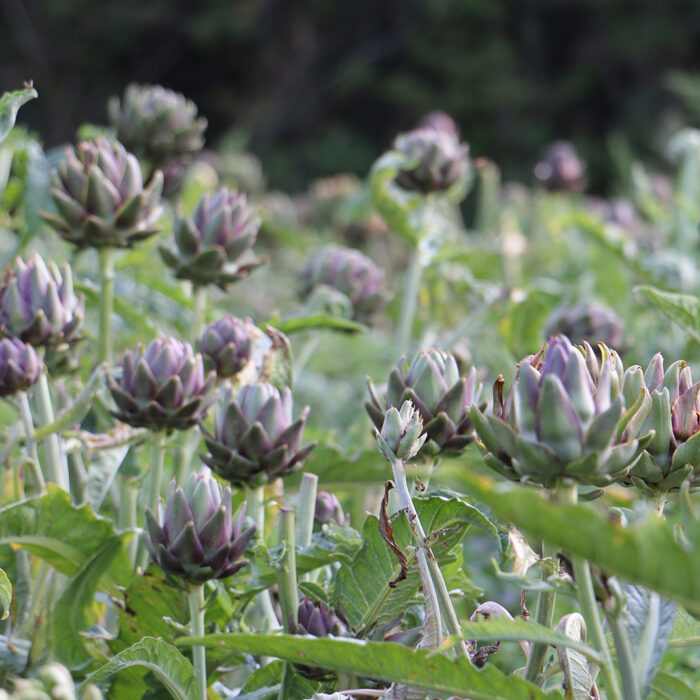
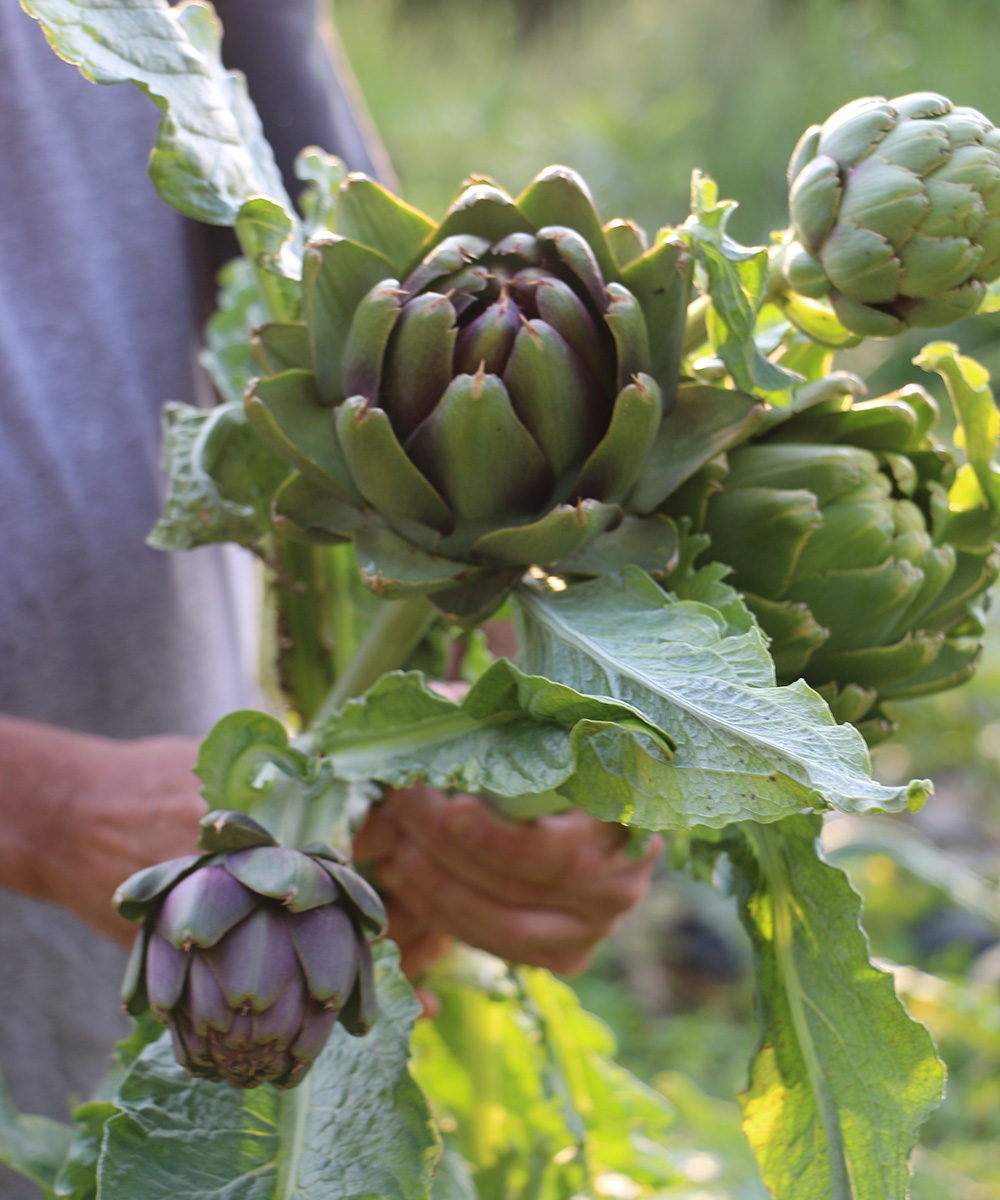
The artichoke that is cultivated as a vegetable is a variety of cardoon (Cynara cardunculus, Zones 7–10), or artichoke thistle, a thistle-type perennial in the sunflower family that’s native to the Mediterranean. Artichokes are large, attractive plants with sharp spines and silvery leaves. They could be considered just as ornamental as cardoon is, making nearly the same architectural statement with their thistle-like, gigantic leaves. But cardoons only have edible stems. You can’t eat their giant flower buds. That’s where artichokes come in.
The Northeastern climate provides a challenge
While artichokes might be hardy in mild, Mediterranean climates like northern coastal California (where most are commercially grown), elsewhere, and particularly in the Northeast, they have remained an ungrowable crop in the past given our cold winter weather. The good news is that in the past twenty years, new varieties have been developed and new methods have been introduced that are making growing artichokes a reality for Northeastern gardeners.
Follow 5 steps for success
Success with artichokes in the Northeast depends on how well one can follow a few essential steps. Each of these steps relates to temperature exposure. These steps are easy to follow once you understand that artichokes are essentially perennial plants, and in order to get your seedlings to bloom early, you’ll need to trick them into believing that they’ve experienced a mini-winter. All of this must be accomplished before your seedlings are too large, and before the weather in the Northeast has completely warmed up for the summer.
The basic process of growing artichokes involves starting seeds in late January, growing them under grow lights indoors, then setting out your plants–still in their pots–in late March or April for a few weeks (depending on the weather) when it is still cool. Here are more details on that process to ensure that you don’t miss a step.
Step 1: Choose the right variety
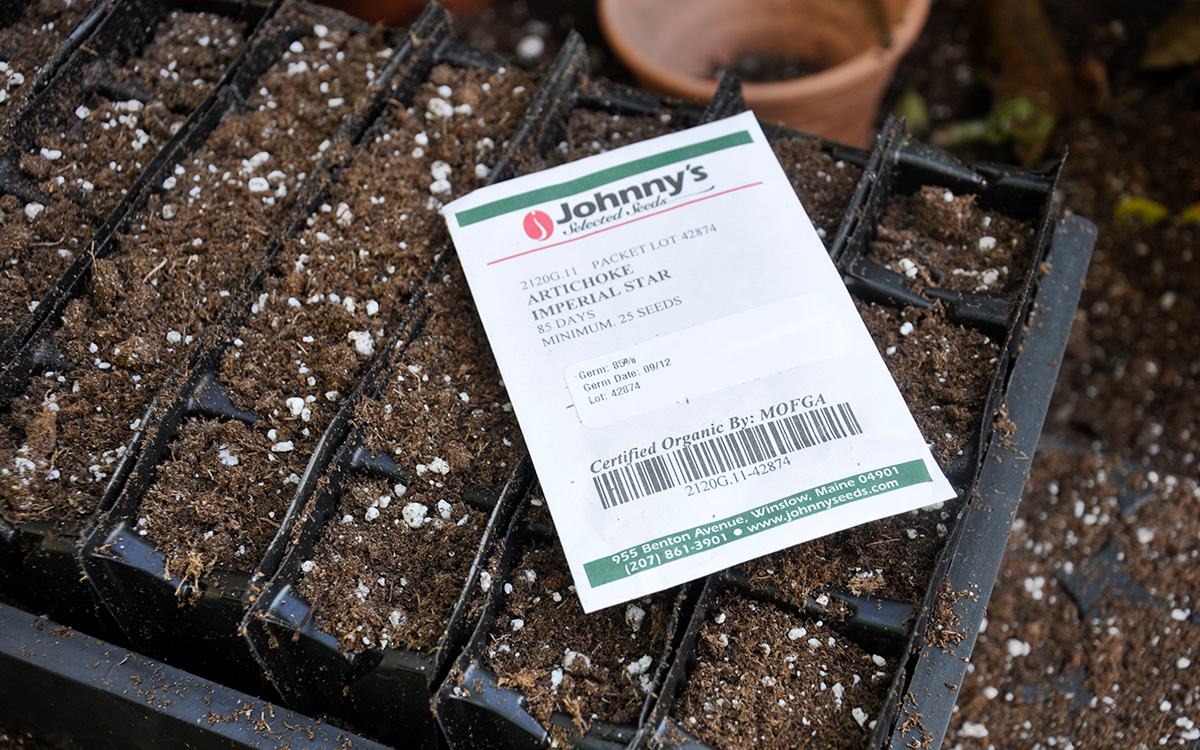
Variety matters here, as only a couple of varieties handle this “fake winter” thing well. They were bred for it. One of the best is ‘Imperial Star’, but ‘Colorado Star’, a red-tinted one, works just as well. Just look for a variety that states that it was specially developed for annual seed production.
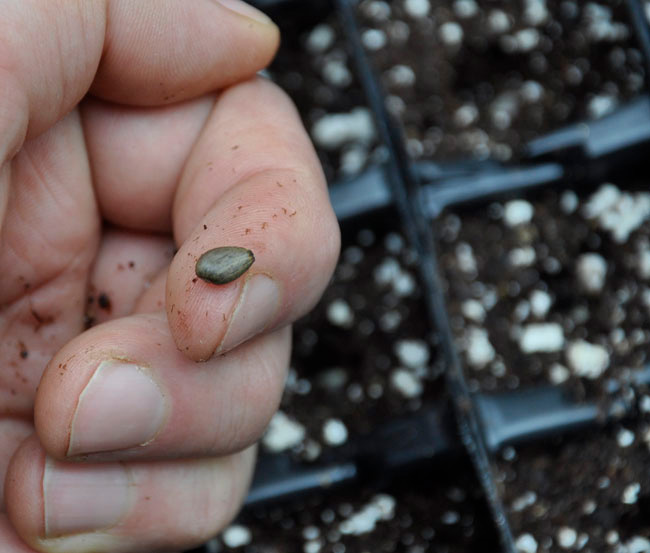
Step 2: Sow seed early
Artichokes need an early start; this means starting them in January or early February. Sow seeds ¼ inch deep in root trainer pots or into individual 4-inch pots to reduce any root disturbance. The deeper the pot, the better. This helps you avoid having roots encircling at the bottom of the pot. Keep seed trays warm (65°F) under grow lights or in a greenhouse.
Step 3: Know when to vernalize (that ‘fake winter’ thing)
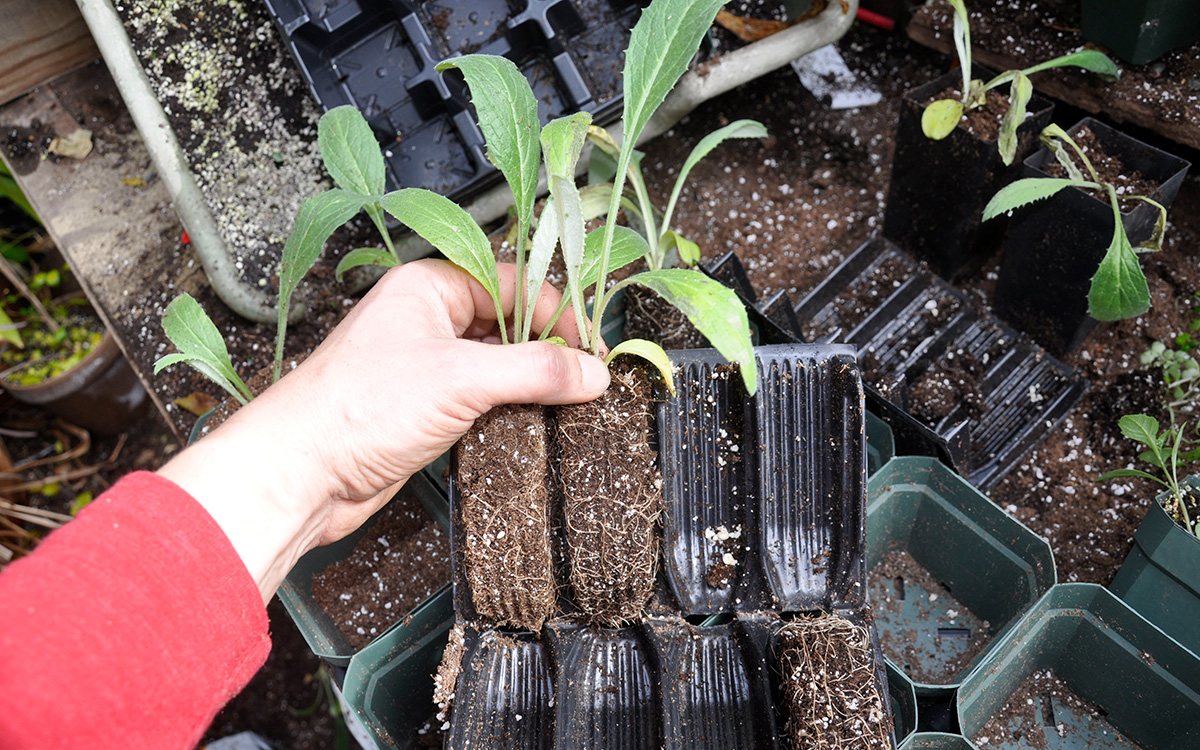
Your artichoke seedlings will need to grow under lights (or in a warm greenhouse) for at least 8 to 10 weeks, as you’ll want to give them enough time to form a few pairs of full-size leaves. This also will require a bit of weather forecasting, as you’ll need to identify a time to set them out—still in their pots—to vernalize at the beginning of spring. This is easy enough to do in most of the Northeast, as it’s usually still chilly even in April. Look at the forecast, and set plants out for at least 10 days when temperatures seem to be remaining just above freezing at night and below 55°F during the day. This typically happens around when the native maple trees (Acer spp. and cvs., Zones 2–10) are done blooming in late April and early May.
Why vernalize?
Think about it: Artichokes are naturally perennial plants from the Mediterranean. A Mediterranean winter is typically wet and cold but rarely dips below freezing. If you set them out in April, artichokes will be tricked into believing that they survived a very Mediterranean winter in just a week or two if temperatures are cool enough and if the seedlings are teenaged-size (meaning they should have about three pairs of prickly leaves for the vernalization to work). This is why you should start them early indoors in winter. This isn’t rocket science; it’s just plain science. You are stimulating these plants to enter into a reproductive stage, which means they will want to form flower buds (aka artichokes).

Step 5: Plant seedlings in the garden, and provide ongoing care
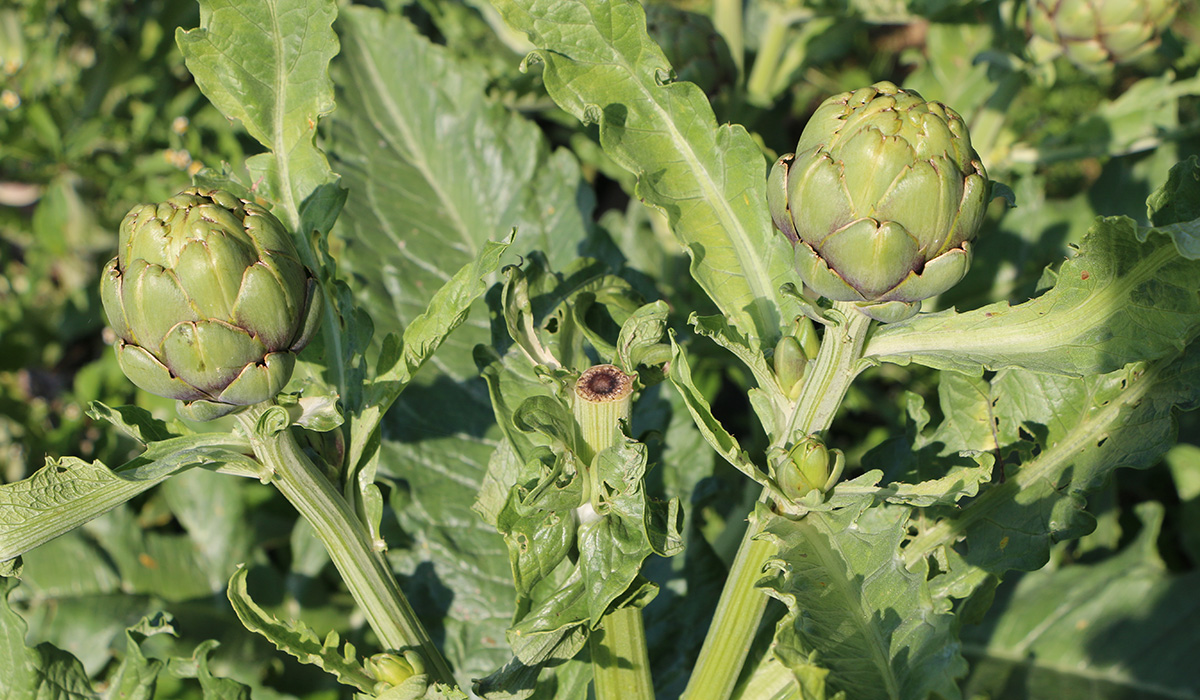
Once vernalized in those cool days of midspring, the young plants can be set out into their final growing space in the garden. Artichokes are heavy feeders; be sure to enrich the soil with plenty of manure, and position plants 3 to 4 feet apart (they grow very big). Pests are usually limited to aphids on or near the buds, which can be hosed off or, if you dare, squished with your fingers. Keep your artichokes well watered, and fertilize biweekly with a balanced fertilizer to keep plants growing. Flower stems should form quickly, usually by July. Keep an eye on the flower stalks and buds, harvesting the large buds before they start to open. (When thinking about when to harvest, imagine what an artichoke looks like at the market.) Don’t be afraid to include a good bit of flower stem when harvesting, cutting just below the first, tiny leaf, as it is just as tasty if peeled and steamed along with the artichoke itself. As a bonus, once the large artichokes are picked, allow side shoots to grow out, as they will provide a few extra crops of “baby chokes” throughout the summer.
Tip: Provide enough room
Artichokes consume a lot of room in the garden, and since each plant only provides about two or three artichokes, consider space when planting them out. An 8-foot by 10-foot bed can handle four plants, but a 20-foot row of plants will give you enough harvest to share and freeze.
For more tips on growing edible crops in the Northeast, check out:
- Growing Currants and Gooseberries in the Northeast
- Growing Fall Brassicas in the Northeast
- Summer Succession Planting of Veggies
And for more Northeast regional reports, click here.
—Matt Mattus is the author of two books: Mastering the Art of Flower Gardening and Mastering the Art of Vegetable Gardening. He gardens in Worcester, Massachusetts.


Comments
Log in or create an account to post a comment.
Sign up Log in