

Build Your Own Classic Compost Bin
This compost bin design features convenient removable sides and maximum air circulation

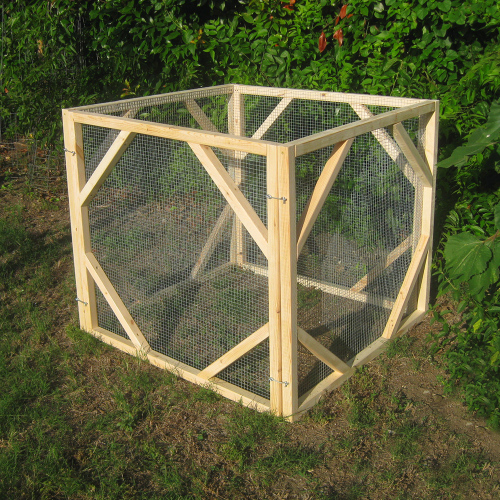
In my ever-evolving quest to improve my composting skills, I am always excited to try new things. In this case, it was a new compost bin design. To properly turn a pile, it may be more convenient or easier to remove the bin first, turn the pile, then put the material back into the bin. That’s where this design excels—the sides are held together by hook-and-eye latches, which make it very easy to take the sides apart. When you are done composting for the year (are your ever really done?), the sides can be conveniently stored. The other advantage is that it provides air circulation on almost 100% of its surfaces. This project will produce a compost bin one cubic yard in size, which is the minimum recommended size for efficient breakdown of organic material. More projects from Greg Holdsworth.
Things you’ll need
Lumber and supplies
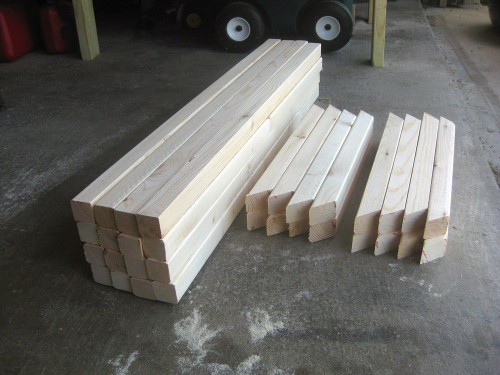
- 24 pieces of 2″ x 2″ x 36″ wood furring strips (I used eight 2″ x 2″ x 8′ pieces)
- 4 pieces of 36″ x 39″ hardware cloth, with 1/2″ squares (I had to get two 3′ x 10′ rolls)
- 60 – 3″ deck screws (a 1-pound box will give you more than enough)
- Box of galvanized metal staples (I used the Arrow 5/16″ size)
- 8 – 2 1/2″ gate hook-and-eye latches (they should include the matching screw eye piece)
- Masking tape (optional)
- Business card (optional)
Tools
- Saw (circular saw strongly recommended)
- Drill and drill bits
- Pencil and tape measure
- Square (metal or fast plastic type)
- Sandpaper or sanding block
- Hammer
- Awl, nail or other pointed-end tool
- Staple gun
- Tin snips or other wire cutters
- Pliers
Skill level
Intermediate
Construction
1. The 2″ x 2″ wood furring strips were available in 8-foot-long pieces, so I cut 24 pieces that were 36″ long.
2. As a result of STEP 1, you may have about eight 24″ pieces left over. This is good because you will need 16 pieces with 45-degree angled cut ends measuring 18″ long. Using the remaining 2″ x 2″ x 8′ wood furring strips, cut the remaining eight 18″-long pieces.
3. Cut a 45-degree angle on both ends of the 18″ long pieces.
You should now have 16 pieces total measuring 36″ long, and 16 pieces (corner braces) measuring 18″ long with 45-degree angled ends.
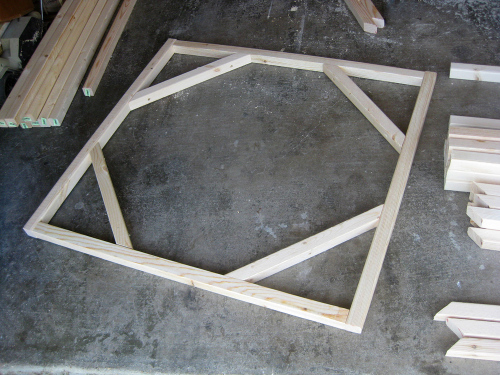
4. Build the first side panel by screwing four of the 36″ long pieces together at the ends. You will want to pre-drill the holes before setting the screws. Repeat this step to build the other three side panels.

5. Screw four corner braces to the side of the assembled panel.
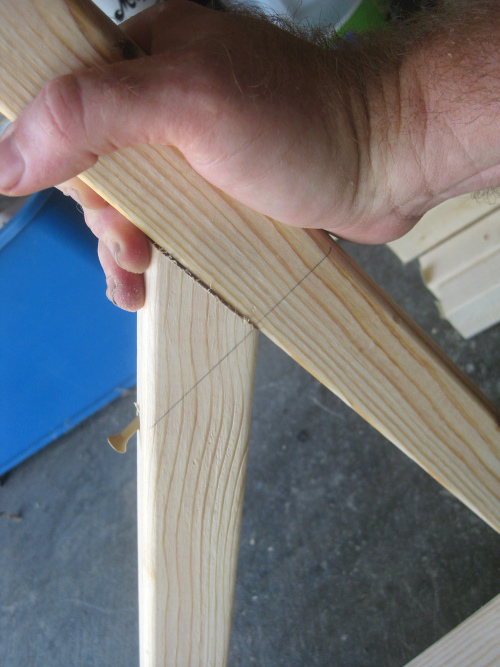
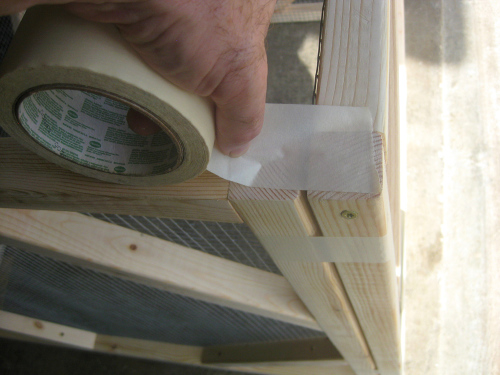
Tip: In order to get the proper angle of the screw, draw a line on the two pieces of wood to act as a guide when you are pre-drilling the holes (photo below). Repeat this step with the other three side panels.
6. Cut out four pieces of the 36″ hardware cloth. Staple the piece of hardware cloth to the wood side panel, making sure there isn’t any overlap. In other words, make sure the hardware cloth isn’t going past the outside edge of the side panel. Repeat this step for the other three side panels.
Tip: Sand down the side panel before stapling the hardware cloth to it. Also, staple each corner of the hardware cloth down first. This will keep the piece from moving while you put in the rest of the staples along the edges.
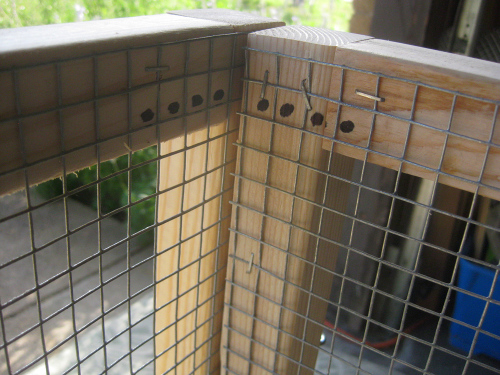
7. Put a pencil mark 6″ from the edge of the side panels, so that the hook-and-eye latches are spaced consistently.
8. Using the back of a business card as a template, mark two spots 2 1/4″ apart. This card can be used as a template to mark the two holes on the side panel, using an awl, nail, or other pointed object.

9. After pre-drilling the holes, screw in the hook-and-eye latches and corresponding screw eye pieces.

At this point, your compost bin is basically finished. You can take the side panels apart, take the bin to where it will be located, and finally, put the panels back together.

|
|
|


Comments
Log in or create an account to post a comment.
Sign up Log in