
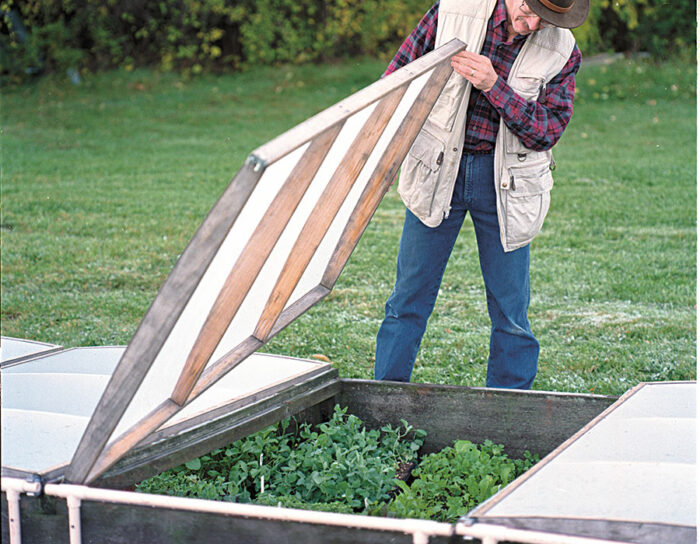
Cold frames are like time machines. They allow you to start planting weeks earlier in the spring and to extend the fall harvest past the hard freezes that would bring an end to crops in unprotected beds. When I designed these cold frame covers I had several goals in mind. They had to be lightweight, because I wanted to use automatic venting controls (I used a Univent) to protect the plants from overheating. They had to be economical and easy to build—the total cost (in 2000), including all hardware but not the Univent, was less than $25 per cover. The covers also had to be easy to remove and set aside for working in the beds. In this case I was building covers for an existing cold frame, but if you need a base, here’s a design that’s simple to make.
I built these frames out of ordinary 3/4-inch white pine, but cedar would serve as well. You don’t need to worry about decay because the wood dries out too quickly for rot to develop. Choose straight-grained boards with no more than a few small knots, if any. Large knots will weaken the frame and cause warping. The 3-foot by 6-foot frames I built are about the maximum practical size for a single cover. This size can be built from three 6-foot lengths of 3-1/2-inch-wide by 3/4-inch-thick lumber, called “one by four” (1×4) at the lumberyard.
A couple of tricks will streamline construction


The frames are covered with clear, 8-mil vinyl, available at hardware stores in 3-foot by 25-foot rolls. I use these covers from early spring through late fall and store them in the barn during the worst of the winter. If you want a cover that can withstand the weight of heavy snowfalls, use sturdier but more expensive fiberglass or polycarbonate sheets to cover your frames and add an extra arched crosspiece for support. The slight arch in the crosspieces isn’t just for aesthetics; it makes the frame and cover more rigid and prevents rain from pooling on the plastic. The vinyl won’t last forever, but with a little care it should last two or three years, at least. If, as is likely, you won’t be using the covers in midsummer, store them out of direct sunlight. It will prolong the life of the glazing.
There is no fancy joinery involved in building the frames. The crosspieces are oriented with the arched edge at the top, against the plastic. They butt up against the longer sides of the frame and are attached at each joint with a pair of 2-inch-long corrosion-resistant screws meant for building wooden decks.
Build the cover with ribs and battens
To build these covers you will need a tablesaw, a jigsaw, and basic hand tools, including a heavy-duty stapler. With a table saw, rip a 1⁄8-inch-thick piece off the better (knot-free) long edge of each 6-foot 1×4 to make thin strips called battens. These will reinforce the edge of the vinyl cover on the finished frame. Once you have cut the battens, take the now slightly narrower 6-foot lengths of 1×4 and cut four arched ribs with a jigsaw. A simple way to draw the curve is to bow one of the battens to the needed arch (which is 1-1⁄2 inches at the ends to 2-1⁄2 inches at the center) and then draw along its edge. With the arches completed, cut the side pieces to size (1-1⁄2 inches wide) from the remaining piece of 1×4. Once all the wood is cut, mark and drill the screw holes and assemble the frame. Drill holes that clear the screws in the side piece and drill smaller pilot holes in the crosspieces to ensure a tight fit when you attach the crosspieces to the frame.
If you are going to use a Univent opener, add a small wood block cut from a 2×4 to the inside of the frame for the bracket.
How to assemble a cold frame with a lightweight cover
If you need a cold frame base, the design included here is simple to make. Build the box out of 2×6 and 2×1 2 lumber, adding additional boards to the sides to make the box deeper if needed. The top boards are tapered to slant the cover for drainage and improved light gathering. Assemble the box with corrosion-resistant screws threaded into the square corner posts. Make the posts from the scrap left over from tapering the sides. The final detail is to add small moldings along the long edge to line up the cover when it is closed.

Cover materials list
This list will supply you with enough materials to make one 3-foot by 6-foot cover. You can adjust the materials for covers of different sizes if you are building one to fit an existing cold frame.
| 3 6-foot lengths 1×4 | 3/8-inch heavy-duty staples | PVC glue |
| 1 roll 3-foor x 25-foot clear vinyl (8 mil) | 2 spring clips | Optional: 1 Univent (automatic vent control unit) and a 6-inch piece of 2×4 |
| 2-inch corrosion-resistant screws | 10 feet 3/4-inch CPVC plastic pipe | |
| Masking tape | 2 CPVC T-fittings |
To get a smooth, wrinkle-free fit for the vinyl glazing, first attach it to the finished frame with short pieces of masking tape every foot or so all around the edges. Once you have adjusted the vinyl to a smooth, tight fit, staple all around the perimeter with 3⁄8-inch staples, spacing the staples about 3 inches apart. Staple the vinyl to the two end arches and the side pieces only, not to the center arches. The crown of staples holding the vinyl should run with the length of the frame pieces. Remove the tape.
Now cut two lengths of the batten to fit the long sides of the frame, put them in place, and staple through the battens and the vinyl into the frame itself. These staples should be crosswise to the battens so they miss the staples below, and should be spaced about 3 inches apart. Any staples that aren’t fully seated should be tapped flush with a hammer. Once the long battens are attached, cut and staple shorter battens onto the two arched end pieces, then trim away the excess vinyl with a sharp knife.
Hitching up the spring clip
The covers can be hinged on either their long or short edge. The hinges I designed are unconventional, but they work well. The heart of each hinge is a simple U-shaped spring clip intended for hanging brooms or mops on the wall. The clips are attached to the cold frame cover and snap over brackets made from easy-to-assemble plastic pipe. Removing and replacing the cover is simple; it snaps on and off with a gentle tug.

The spring clips should be attached to the corners of the cover with the same type of 2-inch-long screws you used to build the cover itself. If needed, adjust the tension of the spring clips with a pair of pliers for a good fit over the pipe brackets. The mounting brackets are made from 3⁄4-inch CPVC plastic pipe, which is used for home plumbing. The pipe cuts very easily with a hacksaw and is simply glued together with PVC pipe glue. To position the pipe bracket on the base portion of the cold frame, clip the glued-up bracket onto the cover and place the whole cover assembly in its proper position on the base. Attach the bracket to the base unit with screws through predrilled holes in the pipe.
Automatic venting controls free up your time
To control the temperature in the cold frames, I decided to attach Univents (made by Solar Vent Works; it can also be purched from Charley’s Greenhouse Supply) to the covers. Univents are odd-looking aluminum linkages powered by a temperature-sensitive cylinder that raises one end of the cover about a foot to prevent the frame from overheating. The covers need to be lightweight because the vents can lift only 15 pounds. The advantage of the automatic vents is twofold: they give you freedom to be away from the garden and, by constantly monitoring and controlling the temperature in the frame, they give your plants a stable environment for their best growth. There is a quick-release catch that detaches the Univent for easy removal of the entire cold frame cover. Univents cost around $40 apiece and are well worth the investment. If you have one large cold frame with several covers, you can economize by installing a Univent on every other cover.

The only remaining task is to attach the Univent to the cover, a simple job that is explained well in the instructions included with the control. Be aware that the Univent responds slowly to temperature changes, so be patient before you decide if it is adjusted properly. Then plant some seeds and enjoy your new longer growing season.
SourcesThe following mail-order catalogs carry Univent automatic vent control units.
Charley’s Greenhouse Supply 17979 State Rt. 536 Mount Vernon, WA 98273 800/322-4707
Gardener’s Supply Company 128 lntervale Rd., Burlington, VT 0540 1 800/863-1 700 |
—John White is a woodworker, Jurniture designer, and gardener in Newtown, Connecticut.
Photos except where noted: Marc Vassallo.
October 2000
From Kitchen Gardener #29


Comments
Log in or create an account to post a comment.
Sign up Log in