
Five Simple Steps to Dried Flowers
I was always a gardener. My mother and grandmother were, too, so I think it’s in my genes. I gardened all through my husband’s career in the military. We moved frequently, but at each new post, I dug beds and filled them with my favorite plants, only to have to move again in a couple years. Maybe that’s how I grew to love drying flowers and using them in long-lasting arrangements. Dried, my favorite flowers lived on and on.
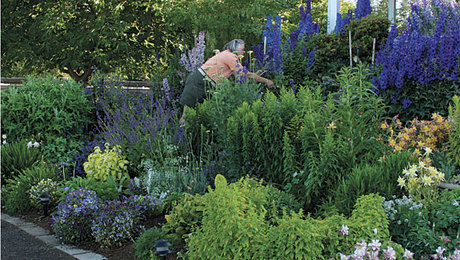
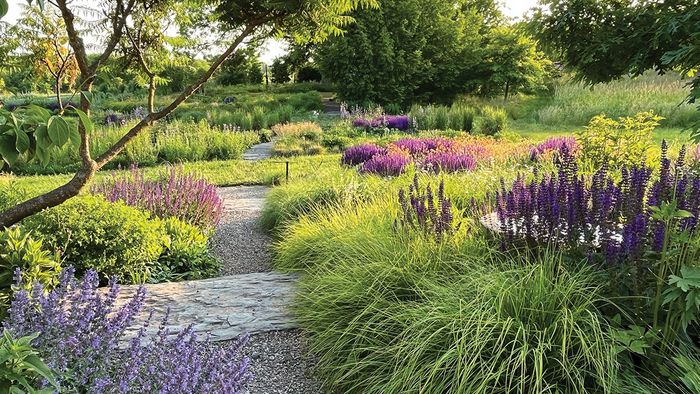
When my husband retired, I was finally able to establish permanent gardens. I was careful to plant them with specimens that wouldn’t look bedraggled after I clipped flowers and foliage for drying and arranging. One thing that helps is having so many trees and shrubs, especially all the neatly clipped mounds of boxwood. It gives the garden a strong sense of structure, with or without the flowers.
I like the heirlooms the Garden Club of Virginia uses in its historic garden preservation projects, so naturally there are lots of plants that are traditional, like boxwood, lilacs, peonies, and delphiniums, in my garden. But I also get excited about things that are new. I have plants to carry me all through the season, from hellebores to dahlias, and most are so productive that a few cut flowers are hardly missed.
I also grow old, traditional roses and like them as plants, but discovered the flowers don’t have enough substance to dry well. So I’ve planted some hybrid tea roses for drying, even though I don’t like the plants as much.
Limit your harvest of flowers to a few at a time
I keep my garden from looking threadbare by cutting lightly. I take lots of flowers from my garden—I used to take them by the thousands every season—but I do it slowly over a long period of time. Its amazing how much you can cut from one plant as it grows, provided you keep cutting a little at a time, rather than all at once.
There are lots of plants that actually benefit from frequent, light cutting. For most annuals, picking blossoms for drying is the same as if you’re constantly deadheading them—the plants respond by producing more and more blooms in an effort to set seed. Some perennials act the same way. Any perennial that benefits from deadheading will thrive if its flowers are lightly and regularly cut for arrangements. The tea roses, for example, love to be cut.
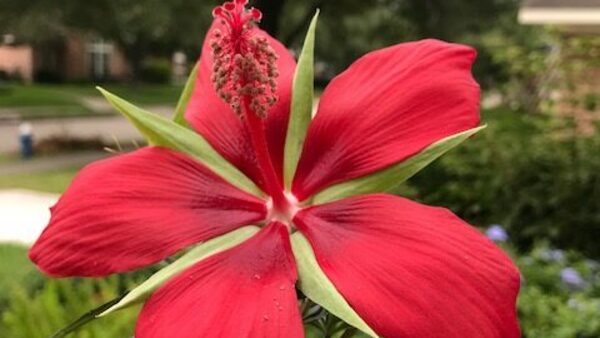
Fortunately it’s not that hard to limit the cutting I do on any given day. After all, I want only perfect specimens for drying. I also cut and dry lots of foliage to use in arrangements—I find it brings a sense of fullness to a composition, as long as the leafy sprigs are flawless. I select flowers that look crisp but not stiff, and choose only flowers whose petals have good texture and substance. I check the stamens for pollen, and if the pollen is still gathered tightly, I know the flower is prime for picking. I cut lilies, for example, the first day they open—that’s the only way I don’t spill their pollen everywhere.
Pick flowers at their freshest
The key to good dried flowers is starting with perfect specimens that are free of flaws from disease, insects, or drought. It’s also important to pick flowers at their freshest. For a good-looking dried flower, there’s no such thing as one that’s too fresh. Everybody knows younger is better. Since flowers usually look best in the morning, that’s often when I go out to cut.
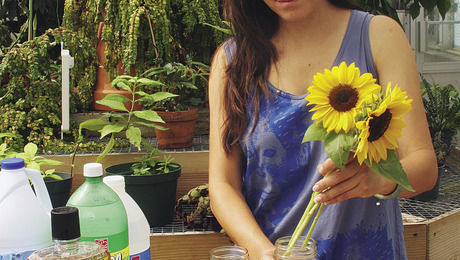
I take a basket filled with containers of warm water, and immediately place the stems of cut flowers into the water. With the stems submerged, the tissues of the flowers slowly fill with water, and the blossoms take optimal form.
When I’m through in the garden, I take the flower-filled containers to my work area and let them stand for several hours or overnight. For the best drying results, the flowers’ surface must be dry, without even a trace of dew or rain.
Since roses tend to fall apart during the drying process, I secure the petals at the base with a touch of watered-down glue and keep the rose stems in water until the glue is dry.
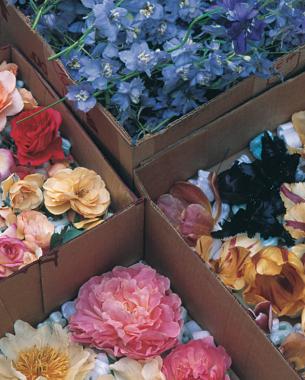
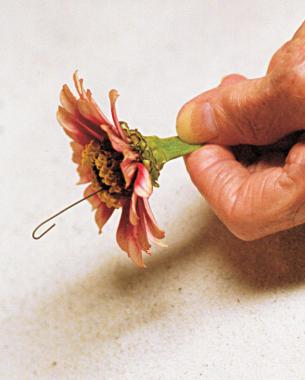
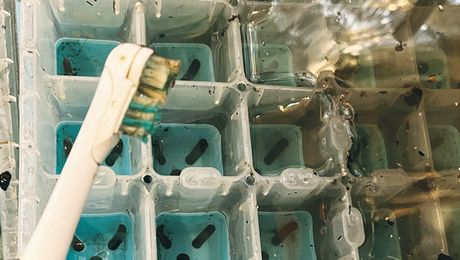
After I’ve gathered all the flowers I plan to dry, I collect my other materials: a few sturdy cardboard boxes, florist’s wire, clippers, and washed, screened sand in the smallest particle size available. I use a packaged children’s play sand called Snow White. Similar products can be found at home centers or building supply stores. The cardboard boxes will be filled with the flowers and sand, so even a small box will be quite heavy by the time I’m finished, hence the need for sturdy boxes. The stems of some flowers, like zinnias and black-eyed Susans, collapse during the drying process, so I reinforce them with a length of florist wire.
I use several methods to dry the flowers and foliage I use in arrangements. Some blooms, like goldenrod, can just be hung to air dry. Very delicate flowers, like most roses, double peonies, and tulips, dry best in silica gel. But my favorite method is drying flowers in sand. Foliage and flowers dried in sand never look dehydrated. Because the sand preserves and supports the form of the flower until it dries, a finished flower has so much substance it looks alive. Drying flowers in sand also allows you to get a rich range of colors. Fast drying in a warm, dry room produces bright colors, while slower drying in a cooler room results in more muted tones. And unlike silica gel, sand leaves little unsightly residue on the blossoms.
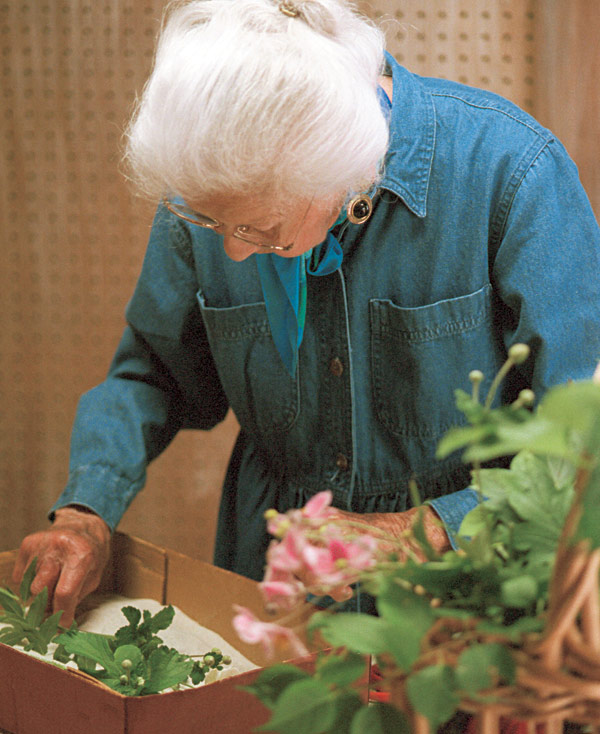
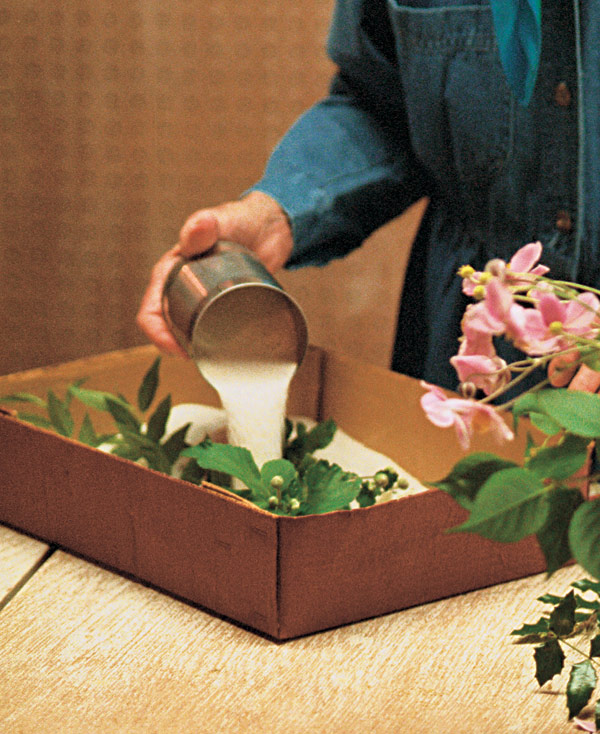
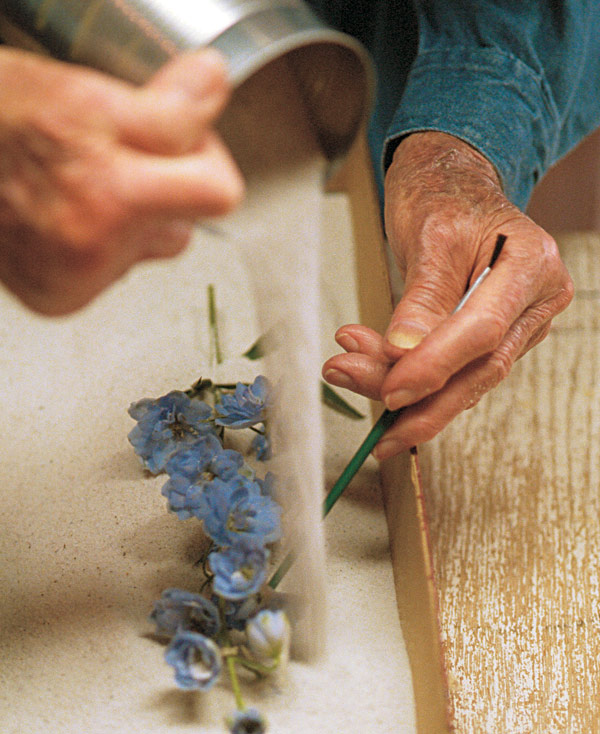
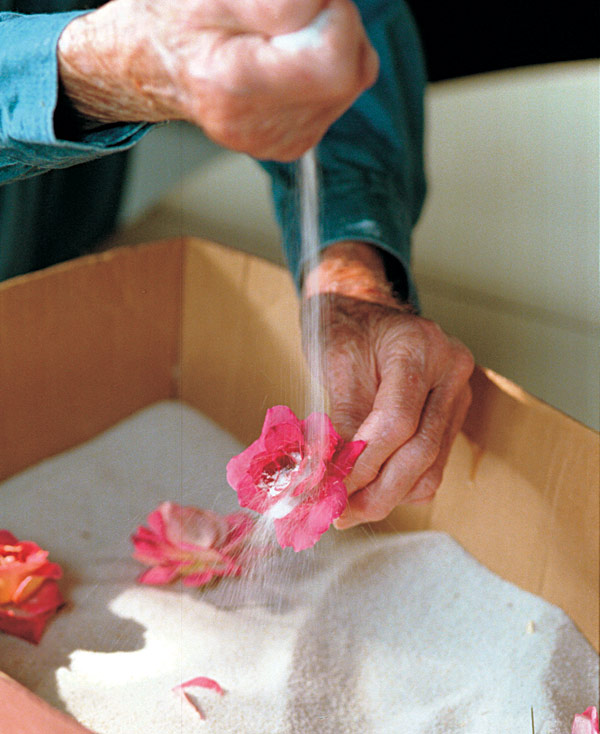
To dry the flowers, I begin by pouring a half-inch layer of sand in the bottom of a box. Then I gently place a flower down on top of the sand. Flowers should be placed face up, face down, or on their side, depending on the type. I position them so they are at least an inch away from each other and from the sides of the box. Foliage can be laid down horizontally. Then, using a soup can and working very slowly, I pour the sand so that it gently flows around, under, and then over each part of the flower until it’s completely covered. I never pour sand directly onto the flower, and I keep my pouring hand moving so pressure builds up evenly around the flower, without distorting its natural shape. I sometimes find it helpful to use a slim tool, like the handle end of an artist’s paintbrush, to gently support the flower petals as I pour the sand. Once the flower is buried, it’s ready to dry. Though I usually don’t add additional layers of flowers and sand to a single box, I sometimes dry several layers of foliage in a single box.
Store the flowers in a warm, dry place
I always date the boxes of flowers before storing them to dry. That way I won’t accidentally open a box I had put away just the day before. I handle full boxes very carefully because shifting sand can damage the flowers.
I’ve found the best place for drying flowers and foliage in sand-filled boxes is in a warm room where humidity does not exceed 60 percent. Good results aren’t possible in a cool or damp area like a basement. Attics are ideal, at least from mid-spring through late summer, because the high temperatures help the flowers dry quickly, ensuring brighter colors. I let the flowers dry for one to three weeks, depending on their size and the substance of their petals. Two weeks is usually enough, but you don’t have to be too precise about timing.
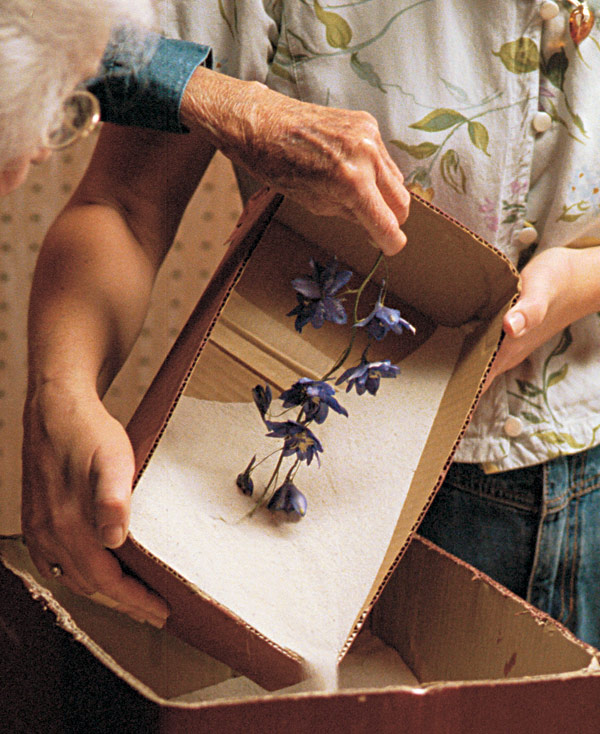
When the dried flowers are ready to be uncovered, I’m careful to avoid abrupt movements that could break or damage them. I tip the box to allow the sand to flow slowly out of one corner and into another storage box. The sand can be used again and again. As the flowers are slowly uncovered, I lift them gently, moving them only in the direction the sand is flowing, to prevent breakage. It’s nice to have a helper during this stage of the process.
Sometimes velvety flowers like delphiniums may need a final cosmetic touch-up, so I “sandblast” them. Holding a dried flower over a box, I grab a handful of sand, and let a light stream of it drizzle over the flower from a height of 12 to 15 inches. As the sand rains down, I turn the flower to expose all its surfaces. As the grains strike and bounce off the flower, they remove any hint of sand left over from the drying process. The result is a perfect, lifelike flower. But it’s also a fragile one, so I store and handle it carefully.
To keep dried flowers looking their best for a long time, I store them in a dry area and display them only during the winter months, when the low humidity typical of a heated home helps them last and last.
Flowers and foliage that dry best
The following are some of the author’s favorites. She advises to cut early in the morning and keep stems in a vase of water for several hours before drying. Some flower stems collapse during the drying process; use florist wire to reinforce them.*
Annuals and perennials
Artemisias (Artemisia spp.), horizontal
Astilbes (Astilbe cvs.), horizontal
Black-eyed Susan (Rudbeckia hirta)*, facedown
Butterfly weed (Asclepias tuberosa), facedown, horizontal
Columbines (Aquilegia spp.), faceup
Cushion spurge (Euphorbia polychroma), facedown
Dahlias (Dahlia cvs.)*, faceup
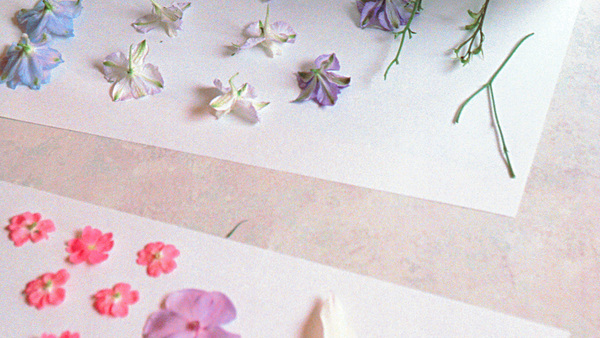
Delphiniums (individual Delphinium cvs. flowers), faceup
Delphiniums (Delphinium cvs. flower spikes), horizontal
Floss flowers (Ageratum houstonianum cvs.), faceup, facedown
Gooseneck loosestrife (Lysimachia clethroides), horizontal
Hellebores (individual Helleborus spp. flowers), faceup
Hellebores (Helleborus spp. flower clusters), horizontal
Hollyhock (Alcea rosea), faceup
Japanese anemone (Anemone × hybrida), faceup
Johnny jump-up (Viola tricolor), faceup
Larkspur (Consolida ajacis), horizontal
Lily-of-the-valley (Convallaria majalis), horizontal
Maidenhair fern (Adiantum pedatum), facedown
Marigolds (Tagetes cvs.), faceup
Michaelmas daisy (Aster novi-belgii), facedown
Penstemons (Penstemon spp.), horizontal
Peonies (Paeonia cvs.)*, faceup
Poppy anemone (Anemone coronaria)*, faceup
Queen Anne’s lace (Daucus carota), facedown
Roses (Rosa cvs.)* , faceup
Shasta daisy (Leucanthemum × suberbum)*, facedown
Snapdragon (Antirrhinum majus), horizontal
Stock (Matthiola incana), horizontal
Sunflower (Helianthus annuus)*, faceup
Vervains (Verbena spp. and cvs.), faceup
Yarrows (Achillea spp. and cvs.), horizontal
Zinnias (Zinnia spp. and cvs.)*, faceup, facedown
Trees, shrubs, and vines
Camellias (Camellia japonica cvs.) , faceup
Cranberry bush (Viburnum opulus), facedown
Deutzia (Deutzia gracilis), horizontal
Dogwood (Cornus florida), faceup
English ivy (Hedera helix), horizontal
Grapevines (Vitis spp.), horizontal
Honeysuckles (Lonicera spp.), horizontal
Lilacs (Syringa spp. and cvs.), horizontal
Mock orange (Philadelphus coronarius), horizontal
Mophead hydrangea (Hydrangea macrophylla), faceup
Oakleaf hydrangea (Hydrangea quercifolia), horizontal


Comments
Exactly where do you buy your sand and what is the product name - the silica gel can add up in cost when drying many flowers
Is that silica sand? Thanks in advance 🙂
Log in or create an account to post a comment.
Sign up Log in