

Designer Secrets for Over-the-Top Pots
Learn the dos and don’ts of creating jaw-dropping containers

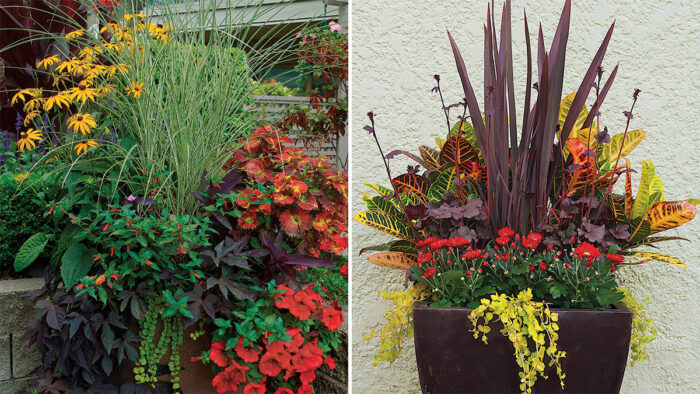
As a professional container designer, I have a few customers who want the biggest and best containers on the block. They like the attention, and they love to report that people stop to gawk and sometimes take pictures. So there is considerable pressure on me to push these containers over the top.
Through the years, I’ve come up with a few strategies to do just that. With these basics under your belt, you’ll be able to design your own big, bold, show-stopping containers with dazzling combos of lush leaves and bewildering flowers.
Choose your container wisely
A big, explosive display requires a large container. It must have enough volume to accommodate the roots of the plants’ ultimate sizes. A stunning combination can be sustained within a smaller container, but it requires constant monitoring to ensure that the container is getting enough water, fertilizer, and pruning. Without the greenest of thumbs, a pot that’s too small will almost always disappoint. At minimum, the container should accommodate a soil volume of at least half the size of the eventual volume of plants. This is important visually as well.
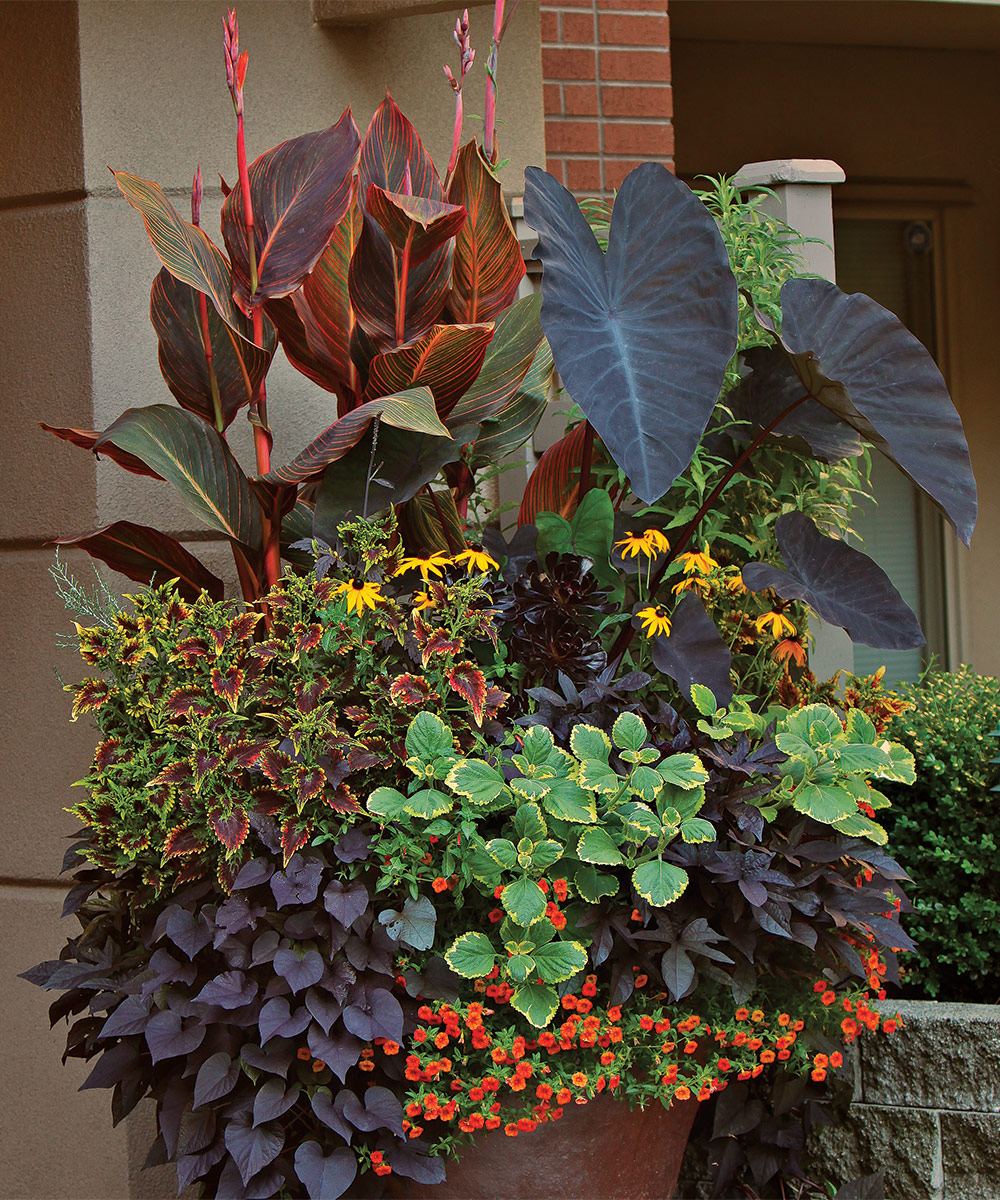
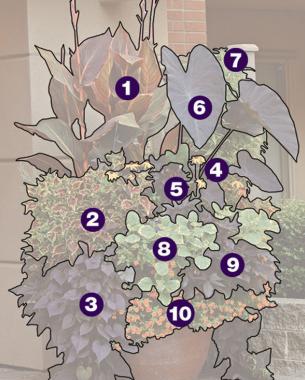
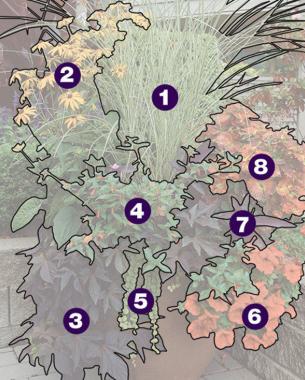
- Tropicanna® canna (Canna inidca ‘Phasion’, USDA Hardiness Zones 8–11)
- ‘Slyfire’ coleus (Solenostemon scutellarioides ‘Skyfire’, Zone 11)
- ‘Sweetheart Purple’ sweet potato vine (Ipomoea batatas ‘Sweetheart Purple’, Zone 11)
- ‘Goldsturm’ black-eyed Susan (Rudbeckia fulgida var. sullivantii ‘Goldsturm’, Zones 4–9)
- ‘Zwartkop’ aeonium (Aeonium ‘Zwartkop’, Zones 9–11)
- ‘Black Magic’ elephant’s ear (Colocasia esculenta ‘Black Magic’, Zones 8–11)
- Lion’s ear (Leonotis leonurus, Zones 10–11)
- ‘Green on Green’ plectranthus (Plectranthus forsteri ‘Green on Green’, annual)
- Callie® Orange calibrachoa (Calibrachoa ‘Callie Orange’, annual)
Use the rule of thirds
I almost always use the rule of thirds when designing containers. The rule is based on an aesthetically pleasing compositional proportion used in painting, photography, and design. The rule can be used in one of two ways, each one opposite from the other. Starting with the container, visualize the overall look of the planting you desire according to the eventual size of your plants. The container must take up either one-third or two-thirds of the eventual total height of the container and the plants together. And the plants must take up the remaining two-thirds or one-third, respectively, of the planting. If, for example, your pot is 2 feet tall, your plants’ eventual height can either be 1 foot tall (which would have your planter being two-thirds of the overall height of 3 feet) or 4 feet tall (which would have your container being one-third of the overall height of 6 feet).
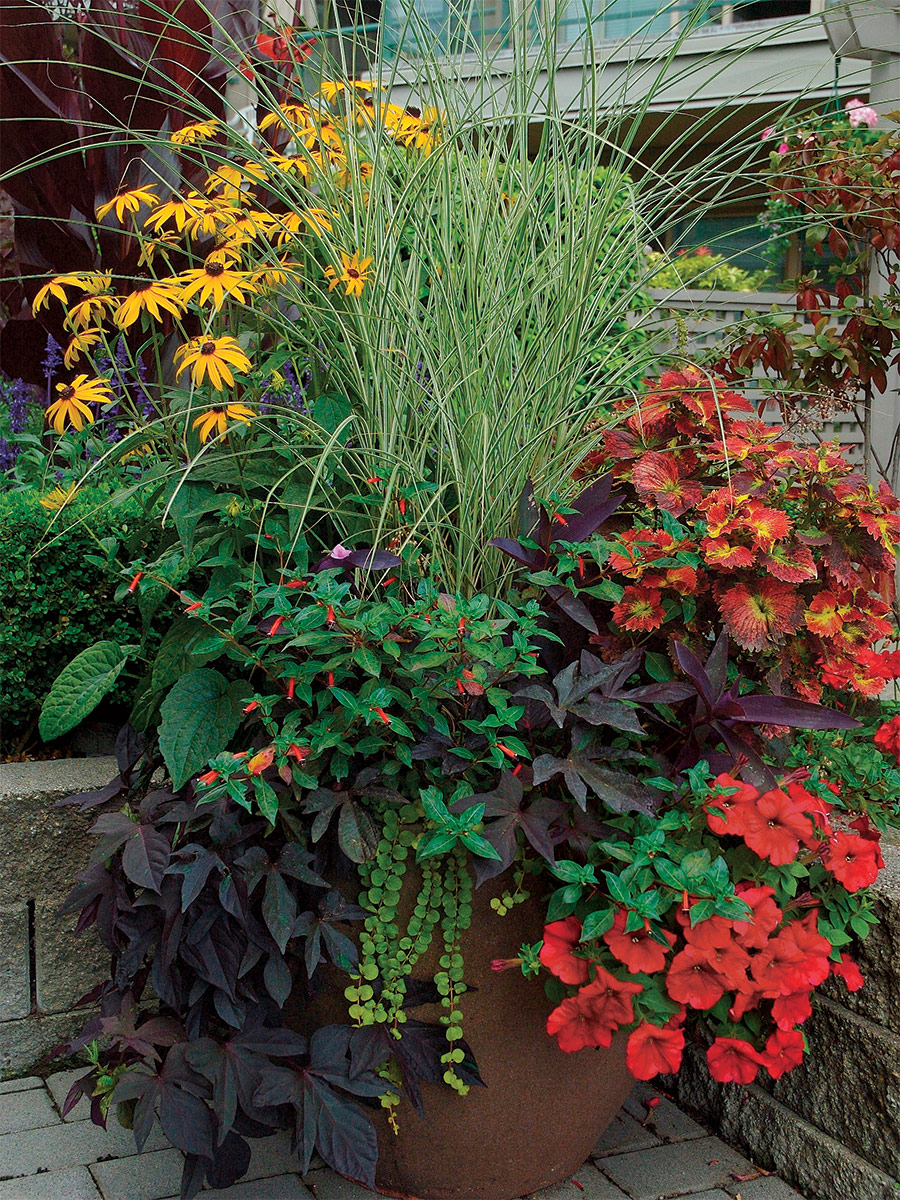
- ‘Morning Light’ miscanthus (Miscanthus sinensis ‘Morning Light’, Zones 4–9)
- ‘Goldsturm’ black-eyed Susan (Rudbeckia fulgida var. sullivantii ‘Goldsturm’, Zones 4–9)
- ‘Blackie’ sweet potato vine (Ipomoea batatas ‘Blackie’, Zone 11)
- Cigar flower (Cuphea ignea, Zones 10–11)
- Golden creeping Jenny (Lysimachia nummularia ‘Aurea’, Zones 4–8)
- Madness™ Red petunia (Petunia Madness™ Red, annual)
- Purple heart (Tradescantia pallida ‘Purpurea’, Zones 8–11)
- ‘Tilt a Whirl’ coleus (Solenostemon scutellaroides ‘Tilt a Whirl’, Zone 11)
Pile in the plants
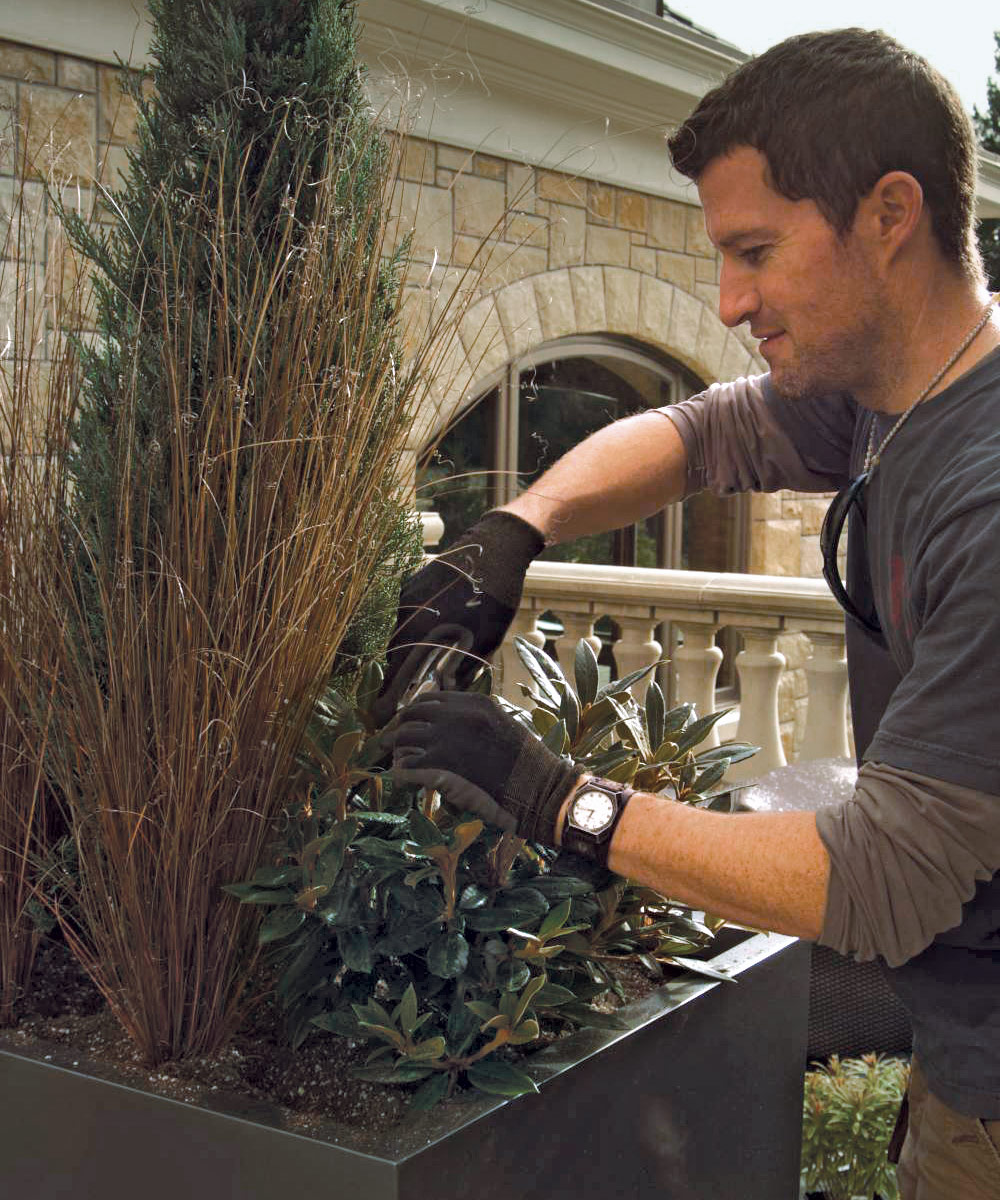
I like to cram lots of different plants into one container for a lush, abundant look. I occasionally have to yank out some poor performers throughout the season, and it’s nice to have lots of other favorites in the mix to keep the show going. But there is such a thing as too many plants.
Rather than filling the entire surface of the soil with plants when potting up your container, leave a couple of inches between each plant. This will give the plants a better chance of getting off to a good start. Adding new plants to a container later in the season doesn’t seem to work for me. The soil surface is usually full of roots, which makes it difficult for new additions to establish themselves.
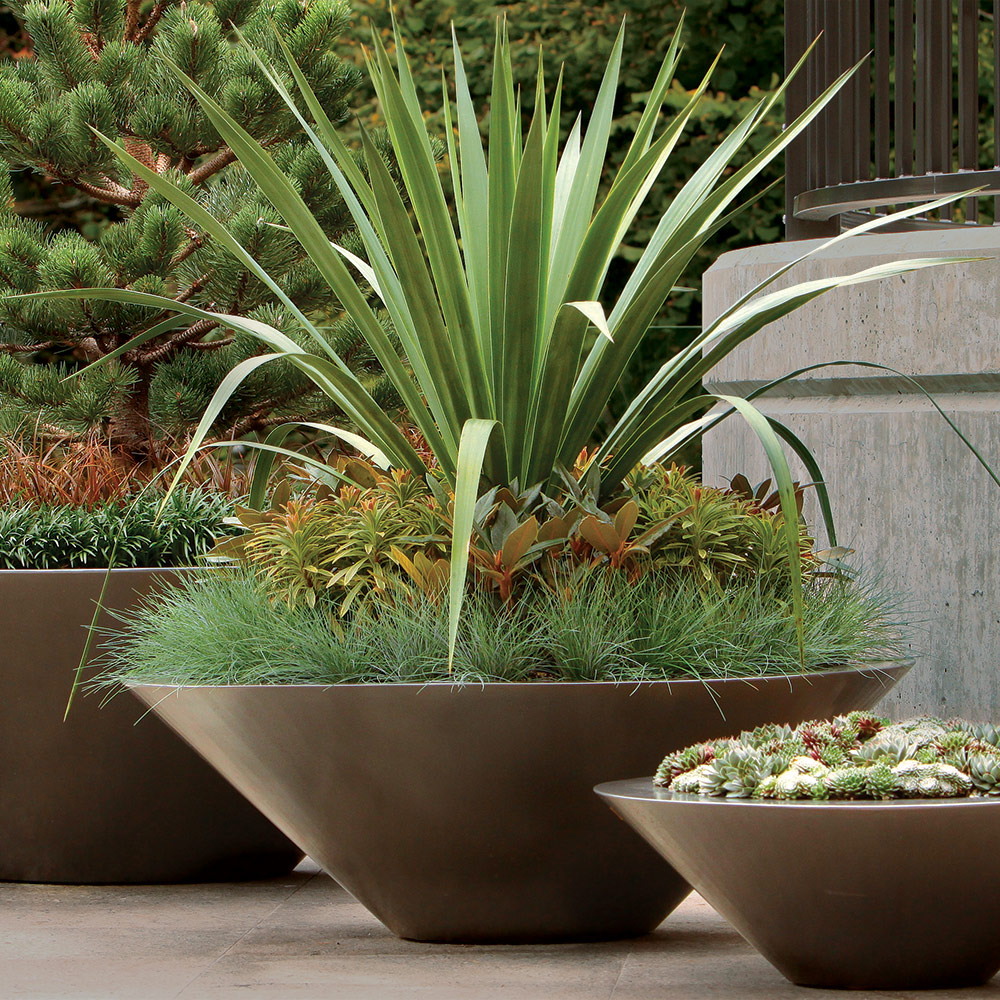
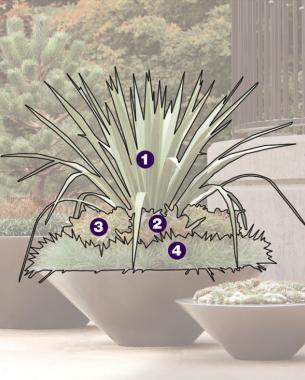
- Weeping yucca (Yucca recurvifolia, Zones 7–9)
- ‘Hansel’ rhododendron (Rhododendron ‘Hansel’, Zones 5–9)
- ‘Ascot Rainbow’ euphorbia (Euphorbia × martinii ‘Ascot Rainbow’, Zones 7–10)
- Dwarf blue fescue (Festuca glauca cv., Zones 4–8)
Don’t skimp on the water
A pot stuffed with lots of plants requires lots of attention. Water is often the biggest issue later in the season, once the plants become larger and more mature. A container that fully dries out one or more times during the season can take weeks to recover and, in many cases, may never reach its full potential. More important than the frequency of watering is how deeply you water. One way to ensure that you are watering thoroughly is to keep watering until water begins to drain freely out of the bottom of the container. If the soil in a container is extremely dry, however, water has a tendency to run off the surface of the soil and down the inside surface of the pot. In this case, water may be draining out of the pot, but the soil isn’t truly getting wet, and you’ll need to take special care to wet the soil thoroughly. Keep in mind that freshly planted containers use far less water than containers in the peak of summer. So adjust your watering habits to compensate for increased heat and plant sizes.

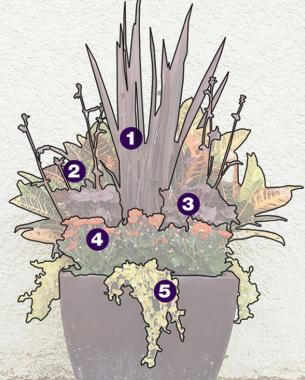
- ‘Dusky Chief’ phormium (Phormium ‘Dusky Chief’, Zones 8–11)
- Croton (Codiaeum cv. Zone 11)
- ‘Obsidian’ heuchera (Heuchera ‘Obsidian’, Zones 5–8)
- ‘Rage’ chrysanthemum (Chrysanthemum ‘Rage’, annual)
- Golden creeping Jenny (Lysimachia nummularia ‘Aurea’, Zones 4–8)
Achieving show-stopping containers is impossible using water alone. Fertilizing is every bit as important as watering, especially in the limited root space of a container. Once the fertilizer has been used up, the roots have nowhere else to get it, unlike garden-dwelling plants. The most foolproof method of fertilizing is to use a slow-release granular fertilizer. Make sure to read the instructions on the package to avoid using too much. If the plants need a boost during the season, you can apply an appropriate liquid fertilizer. It’s often necessary to add a few applications of liquid fertilizer, especially in tightly planted containers. You only have the one season to get everything you can get out of your planters, so make it count!
How to pot up a lush container
1. Cover the drainage holes with a mesh screen to prevent them from clogging and to keep soil from washing through onto your patio or deck.
2. Fill the pot with soil up to a few inches from the top using a top-quality, all-purpose potting mix. This will leave room for the bulk of your plants’ existing root balls and soil. Add more soil if your plants are in small nursery pots.
3. Add slow-release fertilizer to the top of the soil. Using your fingers or a trowel, thoroughly and evenly work the fertilizer into the soil to a depth of 6 to 8 inches. Pack the soil and fertilizer mixture gently into the container with your hands, making sure there are no voids.
4. Plant large plants first, adding smaller plants as you move out toward the edges of the pot. Fill in with soil as you go, making sure not to cover the tops of the roots with more than half an inch of soil.
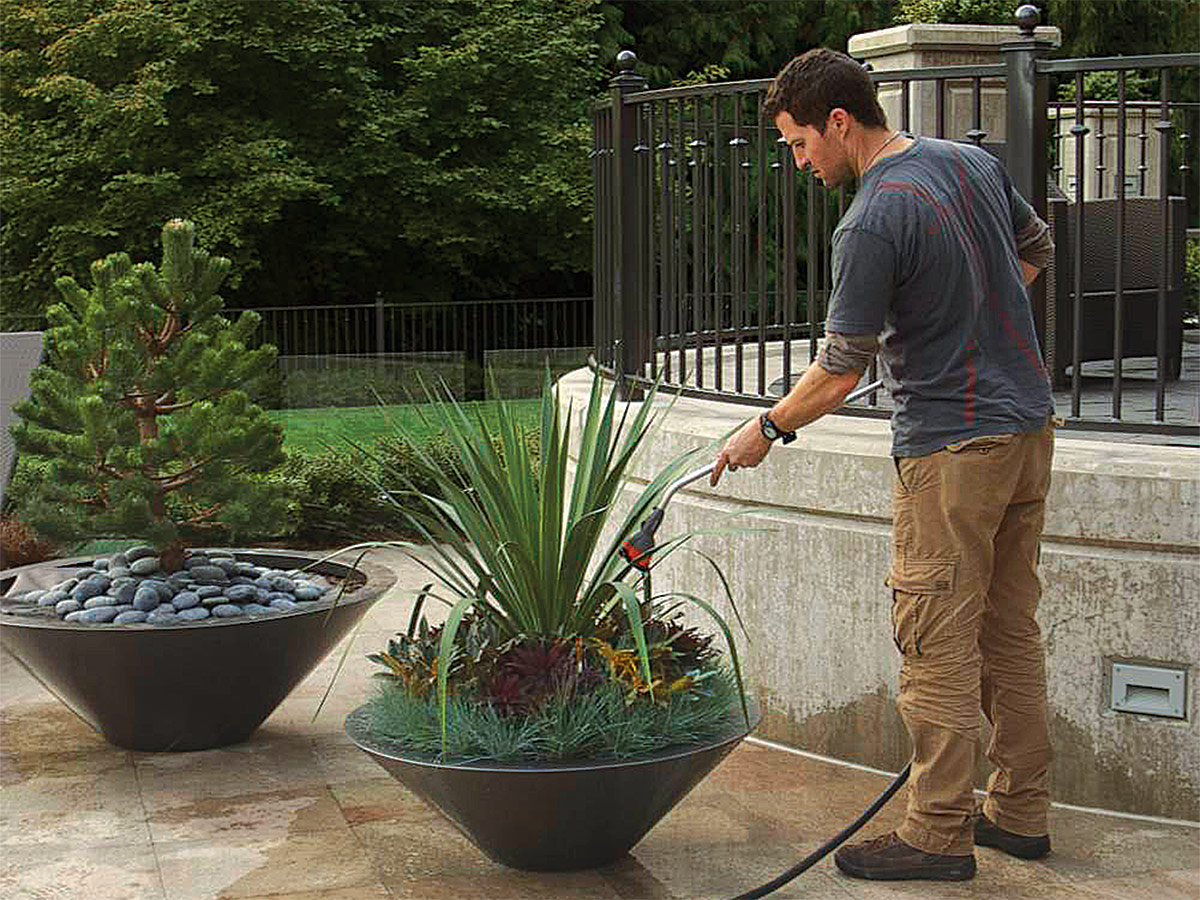
5. Water the container slowly, with your sprayer set to a gentle shower, for up to 10 minutes to allow the new soil to absorb the water properly. You can stop watering when the water is flowing freely out of the container’s drainage holes.
Todd Holloway is a container designer in Vancouver, British Columbia, and owner of Pot, Inc.
Photos, except where noted: Todd Holloway


Comments
Thank you for this excellent tutorial but, especially, for identify the plants in each pot. I often see pots of plants and flowers that I love but don't know the names. You have taken your article one step further and made your tutorial doable by identifying the plants. Thanks so much again.
Amen, Vickie. Great article!
inspiring to add more height!
This is an excellent article with wonderful details. And BIG thanks for naming the plants in your pots! <3
Wow! Very Nice!
Very nice!
Log in or create an account to post a comment.
Sign up Log in