

The Secrets to Growing Great Winter Squash
Winter squashes are incredibly flavorful, and growing them is a joy

There’s nothing more American than apple pie. Or is there? Winter squashes belong to the fall season—and to us—in a way that apples (a transplant from Eurasia) never will. Native Americans domesticated squashes from indigenous varieties hundreds of years ago, so this vegetable is built to thrive here. Besides that, who can imagine Thanksgiving without pumpkin pie?
There’s more to the world of winter squash, though, than farm-stand pumpkins. Hundreds of varieties exist, but you’ll rarely see most of them at your local grocery store. They include everything from garden behemoths, like ‘Gill’s Blue Hubbard’, to the bump-rinded ‘Marina di Chioggia’. Best of all, winter squashes are incredibly flavorful, the best ones tasting like chestnuts or sweet potatoes. Growing winter squash is a joy and is fairly easy if a couple of basic rules are followed.
Increase yields with proper spacing
I can’t guarantee you a bumper crop, but if you give your winter squash the right conditions and care, your success rate will skyrocket. One of the biggest mistakes gardeners make is to direct-sow or transplant seedlings before the soil has warmed to at least 70°F. Squashes do not tolerate cold temperatures. In short-season areas, start seeds inside three weeks before the frost-free date in spring—but no earlier because older transplants will produce poorly. A garden situated in full sun with warm, well-drained, fertile soil that’s slightly acidic (pH of 6.0 to 6.8) is the ideal spot for squashes. Using compost and soil amendments usually eliminates the need for synthetic fertilizers, which are high in nitrogen or phosphorus and can actually lower fruit quality and yield.
You’ll need to space plants far enough apart in the row to give them ample room to flourish. When plants are crowded, fruit yield, size, and quality are reduced (and fungal diseases, like powdery mildew, can fester). Most winter squashes are excessively vigorous growers, with vines that spread out for many feet (unless trellised up); the larger-fruited varieties, like big pumpkins, take up even more space. To reduce competition between plants, I like to space most plants 10 to 12 feet apart.
The lengths of squash branches, however, can vary. So if you don’t have a lot of space, try a variety that has shorter vines. Semibush types have shorter internodes (the stem space between each leaf) and branches. These types may also set fruit on vines later in the season. I find about 8 feet of space between these varieties is adequate. Bush varieties—compact plants with the shortest internodes—don’t spread much, which allows closer row spacing of about 6 feet. These varieties also lack tendrils for climbing, so they can’t be trellised. ‘Gold Nugget’ is an excellent squash that grows on short-running vines.
How to preserve the harvest

A winter squash is ready to harvest when it resists being punctured by a thumbnail. Cut the fruit from the vine, and move it to a well-ventilated place out of direct sunlight. Clean the squash in a 10 percent chlorine-bleach solution to reduce the chances of mold ruining the fruit. Handle with care, and avoid damaging the stem—because if it breaks off, disease can move in and cause spoilage. After curing for two to three weeks, store your winter squash at 50°F to 60°F with a relative humidity of 50 to 70 percent (dry basements work well) until you are ready to use them.
Plastic mulch and insect protection enhance the harvest
|
|
|
|


Squashes can be planted in hills or drills. Hills are mounds of soil into which groupings of plants are elevated above the garden surface to improve soil drainage. Drills are trenches where plants are placed, one at a time down the row, spaced evenly. I use the hill method, allowing two plants per hill for added insurance just in case one of the seedlings dies off. If they are both still thriving after a couple of weeks, I pull out one of the two, leaving behind the strongest seedling.
Black plastic mulch always carpets my winter-squash patch. I also cover newly planted seedlings with floating row covers for a few weeks. These methods ramp up the heat, protect against soil-borne diseases and insect predators, and produce earlier and more abundant harvests. Plastic mulch also conserves soil moisture and reduces the watering requirements—in midseason, squashes may require up to 2 inches of water weekly. As the plants grow, prune off any defective fruit, but don’t prune the vines because that will diminish yield and quality.
Be vigilant about bugs, beetles, and borers as well as fungal and bacterial diseases because these pests and diseases are known to wreak havoc on a squash patch. You could use an arsenal of toxic chemicals, but I recommend more benign and preventive measures, such as crop rotation and good garden sanitation. These will hit the vine borer, squash bug, and cucumber beetle right where they live (overwintering in spent vines and debris). If these bugs don’t have a place to hide out, then maybe they will never take up residence in your garden.
In addition, mechanical barriers, such as row covers, protect young plants against pests and diseases at the start of the plants’ life—a time when they are the most susceptible. I also like to wrap a strip of aluminum foil around the stem of the squash plants at soil level (and generally up the stem a few inches) to ward off vine-borer larvae. This prevents the maggot-looking worms from tunneling into the stems and causing serious injury, which can result in the plants’ demise. Give your squash another layer of protection by coating the plants—and the ground around them—with powders or dusts, such as diatomaceous earth (an organic pest control made from crushed sea fossils), or the endotoxin spray Bacillus thuringiensus (Bt). Be sure to reapply these substances after it rains. Despite all your preventive measures, you may still notice your vines wilting despite getting adequate water. This means your vines have been infiltrated by a borer. If you’re not too squeamish, you can slit the stem of your infected squash vine, remove and eliminate the offender, and let the vine heal itself.
Winter squashes need as much as three to five months of frost-free conditions after sowing to reach maturity. They’re ready to harvest when the fruit have reached their maximum size and weight (check the seed-packet specifications) and their rinds harden and change color. With a little effort, you’ll be able to pull in a big enough harvest to supply the Thanksgiving table.
How to choose the best variety
Winter squashes belong to the genus Cucurbita, and because this diverse group originated in the New World, gardeners in North America have a distinct advantage in growing them successfully. They fall into four domesticated species groups: C. maxima, C. moschata, C. argyrosperma, and C. pepo. Any of these species can be grown by beginners throughout most of the United States, but where you live dictates which type of winter squash is best for you to grow:
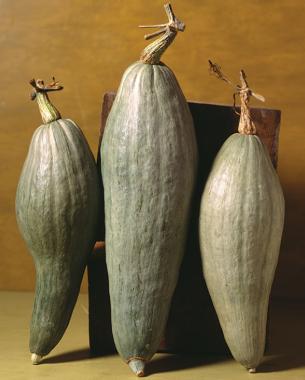
• A chilly spring with a short growing season. The group C. maxima tolerates cool temperatures the best. Some of my favorite cultivars include ‘Buttercup’ and ‘Sibley’.
• Damp, tropical locales. Try any squash that belong to the C. moschata group, including the delicious and reliable ‘Canada Crookneck’ and ‘Musquée de Provence’.
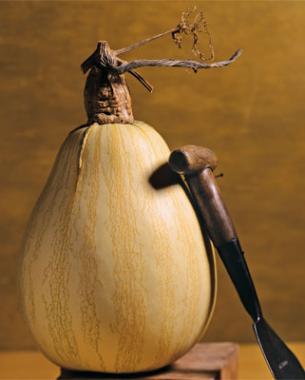
• Warm and dry all season long. Squashes that belong to the group C. argyrosperma, including the cultivars ‘Tennessee Sweet Potato’ (photo) and ‘Green Striped Cushaw’, are the best bet for these conditions.
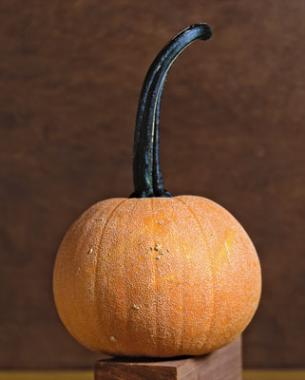
• The hottest of the hot spots. Gardeners in scorching climates should stick to growing C. pepo, the most popular and diverse of the squash species; this group includes pumpkins. Among the most delicious are ‘Winter Luxury Pie’ and ‘Sugar Loaf’.


Comments
Excellent work you done here!
Log in or create an account to post a comment.
Sign up Log in