

How to Easily Make More Shrubs
Layering, an easy propagation technique, lets the plant do most of the work


One of the easiest ways to multiply a favorite shrub or tree is through layering: the propagation of woody plants by putting a stem in contact with the soil where the cool, moist, dark environment induces root formation. The technique is simple and has a high rate of success. Since the new plant remains attached to the mother plant until it’s well rooted, there’s no chance of the top drying out too soon, as can happen with cuttings. In addition, the buds and actively growing leaves release plant hormones that help stimulate root formation. And no greenhouse, mist chamber, or other specialized equipment is needed.Like other methods of asexual propagation, layering produces plants that are genetic replicas of the mother plant. What makes asexual propagation possible is totipotency. Every cell in any plant—except for egg and sperm cells—contains all the genetic information necessary to regenerate a complete organism; under appropriate conditions, a cell can be induced to multiply into roots, shoots, leaves, or flowers.
You can count on the plant to do most of the work. Your job consists of creating the right environment for success by following these three easy steps.
Select the best stem
Start in early spring. Early spring is the best time to begin the layering process because it takes advantage of a plant’s vigor, ensures enough time for the plant to produce an acceptable amount of roots before it is cut away from the mother plant, and provides ample opportunity for the plant to get sufficiently established after it is transplanted.
Pick a good spot. Young stems root best and are easily bent to the ground. Once you select a stem, check to make sure that it can be bent to the ground at a suitable location. When I recently layered a spirea (Spiraea spp. and cvs., USDA Hardiness Zones 4–9) in a flower bed, I chose a stem that could be bent down and rooted without disturbing nearby plants. You have no need to restrict yourself to making only one new plant; as many shoots as you can conveniently bend to the ground can become new plants. If your plant doesn’t have any young stems that are well placed, cut back some older stems during late winter to induce new stems to grow. These young stems will be ready for rooting
2. Cut, bend, and cover
|
|
|
|


Wound the stem: For some species or varieties, mere contact with dark, cool, moist earth is enough to induce roots to form; other plants require some sort of stem treatment. Treat the stem by slitting it and then keeping that slit open with a thin wedge of wood. A matchstick, toothpick, or small twig will do. If you are unsure whether your plant requires such treatment, err on the side of caution and wound the stem. You can also apply rooting powders, which are analogues of the natural root-inducing hormones, to the wound area to speed things along.
Set the stem: Whether or not it requires wounding, the stem needs to make contact with the soil and be held there without movement. Dig a shallow hole, and set the part of the stem where rooting is desired into it, leaving the free end to come up out of the hole.
Secure it in place: Push the soil back into the hole, and keep the stem from springing out of the soil by anchoring the buried portion with a staple of U-shaped wire or with a brick or rock. Cover the ground with a thin layer of some organic mulch—such as leaf mold, compost, or wood chips—to keep the soil moist and the surface loose so that rainfall penetrates easily. If strictly upright growth is desired in the new plant, stake the free portion of the stem to make it stand straight.
Check for roots and replant in fall
|
|
|
|


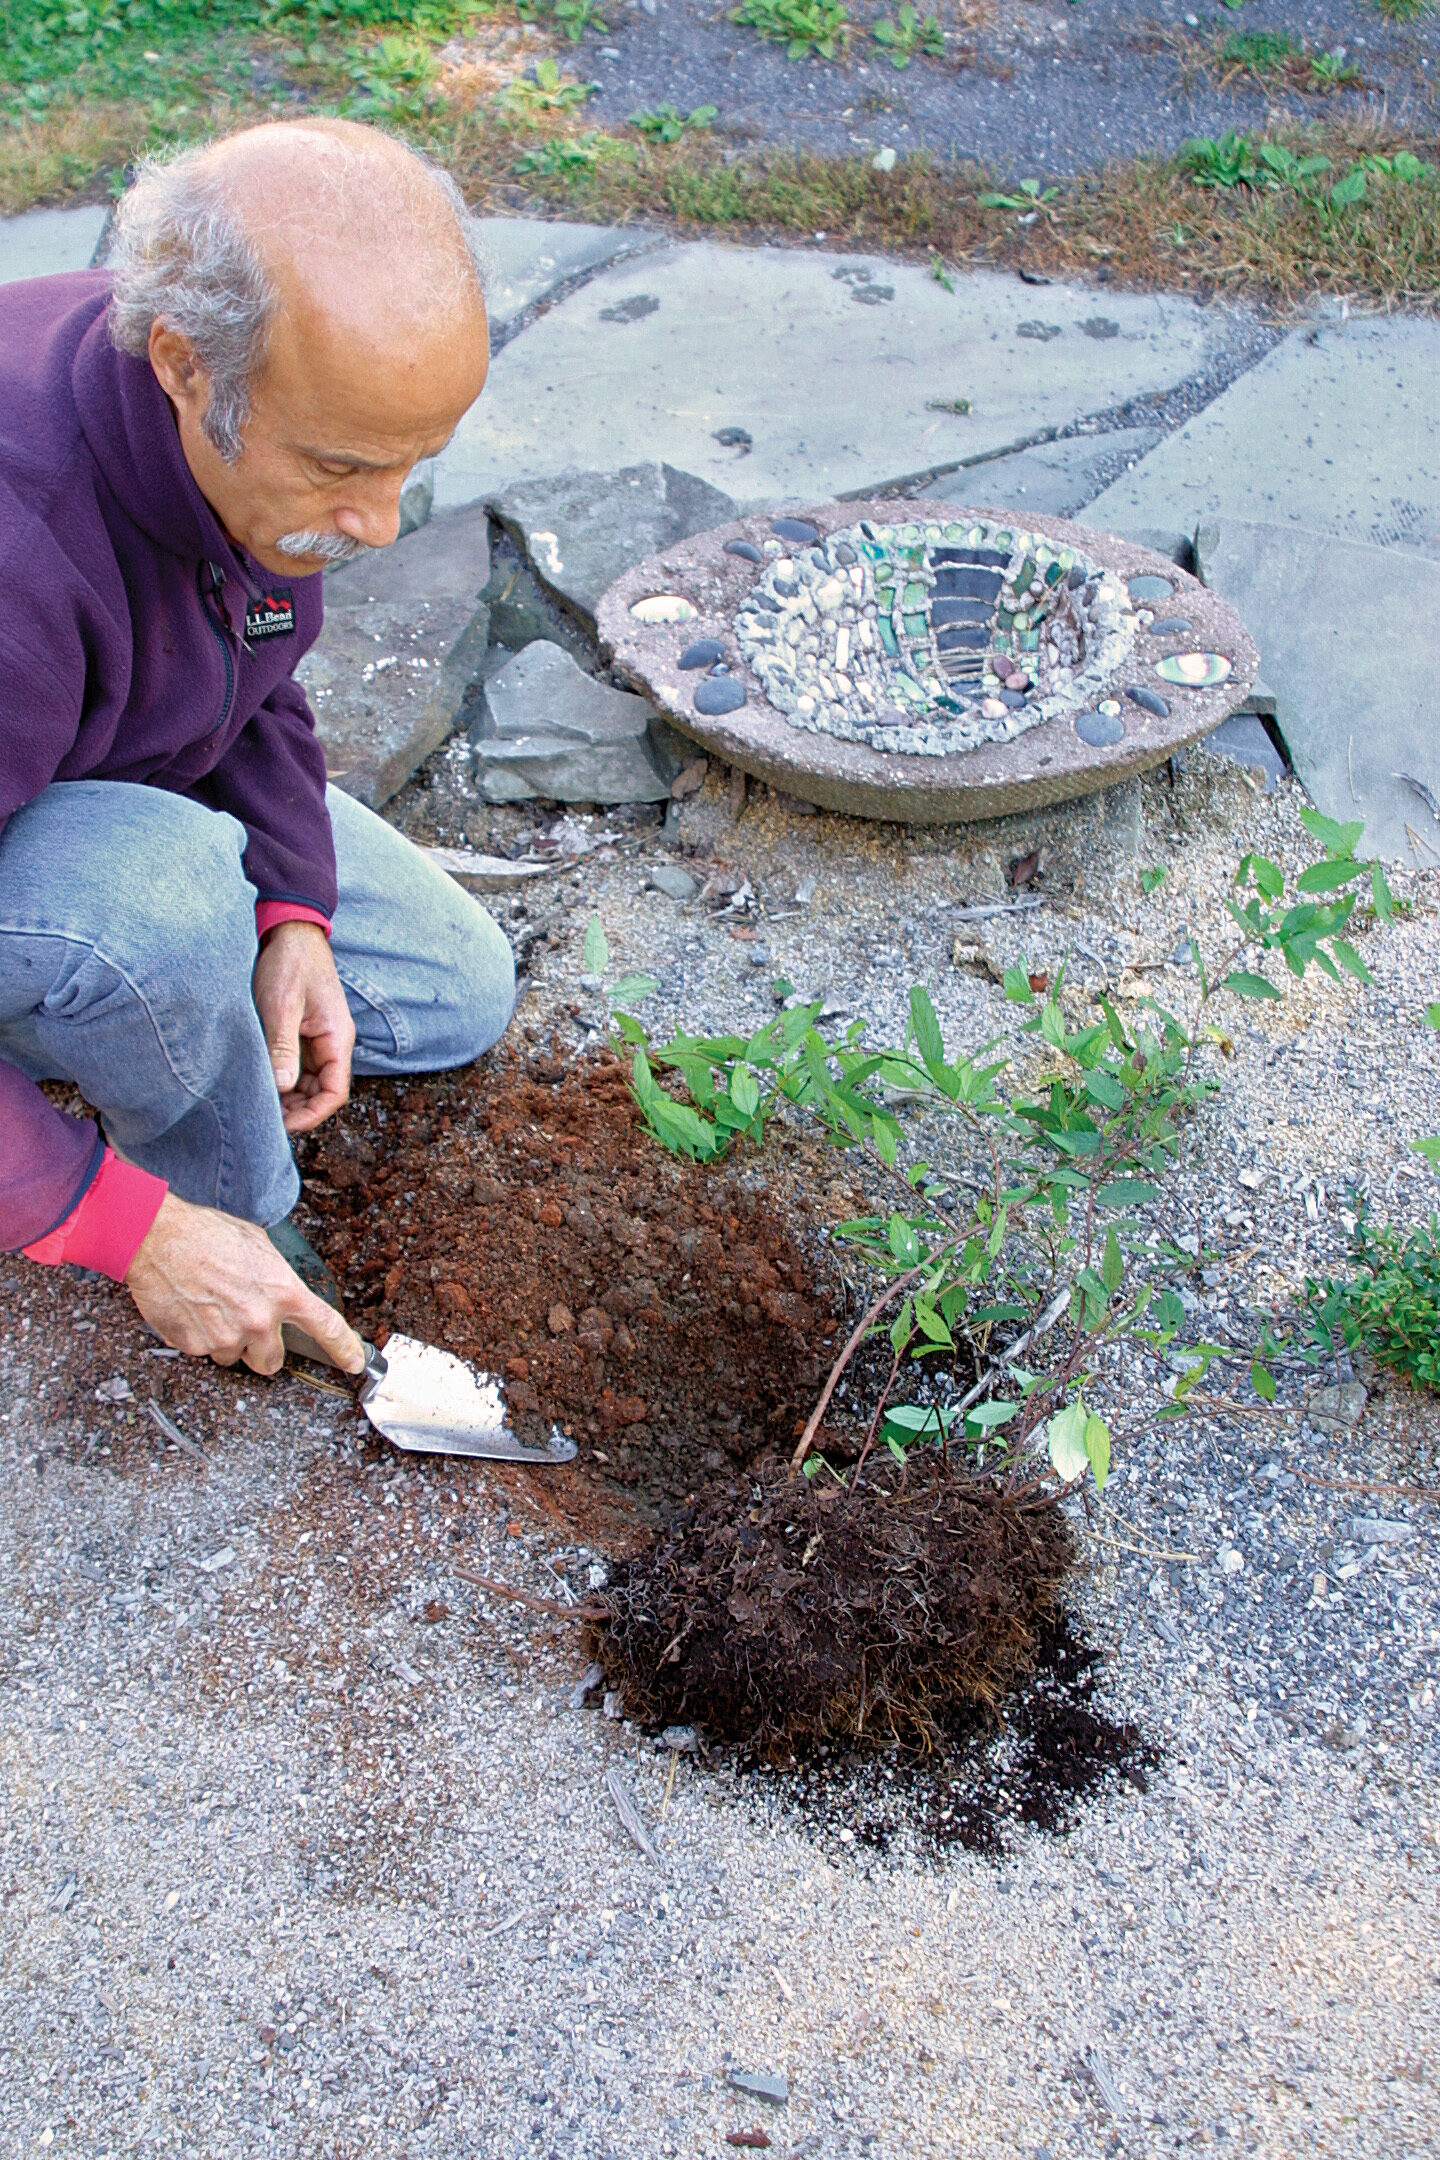
Check for roots: Leave the layered branch undisturbed through the growing season, until autumn. Dig carefully beneath the buried portion of the stem, and lift it to check for root formation. If roots are sparse or lacking, put the stem back in the hole, cover it as before, and leave it in place for another year.
Cut the stem: If the stem has a nice ball of roots attached, cut the rooted portion— along with the free end of the stem— from the mother plant.Have a moist piece of cloth ready to wrap the roots to keep them from drying.
Plant the new shrub: Depending on the size of the plant and the site, the plant can spend its first year in a temporary spot or can start right off at its permanent home. A permanent home is warranted if the plant has a good root-ball and if the location has moist, well-drained soil.
Instead of making one shrub, make several
Two variations of layering use the same principles as simple layering but yield more offspring in the same amount of time.
Serpentine layering
This method works better with the long, flexible stems of vines than with other woody plants. Bend this long stem to the ground and bury portions at intervals. The parts aboveground will grow leaves and those belowground will roots. In fall, dig up and cut apart the rooted sections.
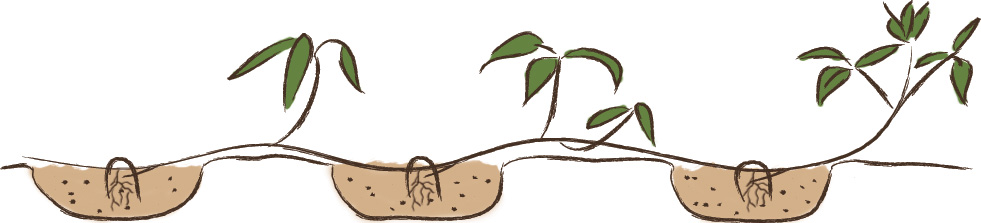
BEST FOR
Wisteria (Wisteria spp. and cvs., Zones 5–9)
Clematis (Clematis spp. and cvs., Zones 4–11)
Mound layering
This method involves cutting an entire shrub to the ground. When new shoots are about 5 inches long, cover them halfway with loose soil or sawdust. Repeat this procedure as needed until the mound is 8 inches deep. In fall, remove the mound, and cut the stems away from the mother plant. Replant them as with simply layered shrubs. The original base of the plant that you started with will be ready to mound-layer again next year.

BEST FOR
Shadbushes (Amelanchier spp. and cvs., Zones 3–9)
Smoke bushes (Cotinus spp. and cvs., Zones 4–9)
Dogwoods (Cornus spp. and cvs., Zones 2–9)
The best shrubs to layer in your zone
|
|
|
|
|
|
|
|
|
|
|
|


Cold regions (Zones 2–4)
- Blueberries (Vaccinium spp. and cvs., USDA Hardiness Zones 2–8)
- Euonymus (Euonymus spp. and cvs., Z 4–9)
- Filberts (Corylus spp. and cvs., Z 3–9)
- Forsythias (Forsythia spp. and cvs., Z 3–9)
- Honeysuckles (Lonicera spp. and cvs., Z 3–10)
- Hydrangeas (Hydrangea spp. and cvs., Z 4–9)
- Lilacs (Syringa spp. and cvs., Z 3–8)
- Mulberries (Morus spp. and cvs., Z 4–9)
- Persian ironwoods (Parrotia persica and cvs., Z 4–7)
- Tree peonies (Paeonia spp. and cvs., Z 3–8)
- Viburnums (Viburnum spp. and cvs., Z 3–8)
- Weigelas (Weigela spp. and cvs., Z 3–9)
Moderate regions (Zones 5–7)
- Andromedas (Pieris spp. and cvs., Z 5–9)
- Beautybushes (Kolkwitzia amabilis and cvs., Z 5–9)
- Cotoneasters (Cotoneaster spp. and cvs., Z 4–8)
- Daphnes (Daphne spp. and cvs., Z 4–9)
- Firethorns (Pyracantha spp. and cvs., Z 6–9)
- Fothergillas (Fothergilla spp. and cvs., Z 4–8)
- Heaths (Erica spp. and cvs., Z 5–11)
- Hibiscus (Hibiscus spp. and cvs., Z 5–11)
- Hollies (Ilex spp. and cvs., Z 5–9)
- Lavenders (Lavandula spp. and cvs., Z 5–9)
- Leucothoes (Leucothoe spp. and cvs., Z 5–9)
- Magnolias (Magnolia spp. and cvs., Z 4–9)
- Mountain laurels (Kalmia latifolia and cvs., Z 5–9)
- Pearlbushes (Exochorda spp. and cvs., Z 5–9)
- Roses (Rosa spp. and cvs., Z 2–11)
- Skimmias (Skimmia spp. and cvs., Z 6–9)
- Trumpet creepers (Campsis spp. and cvs., Z 5–9)
- White forsythia (Abeliophyllum distichum, Z 5–9)
- Winter hazels (Corylopsis spp. and cvs., Z 5–9)
- Witch hazels (Hamamelis spp. and cvs., Z 3–9)
Warm regions (Zones 8–11)
- Bougainvilleas (Bougainvillea spp. and cvs., Z 9–11)
- Camellias (Camellia spp. and cvs., Z 7–8)
- Japanese aralias (Fatsia japonica and cvs., Z 8–10)
- Jasmines (Jasminum spp. and cvs., Z 6–11)
- Oleanders (Nerium oleander and cvs., Z 10–11)
- Passionflowers (Passiflora spp. and cvs., Z 6–11)
- Wax flowers (Hoya spp. and cvs., Z 8–11)
- Wintersweets (Chimonanthus praecox and cvs., Z 7–9)


Comments
Log in or create an account to post a comment.
Sign up Log in