
Growing native perennials from seed is easier than you might imagine. If you choose species that are adapted to your climate and growing conditions, it’s likely that you can start the seeds directly in garden soil—with no nursery flats, grow lights, or greenhouse needed.
A packet of seed costs just a few dollars, so this can be an affordable way to fill garden space. Although it takes at least a few years for plants to reach their mature size, many direct-sown perennials will flower in their second summer.
Keep in mind that when you plant can be as important as where you plant. Some seeds must experience a cold, moist period before they will germinate. Often, the easiest way to provide this is by sowing in fall or early spring.
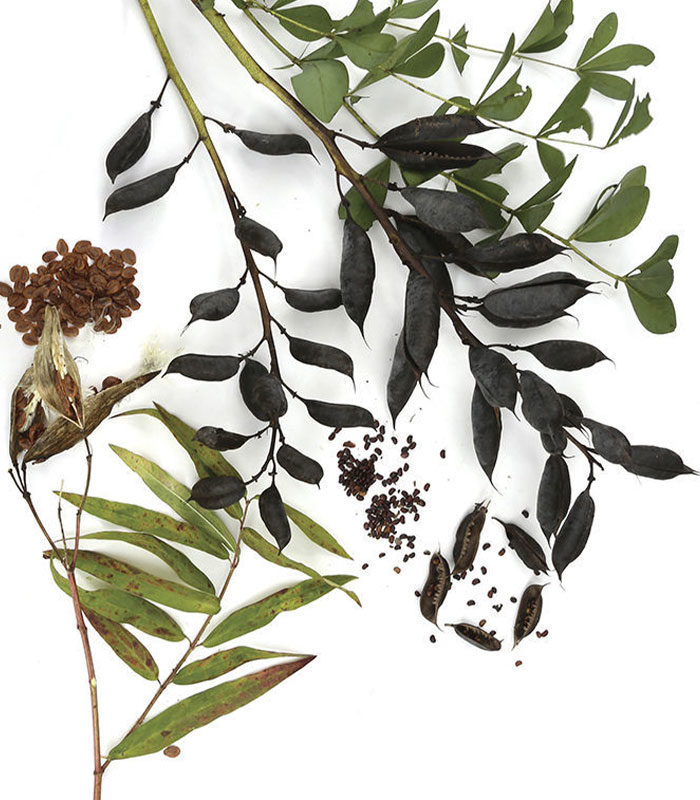
Growing from seed will allow you to establish a genetically diverse plant population in your backyard ecosystem. Mature plants should produce an annual crop of viable, open-pollinated seed that you can sow, share, or swap with other seed-savers. What a refreshing alternative to collecting the cloned, often sterile, cultivars that are a staple of the nursery trade.
The plants in this article are North American natives, adaptable to a wide range of garden conditions. Give them a weed-free spot with the right light, moisture, and soil conditions, and the plants will take care of the rest.
North American native plants provide food and habitat for wildlife, including our beloved pollinators and songbirds. Dr. Doug Tallamy, a renowned entomologist and native plant advocate, found that it takes 6,000 to 9,000 caterpillars to feed one brood of baby chickadees. The chickadee parents he studied gathered most of those caterpillars from native trees, shrubs, and perennials.
I have chosen eight garden-worthy perennials that any gardener could grow from seed. They offer good looks, reliable performance, and wildlife-friendly characteristics.
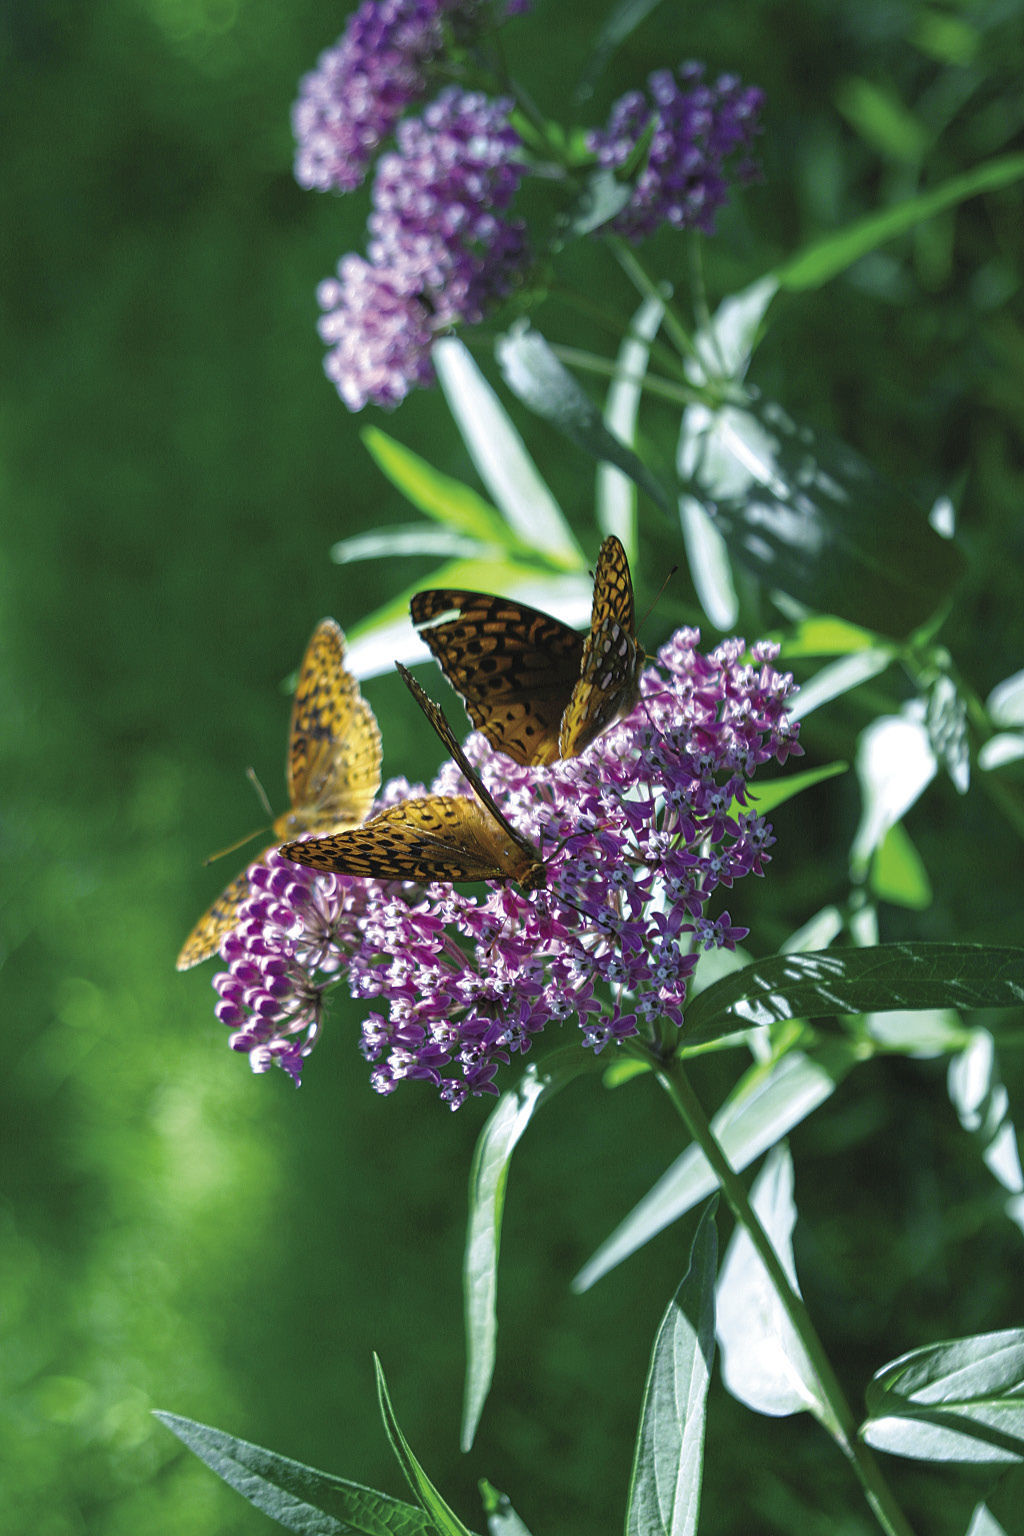
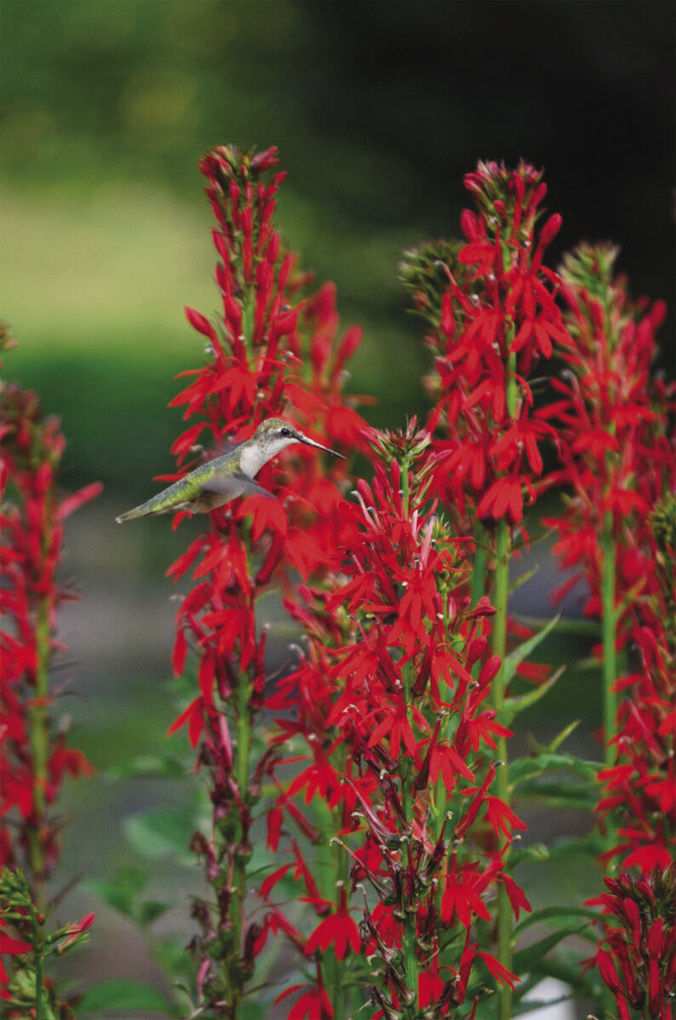
Rose milkweed is butterfly friendly and deer resistant
Name: Asclepias incarnata
USDA Hardiness Zones: 3 to 9
Size: 4 to 5 feet tall and 2 to 3 feet wide
Conditions: Full sun to partial shade; adaptable to many soils
For example, rose milkweed is a valuable nectar source and larval host for monarch butterflies. Planting it in light shade helps make its young leaves even more tender and appealing to caterpillars. Its charming flowers have a light, vanilla fragrance while bitter, milky sap keeps herbivores at bay. Sometimes called swamp milkweed, this plant also adapts well to drier soils.
Rose milkweed grows 4 to 5 feet tall. Individual plants live three to four years, so you may wish to collect and plant a bit of seed each year to keep your stand going. This milkweed is relatively easy to start from seed. Plant it in fall or early spring; 30 days of cold, moist conditions will help it germinate well.
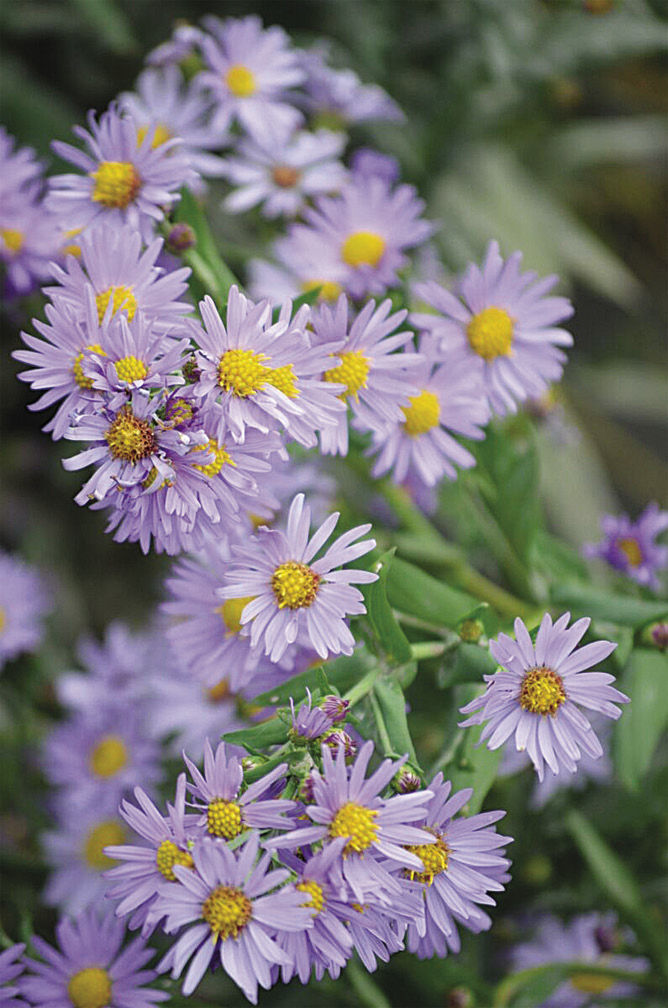
Smooth blue aster offers easy autumn color
Name: Symphyotrichum laeve
Zones: 3 to 9
Size: 4 feet tall, 2 to 3 feet wide
Conditions: Full sun to partial shade; adaptable to most soils
Every garden should have some asters, and reliable, long-lived smooth blue aster would be a lovely choice. Bearing clouds of star-like flowers on sturdy, arching stems, it blooms from late summer until well after the first frost.
Smooth blue aster is easy to grow from seed. Sown in spring or fall, it will germinate reliably when the soil warms up. In its native range, this aster thrives in open woods, meadows, and prairies, and it will adapt to a wide range of garden conditions. Sow seeds shallowly and cover them with just a dusting of soil—1/8 inch will do it. Your plants should flower in their first year and for many years after that. Pruning a few inches from the tops in midsummer will encourage bushier, denser growth.
Its nonaggressive rhizomatous root system allows the plant to spread slowly, and a single plant may last 10 years if taller, more aggressive plants do not take over its turf. However, deer will eat this aster, so if you want to keep Bambi away from your garden, this may not be the best plant for you.
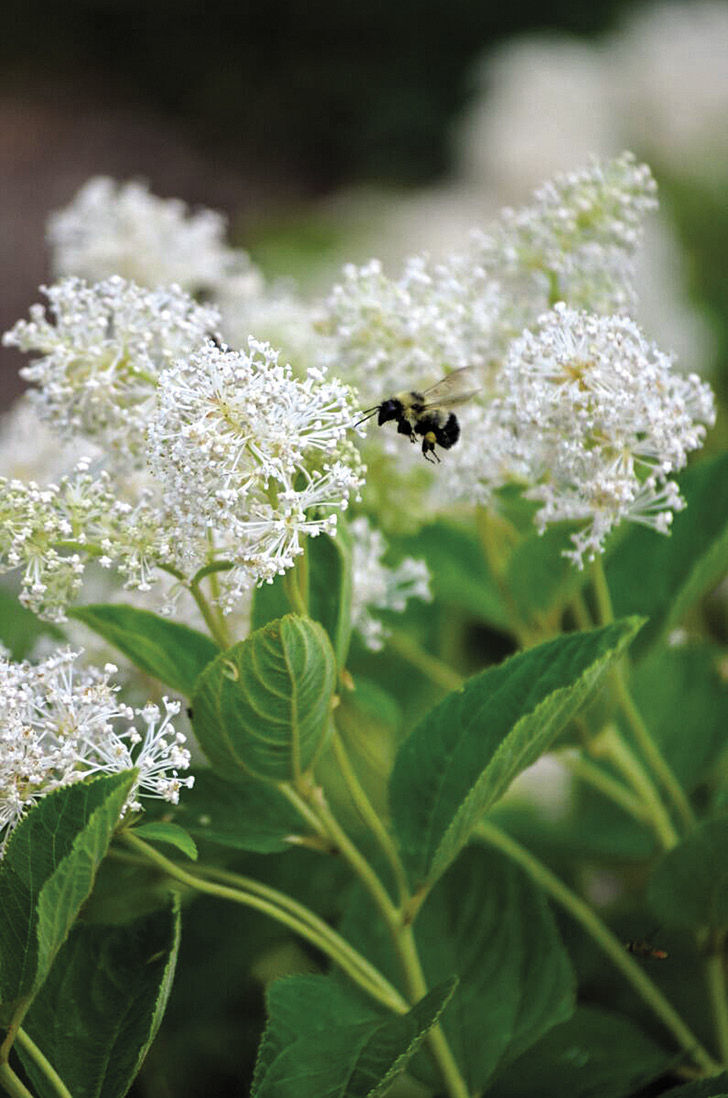
New Jersey tea feeds hummingbirds
Name: Ceanothus americanus
Zones: 3 to 9
Size: 3 feet tall and wide
Conditions: Full sun to light shade; medium to dry soil
The foamy white flowers of New Jersey tea attract a multitude of tiny pollinators. These insects are a favorite protein source for hummingbirds and their nestlings. Instead of hanging up another sugar-water dispenser, why not plant a patch of these sweet, diminutive shrubs?
If sown in fall, New Jersey tea seed does not need to be pretreated. If you are planting it in spring, try this trick to soften the seed coating: Pour boiling water over the seed, let it sit 24 hours, then plant. I promise that this will not cook the seed.
New Jersey tea is slow to emerge in spring, even from transplants; it needs warm soil to wake it up. This plant will do well in average garden soil, and takes dry and sandy conditions in stride. However, it does not appreciate consistently wet soil, so do not put it in a boggy spot. Be aware that this plant can be deer candy and may need protection, especially when young.
Cardinal flower is worth fussing over
Name: Lobelia cardinalis
Zones: 4 to 9
Size: 4 feet tall, 2 feet wide
Conditions: Full sun to partial shade; moist, rich soil
Cardinal flower is a show-stopping wildflower. Its native range includes fertile wetlands throughout the eastern United States and north into Canada. It is a favorite of hummingbirds, swallowtail butterflies, and a host of native pollinators.
Cardinal flowers’ seeds need at least 60 days of cold, moist conditions to germinate. If cold-stratified it may be started indoors in flats. But where winters are cold and wet, simply sprinkle seed on the surface of weed-free garden soil in late autumn. Cover the bed with burlap to keep the tiny seeds from drying out or washing away during winter.
Remove the burlap in spring after tiny seedlings emerge, and keep an eye on the small rosettes that will form in the first year. Do not let these dry out. In their second year, your plants will flower, set seed, and die. However, most plants will form offsets that flower the following year, and it is definitely worth looking for these satellite rosettes in autumn to give them a helping hand. Offsets can form a foot or more from the parent plant, and first-year plants are tiny, so keep their bed well weeded.
Cardinal flower may self-sow if conditions are right, but it won’t take over the garden. With vigilance, occasional reseeding, and a moist, weed-free location, you can keep a healthy stand going for years.
Tip: Like blue better?
Great blue lobelia (Lobelia siphilitica, Zones 3–9) has similar cultural requirements, grows more easily from seed, and is longer lasting than cardinal flower (Lobelia cardinalis). Plants will live about four years.
Rattlesnake master delivers dramatic texture in lean soil
Name: Eryngium yuccifolium
Zones: 4 to 9
Size: 4 to 5 feet tall, 2 to 3 feet wide
Conditions: Full sun; medium to dry soil
Rattlesnake master offers a long season of garden interest. Its sturdy, sword-shaped leaves and bristly flower heads look especially dramatic next to soft-textured plants. This distant cousin of the carrot is disease and pest free, though it does attract many beneficial insects and can host a birds’ buffet of native caterpillars without appearing chewed or bedraggled.
The seeds of rattlesnake master need cold conditions to trigger germination. Sow in fall and expect early, reliable germination the following spring. Rattlesnake master should bloom in its second year, and every summer thereafter for up to 20 years.
To look its best, this plant needs at least four to five hours of direct sun. It can take a bit of light shade but will get leggy and flop if it gets too much shade or moisture.
Eastern prickly pear cactus brightens dry, sandy spots
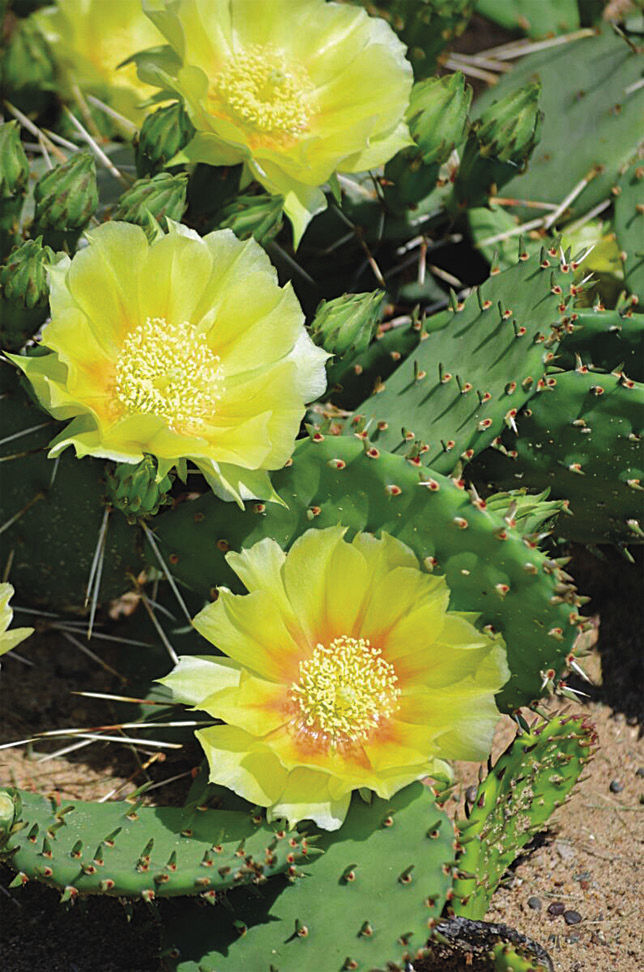
Name: Opuntia humifusa
Zones: 4 to 9
Size: 6 to 12 inches tall and wide
Conditions: Full sun; medium to dry well-drained soil
With early summer flowers followed by attractive, edible fruit, eastern prickly pear is an unexpected choice at the front of a sunny border or south-facing foundation planting. This resilient, low-growing cactus does not mind the cold. Its natural range includes a generous portion of eastern North America, where it thrives in dry, sandy, exposed soil. It will adapt to garden soils with more moisture, but it will not survive in the shade of weeds or taller plants.
Eastern prickly pear takes about three years to reach blooming size from seed. I think it is great fun to watch the tiny new cacti develop and grow. This plant also can be propagated by pushing cuttings directly into the soil (but be sure to wear sturdy gloves). These cuttings will root quickly, flowering and forming new pads in their second year.
Harvested seeds must be aged in a cool, dry place for at least one year before they will germinate. After that, they will sprout readily in warm soil and do not need cold, moist conditions to break dormancy.
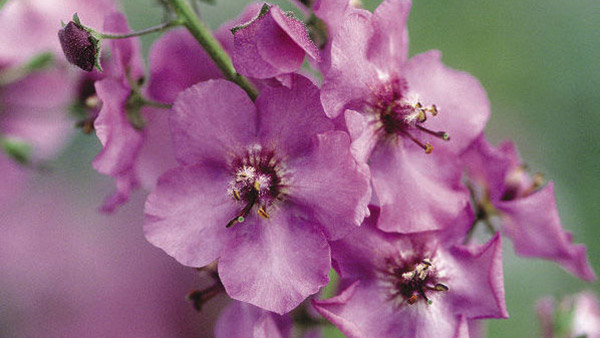
Wild blue indigo has shrublike presence
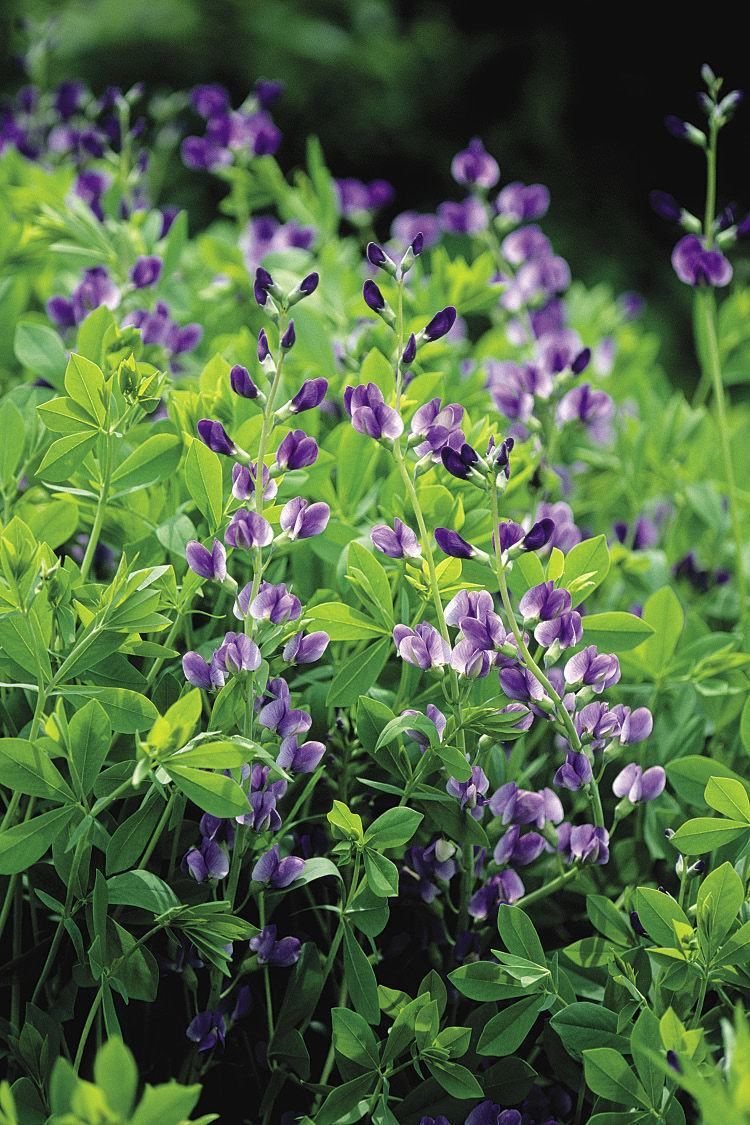
Name: Baptisia australis
Zones: 4 to 9
Size: 3 to 4 feet tall and wide
Conditions: Full sun to partial shade; average, well-drained soil
For the first few years after you plant it, wild blue indigo will put most of its energy into developing a strong root system, and the top will not look like much. But the early summer show it will put on when it reaches full size is well worth the wait, providing a treat for pollinators when many other flowering perennials are just waking up. Once established, a wild blue indigo plant can live for 20 years or longer.
Its big seeds are easy to work with, and need only 10 days of cold, moist conditions to trigger germination. If your seed supplier has not already scarified (scratched) the seed coat, you can do this easily by rubbing the seed between two pieces of medium-grit sandpaper.
Like other legumes, wild blue indigo harbors beneficial bacteria called rhizobia on its roots. You can jump-start the rhizobia population by treating your seeds with an innoculant before planting, but this is not a necessity.
Other wild indigo species, including white wild indigo (Baptisia alba, Zones 4–9) and small yellow wild indigo (Baptisia tinctoria, Zones 3–9) may be grown from seed using the same methods.
Hairy mountain mint is a bee magnet
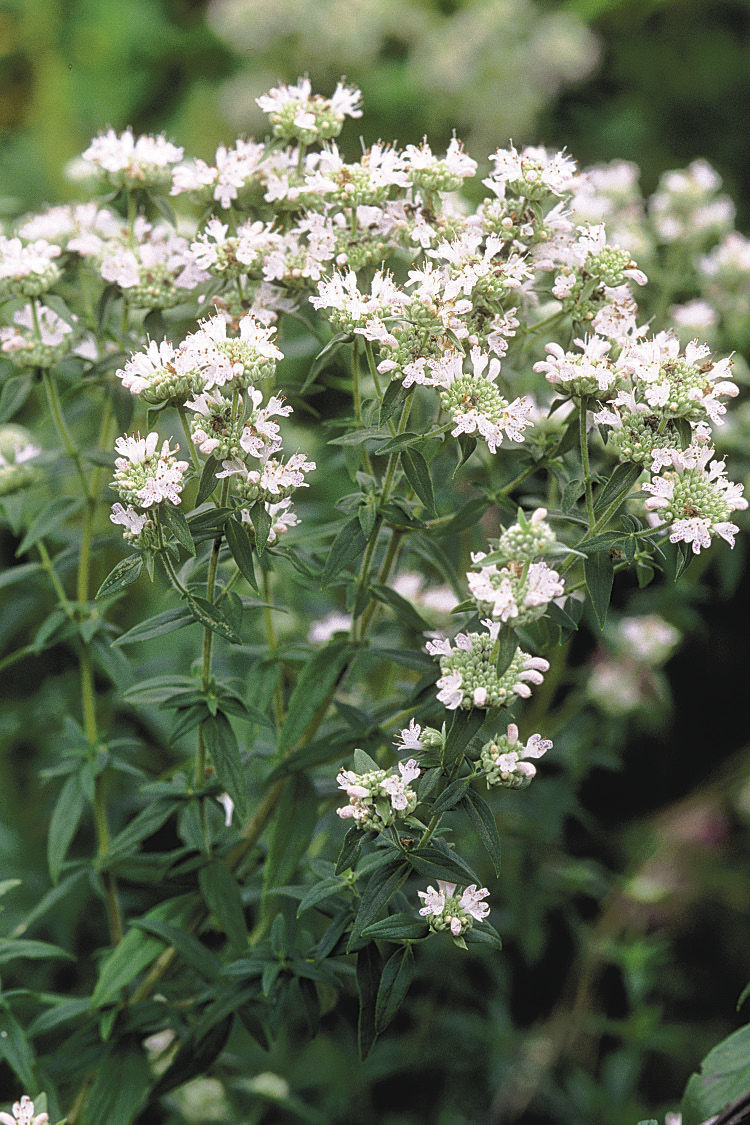
Name: Pycnanthemum verticillatum var. pilosum
Zones: 4 to 8
Size: 3 feet tall, 18 inches wide
Conditions: Full sun to partial shade; medium to dry soil
There is a growing demand for plants that support honeybees, native pollinators, and predatory wasps. Hairy mountain mint is attractive, fragrant, and perfect for the bee-friendly border. The small seeds don’t need cold, moist conditions to break dormancy, but germinate most reliably in cool, early spring soil. Planted too late, they may wait until the following spring to sprout.
Sprinkle seed onto level soil; cover with only a dusting of soil, and do not allow the seed or young plants to dry out as they start to grow. A single layer of burlap can help retain moisture until the seeds germinate; a screen set 1 foot off the ground also can help conserve moisture in the first summer.
This plant will establish itself quickly, flowering in its second year or even its first when conditions are just right. Mountain mint is a late-season bloomer that spreads slowly and reliably; it will self-seed but not aggressively. A single plant can live for 8 to 10 years.
Seed-Starting Basics
The easiest way to start many of the plants mentioned in this article is in good, weed-free garden soil, out of the way of foot traffic and competitive garden neighbors. Seeds that need a period of cold, moist conditions to trigger germination can be sown at the end of the season, when you are putting the rest of the garden to bed.
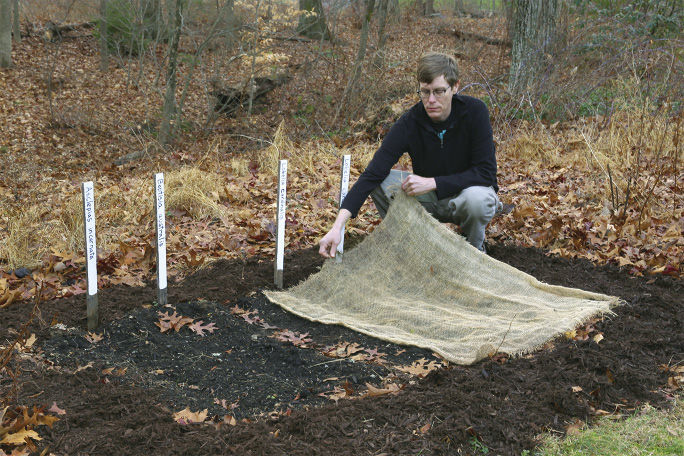
1. Plant in rows
Planting seeds in a row or grid makes it simpler to keep track of tiny seedlings (photo above). When they come up in the spring, you will be able to distinguish your babies easily from the weed seedlings that may emerge around the same time.
2. Keep it tidy
In their first season, many perennials will focus their energy on building a strong root system, while top growth remains relatively small. Regular weeding will prevent your young plants from being overshadowed and outcompeted.
3. Work with nature’s cycles
The North American natives in this article are well equipped to take advantage of available water, and are “programmed” to wait until conditions are optimal to germinate. Seeds that fail to sprout during an unusually warm, dry spring may come up the following year.
4. Simulate spring conditions
If you can’t plant in fall, or if you’d like to start a tray of seedlings in the greenhouse, it’s easy to stratify seeds in the fridge. Mix seeds with an equal part or more of damp, sterile sand. Place in a sealed, labeled bag in the fridge for the recommended number of days (usually 10 to 60 days, depending on the species) then plant in the garden. If sprouting occurs while the seeds are still in the bag, plant immediately.
Bill Carter is president and co-owner of Prairie Moon Nursery, which offers over 700 species of noncultivar North American native seeds and plants.
Photos, except where noted: Carol Collins
Sources
- American Meadows, Williston, Vt.; (877) 309-7333; americanmeadows.com
- Prairie Moon Nursery, Winona, Minn.; (866) 417-8156; prairiemoon.com
- Prairie Nursery, Westfield, Wis.; (800) 476-9453; prairienursery.com


Comments
Log in or create an account to post a comment.
Sign up Log in