

-
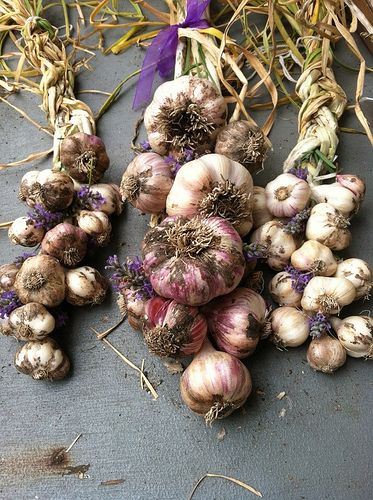
Braid softneck garlic varieties to store for future use. Photo by Nostapinne under the Creative Commons Attribution License 2.0.
-
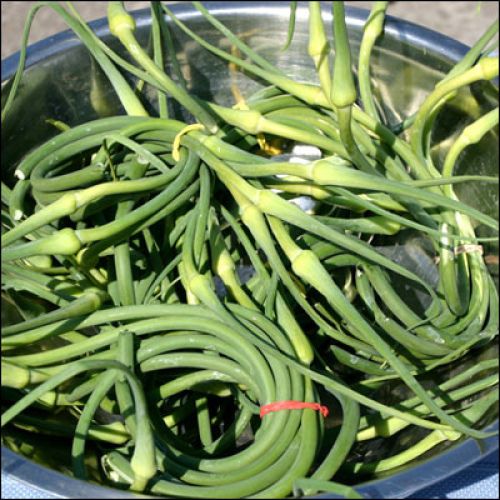
Feel free to harvest and eat hardneck garlic scapes. Photo by Le Grandes Farmers Market under the Creative Commons Attribution License 2.0.
-
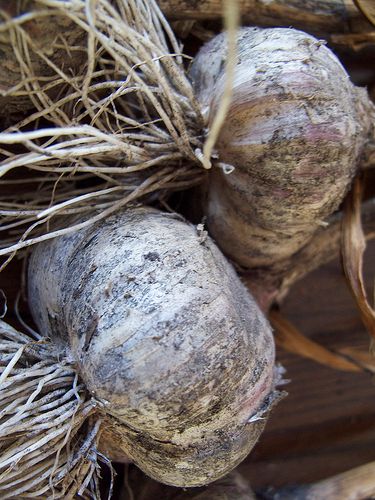
Photo by cyanide45 under the Creative Commons Attribution License 2.0.
Garlic is a must-have in the kitchen and home-grown garlic will spoil you for life. If you haven’t gotten around to planting your garlic bulbs yet this fall — ignore those who tell you that it’s “too late.” Just get out there and plant them into a manure or compost-rich soil ASAP. You’ll be harvesting a little later than some people, but you’ll reap a grand harvest none-the-less. Personally, I’d be lost without its deep flavors and even the pungent aroma.
Garlic (Allium sativum) is a perennial bulb that belongs to the onion family and is one of the oldest known culinary seasonings. Back in the day (way back), the sustenance-giving properties of garlic was well-known. It was consumed everyday by Egyptian pyramid builders that considered it a body strengthener. Roman soldiers ate it to help them stay healthy during long marches.
Today, garlic is still one of the most beloved herbs for improving the flavor of countless dishes; soups, stews, meat dishes, and sauces just wouldn’t be the same without it.
Garlic Bulb Types
There are three main garlic types grown for the culinary purposes. Each has its unique properties and you may want to try all three types (and their varieties) before you decide which grows best in your particular garden and which flavor strikes your fancy. If you’re not sure where to start, visit your local nursery or call your county cooperative extension office. They’ll be happy to provide more information on the varieties that thrive in your zone.
- Softneck varieties: This is the garlic type that you’ll find in the produce section at the grocery store because their shelf life is longer than others. Sadly, you’ll probably only see one variety available. Softnecks aren’t particularly cold-hardy and do best in gardens where the winters are mild. Cloves on these varieties are layered over one another around the core. Their flavor is generally spicier than the hardneck types and their leaves are perfect for braiding.
- Hardneck varieties: This type of garlic has a single ring of cloves around the central stem, which is firm and stiff (you won’t be braiding these varieties). They produce a long stem or “scape” that would become a flower if we don’t harvest and eat them before they can boom. Cold climates are no problem for hardnecks.
- Elephant garlic (Allium ampeloprasum): Elephant garlic isn’t a true garlic at all, but rather a member of the leek family in disguise. It produces four to six cloves that are impressively large, yet have a milder flavor than their cousins.
Growing Garlic
Garlic is planted by the sections inside a garlic bulb that can be pulled apart or the “cloves”. Ideally they should be purchased by a reputable company that sells garlic bulbs specifically grown for planting as opposed to bulbs obtained at a grocery store.
Bulbs found in the produce aisle aren’t necessarily virus-free and you’ll get a higher yield from nursery or catalog purchased bulbs. Plant them from October to January after the first frost, but the larger bulbs will be produced by cloves planted in the fall, so that’s food for thought. If you plant a wide variety of types hardy to your area, it’s entirely possible to harvest and store enough garlic for the year.
Garlic loves well-drained soil that’s a little on the sandy side and rich in organic matter and its ideal situation is a pH of 6.5 (which is fairly neutral). Plant individual cloves in an area that gets full sun about 2″ deep and 4″-6″ apart. After planting they can be mulched with leaves or straw, which will encourage the worms to move in adding good tilth to the soil around the plants. When spring arrives, add a layer of compost to the garlic bed.
Water them only to the point that the soil is never entirely dried out. When flower buds show up in the spring, snip them off with scissors to encourage larger garlic bulbs (hardnecks will have the curly scapes to use for cooking).
Harvesting and Storing Garlic Bulbs
In the late summer, their leaves will turn yellow and some of the tops will fall over. Harvesting garlic isn’t like harvesting onions; don’t wait for all of the leaves to die back before lifting. When more than half of the bottom of the leaves turn yellow (60%) it’s time to harvest the garlic bulbs. Use a garden fork to loosen the soil around the bulbs and then gently pull them from the ground.
Before the bulbs can be stored for any length of time they need to be “cured.” Harvested garlic should be spread out on a table or preferably onto a screen or anything else that allows good air circulation. The stalks or leaves of the garlic should be left on the top until the curing process is over and you’ll want to keep the bulbs out of the elements such as rain or strong sun.
After they have cured for about two weeks, the leaves should be clipped off at the bottom of the stem where it meets the bulb. If the leaves are left attached to a softneck variety, they can be braided together at this time and hung up until needed. Garlic bulbs should be stored in a cool, dark place where they’ll keep for six months to one year.


Comments
Log in or create an account to post a comment.
Sign up Log in