
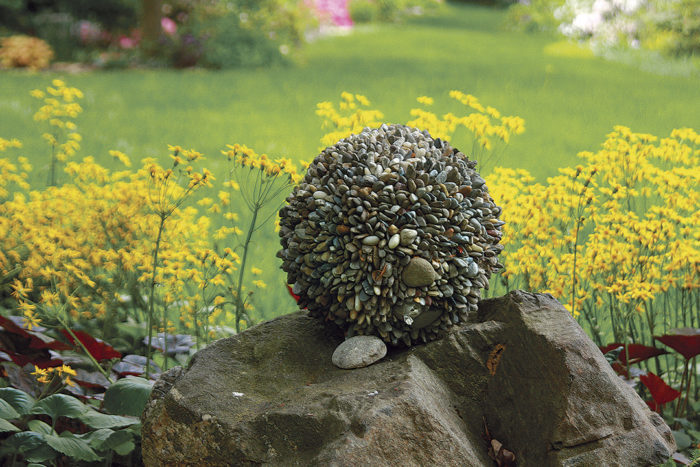
Gardeners have been using bowling balls as garden decorations for many years, especially since they started being produced in numerous jelly-bean colors and swirling patterns. To my taste, however, they still look like bowling balls. I started to wonder if I could disguise them and make them more elegant. Inspired by stone mosaics, I decided to glue stones and glass gems to bowling balls, and was amazed at the results. Here’s how I do it.
3 Steps to a Striking Ornament
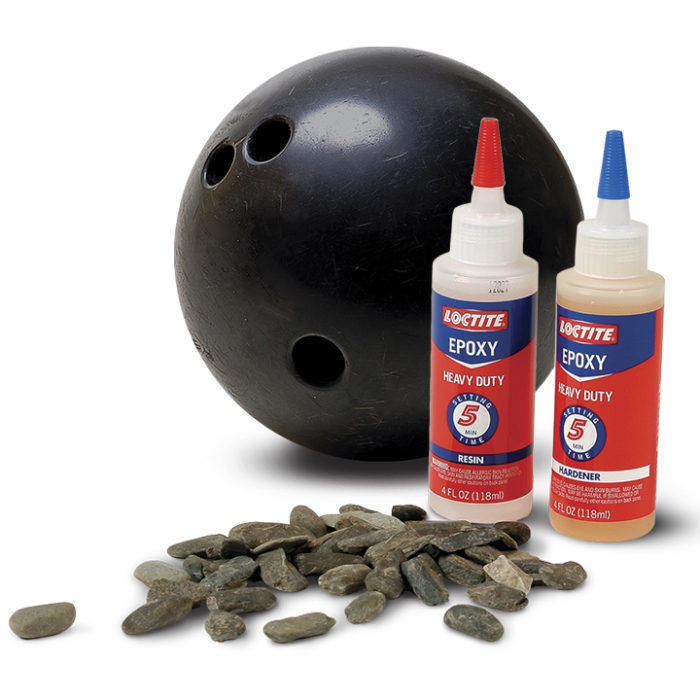
Supplies
• Pea gravel
• Bowling ball
• Two-part epoxy glue
• Clean scraps of wood and several nails for mixing and applying epoxy
1. Prepare materials
Choose stones that are about ¾ of an inch long and half that width. A pea-gravel pathway should yield an ample supply; about a quart should suffice. Because everything needs to be clean and dry for the epoxy to stick, wash the stones and bowling ball thoroughly, and let them dry completely. Set the ball on a few wood scraps or in a small clay pot so that it sits securely.
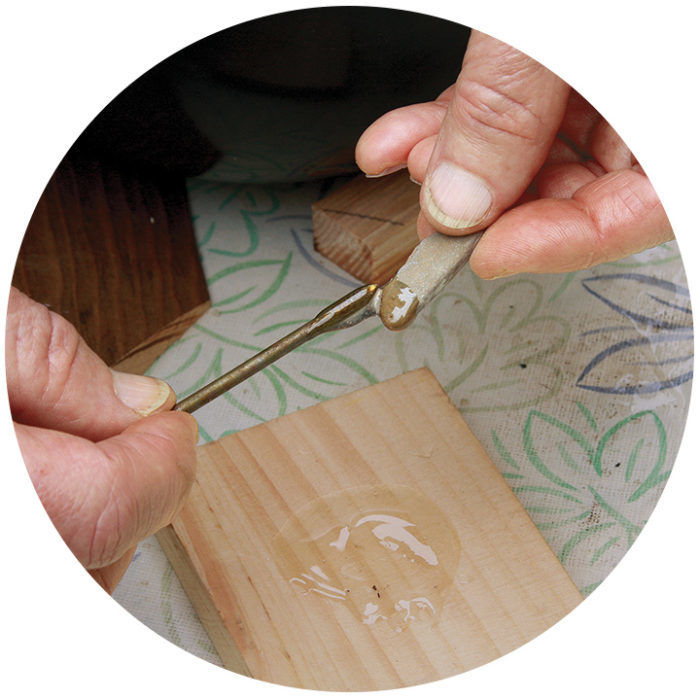
2. Mix and glue
Mix a small batch of epoxy on a scrap of wood using a sturdy nail.
Apply glue to the base of several stones, and firmly place them as a group to the very top of the ball. Hold them in place until the epoxy sets, about five minutes.
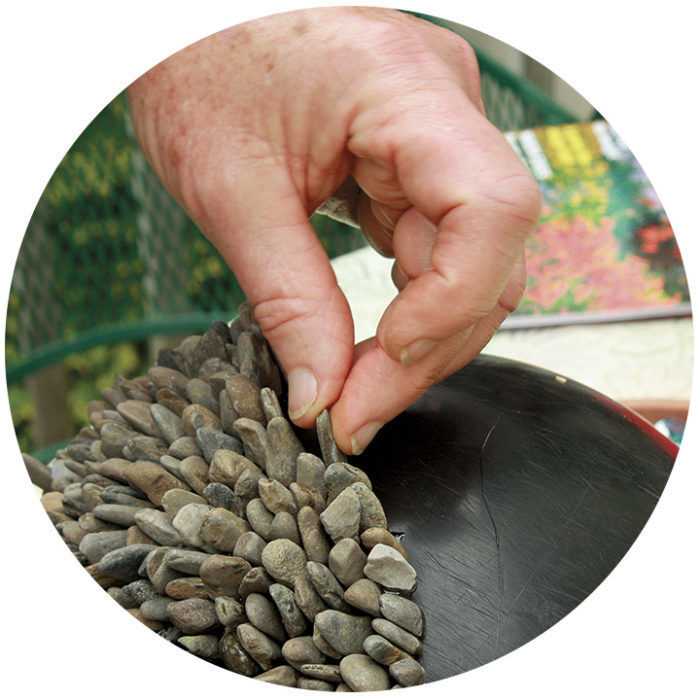
Add individual stones to the mass already affixed to the ball once those first few stones set, but always rotate the ball slightly so that new stones are supported by the previously glued stones. Apply enough epoxy to each stone so that the stone sticks to both the ball and to the adjacent stones. Fill the finger holes with a mix of stones and epoxy, leaving the thumb hole open for staking.
Take breaks to allow sections of epoxy to cure. This means it will take several hours to cover a ball with stones. Plan on starting several projects at once so that you can move along to the next as the first one dries.
3. Handle with care
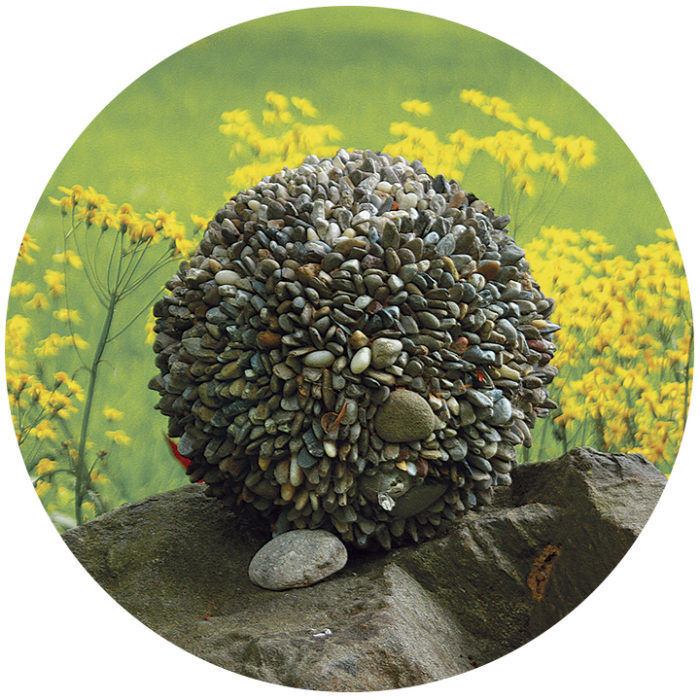
Be careful when handling the stone-covered ball because it is considerably heavier than the unadorned ball. I store my customized balls in the garage each winter before the first hard frost because any water between the stones would expand during freezing and cause damage.
A Gallery of Disguises
I like to experiment with different stone colors and textures—and with different materials—to transform humble bowling balls into works of garden art. Here are a few of my favorites.
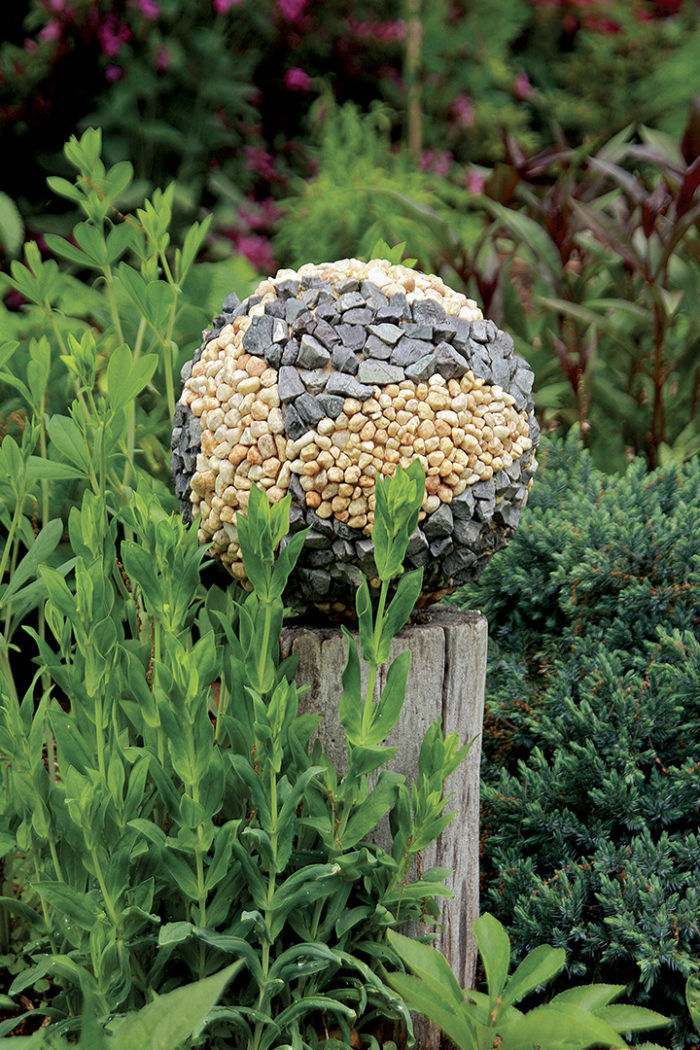
Mix materials to create patterns
Using different combinations of stone, you can create striking patterns. This ball has distinct patches of large, slate gray gravel and a light-colored pea gravel.
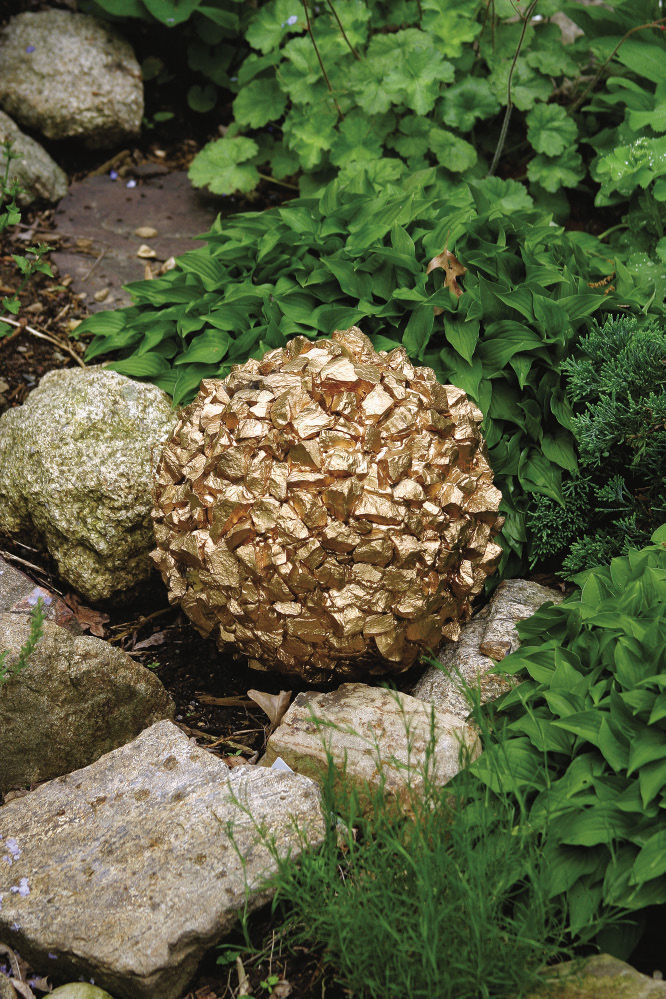
Cover mistakes with paint
I used a different glue in one of my earlier projects, and it began to bubble up from between the stones, creating a messy result. Instead of ditching the project, I sprayed the gravel-encrusted ball with bright gold metallic paint. It now looks like a giant gold nugget.
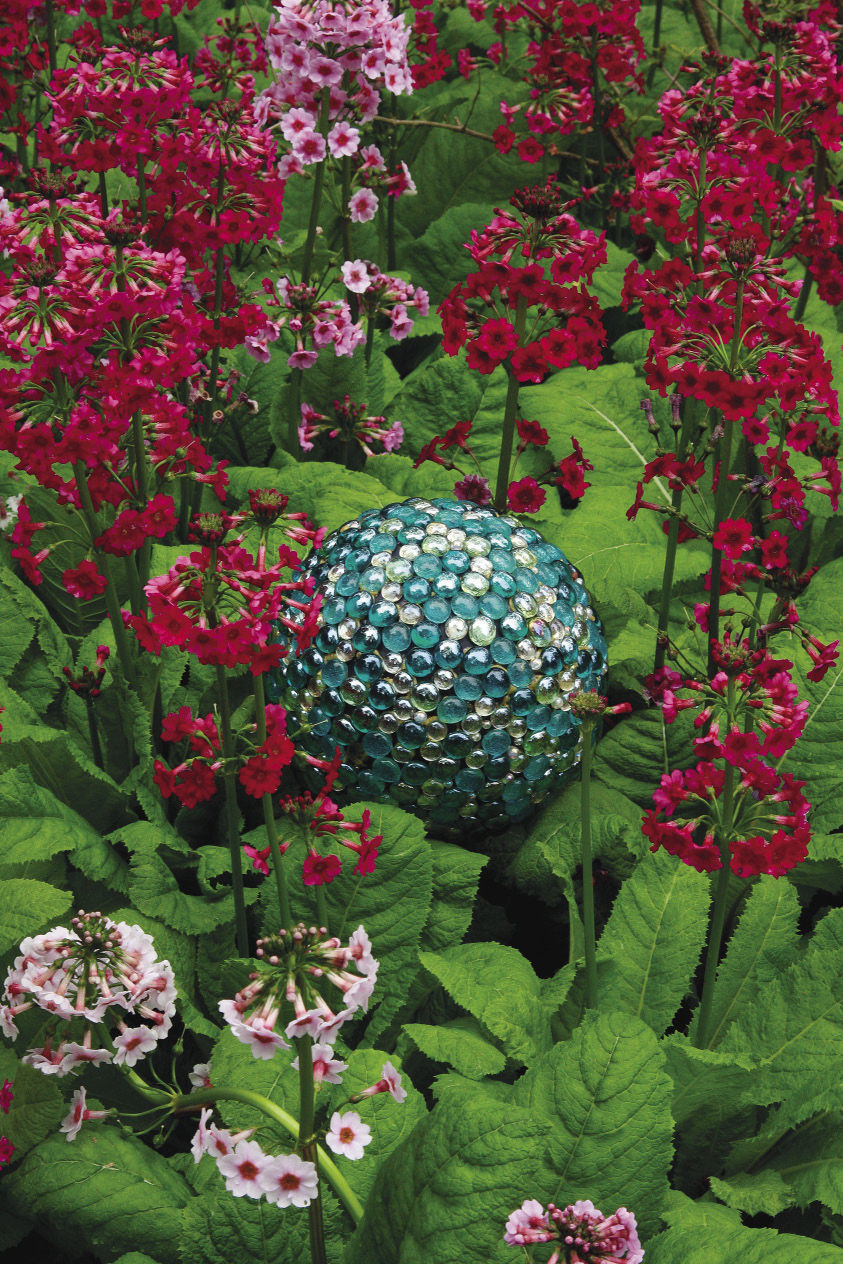
Play with glass gems and color
You can use the color of the ball (its existing color or a color you paint it) to your artistic advantage by applying colorful glass gems from craft stores. Not only are the spaces between the circular gems exposed but also many of the gems are transparent.
Mimic stone with sanded paint
I primed and then painted this ball with sand-colored paint mixed with sand. A few light sprays of brown and white paint give it an aged appearance.
Robert Stamper is an avid gardener and rhododendron aficionado who gardens in Zionsville, Pennsylvania.
Photos: Michelle Gervais; Edward Fielding/www.dreamstime.com; Brittany Leandra; Steven Cominsky


Comments
Log in or create an account to post a comment.
Sign up Log in