


When you conjure up an image of a gravel garden, it probably isn’t very fun or colorful. Many people picture a sea of hot, dry gravel, some harsh, craggy rocks, and a handful of plain green, sparsely growing plants. This image might be right on the money if we were talking about mountainous alpine rock gardens, but the gravel gardens that I’ve helped create here at the Olbrich Botanical Gardens are different. Why would you want to have a gravel garden? Well, for starters, you get the same beauty as a traditional perennial garden but with 80 percent less maintenance. These sustainable plant communities, once established, thrive on natural rainfall alone and require no fertilizer or other chemicals to grow. If given a little time to grow and fill in, they will look similar to traditional perennial gardens but require far less work.
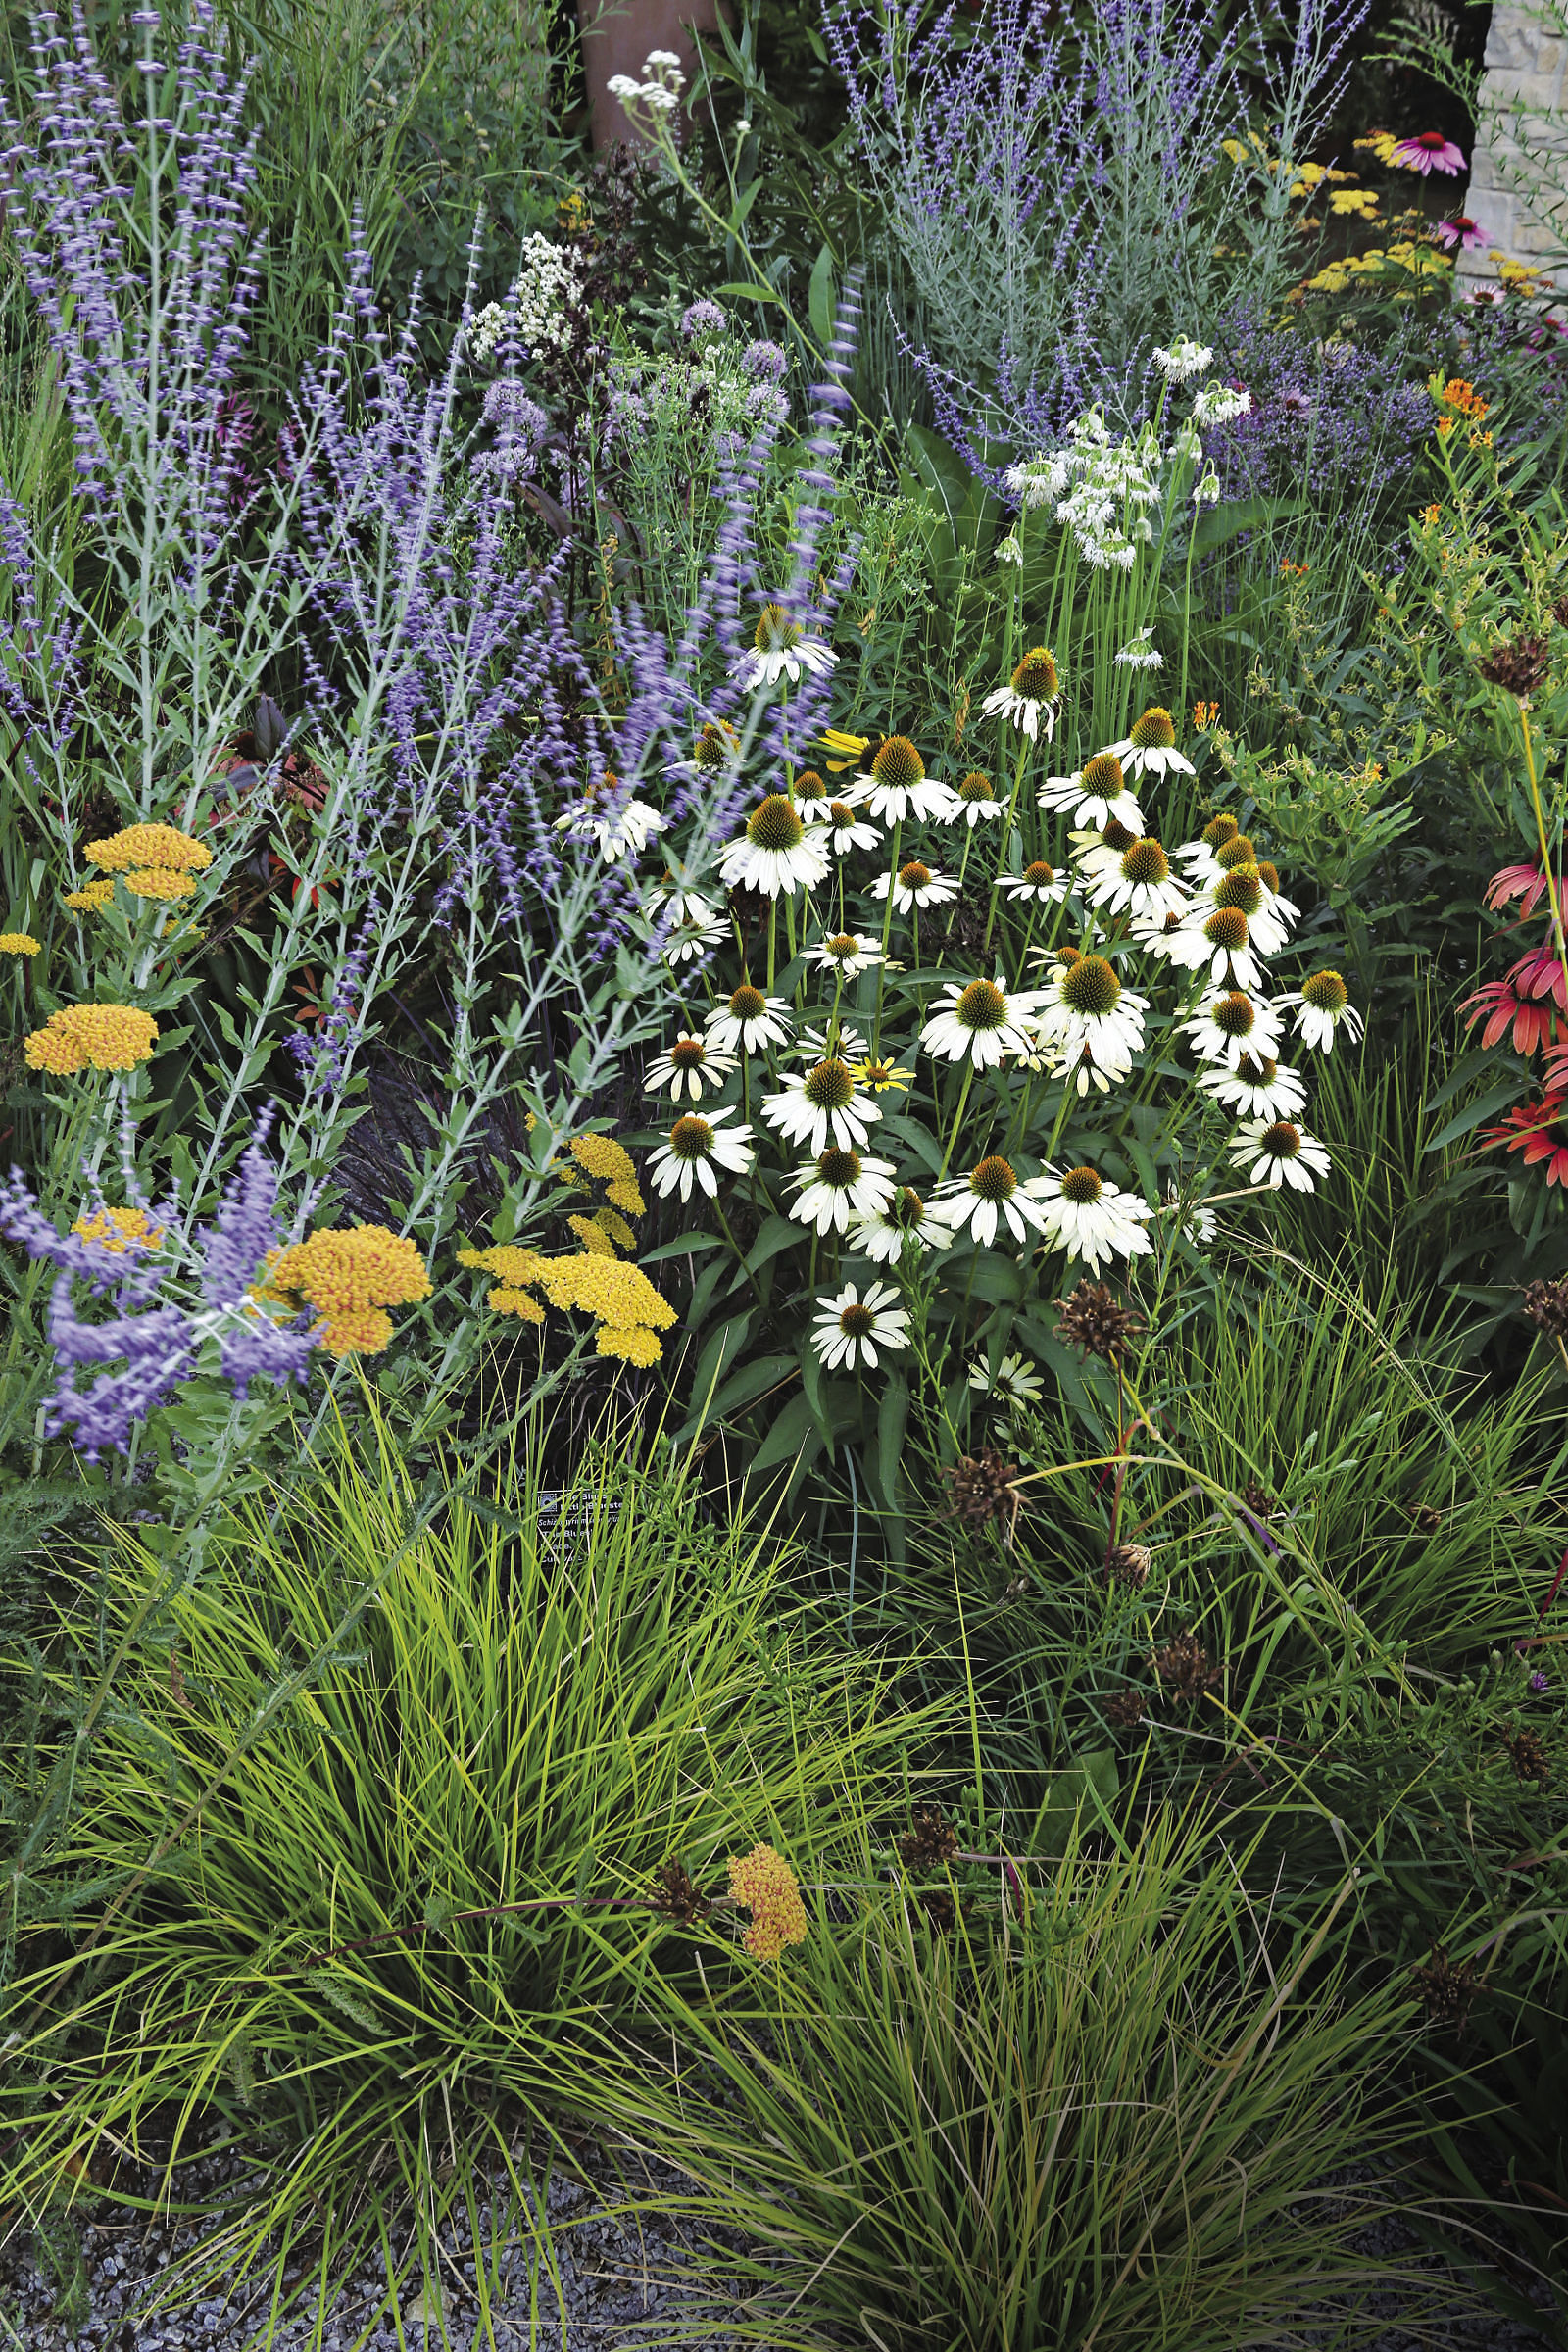

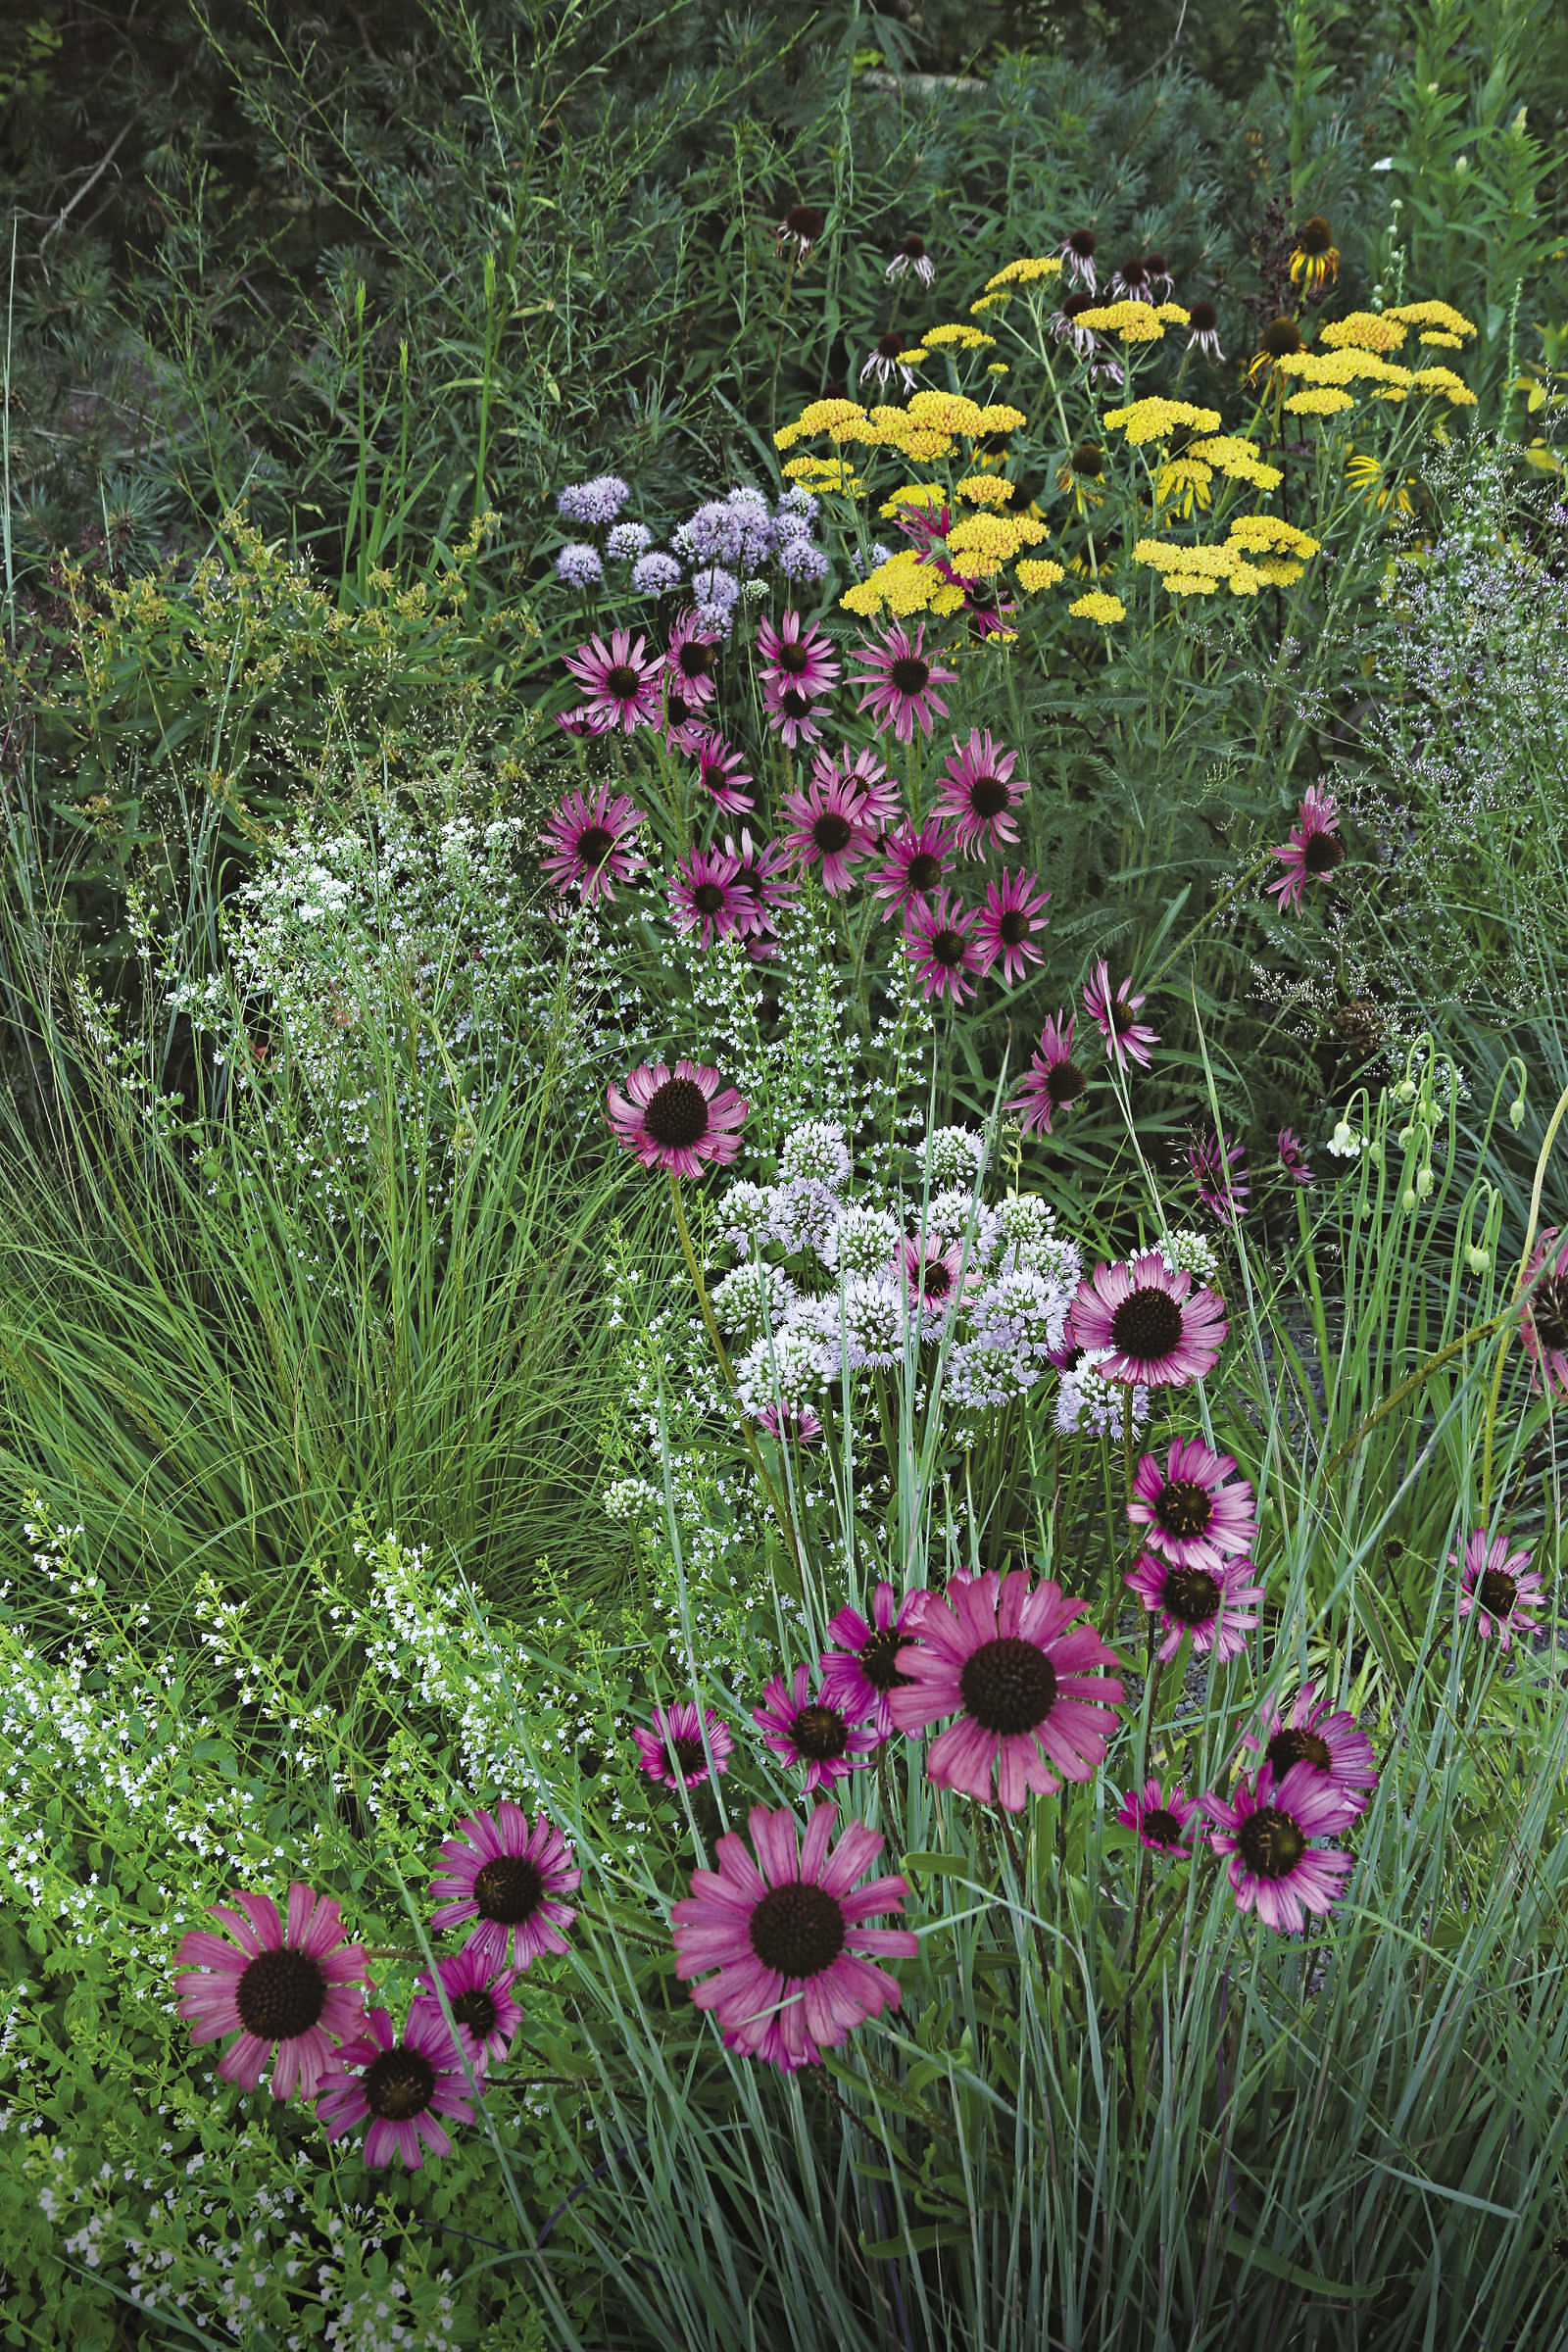
The gravel garden concept is not new, and most keen gardeners might associate it with one of the greatest gardeners of our time: Beth Chatto. Beth converted a gravel parking lot into a beautiful, drought-tolerant garden more than 25 years ago. Her gardens in Essex County, England, thrive despite a meager 20 inches of rainfall each year, inspiring many gardeners over the years—including me. Much like Beth’s gardens, the Olbrich gravel gardens are chock-full of tough, lush, and colorful plants that grow harmoniously together. The only time you can see gravel is when we cut the plants back in spring before they come back to life for another season. Some of the greatest things about our gardens, beyond their beauty, are their ease of care and their inherent environmental compatibility with our climate.
The following are the steps we took when installing our gravel gardens. Though you may not want to transition your whole landscape to this concept, you can start out small and see for yourself all the advantages these types of gardens have. Once you do, you’ll be tempted to replace your entire front lawn with a gravel garden—which is exactly what I’ll be doing at home this spring!
How to create a gravel garden
With a simple plan, you too can install a landscape that virtually takes care of itself.
Step 1: Pick a site
First, select a site that has decent soil drainage. Once you have that, you begin by removing any existing herbaceous vegetation, either mechanically or with the aid of a non-selective herbicide like glyphosate. If there are existing trees or shrubs, they can be left in place and incorporated into the gravel garden; just remove any loose soil, mulch, or other organic matter from around the crowns of the plants.
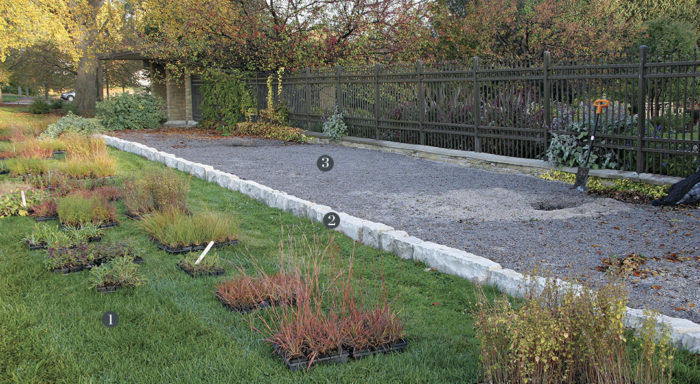
Step 2: Install an edge
Next, create a solid border or hard edge around the perimeter of the garden, if one doesn’t already exist. Medium size stone, large boulders, or pavers are often used to make an edge, but the foundation of a building, a driveway, an existing sidewalk, or a concrete curb all make good edgers, too. Just be sure that the permanent border is tall enough to retain the 4 to 5 inches of gravel that will be placed atop the soil. The border is critical because the gravel needs to be kept at a consistent depth throughout the garden, right up to the edges. If it tapers off at the edges, weeds will find their way in.
Step 3: Spread the gravel
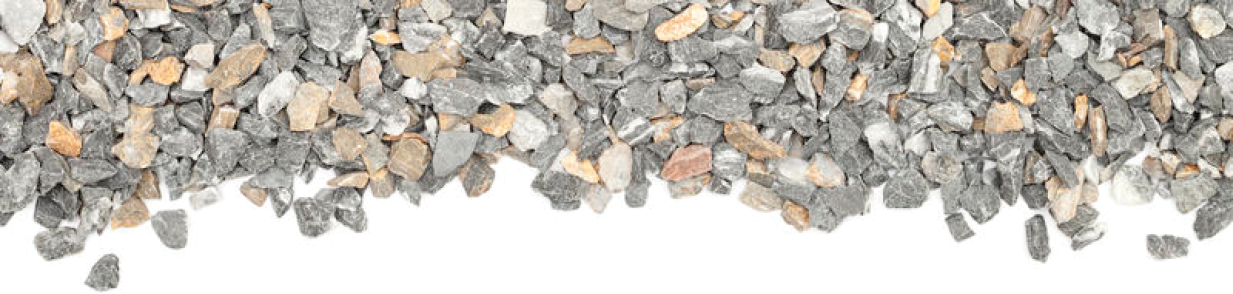
Now for the gravel, and not just any gravel: Washed 1/4- to 3/8-inch quartz or granite chip gravel works best. Every piece of gravel will be relatively the same size, so if you stick to these specifications, it will remain loose and never pack tight (picture marbles in a jar). We use local gray angular quartzite or rounded pea gravel, but any stone of similar size is fine.
If the planting bed is large, it’s a good idea to drive in stakes about every 4 to 5 feet. Make a mark on the stake about 5 inches above the soil line so that you can gauge the depth of the gravel as you spread it and ensure a consistent depth of 4 to 5 inches throughout the garden. This is a very important detail because the gravel acts as the barrier to weed seed germination. Too deep, and the plants perform poorly; too shallow, and the roots of weed seedlings can reach the soil below and become established in your nice, clean gravel garden.
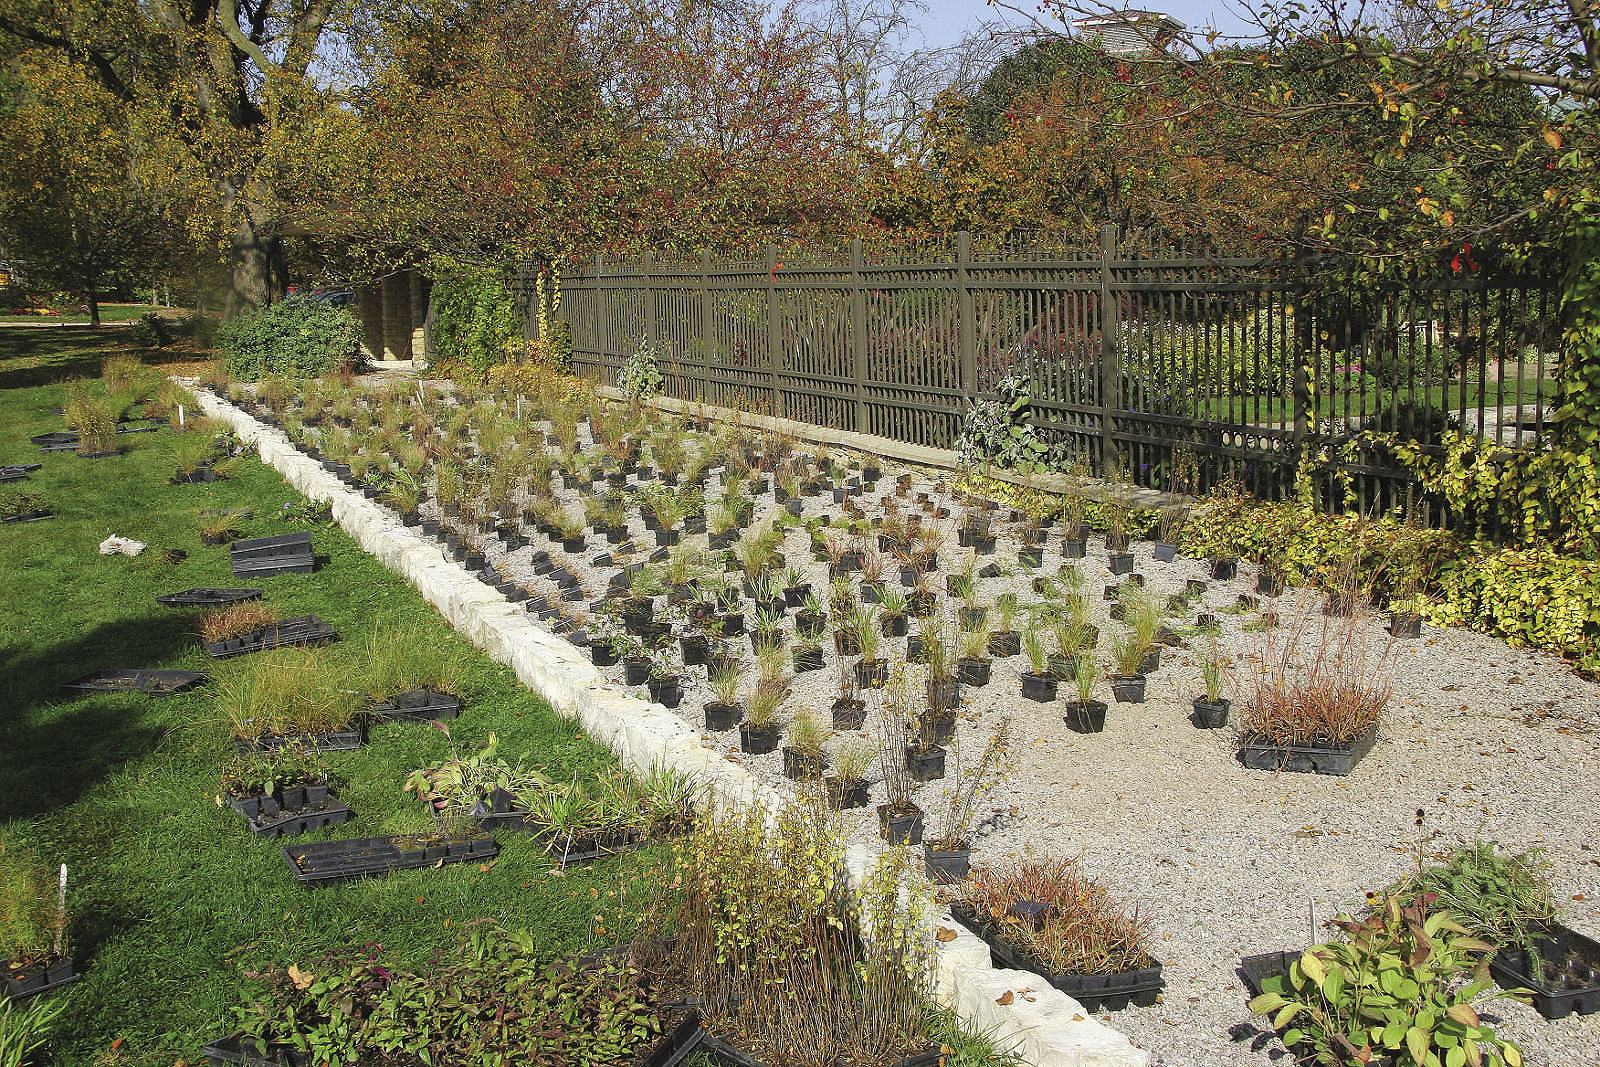
Step 4: Put the plants in
No special tools needed. Because you’re planting into loose gravel, you’ll only need your hands to dig a hole and put the plant in place. Once the gravel is in place, you are ready for the fun part—planting! Selecting drought-tolerant, deep-rooting species is essential. Perennials grown in 3-1/2- to 4-1/2-inch pots are the ideal size because they typically have a root-ball depth of 4 inches (the same depth as the gravel). Larger potted plants can be used, but the root balls have to be reduced to a 4-inch depth, so they will be more difficult and time-consuming to plant. Smaller pots or plugs can also be used, but they take longer to root into the soil, therefore making them more vulnerable to drought stress during the establishment period. Plants should be spaced anywhere from 10 to 15 inches on center, depending upon their mature sizes. The goal is to cover the gravel with vegetation and create a living, interacting community of plants, so tighter-than-usual spacing is best.
When planting, be careful not to spill any potting mix into the gravel, as this may create a potential weed seed bed in the future. Soil or organic matter build-up in the gravel is our enemy, and we always look to keep that from happening. Maintaining the air space between gravel particles makes it hard for weed seedlings to get a foothold. No special tools are needed for planting, just a good pair of gloves to dig through the gravel and put the root ball in place. When setting the plants in the gravel, their crowns should be flush or just slightly below the top of the gravel. Remove the top inch or so of soil from the root balls before planting. In the process of removing that soil, you will also remove the majority of dormant weed seeds that may germinate after planting. You will get most of the seed, but not all; however, the weeds we have pulled in the first two years (which haven’t been many) were in the perennials’ crowns, not in the gravel between plants.
Once the garden is planted, you will have what looks like a sea of gravel with a few dots of green here and there. Even though you see more gravel than plants the first season or two, don’t despair; that will quickly change as the plants grow to maturity. In 2 to 3 years, you will enjoy a beautiful tapestry of lush, colorful plants, and the gravel will lie hidden below, doing its job of controlling your weeds.
Step 5: Get everything established
Establishing your plants is a bit different in a gravel bed than in a conventional perennial bed or border. Maintenance will be much easier in the long run, but getting the garden off to a good start is critical to its long-term success. The key to a good start is water, water, and more water. This seems contrary to the whole gravel garden concept, but that requirement changes as the plants root in. Once they reach maturity, they will, in turn, reach their maximum drought tolerance. Even though the plant species selected for the garden are naturally drought tolerant, they need to root deeply into the soil below the gravel to be that way.
Keep in mind that the only moisture available to the plant initially is in the soil mass that it was planted with; the surrounding gravel has little to no water-holding capacity. Water the plants as if they were still in the plastic pots they were initially grown in. In the beginning, that may mean daily watering on sunny, hot, windy days. As the plants grow and root in, the watering will become less frequent.
The best way to know when it’s time to water is by monitoring the plants daily. Water when you see signs of stress—most often, off-colored and wilting foliage. A good way to make it easy on yourself and your plants is to set up a temporary irrigation system that can be left in place for the first season. Hoses and impact sprinklers are relatively inexpensive and worth the investment. We do like to water by hand whenever possible to conserve this precious resource, but when we can’t, the sprinklers do a good job of quenching our plants’ thirst.
Step 6: Make a maintenance plan
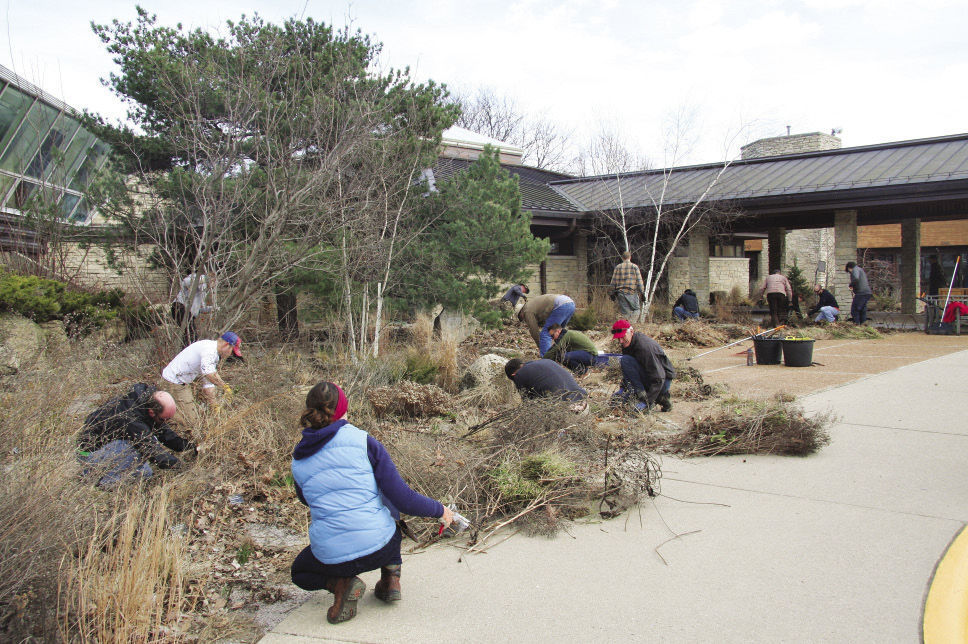
The best part of a gravel garden may be the maintenance, or should I say the lack thereof? In spring, after enjoying the dried plants, including flower and seed structures and the associated birds they attract over the winter, we cut back all of the herbaceous plants. We use shearing tools of all types to cut everything back to within a couple of inches of the gravel and remove as much organic matter as humanly possible. Two people working in tandem—one with a rake, and the other with a mechanical blower—do a fantastic job of cleaning up the garden. That’s it! Well, you’ll still pull a few weeds here and there because nothing in life is perfect and maintenance free. There’s always that occasional dandelion seed that blows in and lands in the crown of one of your beauties that has to be pulled, but in the long run, you’ll spend a fraction of your time maintaining your gravel garden compared to your traditional perennial bed or border.
Plants
Jeff’s top gravel-garden plants
Generally, what makes a perfect gravel garden plant is simple: low water needs, tolerance of exceptionally dry conditions, and at least three seasons of good looks.
1. Lead plant (Amorpha canescens)Zones: 2–9 Size: 2 to 3 feet tall and wide Conditions: Full sun; dry to medium, well-drained soil |
 |
2. Eastern bee balm (Monarda bradburiana)Zones: 5–8 Size: 18 to 24 inches tall and wide Conditions: Full sun to partial shade; well-drained soil |
 |
3. ‘Summer Beauty’ ornamental onion(Allium ‘Summer Beauty’ )Zones: 5–8 Size: 12 to 18 inches tall and 18 to 24 inches wide Conditions: Full sun; dry to medium, well-drained soil |
 |
4. Prairie dropseed (Sporobolus heterolepis)Zones: 3–9 Size: 2 to 3 feet tall and wide Conditions: Full sun; dry to medium, well-drained soil |
|
5. Pale purple coneflower (Echinacea pallida)Zones: 3–10 Size: 2 to 3 feet tall and 12 to 18 inches wide Conditions: Full sun to partial shade; dry to medium, well-drained soil |
|
6. ‘The Blues’ little bluestem (Schizachyrium scoparium ‘The Blues’)Zones: 3–9 Size: 2 to 4 feet tall and 18 to 36 inches wide Conditions: Full sun; dry to medium, well-drained soil |
|
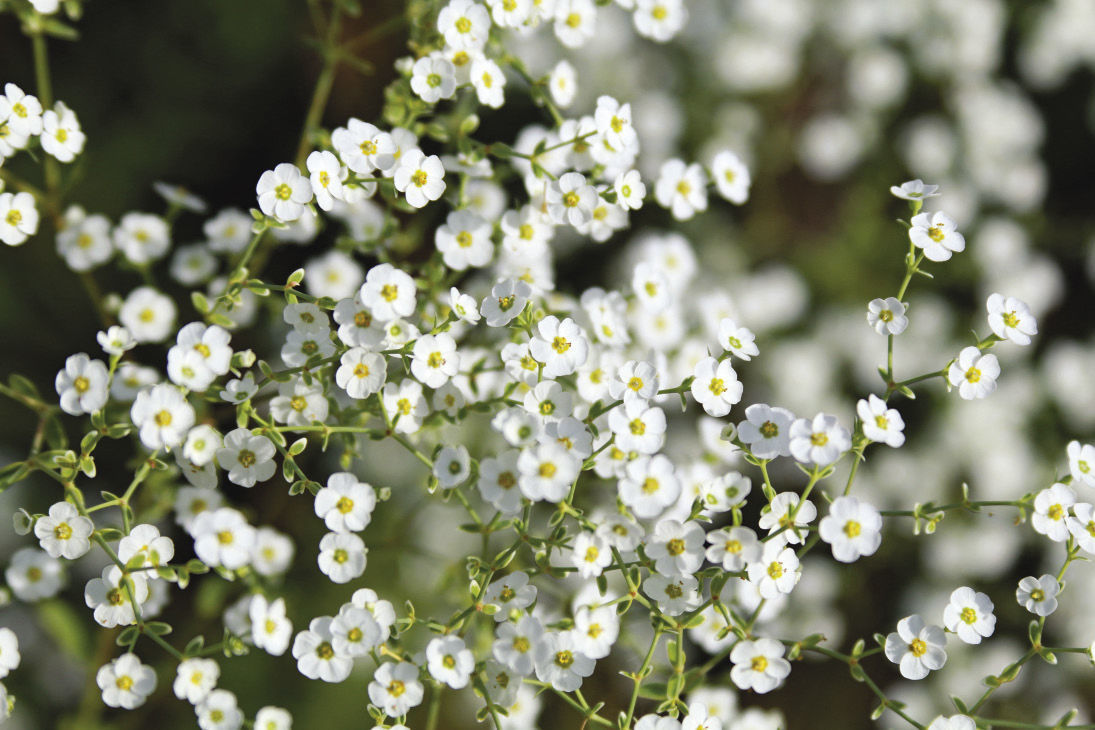
7. Prairie baby’s breath (Euphorbia corollata)Zones: 3–9 Size: 18 to 30 inches tall and 18 to 24 inches wide Conditions: Full sun to partial shade; dry to medium, well-drained soil |
 |


Care Tip
Why no fertilizer?
Typically, the drought-tolerant species we plant in gravel gardens grow in poor, dry soils that are low in fertility. If grown in fertile soils or fertilized regularly, they grow fast and tend to open up in the center (typical in rich garden soils). Then we have to divide the perennials to get them to look good. Not fertilizing lets the plants grow slow and steady, without ever having to divide—which would mess up the gravel garden’s soil-under-gravel matrix.
 Jeff Epping is director of horticulture at Olbrich Botanical Gardens in Madison, Wisconsin.
Photos, except where noted: courtesy of Jeff Epping; Danielle Sherry


Comments
Log in or create an account to post a comment.
Sign up Log in