

-
Photo/Illustration: Greg Holdsworth (All photos)
-
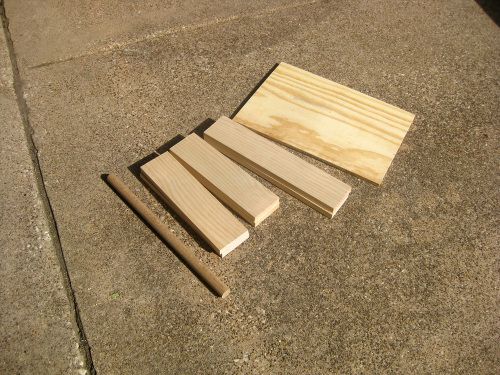
PHOTO A - All of the pieces cut and ready to assemble.
-
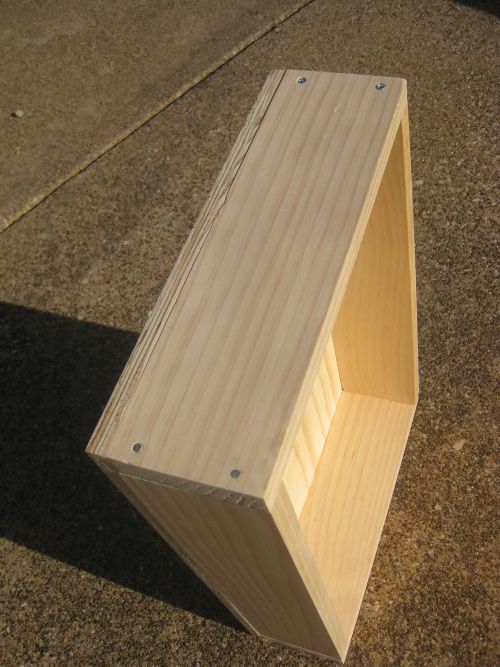
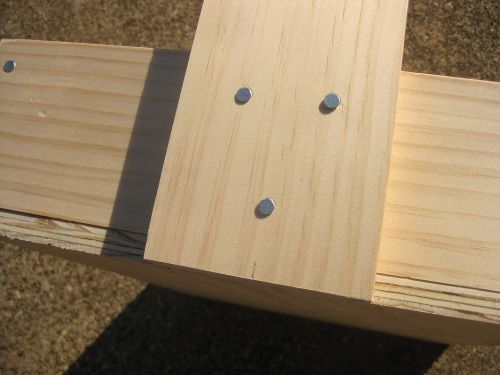
PHOTO B - Frame nailed together.
-
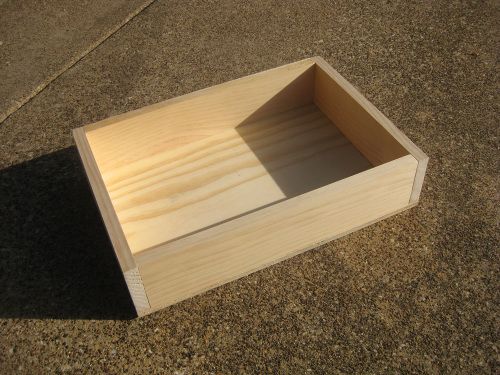
PHOTO C - The box frame is completed.
-
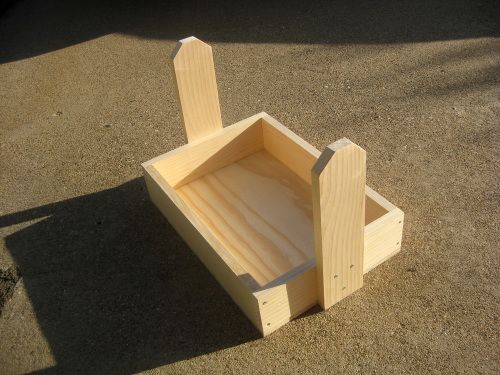
PHOTO D - The box frame with handle supports attached.
-
PHOTO E - Putting in three nails in a triangular configuration will help prevent the handle from moving.
-
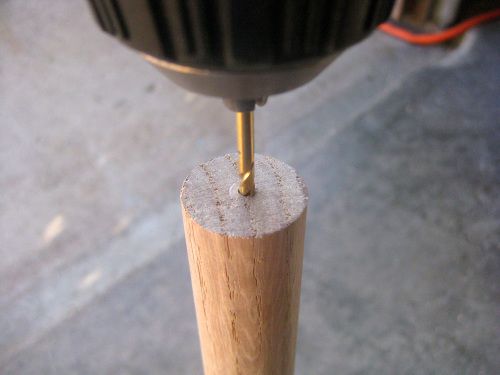
PHOTO F - You'll definitely want to predrill the holes for the dowel.
-
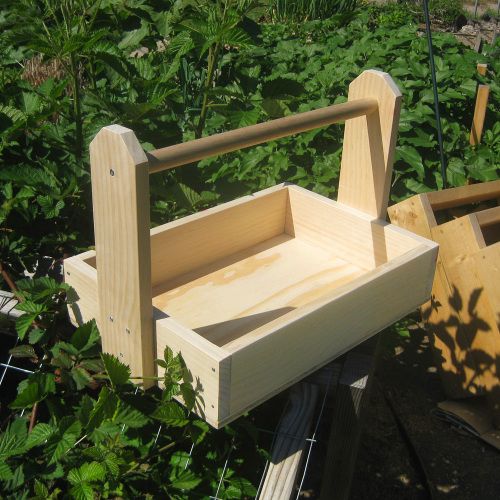
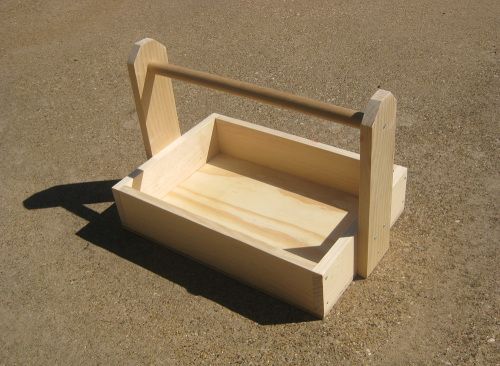
PHOTO G - Ready for the berries!
Last year I dipped my toes into the world of growing berries (specifically raspberries and blackberries). The plants grew well in the fall, but then went into a depressive-looking state of hibernation through the winter. With spring arriving over a month ago, the plants have come back to life, and are growing with a vengeance. Now that the flowers are dropping off, I can see that it’s about to be “berry time”. So, with that, I needed a container for harvesting. Enter my “berry own” berry box. This project will produce a box approximately 17 1/2″ wide, by 12 1/2 inches long, by 13 inches tall.
The list of things you’ll need:
• 1 – 1″ x 3″ x 8′ wood board (cedar, pine, etc.)
• 1 – 1/2″ thick sheet of plywood, 18″ x 12 1/2″
• 1 – 18″ wood dowel, 1″ diameter
• 10-15 box nails, 6d (2″ long)
• 18-20 box nails, 4d (1 1/2″ long)
• Saw (circular saw strongly recommended)
• Drill and drill bits
• Pencil and tape measure
• Square (metal or fast plastic type)
• Sandpaper or sanding block
• Hammer
• Waterproof wood glue (optional, but highly recommended)
Skill Level:
Easy to intermediate
Construction:
1. Using the 1″ x 3″ x 8′ board, cut two 16 1/2″ lengths (for the front and back sides of the box), two 12 1/2″ lengths (for the sides), and two 13″ lengths for the handle support pieces.
2. Using the sheet of plywood, cut a piece 18″ long and 12 1/2″ wide.
3. Using the wood dowel, cut a length 18″ long. Now you’ve got the pieces you’ll need (PHOTO A).
4. Build the box’s frame by nailing the front and back pieces (16 1/2″ long) to the opposite ends of the side pieces (12 1/2″ long) (PHOTO B). Nail the frame to the piece of plywood to create the box (PHOTO C).
Tips: Pre-drilling the holes for the nails will make it easier to put them in. If you choose to use the wood glue, I found it easier to glue the four sides of the frame to the piece of plywood first, and THEN nail the whole thing together.
5. On the two handle support pieces, cut the corners at a 45-degree angle on one side.
6. Nail the two handle supports to the box/frame, aligning them at the bottom edges (PHOTO D). I ended up using three nails here, to prevent the handle from moving side to side (PHOTO E).
7. Pre-drill the nail holes at both ends of the wood dowel, as well as the handle support pieces (PHOTO F). Then nail the dowel piece in place between the handle support pieces..
At this point, your box is ready for berry harvesting (PHOTO G). Finally, I would sand all edges to prevent slivers.
Now get pickin’!


Comments
Log in or create an account to post a comment.
Sign up Log in