

-
Photo/Illustration: Greg Holdsworth (All photos)
-
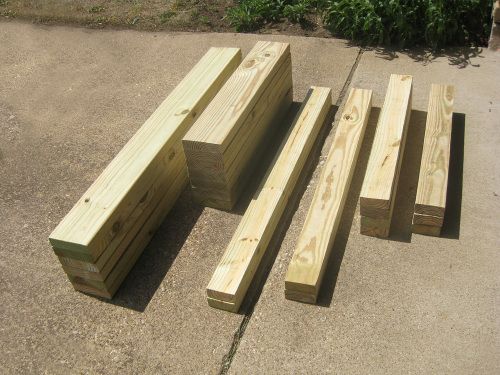
PHOTO A - The cut pieces before assembly.
-
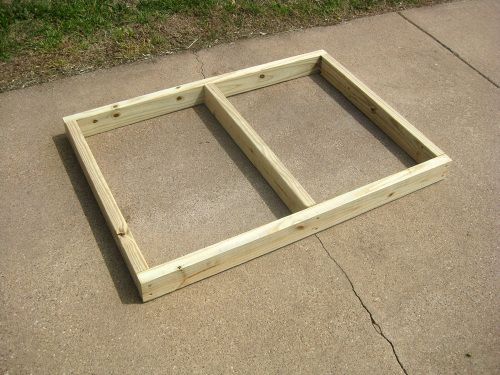
PHOTO B - The tabletop frame.
-
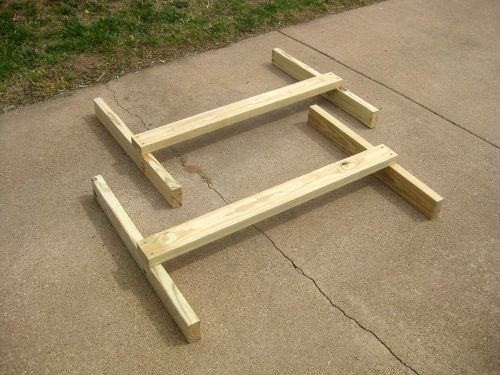
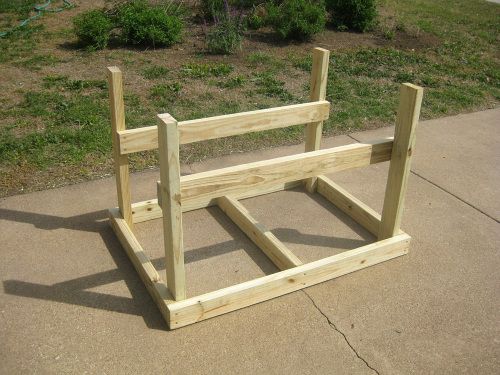
PHOTO C - The two leg sections.
-
PHOTO D - The two leg sections secured to the tabletop frame.
-
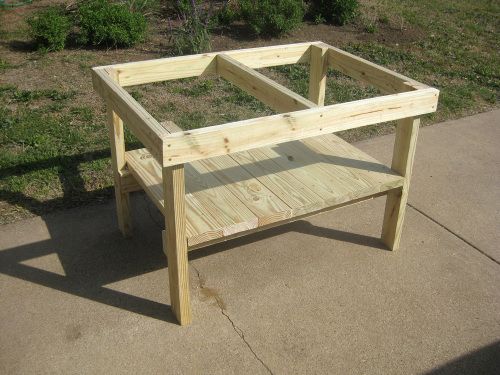
PHOTO E - The bench with the bottom shelf put in.
-
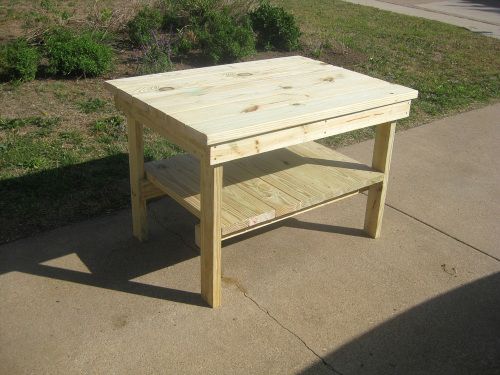
PHOTO F - The bench with the top shelf in place.
-
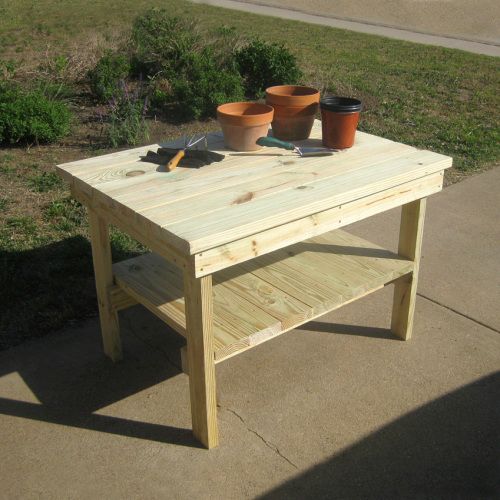
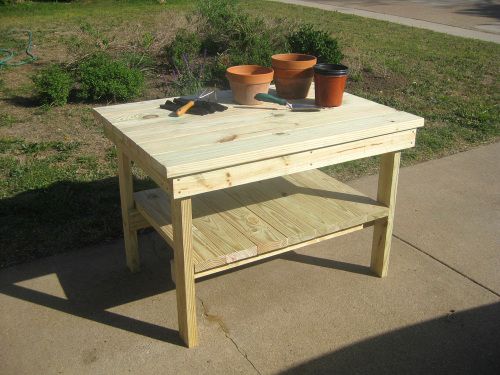
Ready for pots and plants!
-
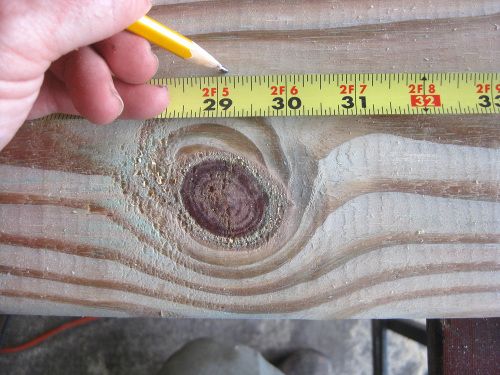
Greg's Misc. Tip #1: You may encounter a situation where the cut mark falls right where a knot in the lumber is. Try to avoid this by measuring from the other end of the board, or if you have enough extra, move all of the cut lines over.
-
Greg's Misc. Tip #2: In cases where you don't have a lot of extra leftover on the board you're cutting, or the pieces need to be cut exactly the same length, cut with the blade on the side of the cut mark. That way, the thickness of the blade itself won't throw off the measurement.
Somehow in my many years of gardening, I’ve gotten by with not having a dedicated workspace in which to repot my transplants and landscape plants. My work area was the ground, which meant bending over or being in some other uncomfortable position. In my never-ending quest to make gardening tasks easier, I finally got around to building myself a potting bench. This project will produce a bench approximately four feet long, by 30 inches wide, by 31 inches tall. You will need to enlist a friend to move it to its location, as it turned out to be quite heavy.
The list of things you’ll need:
• 3 – 2″ x 4″ x 8′ boards
• 1 – 2″ x 4″ x 10′ board
• 4 – 2″ x 6″ x 8′ boards
• 1 – 2″ x 6″ x 10 board
• 1 lb. box (or similar) – 2 1/2″ deck screws
• Saw (circular saw strongly recommended)
• Drill and drill bits
• Pencil and tape measure
• Square (metal or fast plastic type)
• Sandpaper or sanding block
• Wood stain (optional)
Skill Level:
Easy to intermediate
Construction:
1. Using the 2″ x 6″ boards, cut six 47 3/4″ lengths (for the tabletop), and seven 29 1/8″ lengths (for the lower shelf).
2. Using the 2″ x 4″ boards, cut two 45 3/8″ lengths (for the front and back frame), three 29 1/8″ lengths (for the frame’s sides and center), four 30 1/2″ lengths (for the legs), and two 42 3/8″ lengths (for the shelf supports) (PHOTO A).
Yes, I know… it’s frustrating when you get these kind of directions, because you don’t know which lengths are cut from each board. Do the wrong cuts and you’ll be heading back to the hardware store. No worries, I’ve got you covered. Here’s the breakdown of the cuts that need to be made to each board:
Board #1 (2″ x 4″ x 8′) – 45 3/8″ and 45 3/8″ (about 5 1/4″ extra)
Board #2 (2″ x 4″ x 8′) – 29 1/8″, 29 1/8″ and 29 1/8″ (about 8 5/8″ extra)
Board #3 (2″ x 4″ x 8′) – 30 1/2″, 30 1/2″ and 30 1/2″ (about 4 1/2″ extra)
Board #4 (2″ x 4″ x 10′) – 42 3/8″, 42 3/8″ and 30 1/2″ (about 4 3/4″ extra)
Board #5 (2″ x 6″ x 8′) – 47 3/4″ and 47 3/4″ (about 1/2″ extra)
Board #6 (2″ x 6″ x 8″) – same as board #5
Board #7 (2″ x 6″ x 8″) – same as board #5
Board #8 (2″ x 6″ x 8′) – 29 1/8″, 29 1/8″, 29 1/8″ and 29 1/8″ (about 8 5/8″ extra)
Board #9 (2″ x 6″ x 10′) – 29 1/8″, 29 1/8″, 29 1/8″ and 29 1/8″ (about 3 1/2″ extra)
3. Build the tabletop’s frame by screwing the front and back pieces (45 3/8″ long) to the opposite ends of the side and center pieces (29 1/8″ long) (PHOTO B).
4. Build the left leg support by screwing one of the bottom shelf supports (42 3/8″ long) to two leg pieces (30 1/2″ long) at 10″ from the ends of the leg pieces. Repeat this for the right leg support (PHOTO C).
5. Screw the two leg supports to the tabletop frame piece (PHOTO D). Your wooden creation is now looking like a table.
6. Complete the bottom shelf by screwing in the seven 29 1/8″ lengths into the bottom shelf supports (PHOTO E).
7. Complete the top shelf by screwing in the six 47 3/4″ lengths into the tabletop frame (PHOTO F). Tip: Before you screw in the pieces, look at the underside of the top shelf from all sides to make sure the overlap distance is the same all the way around.
Note: You will want to counter sink the screws on both shelves to prevent any sharp points in the wood.
At this point, your bench is basically ready for active dirty duty (PHOTO G). I would sand the edges to prevent slivers. If your bench is to be stained, wipe off any excess sawdust first.


Comments
Log in or create an account to post a comment.
Sign up Log in