


Did you ever love a plant so much that you wished you could make more of it? I feel that way about Japanese snowball bush ( Viburnum plicatum f. plicatum , USDA Hardiness Zones 6–8). It’s big, bold, and beautiful—and I’ve always wanted a few more around my yard. But a sizable shrub can, unfortunately, cost $40 or more at the nursery, and to be honest, I’d rather spend that money on something new. But if I could propagate more little plants from my full-grown shrub, I would. Taking hardwood cuttings is the way to do it, but for years, I’ve been intimated to try this technique. Even seasoned gardeners say that it is hard to do successfully. With the following step-by-step methods, though, I found out just how easy it can be to make more of your most treasured woody plants.

Photo/Illustration: Steve Aitken
Photo/Illustration: Steve Aitken
Not every plant is a candidate for the hardwood-cutting method of propagation. The ones that do qualify are mostly deciduous trees or shrubs that go through a period of dormancy before pushing significant new growth. Below is a list of some of the most popular plants to propagate this way:
- Abelia (Abelia spp. and cvs., Zones 6–9)
- Aspen (Populus spp. and cvs., Zones 1–9)
- Barberry (Berberis spp. and cvs., Zones 3–9)
- Blueberry (Vaccinium spp. and cvs., Zones 2–8)
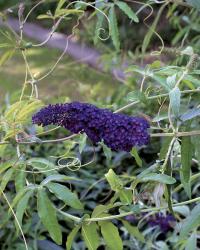
- Butterfly bush (Buddleia spp. and cvs., Zones 6–9)
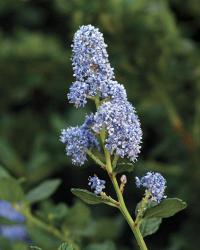
- California lilac (Ceanothus spp. and cvs., Zones 4–10)
- Camellia (Camellia spp. and cvs., Zones 7–8)
- Deutzia (Deutzia spp. and cvs., Zones 5–8)
- Dogwood (Cornus spp. and cvs., Zones 2–9)
- Elder (Sambucus spp. and cvs., Zones 3–9)
- Euonymus (Euonymus spp. and cvs., Zones 4–9)
- Forsythia (Forsythia spp. and cvs., Zones 3–9)
- Mock orange (Philadelphus spp. and cvs., Zones 4–9)
- Rose of Sharon (Hibiscus syriacus* and cvs., Zones 5–9)
- Viburnum (Viburnum spp. and cvs., Zones 3–9)
- Weigela (Weigela spp. and cvs., Zones 4–9)
- Willow (Salix spp. and cvs., Zones 4–9)
*Potentially invasive
The Prep Work: Cut, coat, then make the mix
Photo/Illustration: Danielle Sherry
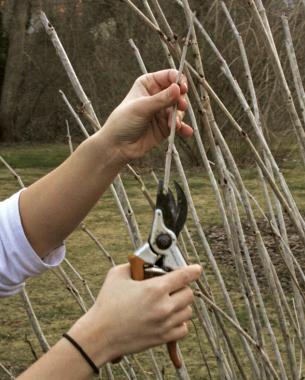
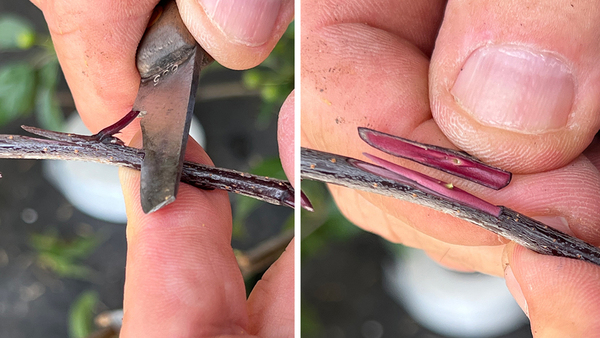
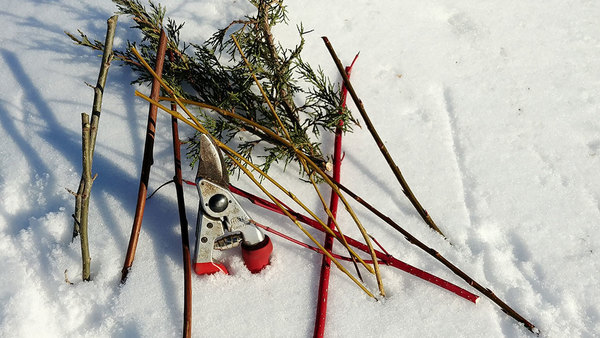
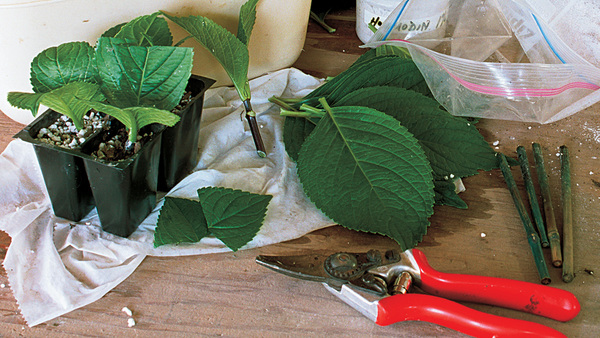
Step 1: For each of the propagation methods, take cuttings of your tree or shrub in the dormant season. Cut a 6- to 8-inch-long section of stem, preferably from the previous season’s growth. The top of the section should have an angled cut (to prevent water from settling and causing tip rot) just above a single bud or pair of buds. The bottom of the section should have a straight cut just below a single bud or pair of buds.
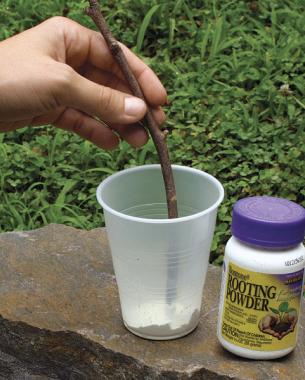
Step 2: Dip the base of each cutting into a rooting-hormone powder, which can be found at most gardening-supply stores.
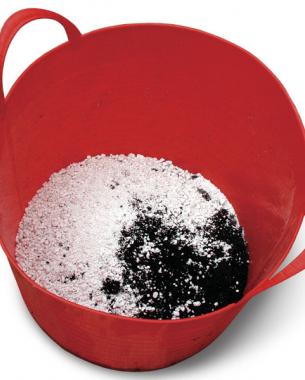
Step 3: If you are going to pot up your cuttings or put them into plastic rolls to root them, you’ll need to make a special potting soil. The mixture should be four parts compost (peat-free) to one part perlite. Be sure to combine the ingredients thoroughly.
Photo/Illustration: Danielle Sherry
Photo/Illustration: Danielle Sherry
Method 1: Roll them up in plastic to make the most plants
Photo/Illustration: Danielle Sherry

Photo/Illustration: Danielle Sherry
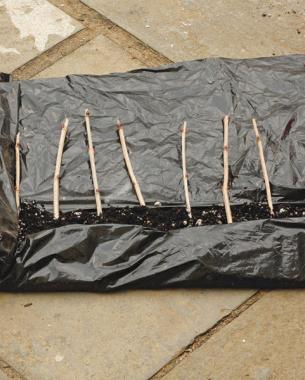
Step 1: To make the largest number of new plants in the smallest amount of space, cut a piece of black plastic that is 1 foot wide and 3 feet long; heavy-duty contractor’s garbage bags work well, as do recycled potting-soil bags. Place several handfuls of moistened potting mix down the length of the plastic sheet, then line up the cuttings (2 to 3 inches apart) on top of the soil.
Step 2: Fold in the base of the plastic sheet so that it covers the bottom 2 or 3 inches of the cuttings, then roll up the entire sheet. Secure the roll with large rubber bands, and poke drainage holes into the base with a razor blade.
 Step 3
Photo/Illustration: Danielle Sherry
Too much water is worse than not enough
When it comes to keeping your cuttings moist, err on the dry side. Because the small branches don’t have any roots to start, they won’t be absorbing the excess water in the soil around them. Too much rainfall or watering by hand can quickly lead to rotted cuttings. Also, don’t fertilize the cuttings until they are rooted and transplanted; fertilizers can burn tender cuttings or even kill them.
Method 2: Put them in a pot to get the best root development
Photo/Illustration: Danielle Sherry
Photo/Illustration: Danielle Sherry
Photo/Illustration: Danielle Sherry
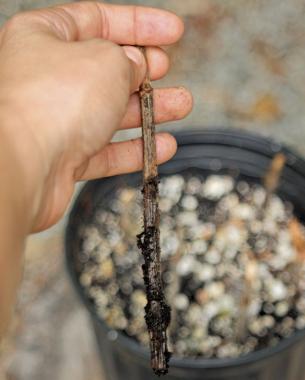
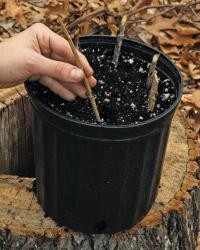
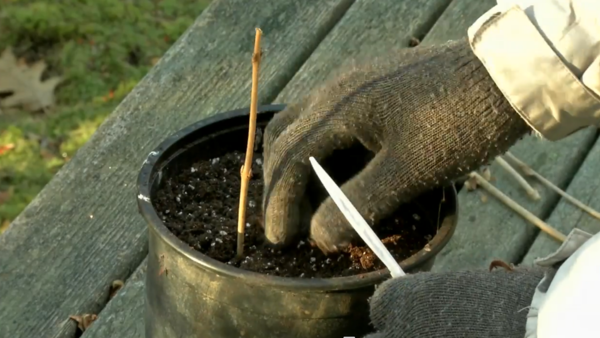
Step 1: Fill a 1-gallon pot with potting soil and then push five to seven cuttings into the pot (around the edge), leaving just one bud or one pair of the buds exposed.
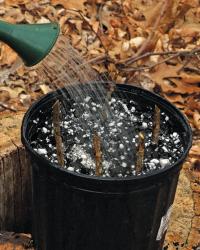
Step 2: Water the cuttings in, making sure that the soil is consistently moist throughout the pot.
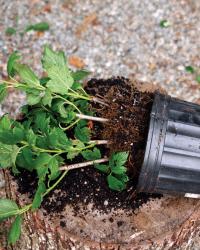
Step 3: Place the pot in a cold frame or in an unheated location where it will still receive some light (by a window in the garage, for example), and keep it there throughout winter and into spring. Keep the soil fairly dry during the coldest months. Increase watering as the days get warmer, and move the pot outside to a partially shaded spot after the last frost. You should see some shoot growth by midspring, but wait until late summer before transplanting the rooted cuttings.
Method 3: Sink them into the soil to let nature do the work
Photo/Illustration: Danielle Sherry
Photo/Illustration: Danielle Sherry
Photo/Illustration: Danielle Sherry
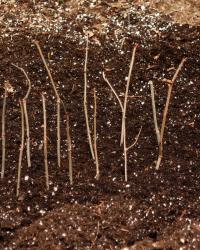
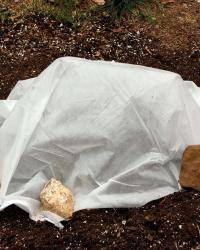
Step 1: Select a location that has amended, well-drained soil, such as a raised bed. Insert the cuttings into the soil, leaving a pair of buds aboveground and spacing them at 4- to 6-inch intervals. If the soil is partially frozen and difficult to work, use a shovel or pitchfork to dig a shallow trench.
Step 2: Cover the cuttings with a floating row cover to help them overwinter outside without damage. Periodically check the cuttings to make sure they haven’t shifted and to lightly water if the conditions are dry.
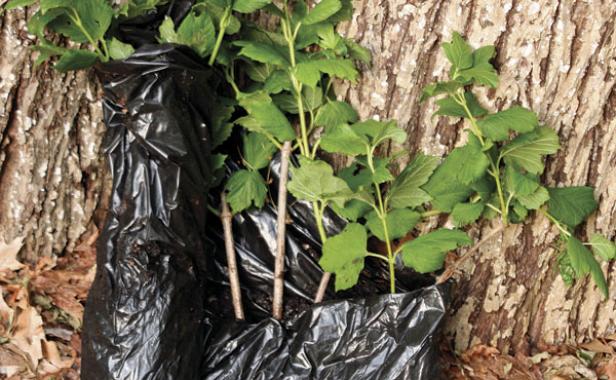
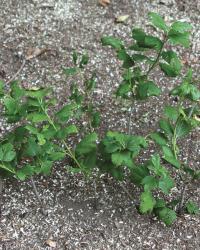
Step 3: Remove the cover in spring, when you start to see sprouting. Wait until late summer or early fall before transplanting the rooted cuttings.


Comments
Thanks for the information!!
Good one!!
Really appreciated!
Awesome!
its really very nice video
interesting
amazing
fantastic
Log in or create an account to post a comment.
Sign up Log in