

Save Money and Grow More Plants With Tip Cuttings
Why buy multiples of the same plant when you can make more of them at home?
Over the years I’ve propagated hundreds of new coleus (Plectranthus scutellarioides cvs.) plants. Considering the vast number I use in my garden each year, I have to. Many of the varieties I want cannot be grown reliably from seed, and I just can’t justify buying, say, 15 of the same plant at $5 a pop. So instead I buy one and plunder it for tip cuttings, which I use to grow more plants. Within two weeks of returning home from a garden center with just the right coleus, I can root a whole colony of its offspring. Then I take tip cuttings from that brood, and soon I have a whole passel of plants.
And it doesn’t stop with coleus. Propagating by tip cuttings works just as well with other tender perennials—those not typically hardy in cold temperatures—like flowering maples (Abutilon spp. and cvs.), geraniums (Pelargonium spp. and cvs.), sages (Salvia spp. and cvs.), and many more plants. As with hardy perennials, I’m dividing to multiply, but all I need is bits and pieces of the plant’s stem and leaves rather than entire sections containing buds and roots. So if I spy a hard-to-find, must-have specimen in a friend’s garden, I can ask for a tip cutting or two to try at home. This technique also makes it easier to overwinter some of my favorite plants indoors so that they’re ready for the following season. Growing my own enriches my garden while saving me money, and for minimum effort I get maximum impact. If there’s anything difficult about rooting plants from tip cuttings, it’s deciding which one to start with.
7 easy steps to tip cuttings
I take cuttings three times a year: in late spring or early summer, to increase my stock of plants; in late summer, to create plants to overwinter indoors; and in early spring, to grow new plants that will be ready for the garden when temperatures rise.
What you will need
• Shears or pruners
• Single-edge razor
• Pencil or pen
• Powdered or liquid rooting hormone
• Potting medium
• Pots
• Latex gloves (optional)
1. Ready your pots
It’s best to grow tip cuttings in a soilless potting mix containing perlite (a volcanic mineral), vermiculite (a micaceous mineral), or sand for good drainage. You can whip up your own mix by combining equal volumes of peat moss and perlite in a 5-gallon bucket, adding water, and stirring. The mix should be moist but not soaked—just wet enough that if you squeeze a handful of medium, a few drops of water dribble out. After the mix is ready, fill your pots (I usually use 3-inch plastic containers) and gently tamp down the medium.
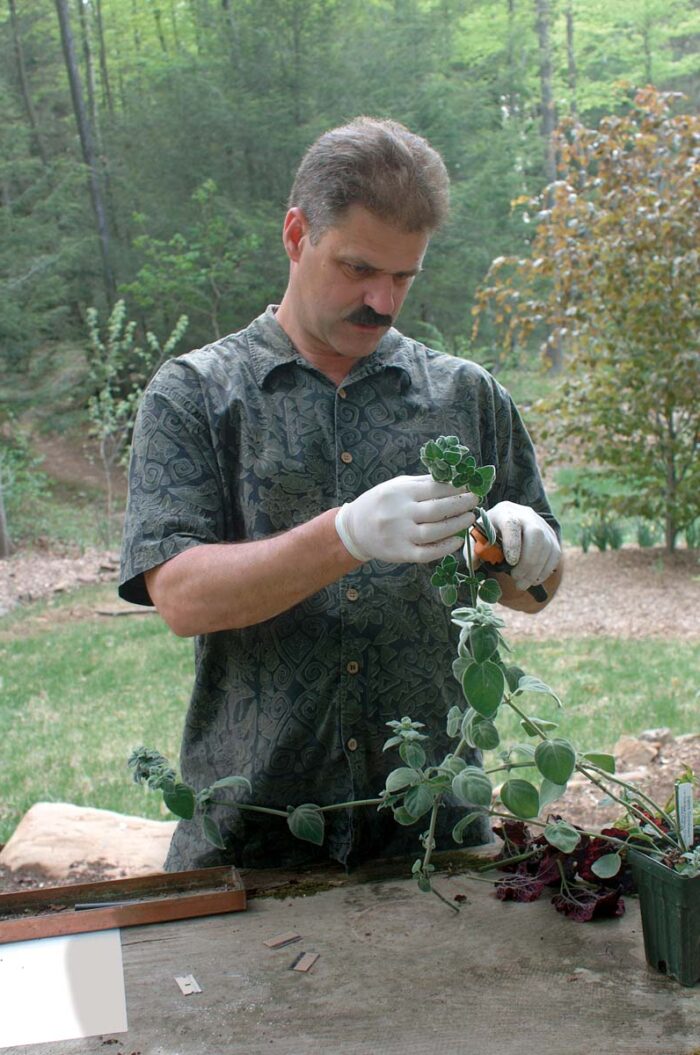
2. Make the cuts
| For plants growing outdoors, take tip cuttings in the morning, when the plant’s tissues are turgid. To ensure that tissues are well watered, give any candidates for cutting a good dousing the night before. Indoors, tip cuttings can be taken anytime. Use your trusty pruners to lop off stem tips, making sure that each piece has at least three sets of leaves. The stem should not be too woody or too soft; it should snap when bent. |  |
3. Prepare the cuttings
 |
 |
| Working in a shady spot, begin by trimming off the bottom pair of leaves right at the stem using a clean razor blade, pruners, or a sharp pair of scissors. Next, snip off the bottom of the stem just below where you removed the leaves. Leave the top two sets of leaves intact, unless they are very large, as with, say, angels’ trumpets (Brugmansia spp. and cvs.). In this case, cut them in half crosswise so the foliage will lose less water. Finally, dip the lower stem and the wounds where the leaves were removed into a small jar of rooting hormone, tapping any excess hormone on the stem back into the jar. Rooting hormone is reported to be nontoxic, but I like to wear latex gloves when working with any chemical. |
4. Pot them up

 |
 |
| Use a pencil to make a hole about an inch deep at the center of a prefilled pot. Then stick a cutting into the hole, taking care not to brush off the rooting hormone. Don’t stick the cutting in too deep because those that touch the bottom of the container have a tendency to rot. Next, firm up the soil around the cutting so that the plantlet stands tall and there’s good contact between the stem and the potting mix. As you pot up the cuttings, transfer them to a tray. When it’s full, pour water into the tray to provide a good bottom watering. I let about a quarter inch of excess water remain in the tray. Try to avoid watering from above, since water washing down through the soil carries much of the rooting hormone. |
5. Provide optimum growing conditions
 |
| Most cuttings like a moist, enclosed environment safe from extremes of temperature, burning sun, drying winds, and pounding rain. I find the best place to grow many of my cuttings indoors is in a translucent plastic sweater box placed beneath fluorescent lights hanging an inch or so above the top. I place the cuttings in the inverted lid, with the bottom translucent part placed on top like a greenhouse dome. I slide an inexpensive heating pad—the kind made for seed starting—underneath the box. This setup, however, can be too humid for some kinds of cuttings, encouraging them to rot rather than root. In this case, for better ventilation, I use an old aquarium covered with a sheet of glass kept slightly askew so the setup can breathe a little. Outdoors, in summer, the process is easier. Just put a tray of cuttings in a shady spot. |
6. Check for pests and diseases
| Check your cuttings every few days to make sure the planting medium is moist and to look for pests. Any aphids or whiteflies should be sprayed with soapy water. Harsher insecticides could harm the fragile cuttings. Also, remove any foliage that looks unhealthy or shows signs of fungal growth. If a plant continually sprouts fungal growth or seems to be rotting, it needs better ventilation. |  |
7. Test for roots
| Some plants root in 7 to 10 days; others may need a few weeks. To check if a cutting has rooted, tug on it gently. Sturdy resistance means it has roots. If it looks like a plant is not going to root, try a slightly larger cutting with a few more leaves. I’ve found geraniums, flowering maples, and tropical smokebush (Euphorbia cotinifolia) to be among the plants that do best with a slightly larger, leafier cutting. Another strategy for challenging plants is to take a cutting with a heel—a small strip of tissue from the main stem—at its base. Once your cuttings have roots, allow them at least three days of increasing exposure to sun and wind before planting them in your garden. |  |
Here are some of the tender perennials I’ve rooted with ease. It’s worth trying this technique on almost any plant, provided the cutting has a bit of stem and several sets of leaves.
• African daisies (Arctotis spp. and cvs.)*
• Alternantheras (Alternanthera spp. and cvs.)
• Angels’ trumpets (Brugmansia spp. and cvs.)
• Cape fuchsia (Phygelius capensis)
• Coleus (Plectranthus scutellarioides cvs.)
• Cupheas (Cuphea spp. and cvs.)
• Flowering maples (Abutilon spp. and cvs.)
• Fuchsias (Fuchsia spp. and cvs.)
• Annual geraniums (Pelargonium spp. and cvs.)*
• Helichrysums (Helichrysum spp. and cvs.)*
• Osteospermums (Osteospermum spp. and cvs.)
• Passionflowers (Passiflora spp. and cvs.)
• Persian shield (Strobilanthes dyerianus)
• Plectranthus (Plectranthus spp. and cvs.)
• Redleaf hibiscus (Hibiscus acetosella)
• Sages (Salvia spp. and cvs.)*
• Sanchezia (Sanchezia speciosa)
• Sweet potato vines (Ipomoea batatas cvs.)
• Tall verbena (Verbena bonariensis)
• Tropical smokebush (Euphorbia cotinifolia)*
*Ventilation recommended


Comments
Log in or create an account to post a comment.
Sign up Log in