

Planting a Pot with Lots of Plants
For a lush look, pick the right options and don’t be afraid to pack ’em in
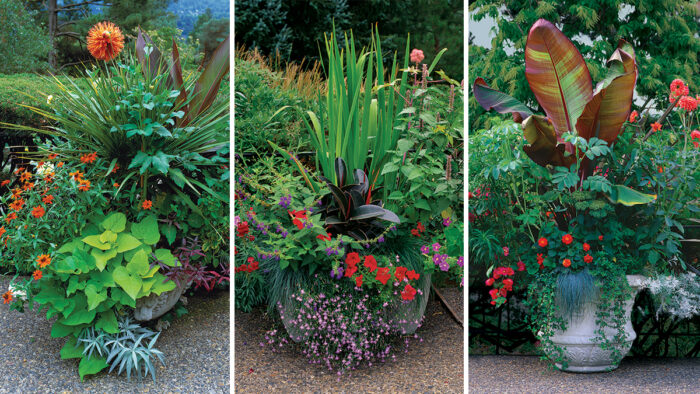
I stood looking at the expanse of decking that surrounds our pool area, and I knew that I had my work cut out for me. My mission was to soften the harsh lines of the hardscape. What better way to do that than with boldly planted pots? With a quick scan of the scene, it was evident that the four existing redwood containers were too small and in bad shape. I’m always up for a gardening challenge, however, so I dove right in.
My first action was to replace the redwood containers with large, sturdy concrete containers. Then, because I like a tropical look, I selected plants with bold, architectural shapes, such as bananas, cannas, and dracaenas, and planted each pot to its maximum capacity. The result was bountiful, dramatic, jam-packed containers that spilled over with color and visual interest.
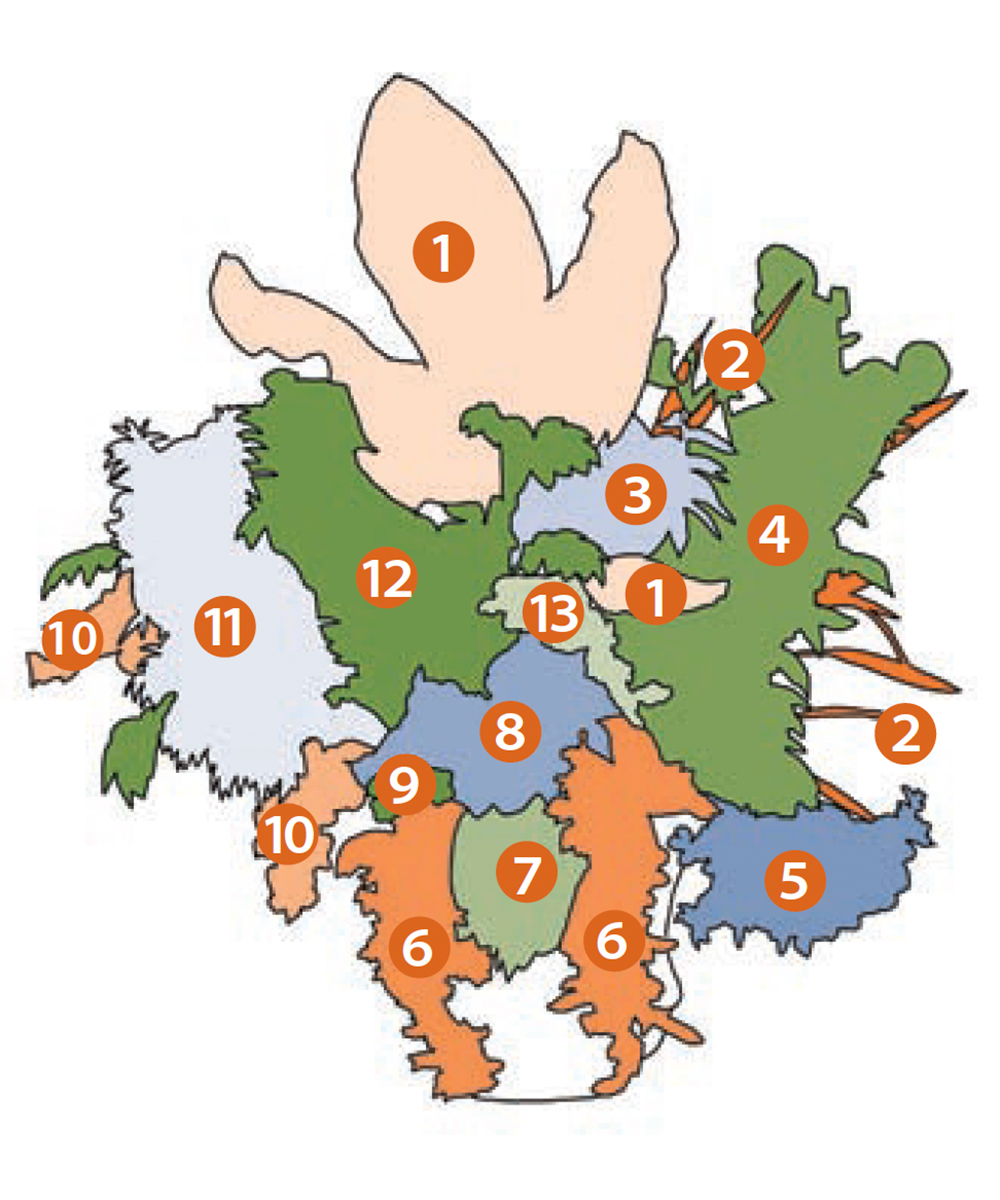
Combination 1
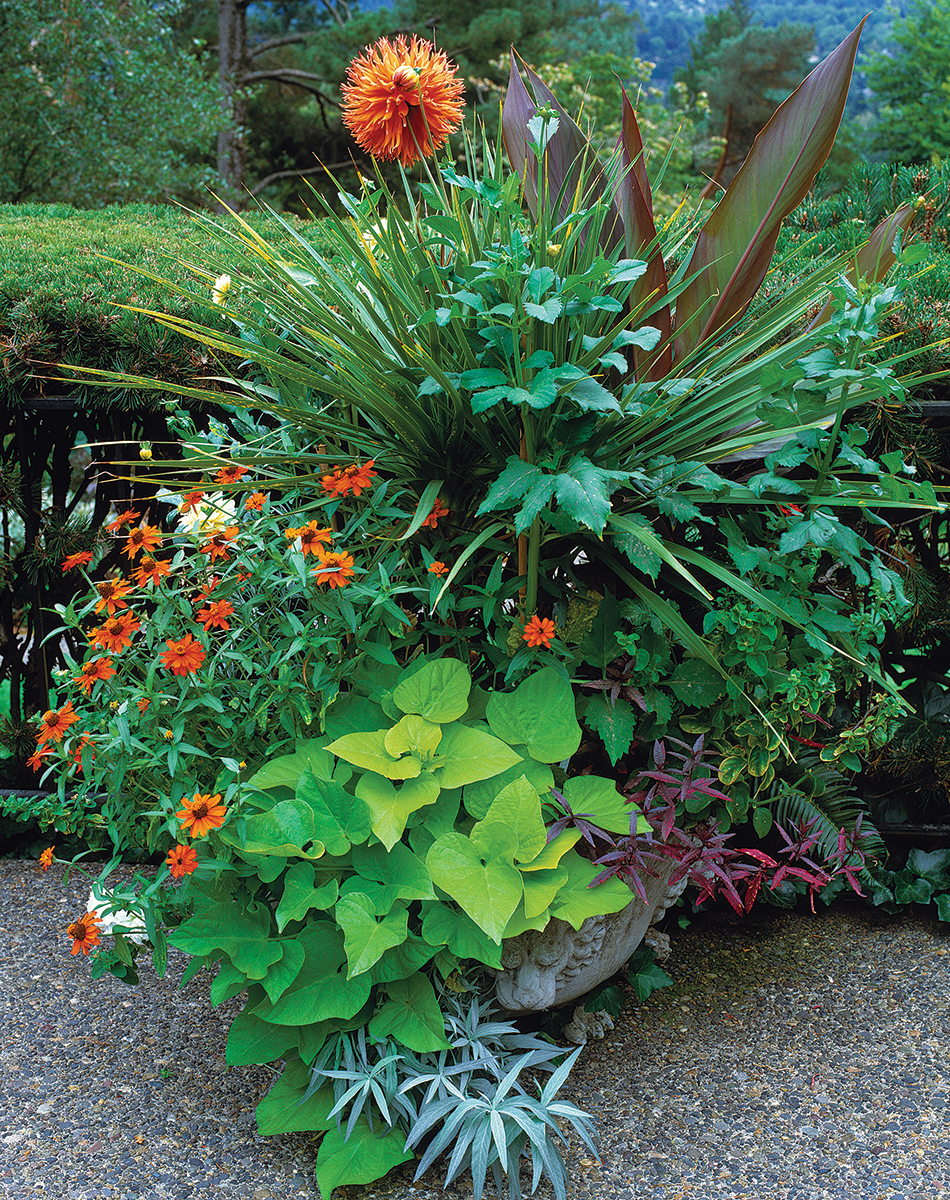
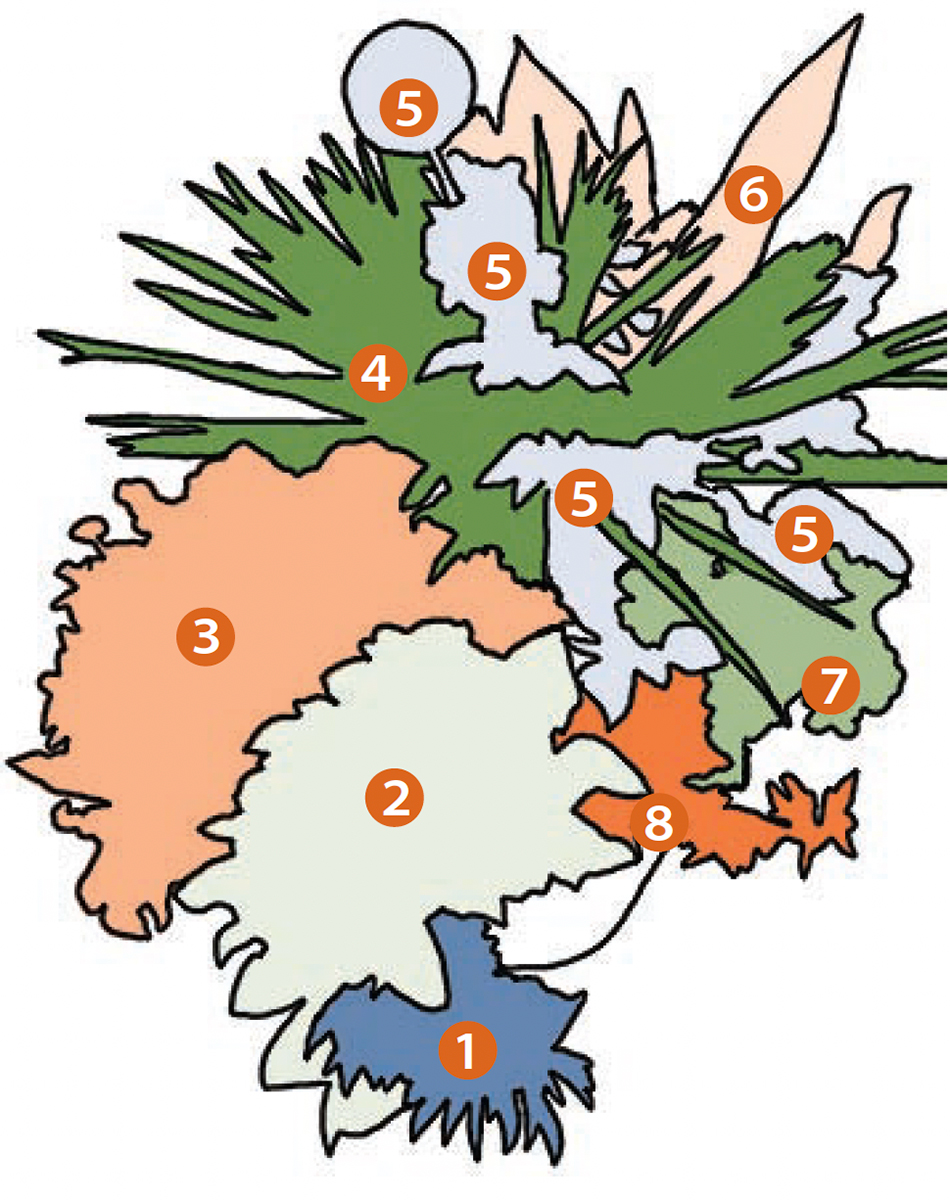
- Western mugwort (Artemisia ludoviciana, USDA Hardiness Zones 4–9)
- ‘Margarita’ sweet potato vine (Ipomoea batatas ‘Margarita’, Zone 11)
- ‘Profusion Orange’ zinnia (Zinnia ‘Profusion Orange’, annual)
- Dracaena (Dracaena sp., Zone 11)
- ‘Snoho Wonder’ dahlia (Dahlia ‘Snoho Wonder’, Zones 9–11)
- ‘Intrigue’ canna (Canna ‘Intrigue’, Zones 8–11)
- ‘Sonata’ petunia (Petunia ‘Sonata’, annual)
- ‘Rubiginosa’ alternanthera (Alternanthera dentata ‘Rubiginosa’, Zones 9–11)
Planning the extravaganza
I find that the big, bold, leafy plants with various textures, colors, and habits are the most important element of my container gardens. My planting plans are based on successful designs I’ve used in the past, yet I’m always open to experimentation and serendipity.
Because I like my containers to be abundant, I choose plants that I know will perform well in tight quarters. Color is also a factor in my selection, and I try to select two or three colors of flowering annuals that complement the core architectural plants in each container. I find a limited palette to be more harmonious, and it also makes the plant search much easier. I use hot colors in my tropical designs, and I’ve had great success with monochromatic color schemes as well as combinations that featured purple and red flowers; apricot and lavender flowers; and orange, yellow, and white flowers. I find the most difficult colors to work with are magenta and blue. I use all hues of the selected colors and choose plants with green, yellow, purple, and gray leaves to use as backdrops.
Combination 2
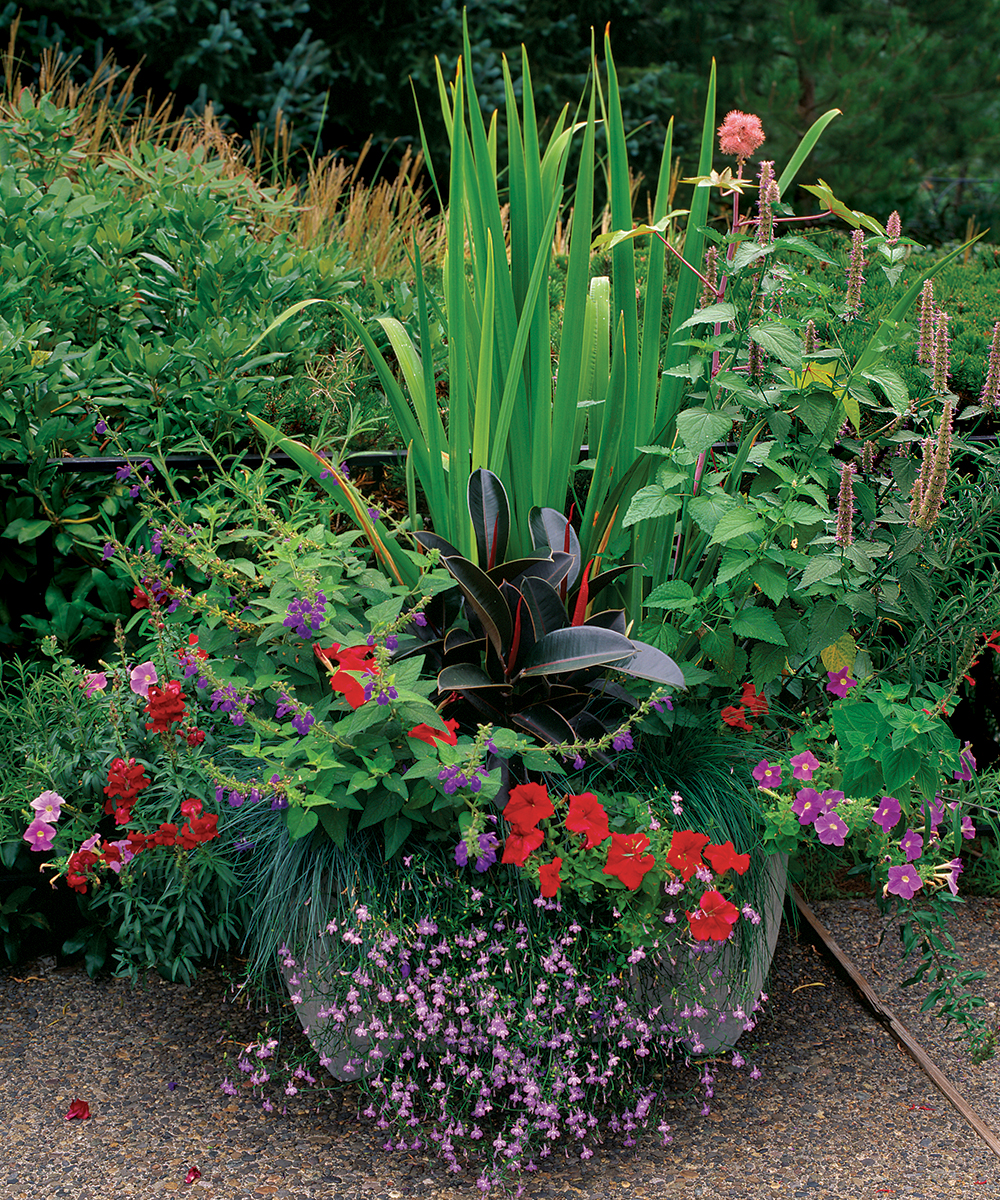
- Lobelia (Lobelia ricardii, annual)
- Blue fescue (Festuca glauca, Zones 4–8)
- ‘Rocket Red’ snapdragon (Antirrhinum majus ‘Rocket Red’, annual)
- Blue bush sage (Salvia urica, Zones 9–10)
- ‘Nekan’ pitcher sage (Salvia azurea ‘Nekan’, Zones 4–9)
- Iris (Iris cv., Zones 3–9)
- ‘Carmencita’ castor bean (Ricinus communis ‘Carmencita’, annual)
- ‘Liquorice Blue’ giant hyssop (Agastache scrophulariifolia ‘Liquorice Blue’, Zones 4–9)
- ‘Lady in Red’ Texas sage (Salvia coccinea ‘Lady in Red’, annual)
- ‘Azure Pearls’ petunia (Petunia ‘Azure Pearls’, annual)
- ‘Red Madness’ petunia (Petunia ‘Red Madness’, annual)
- ‘Cabernet’ rubber plant (Ficus elastica* ‘Cabernet’, Zone 11)
Getting the pots to thrive
For me, the ideal container size is 26 inches high and 30 inches across. I prefer using concrete pots because of their durability and unique sculptural qualities. I recommend drilling two ½-inch-diameter holes on each side of the container, 4 inches up from the base, in addition to a drainage hole in the bottom. These unobtrusive holes, easily created with a masonry bit, not only allow for better drainage but also create a reservoir of water. If these side holes become obstructed, I poke them with a bamboo stake to allow the excess water to drain out.
Because my containers are packed with plants, the soil tends to become root-bound. So I begin each season with new soil: a mixture of compost; perlite; and 14-14-14 granular, slow-release fertilizer. Once the plants are in place, they flourish in their large containers as long as I keep them well watered, either by a dependable automatic irrigation system or an unflagging hose handler. I also provide them with a weekly feeding of liquid fertilizer, and I deadhead them regularly.
I keep a garden journal for each year’s container design, devoting one page to each container and using a circle diagram to note the placement and name of each plant. I also attach a digital photo of the container to the page. The record keeping sounds tedious, but in the long run, it provides me with invaluable information. I learn which plants not only make good companions but also are easy to maintain and seasonally strong. It’s taken some trial and error to learn which plants work best together, but that’s part of the fun of growing plants in pots.
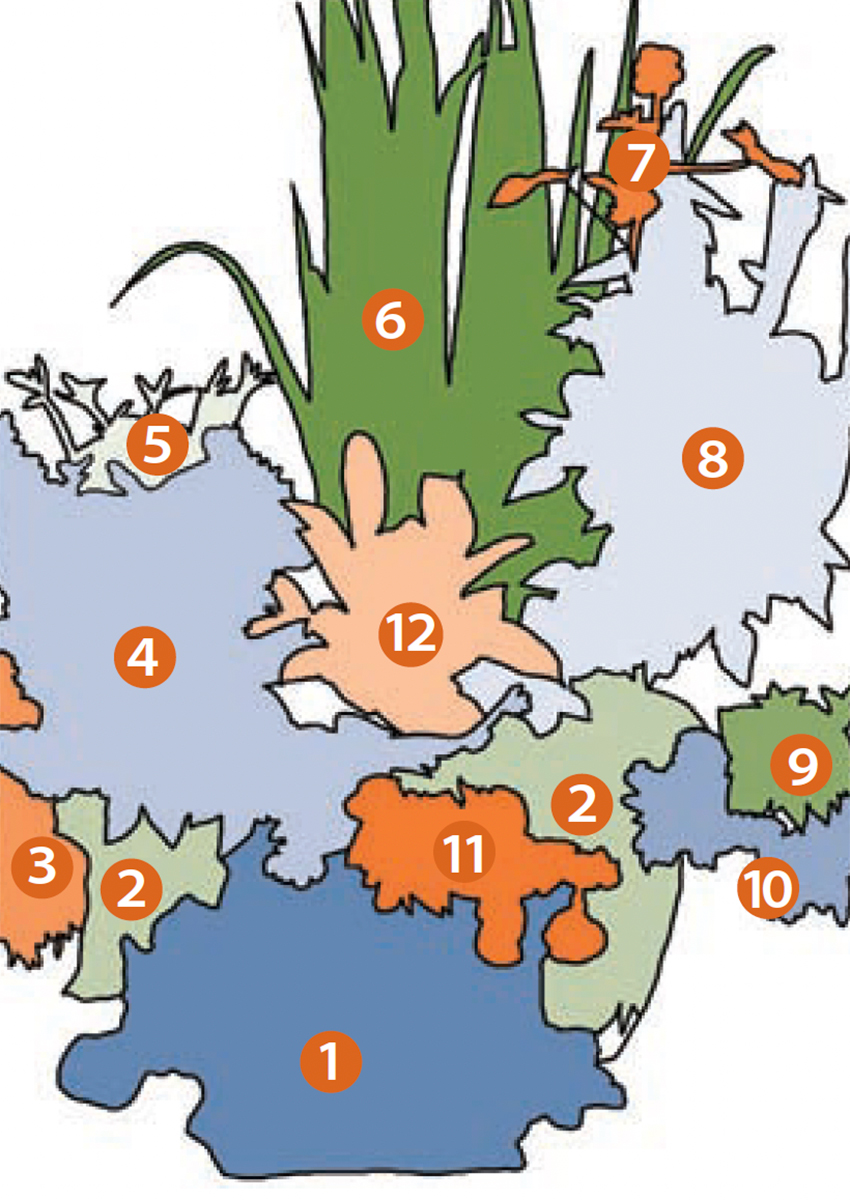
Combination 3
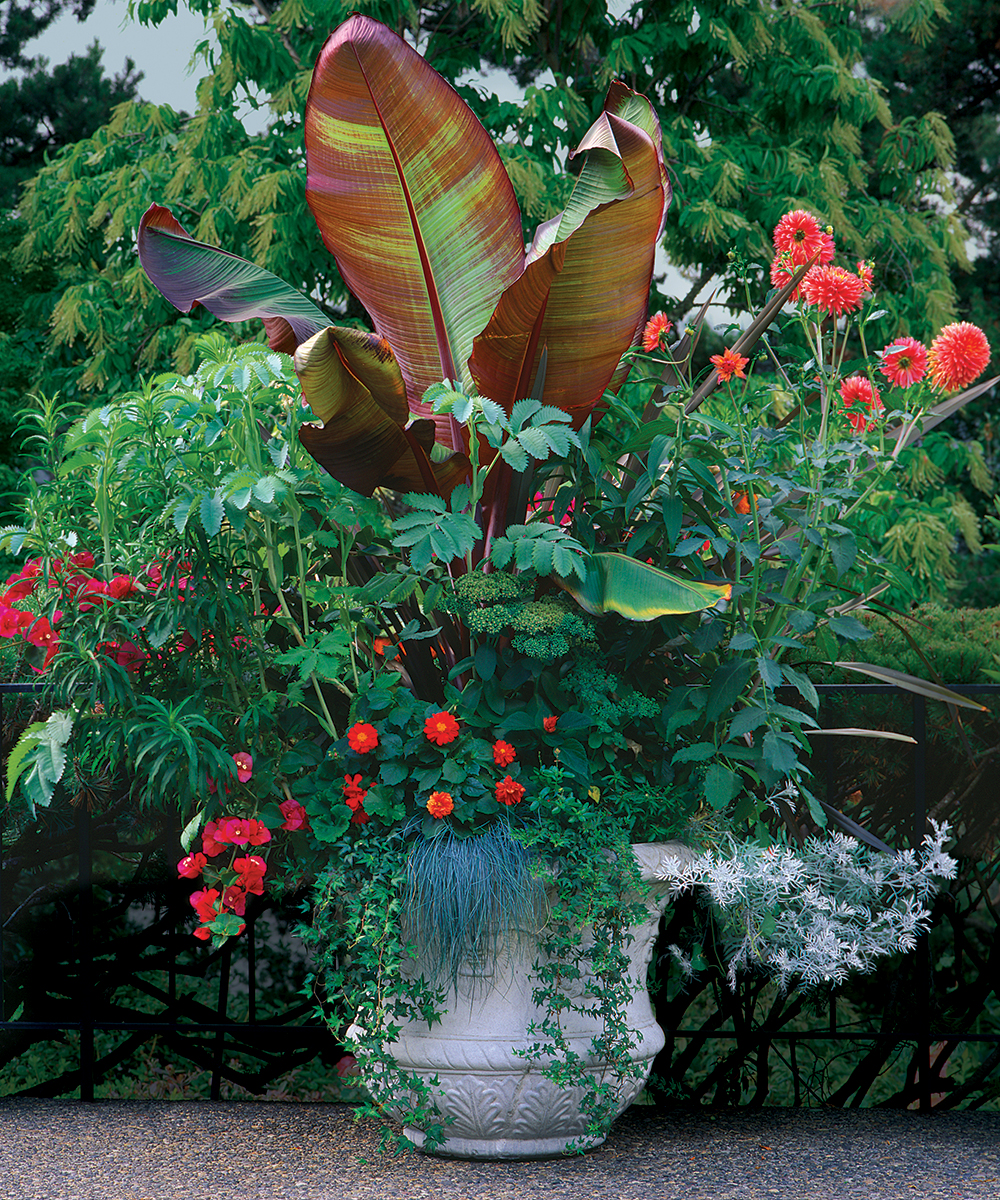
- Red Abyssinian banana (Ensete ventricosum ‘Maurelii’, Zones 9–11)
- Purple New Zealand flax (Phormium tenax ‘Purpureum’, Zones 8–11)
- ‘Casa Blanca’ Oriental lily (Lilium ‘Casa Blanca’, Zones 6–9)
- ‘Nicky K’ dahlia (Dahlia ‘Nicky K’, Zones 8–11)
- Dusty miller (Senecio viravira, Zones 8–10)
- English ivy (Hedera helix* cv., Zones 5–11)
- Blue fescue (Festuca glauca, Zones 4–8)
- Red bedding dahlia (Dahlia cv., Zones 8–11)
- ‘Sizzler Burgundy’ salvia (Salvia splendens ‘Sizzler Burgundy’, annual)
- ‘Coral’ bougainvillea (Bougainvillea ‘Coral’, Zones 9–11)
- Lion’s ear (Leonotis leonurus, Zones 10–11)
- Honey bush (Melianthus major, Zones 8–11)
- ‘Meteor’ sedum (Sedum spectabile ‘Meteor’, Zones 4–9)
*These plants are considered invasive in some areas. Please check invasiveplantatlas.org or your state’s list of invasive plants for more information.
Two planting methods
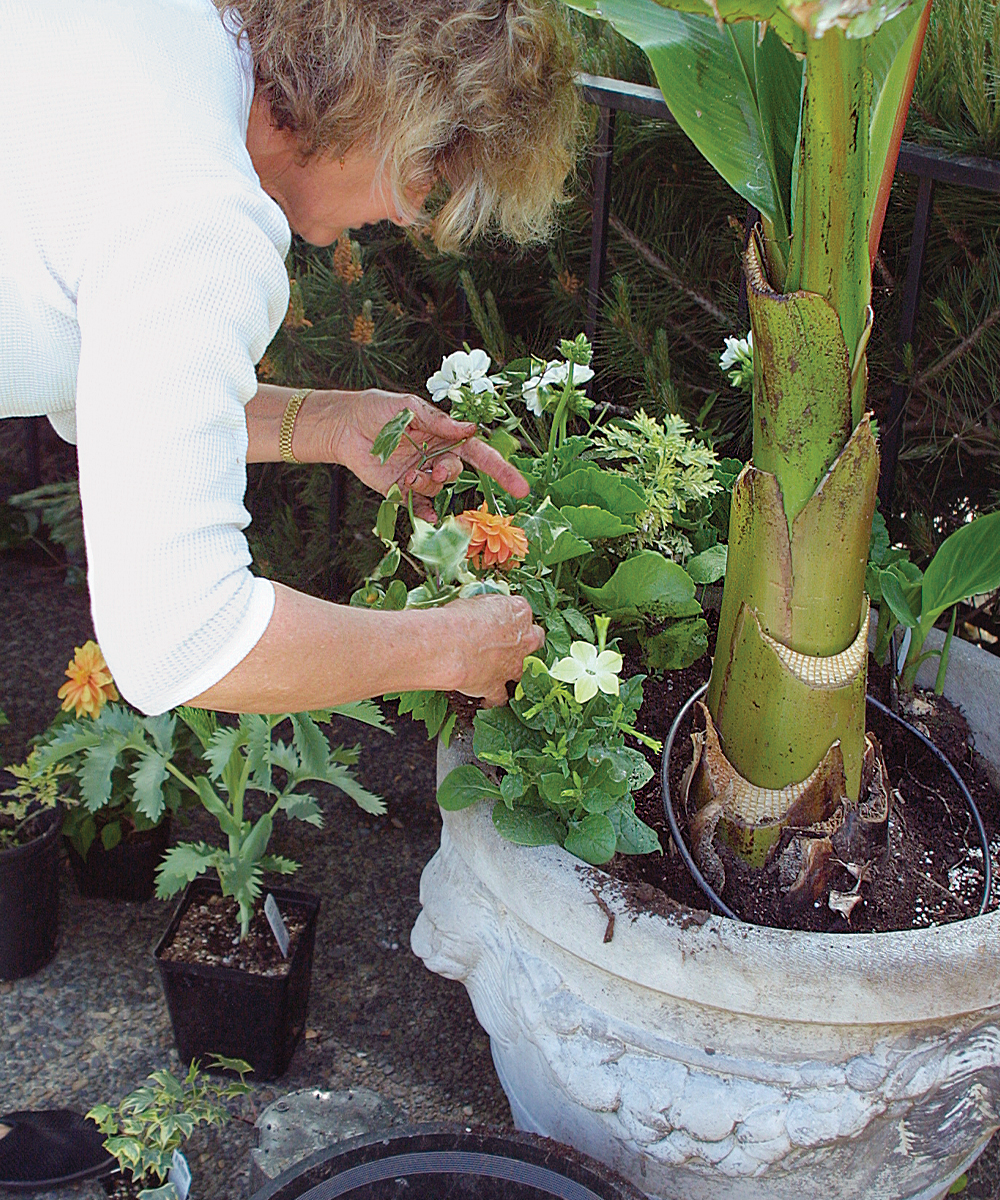
When I first started container gardening, I brazenly packed each container with 30 plants. After several years, I have found more success using fewer plants, approximately 18 to 20 in each container. Annuals sold in 4-inch-square pots, rather than in cell packs, are more apt to survive in crowded conditions because their roots systems are better developed. I arrange the plants so that they are most prominent on the side they will be viewed from. I also pull out any plant that is not behaving. Here are two planting methods that I use when packing my large-size containers. Give both types of arrangements a long, slow soaking once plants are in place; this is especially important when using the alternate method to prevent soil runoff.
Standard method
When my design calls for a hefty core plant, I simply place the core plant (combination 3) near the center of the pot and pack in as many supporting plants as possible.
- Fill the container approximately halfway with fresh, damp soil and time-release fertilizer.
- Center the core plant slightly toward the back of the pot.
- Add more soil and time-release fertilizer to within 8 inches of the top of the container.
- Arrange the filler plants around the core plant, placing them as close together as possible and adding soil to secure each plant in place.
|
|
|


Alternate method
When using a core plant with a smaller base or trunk (combinations 1 and 2), I use a planting method that I’ve been experimenting with for the past few years. I like this method because it gives the core plant more height and creates more planting area for me to cram plants into.
- Fill the container approximately three-quarters full with fresh, damp soil and time-release fertilizer.
- Place the core plant in the center of the container, making sure the soil level of the plant sits approximately 2 inches above the top of the container.
- Add more soil and time-release fertilizer to the container to form a mound.
- Place filler plants as close together as possible into the mound so that they cascade over the edge of the container.
Juanita Nye surrounds her home in Portland, Oregon, with bountifully planted containers.
Photos, except where noted: Allan Mandell
Illustrations: Melissa Lucas


Comments
Log in or create an account to post a comment.
Sign up Log in