

-
-
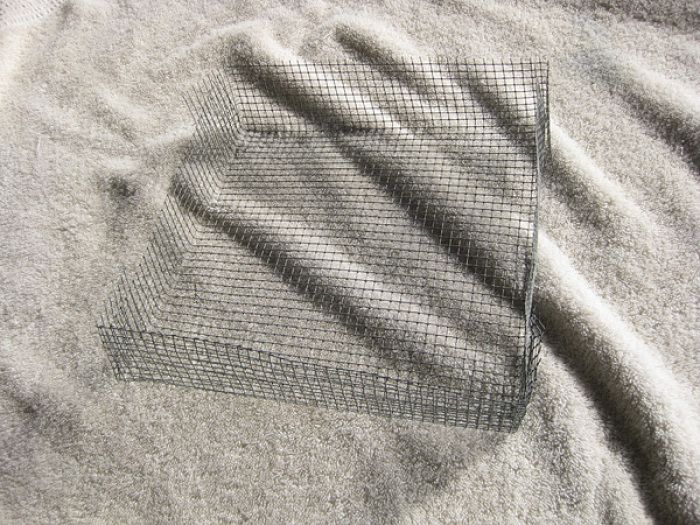
Photo/Illustration: The folded hardware cloth
-
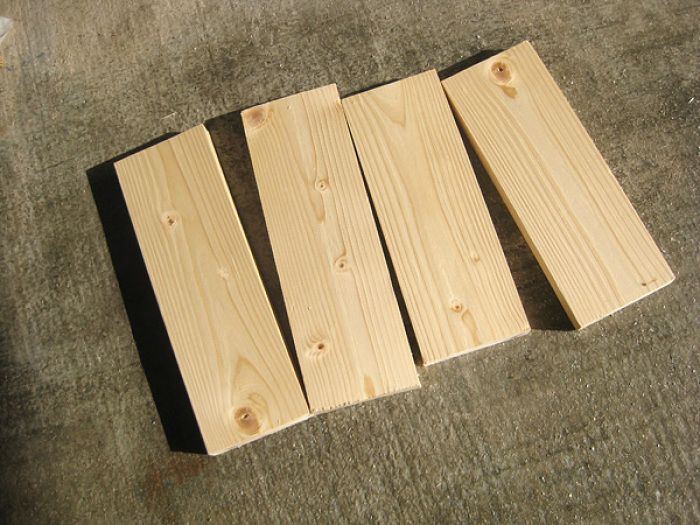
Photo/Illustration: The cut wood pieces
-
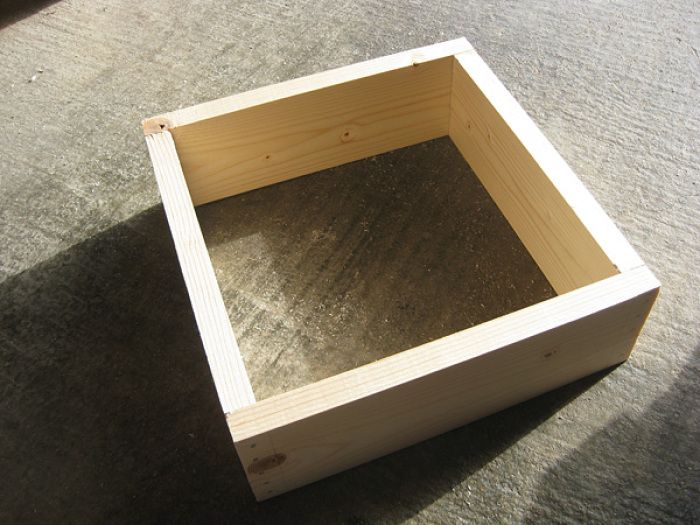
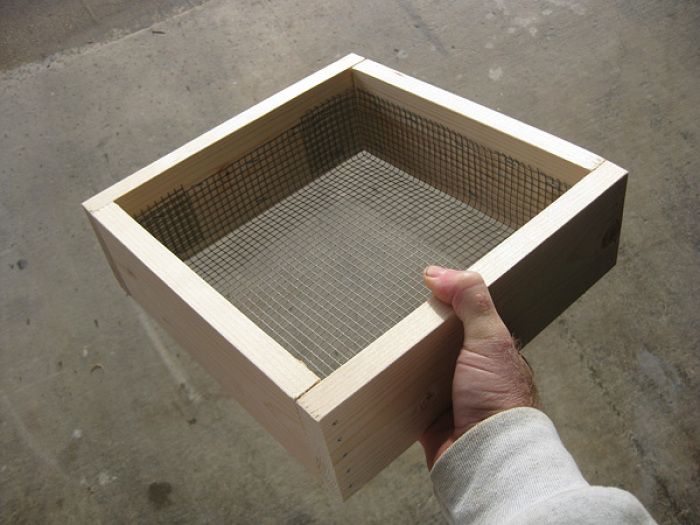
Photo/Illustration: The finished wood frame
-
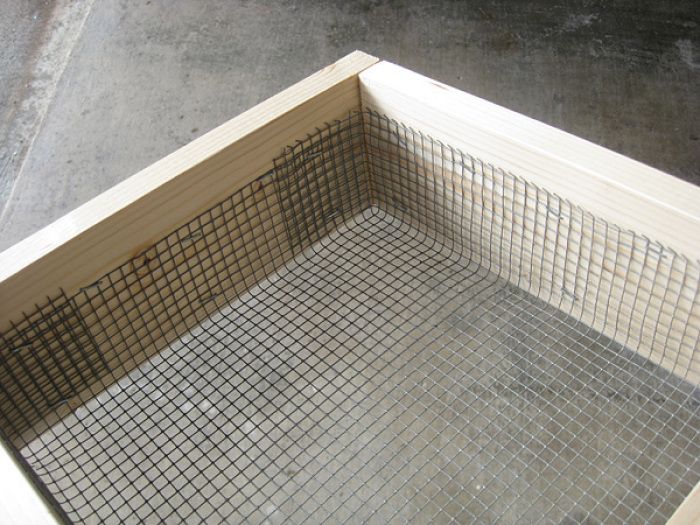
Photo/Illustration: Hardware cloth stapled to the frame
-
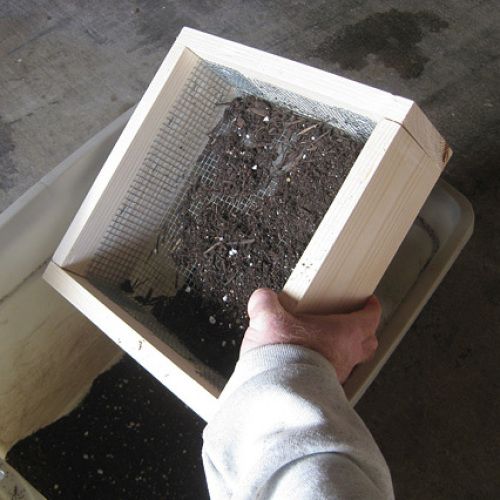
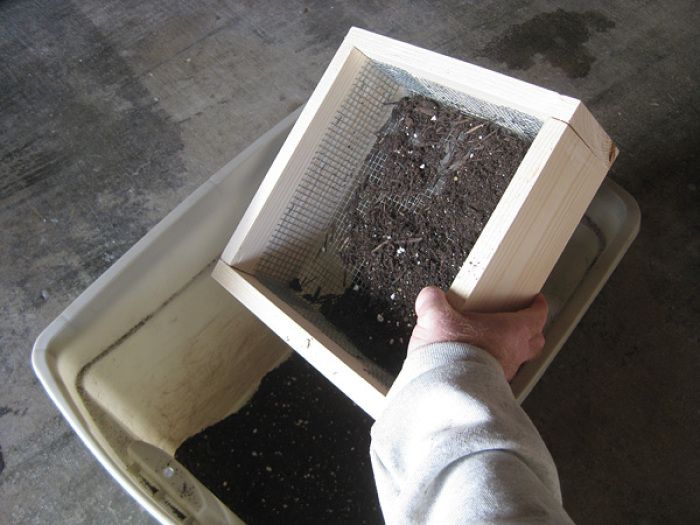
Photo/Illustration: Ready to sift...
-
When it comes to soil preparation for seed starting, I have come up with a “recipe” that includes the regular seed starting mix, potting soil, and perlite/vermiculite. I may “season” it with coffee grounds, epsom salt, and worm castings :). I add the potting soil to the seed starting mix because it’s too light IMO for transplants; that is, they are already tough enough for rougher soil. Here’s the problem – the potting soils I’ve tried all seem to contain pieces of wood and the occasional rock… not what you want.
So, I’ve come up with a way to separate the larger unwanted objects from the soil. A historical homage to the gold mining days has inspired my latest DIY project – the soil sifter. Of course, this can also be used for compost, gravel, large seeds, etc. The one I’ve built is small for sifting soil into a plastic tub, but you can build yours to whatever size you need.
But what about using a simple cooking colander? Believe me, I’ve looked everywhere for one that has the right size holes for the job, and have been unsuccessful. I feel it’s worth the time and trouble of removing unwanted objects in the soil (my tomatoes thank me for it later!).
The list of things you’ll need:
• Piece of 1″ x 4″ x 6′ plywood. The size you’ll need will depend on how large a sifter you’re building. You may only need one piece.
• Saw – manual or power electric
• 12-20 Nails (1 – 1 1/2″ will do nicely)
• Hardware cloth (I chose the size with 1/4″ spaces/squares)
• Hammer
• Wire cutters
• Pencil and tape measure for, um, measuring
Construction
1. Determine how large you want your sifter to be to determine the dimensions
2. Mark out the width twice and the length twice on the piece of plywood to create the four sides
3. Cut the four pieces out, making sure the cuts are as straight and clean as possible
4. Start the nails in two of the boards to make it easier when you are hammering the four pieces together
5. Hammer the four pieces together
6. Cut a square piece of hardware cloth large enough to not only cover the width and length of the wooden frame, but also to fold over into the sides of the frame
7. Fold over the edges of the hardware cloth to snugly fit inside the wood frame
8. Staple the folded edges to the sides of the wood frame, securing it
9. Sand the edges and sides of the wood frame to eliminate any possibilities of slivers
10. Test it. If it’s OK, you’re done
Enjoy… and start sifting!


Comments
Log in or create an account to post a comment.
Sign up Log in