

-
Photo/Illustration: Greg Holdsworth (All photos)
-
Photo A
-
Photo B
-
Photo C
-
Photo D
-
Photo E
-
Photo F
-
Photo G
-
Photo H
-
Photo I
-
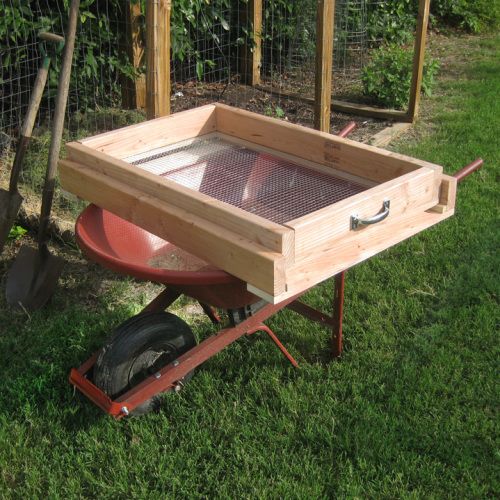
The finished product... ready for compost!
Whether it’s your special seed-starting mix or your pile-produced compost, having the material free of twigs, stones and other debris will make your garden bed preparation easier.
Most sifter screens require you to hold them up as you shake them back and forth in order to sift the material. This is an effective way to sift compost, but it has one big physical flaw – it can put a strain on your wrists, arms and back in a hurry.
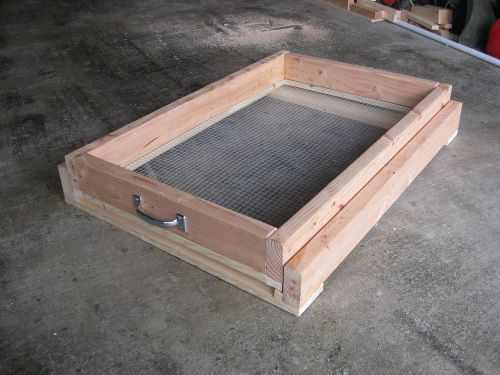
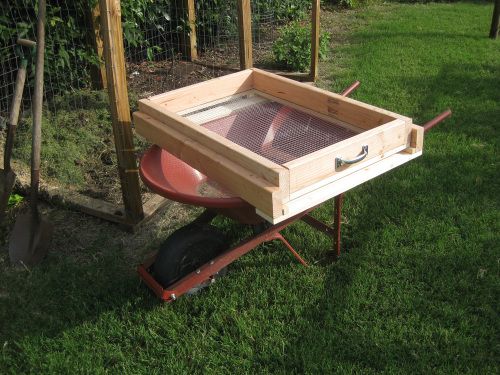
This sifter design rests on a wheelbarrow and puts less strain on your back and arms. The sifter consists of two parts: a frame that straddles most wheelbarrows (length-wise or sideways), and a tray with the metal screen on the bottom. The tray sits inside the frame.
To use the sifter, you load the tray with 1-3 inches or so of compost, soil, etc. You then quickly slide it back and forth on the frame, allowing the finer sifted material to fall into the wheelbarrow. The leftover material still in the tray can be thrown back into the compost pile or disposed of. You can use whatever type of wood suits your fancy.
The list of things you’ll need:
• 6 feet of 1″x1″ lumber
• 10 feet of 1″x2″ lumber
• 5 feet of 1″x4″ lumber
• 16 feet of 2″x4″ lumber
• 14-16 1-1/2″ wood or deck screws
• 8-12 2″ wood or deck screws
• 8-12 3-1/2” wood or deck screws
• 1 24″x36″ piece of hardware cloth (galvanized metal screen), either 1/2″ or 1/4″ mesh
• Metal staples
• 2 Metal handles
• Wood glue
• Candle
• Paint, stain, varnish, or water sealer (optional)
Tools:
• Saw, jig or circular
• Drill and drill bits
• Staple gun
• Tin snips or other metal cutters
• Sandpaper
Skill Level:
Intermediate
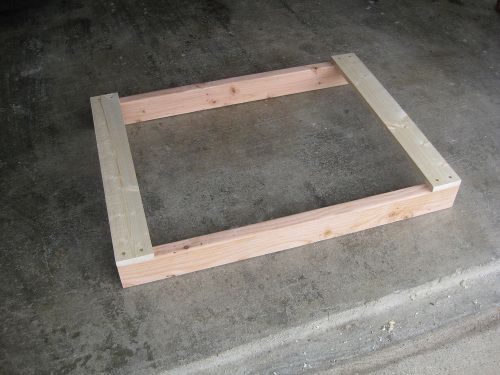
Frame Construction:
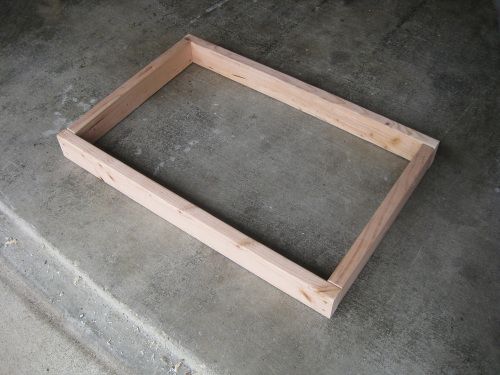
1. Cut two 36″ long pieces from the 2″x4″ lumber.
2. Cut two 27″ long pieces from the 1″x4″ lumber.
3. Cut two 36″ long pieces from the 1″x1″ lumber.
4. Screw the two 1″x4″ cross pieces to the bottom of the 2″x4″ (pre-drilling will help prevent splitting) (Photo A).
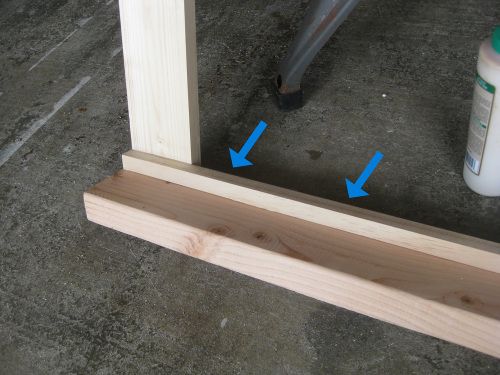
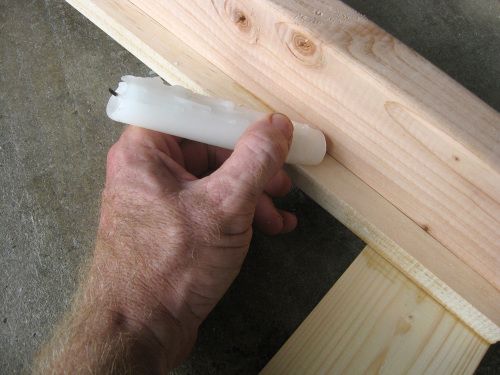
5. Glue the two 1″x1″ pieces to the inside of the two 2″x4″ pieces, where the four pieces meet at each corner (Photo B).
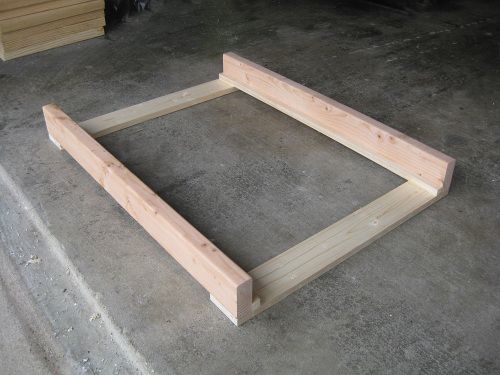
The frame should be 24″ wide measuring from inside to inside, just above the 1″x1″s, so that the screened tray can ride on top of the 1″x1″s (Photo C).
Tray Construction:
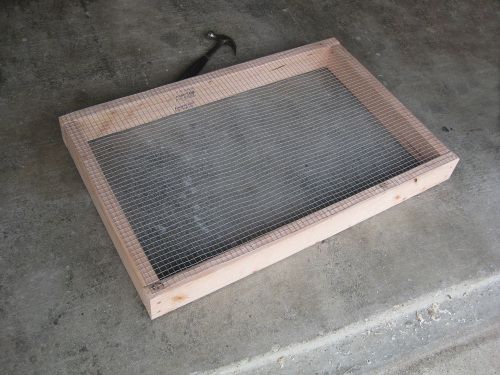
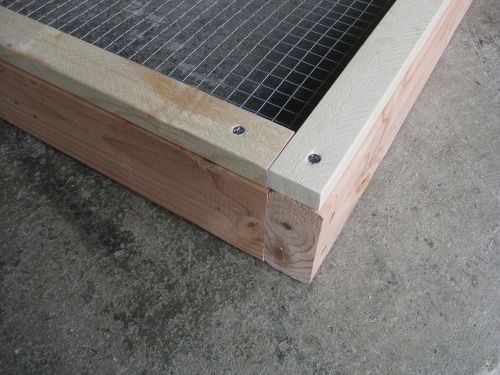
1. Screw the tray’s 2″x4″ side and end pieces together using 3 1/2-inch screws (Photo D).
2. Cut the hardware cloth screen to match the width and length of the 2″x4″s that were screwed together, but not right to the edge. Secure it to the bottom of the 2″x4″s with metal staples (Photo E). You only need to put in enough staples to hold it in position tightly.
3. Screw the 1″x2″s to the tray’s bottom (Photo F).
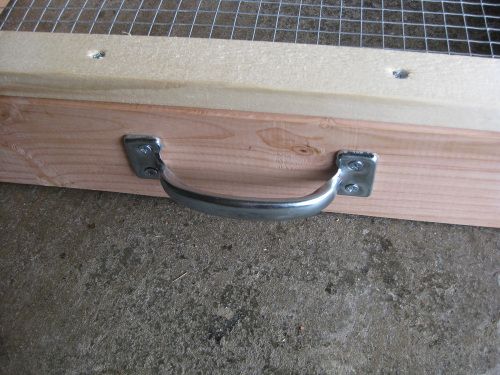
4. Attach/screw a handle to each end (Photo G).
The tray should be 24″ wide, outside to outside, to fit on top of the 1″x1″s of the frame (Photo H).
Finally:
• Sand the wood surfaces and seal with stain, water sealer, paint, etc. if you desire.
• Rub a candle on the bottom of the tray and the tops of the frame 1″x1″s so the tray slides easily (Photo I).


Comments
Log in or create an account to post a comment.
Sign up Log in