

-
Photo/Illustration: Greg Holdsworth (All photos)
-
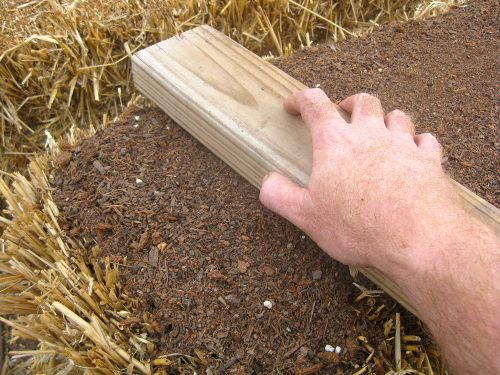
Once you've put down the planting mix, you can use a board or other flat surface to even it out.
-
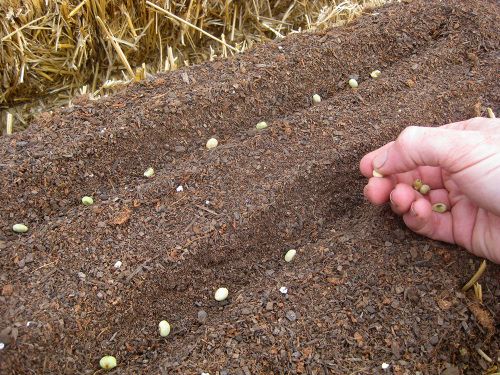
Planting seeds in a straw bale (actually on) is basically the same as in a soil bed.
-
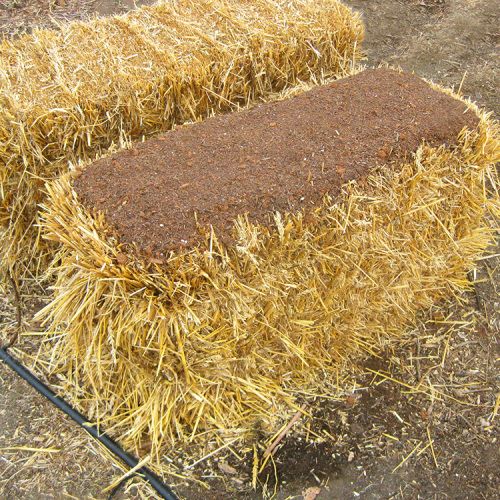
The finished straw bale, ready for new seedlings.

Last year I discovered Straw Bale Gardening, as based on Joel Karsten’s book Straw Bale Gardens. I started with a single straw bale and a few transplants. With the Spring season upon me, I can now revisit the straw bale, only this time I’ll be planting seeds instead of putting in grown transplants.
What You’ll Need
• Straw bale(s) (NOT hay bales, which tend to contain a lot of seeds)
• Fertilizer (high nitrogen, not slow-release, without herbicides or weed preventers)
• Hand trowel
• Planting or potting mix (sterile soilless mix)
• Small wood board (or other square flat object)
For watering:
• Soaker hose, drip hose, and/or watering can
• Garden hose
STEP 1 – Getting your bales and setting up
As with traditional gardening, maximum sunlight is key. Placed your bale where it will get full sun (at least 6-8 hours). When placing the bale where you want it, it is very important to place it “cut side up”. You’ll notice that one side of the bale looks like hundreds of straw tubes were sliced off with a knife. Having this side up will allow for better water and fertilizer penetration during the conditioning process. Do not cut any strings or wire that may be holding the bale together.
STEP 2 – Conditioning the bale
“Conditioning” the bales is basically the process of getting the inside of the bales to start composting. This process takes approximately 12 to 15 days. Depending on what you’ll be planting in your straw bales will determine when you need to have the conditioning process completed. For example, if I wanted to put transplants in my bales out on the last average frost date, I would need to start conditioning the bales at least two weeks before that date. At the end of the conditioning stage, the inside of the bale will not feel and look composted yet. The idea is to get the bale composted far enough so that the bacteria is activated, making the nutrients available to the plants or seeds.
Fertilizer and water are the chief ingredients used to condition the bales. Joel recommends a fertilizer with high nitrogen content, such as lawn fertilizer, blood meal or Milorganite®. Do not use “fresh” manure.
The following is an at-a-glance chart of the conditioning process, taken from the book directly. All the volumes and quantities are per bale.
|
Day In Process |
Traditional Fertilizer |
Organic Fertilizer |
Water |
|
Day 1 |
1/2 cup |
3 cups |
Water to saturation |
|
Day 2 |
Skip |
Skip |
Water to saturation |
|
Day 3 |
1/2 cup |
3 cups |
Water to wash in fertilizer |
|
Day 4 |
Skip |
Skip |
Water to saturation |
|
Day 5 |
1/2 cup |
3 Cups |
Water, warm is best |
|
Day 6 |
Skip |
Skip |
Water, warm is best |
|
Day 7 |
1/4 cup |
1 1/2 cups |
Water, warm is best |
|
Day 8 |
1/4 cup |
1 1/2 cups |
Water, warm is best |
|
Day 9 |
1/4 cup |
1 1/2 cups |
Water, warm is best |
|
Day 10 |
1 cup 10-10-10 |
3 cups with P and K |
Water to wash in fertilizer |
|
Day 12 |
PLANT TODAY |
Wait 5 more days |
Water any new plantings |
STEP 3 – Preparing the “seed bed”
Pour the planting mix on to the top of the bale, covering most of the surface. DO NOT use regular garden soil, as you may introduce weed seeds or soil-borne diseases. Put enough planting mix to create a seed bed 1 to 2 inches thick. Use a square wood board or other flat object to smooth out the mix. Lightly pat down the mix.
STEP 4 – Planting the seeds
Using the spacing recommended on the seed packet, plant the seeds as you normally would. A cool tip provided by Joel is to use the plastic plant trays from the garden center as “templates” to make imprints in the planting mix to space the seeds precisely.
STEP 5 – Watering
Water the seeds daily with a watering can or gentle mist from the garden hose. I also watered the vertical sides of the bale to keep it moist.
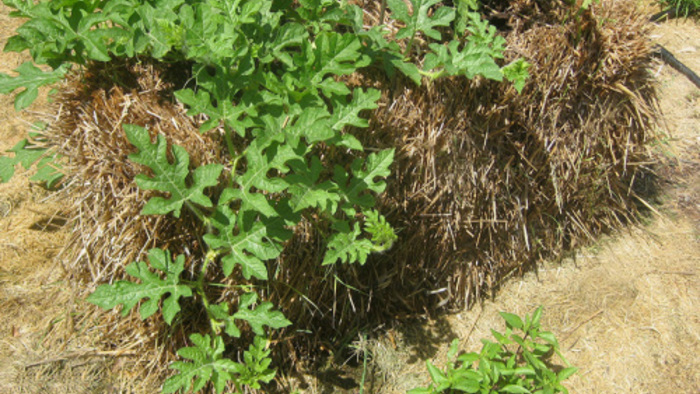
STEP 6 – See what happens!
At this point your straw bale seed bed is basically finished. From this point on you’ll water the seedlings like you normally would in the garden.


Comments
Log in or create an account to post a comment.
Sign up Log in