

-
Photo/Illustration: Greg Holdsworth (all photos). Construction plans courtesy of Bonnie Plants
-
PHOTO A
-
PHOTO B
-
PHOTO C
-
PHOTO D
-
PHOTO E
-
PHOTO F
-
PHOTO G
-
PHOTO H
-
PHOTO I
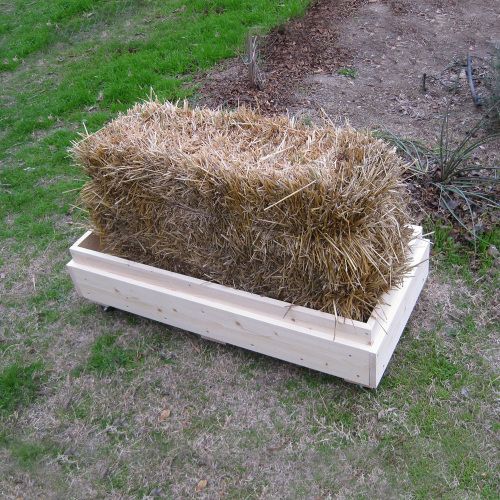
I started to experiment with straw bale gardening a couple of years ago, and for the most part, have been quite satisfied with the results. Since I have a large garden area at my disposal, I can position my straw bales almost anywhere where they will benefit the most. I was thinking about the period of time when I couldn’t have an in-ground garden because I wasn’t living in a house with a yard.
An article from Bonnie Plants inspired me to build this project. The original article and downloadable construction plans can be found here. This project allows gardeners with only a deck or patio to enjoy a straw bale garden. The cart has casters on it, allowing it to be positioned anywhere. In the “Wood Parts List” below, I’ve named the pieces that will be cut, and I will reference the same names in the construction section.
The list of things you’ll need:
Supplies
• 2 – 1 x 4 x 8 boards
• 3 – 1 x 6 x 8 boards
• 2 – 2 x 2 x 8 boards
• 12 – 2 1/2-inch deck screws
• 56 – 1 1/4-inch deck screws
• 4 – 2 1/2-inch swivel casters
• Wood stain (optional)
Tools
• Saw (circular saw strongly recommended)
• Drill and drill bits
• Pencil and tape measure
• Square (metal or fast plastic type)
• Clamps
• Sandpaper or sanding block
Skill Level:
Easy to Intermediate
Wood Parts List:
Cross Rails
Quantity: 3
Size: 1 1/2″ x 3 1/2″ x 18″
Long Rails
Quantity: 2
Size: 1 1/2″ x 3 1/2″ x 40″
Slats
Quantity: 7
Size: 3/4″ x 3 1/2″ x 18″
Side Panels
Quantity: 4
Size: 3/4″ x 5 1/2″ x 40″
Short End Panels
Quantity: 2
Size: 3/4″ x 5 1/2″ x 16 1/2″
Long End Panels
Quantity: 2
Size: 3/4″ x 5 1/2″ x 19 1/2″
Construction:
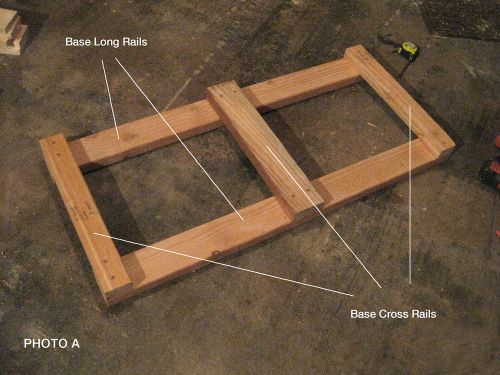
1. Using the 2 1/2″ deck screws, position two Base Cross Rails flush with the ends of the Base Long Rails, and one Base Cross Rail in the center of the Base Long Rails. (PHOTO A).
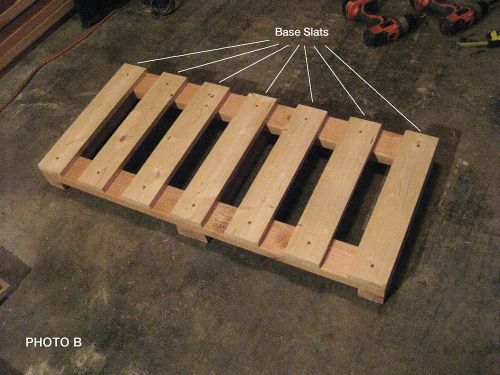
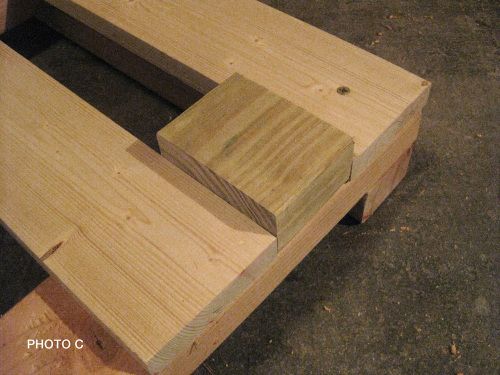
2. Flip the project as created in STEP 1 over. Position the seven Base Slats equidistant apart on the Base Long Rails using the 1 1/4″ deck screws (PHOTO B). TIP: I determined that the space between the Base Slats was approximately 2 1/2″. Using a piece of scrap 2 x 4, I made a “spacer” to space the Base Slats equally (more or less) (PHOTO C).
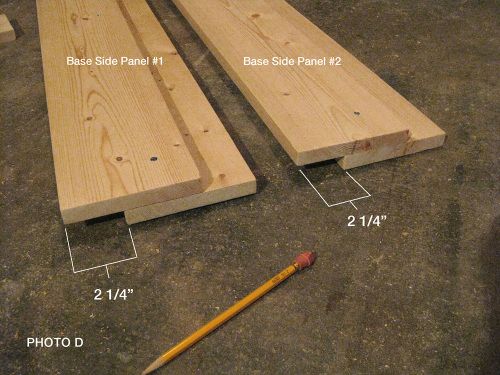
3. Position one Base Side Panel 2 1/4″ from the edge of another Base Side Panel. Attach using the 1 1/4″ deck screws (PHOTO D). Repeat for the opposite side.
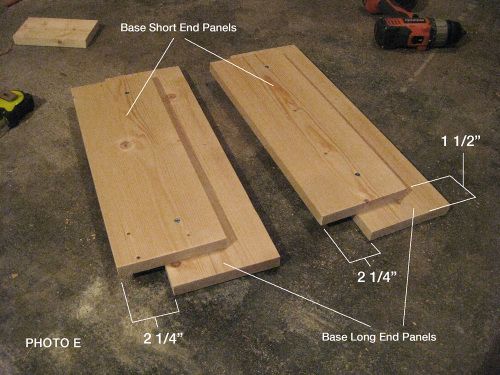
4. Position one Base Short End Panel 2 1/4″ inches from the edge and centered across the length (1 1/2″ from each end) of a Base Long End Panel. Attach using the 1 1/4″ inch deck screws (PHOTO E). Repeat for the opposite side.
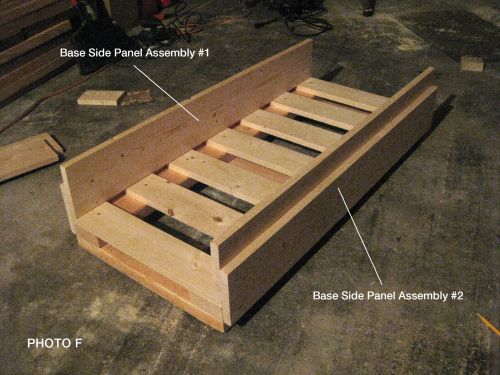
5. Position the Base Side Panel Assemblies with the 2 1/4″ overlap flush against the Base Long Rails and Base Slats (PHOTO F). Attach to the Base Long Rails using the 1 1/4″ deck screws.
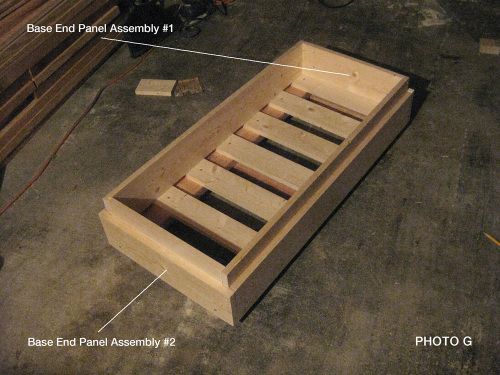
6. Position the Base End Panel Assemblies, and attach using the 1 1/4″ deck screws. Be sure to drive screws through the Base Side Panels and into the Base Short End Panels, as well as through the Base Long End Panels and into the Base Long Rails (PHOTO G).
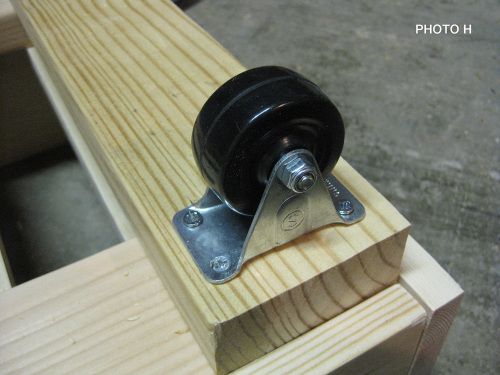
7. Flip the project over. Attach the four casters to the ends of the Base Long End Panels using the 1 1/4″ screws (PHOTO H).
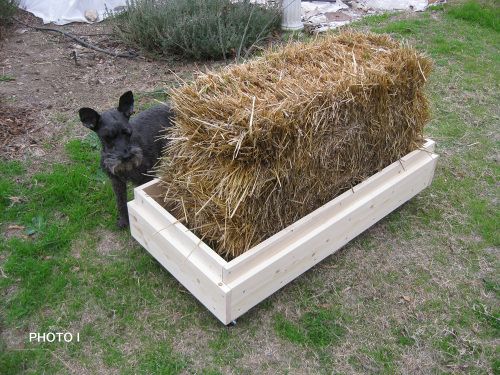
8. At this point, the straw bale base is basically finished and ready to hold the bale (PHOTO I). You can apply a wood stain if desired.
Note: My apologies for the quality and lighting of the photos. I had to do most of the work in my garage without outside lighting.


Comments
Log in or create an account to post a comment.
Sign up Log in