

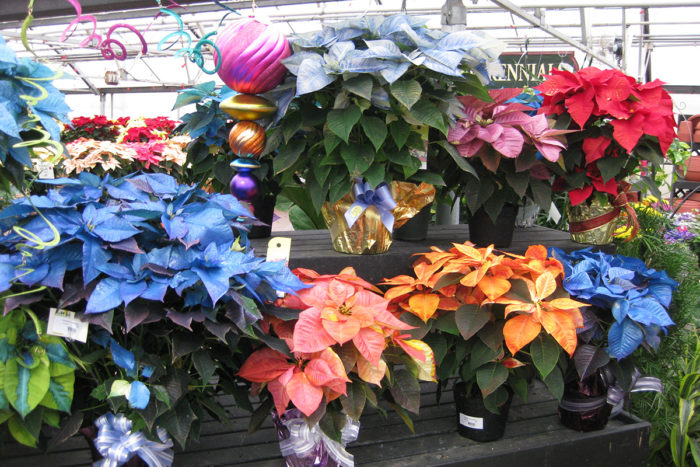
Pamper your poinsettia. A poinsettia (Euphorbia pulcherrima, Zones 10–11) may end up in your care at some point this month. Ensure that it stays healthy for better long-term color and impact. First, see that the poinsettia container is free-draining, and remove any foil that may be inhibiting excess water from vacating the container. Don’t let the plant sit in standing water in the saucer. Place the poinsettia in bright, indirect sunlight near windows that face south, east, or west, and keep indoor temperatures between 60° and 70°F (15.6° and 21.1°C). Never let temperatures drop below 50°F (10°C). Additionally, don’t place the poinsettia near cold windows, drafts or warm vents. Periodically rotate the plant to even the distribution of available light, and only water as needed.
You should be able to get at least six to eight weeks of significant color from your poinsettia. However, there are ways of carrying the plant through the winter, planting it out in the garden in summer, and ultimately returning it to its original glory indoors by following sequential and very specific steps. If you decide to take your poinsettia beyond the holiday season, consider starting a feeding application (half strength) of all-purpose houseplant fertilizer every two weeks after New Year’s. By spring, your poinsettia likely will have lost the holiday color on the bracts and may need some cutting back before going outside in a container or garden bed for the summer. Prune back the leggy stems in early spring to 4 to 6 inches in height, and leave one to three leaves on each stem. This will result in a bushy plant. Then, in fall, you can impose a shorter day length on the plant of eight hours of light followed by 16 hours of full darkness, like in a closet. This reduced light will prompt the growth of colorful bracts. I encourage you to do further research to attempt this challenging but rewarding project. For more information on poinsettias, read on here.

Winterize your power equipment. As the garden season is coming to a close and your mower, string trimmer, chain saw, and other power equipment are preparing to hibernate, timely attention to winterization is extremely important. Time spent now will increase the longevity of the equipment, offset potential maintenance costs due to neglect, and prepare the equipment to be ready for use next season.
All power equipment should be cleaned after its last use. Firmly clear off dirt and rust. Drain the oil (process and recycle it as directed), replace fuel and air filters, and check for worn or missing parts on every item. Lubricate any hinges or moving parts. Spark plugs may need to be checked and replaced. Drain fuel from any two-cycle engines (e.g., string trimmers, blowers, hedge trimmers, chain saws). Other equipment with remaining fuel should have a fuel stabilizer added and the unit run for five minutes after the stabilizer is added.
Clean and scrape mower decks to remove debris, and clear any rust to minimize further corrosion. Remove and sharpen mower blades. Always have an extra set or sets of blades at the ready, and make sure they are sharp. Store as much equipment inside or in a sheltered location as possible if you have the space. Don’t wait until spring for any of the tasks mentioned above, as this winterization process is vital and will save time and money in the long run while increasing the lifespan of your power equipment dramatically. Learn more about winterizing your power equipment here.
Prepare your garden for rough winter weather. With its combination of low temperatures, howling winds, freezing rain, ice storms, and heavy snow accumulation, winter can be brutal on Midwestern plants. Preparations done now will help mitigate some of these potential issues. Do some scouting in your early winter garden for any potential problems before they happen.
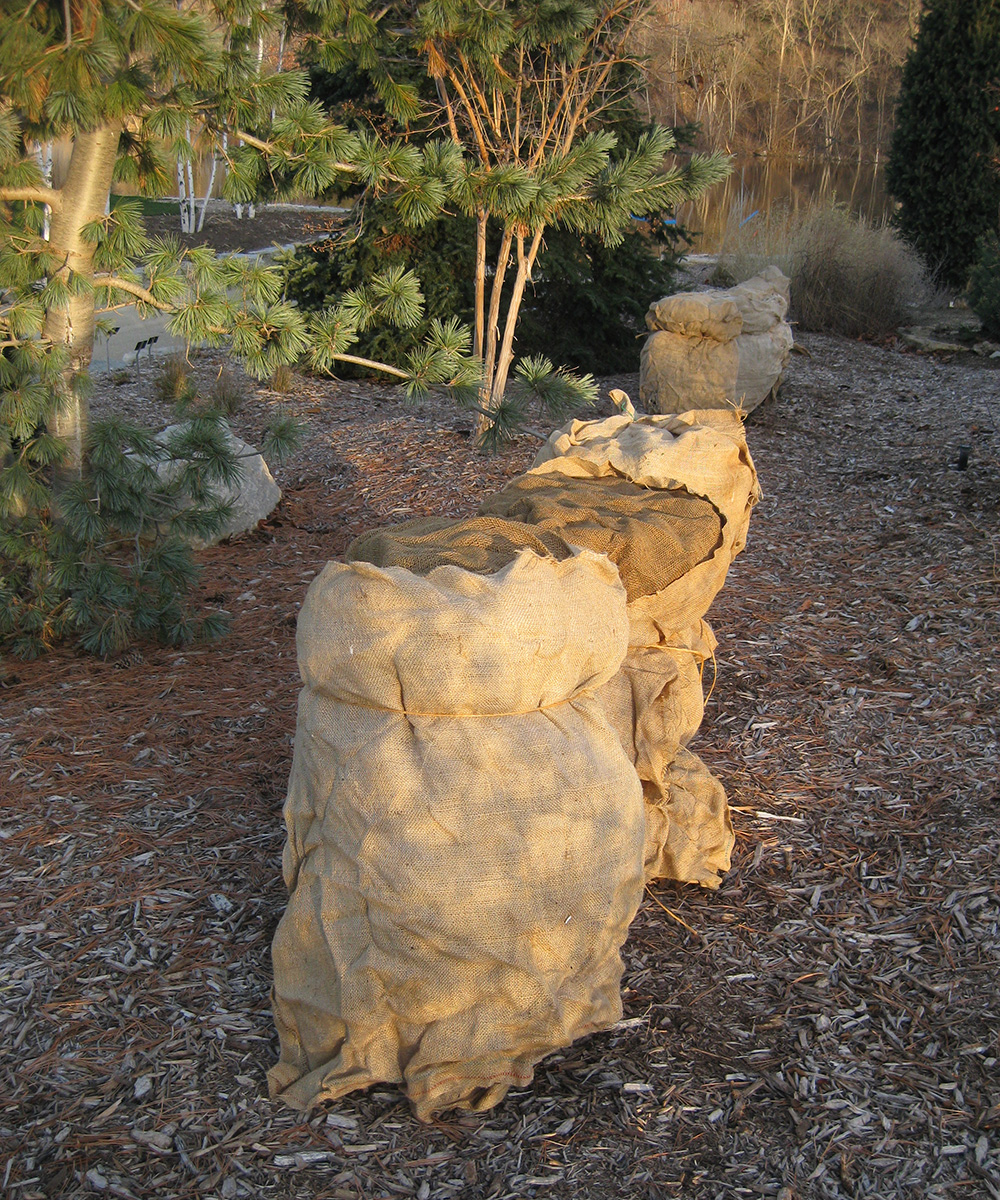
If you have tender woody plants that suffer through the toughest of winters, consider wrapping them in light burlap to protect them from winter sun damage and to lessen the impact of desiccating winter winds. Also consider putting up temporary stakes and creating a wind barrier with the burlap encircling the plant. This protective use of burlap is also warranted in areas where salt spray may be an issue, such as along roads or sidewalks.
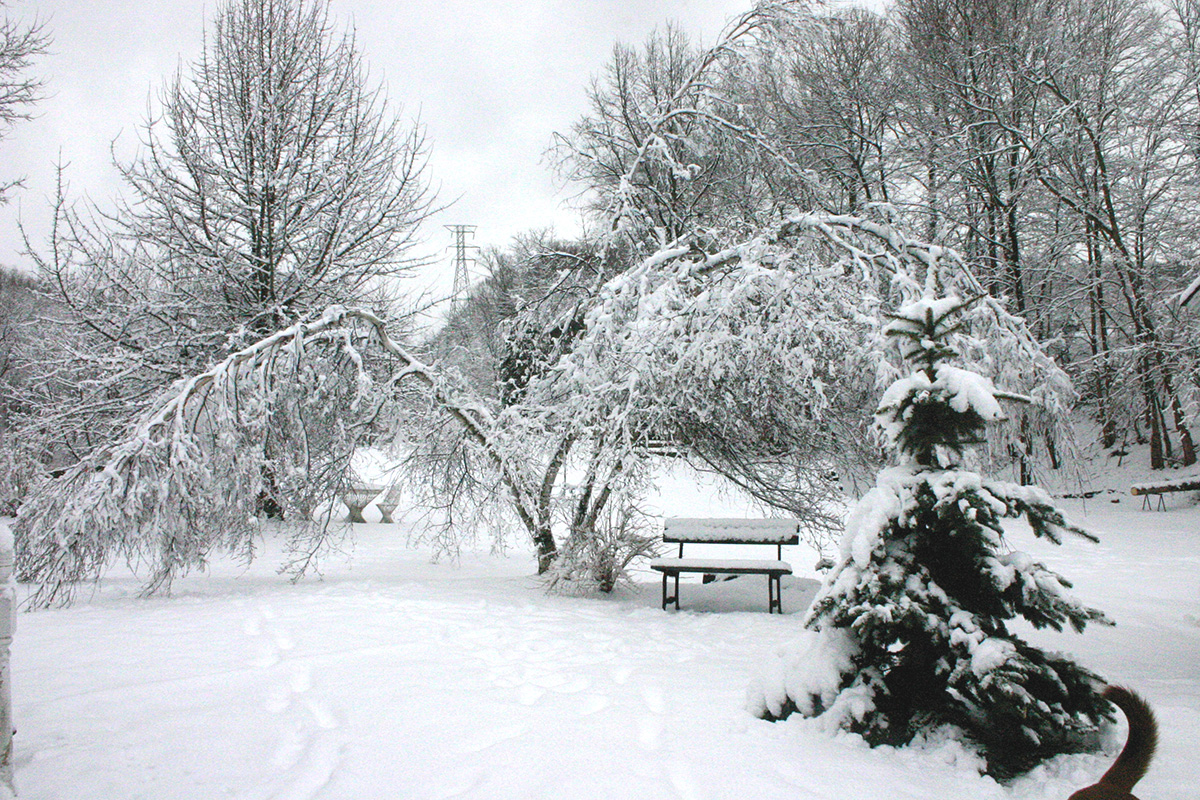
Narrow evergreens with multiple trunks (leaders) are prone to splaying and bending with heavier snow loads and benefit from some light securing or tying of the trunks prior to any snow event. Remember that trying to remove heavy snow and ice from existing plantings can result in more damage to the plants themselves and is typically not warranted. Also, identify smaller tree trunks, particularly those with thinner bark, and consider installing a trunk protector or other product to minimize nibbling over a tough winter.

Your December scouting of woody plants in the garden might reveal problematic branch angles, dead branches, or other challenges that can be addressed now with some judicious target pruning. Now that their leaves are gone, it’s easy to observe problems on these plants that can be mitigated now. Tackling these tasks promptly this month will save time, particularly if challenges materialize later in winter when it is more difficult to attend to them. The most vital pruning tasks can be done now, with the remainder of the work accomplished in late winter or early spring. Learn more about preventing winter damage in your garden here.
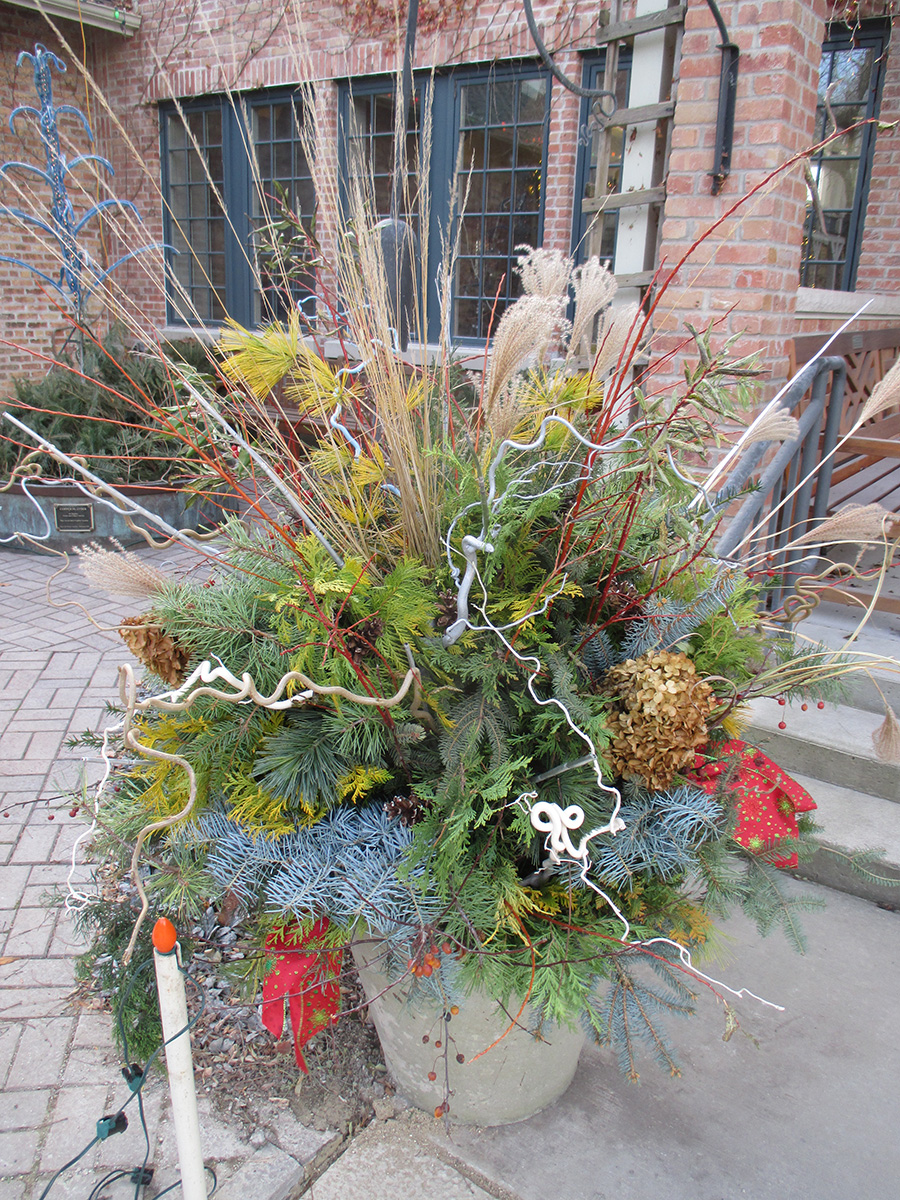
Create a dry winter-container arrangement. When considering your winter container, first remove the soil from the container you want to use. The freezing and thawing of soil can damage or compromise containers. Leaving soil in a container over the winter doesn’t always result in damage to the container, but why risk it? Then think about what kind of dry arrangement (arrangement with no soil) you’d like to make out of the many possible ingredients available right in your garden.
Any good dry arrangement relies on greens from local conifers. Good candidates are spruces (Picea spp. and cvs., Zones 2–8), firs (Abies spp. and cvs., Zones 3–8), pines (Pinus spp. and cvs., Zones 2–7), and junipers (Juniperus spp. and cvs., Zones 3–9). Next, add colorful stems from dogwoods (Cornus spp. and cvs., Zones 3–9) and willows (Salix spp. and cvs., Zones 4–9), along with inflorescences of ornamental grasses for punctuation and color. You might also include stems with fruits like those of crabapple (Malus spp. and cvs., Zones 4–8), hawthorn (Crataegus spp. and cvs., Zones 3–9), or winterberry (Ilex verticillata, Zones 5–8), along with gourds and pumpkins. Drying flowers of hydrangea (Hydrangea spp. and cvs., Zones 4–9) are also great components to consider. These odds and ends likely exist in abundance throughout your late-season landscape.
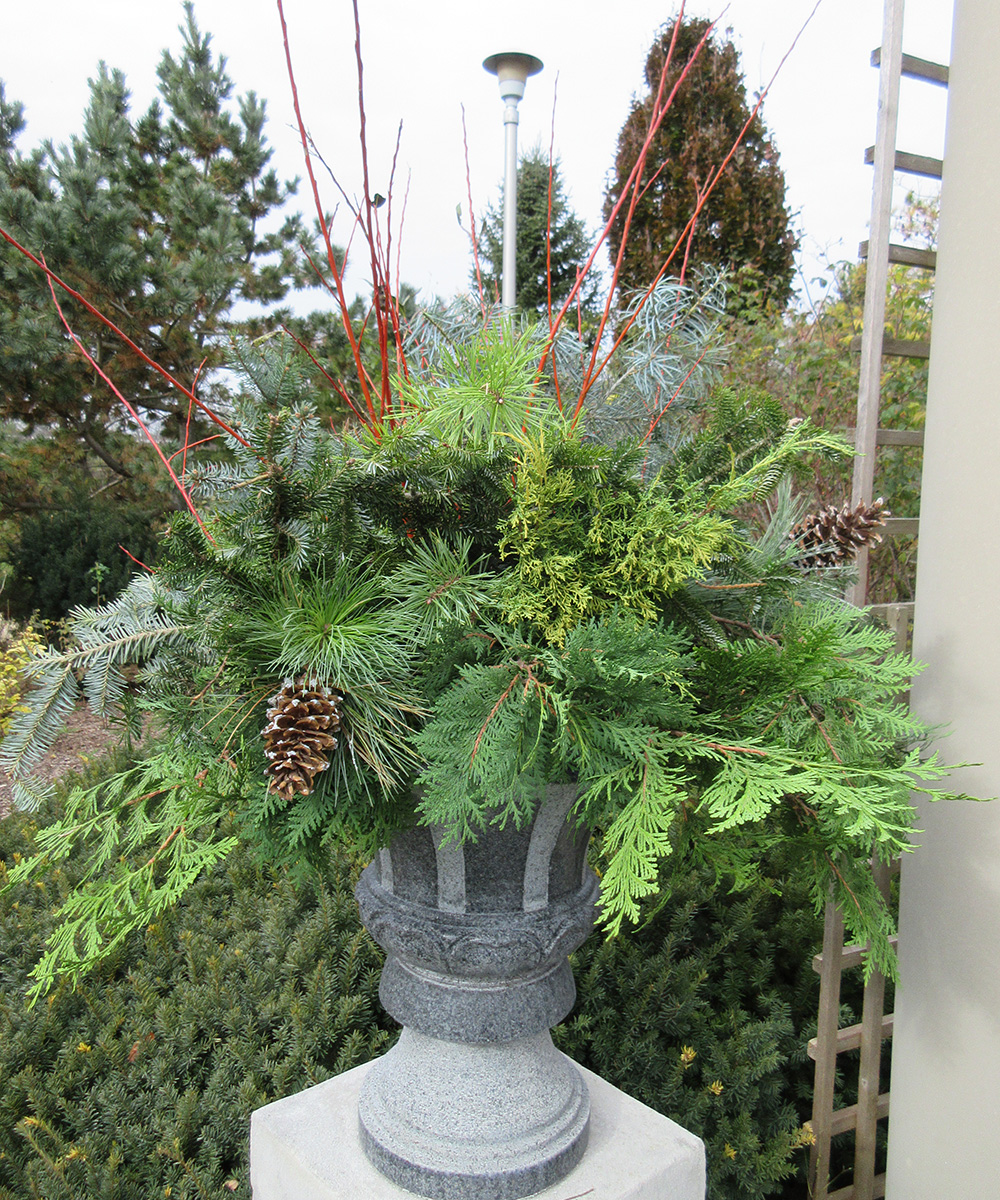
There is no limit to the creativity that can come into play when creating a winter container using found elements out in the landscape. Densely arranging this material will help it hold together with snow and wind, although consider the use of disguised wire, twine, and floral foam as needed. If the container is quite light and prone to tipping over, consider internal anchoring with bricks, cinder blocks, or other materials that still allows drainage but adds basal weight to the container. For more inspiration regarding winter container design, read on here:
Force bulbs for winter interest. Do you have some extra spring-blooming bulbs that you haven’t yet planted in the garden? Consider forcing those bulbs indoors. In essence, you’ll be imitating an outdoor environment for these bulbs in a cool location that will result in active root growth, acclimation to the cold, and then ultimately an active bloom period with much-needed color.
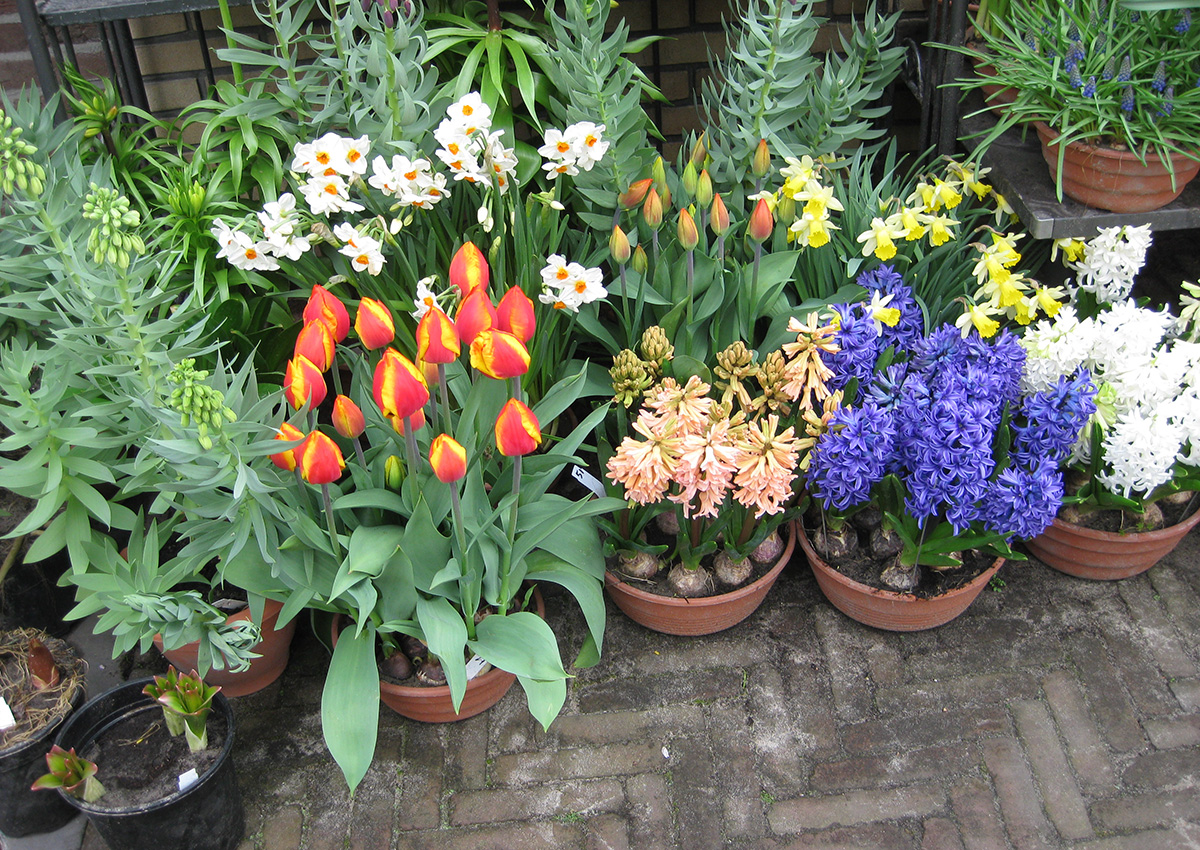
The most commonly forced bulbs include tulips, daffodils, hyacinths (Hyachinthus spp. and cvs., Zones 5–9), crocuses (Crocus spp. and cvs., Zones 3–8), grape hyacinths (Muscari spp. and cvs., Zones 4–8), snowdrops (Galanthus spp. and cvs., Zones 3–9) and reticulata irises (Iris reticulata, Zones 5–8). The process of planting and vernalization (cool period) averages between 12 and 16 weeks depending on the type of bulb. Keep in mind that amaryllis (Hippeastrum spp. and cvs., Zones 8–10) and paperwhites (Narcissus papyraceus and cvs., Zones 8–11) can be forced in the home but don’t require the cooling period.
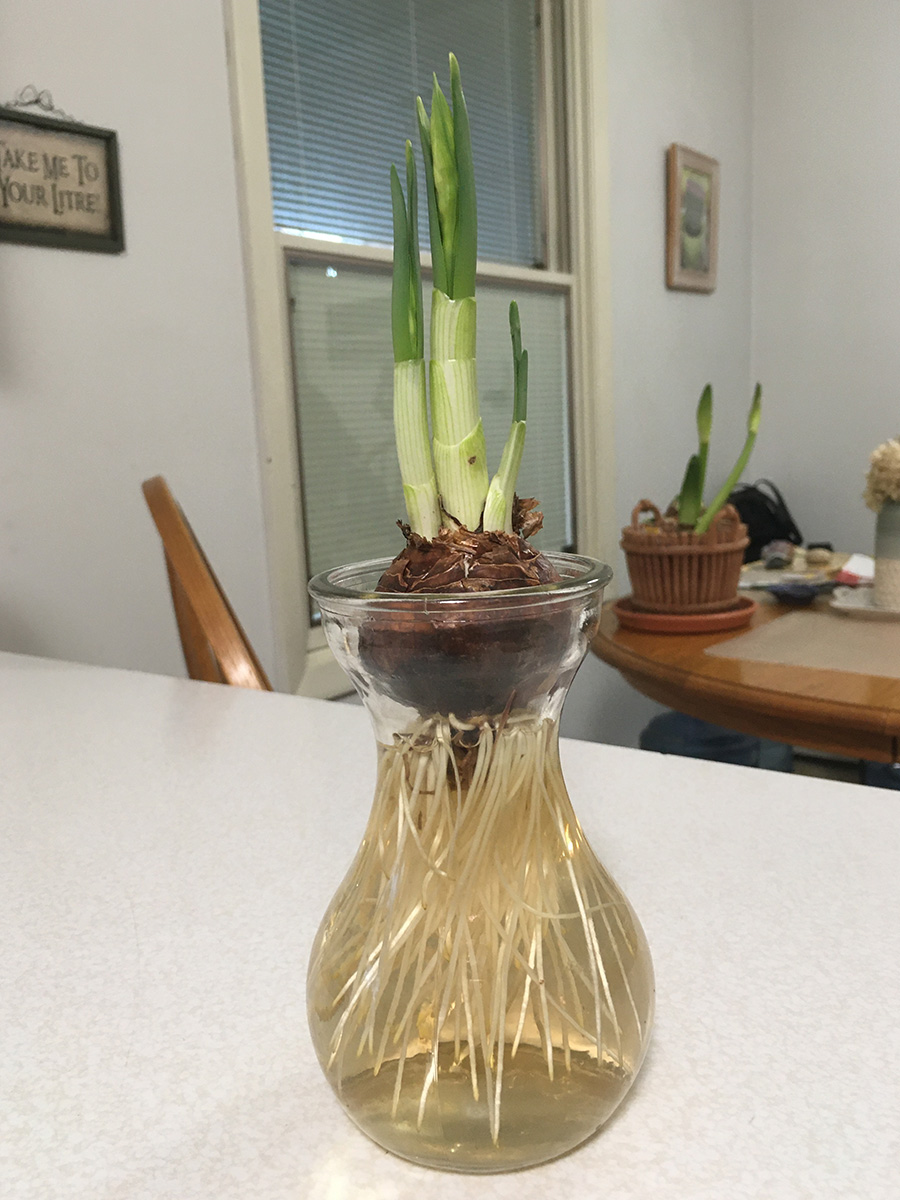
For bulbs that do need a cooling period, first make sure the bulbs are firm and free of nicks, bruises, or damage. Select a container that is twice the height of the bulb and has sufficient drainage holes. Fill the container with a lightweight, soilless potting mix, and plant the bulbs close together (not touching), with the tips of the bulbs just barely poking above the soil level after the first watering. The soil should be monitored and kept slightly damp throughout the cooling process, which requires temperatures between 32° and 50°F (0° to 10°C). A range around 40° to 45°F (4.4° to 7.2°C) is ideal and can be frequently found in an unheated garage, cellar, cold frame, window well, or the refrigerator. This can be a messy endeavor in the fridge, so keep the pots in plastic bags but still able to drain if you choose that option. Also, make sure that you don’t have fruits or vegetables in the fridge, as the ethylene they emit as they ripen can adversely affect the bulbs. Inspect these containers weekly for watering needs, and keep them out of any light until they are ready to be moved inside. No fertilizer is needed for this entire process.
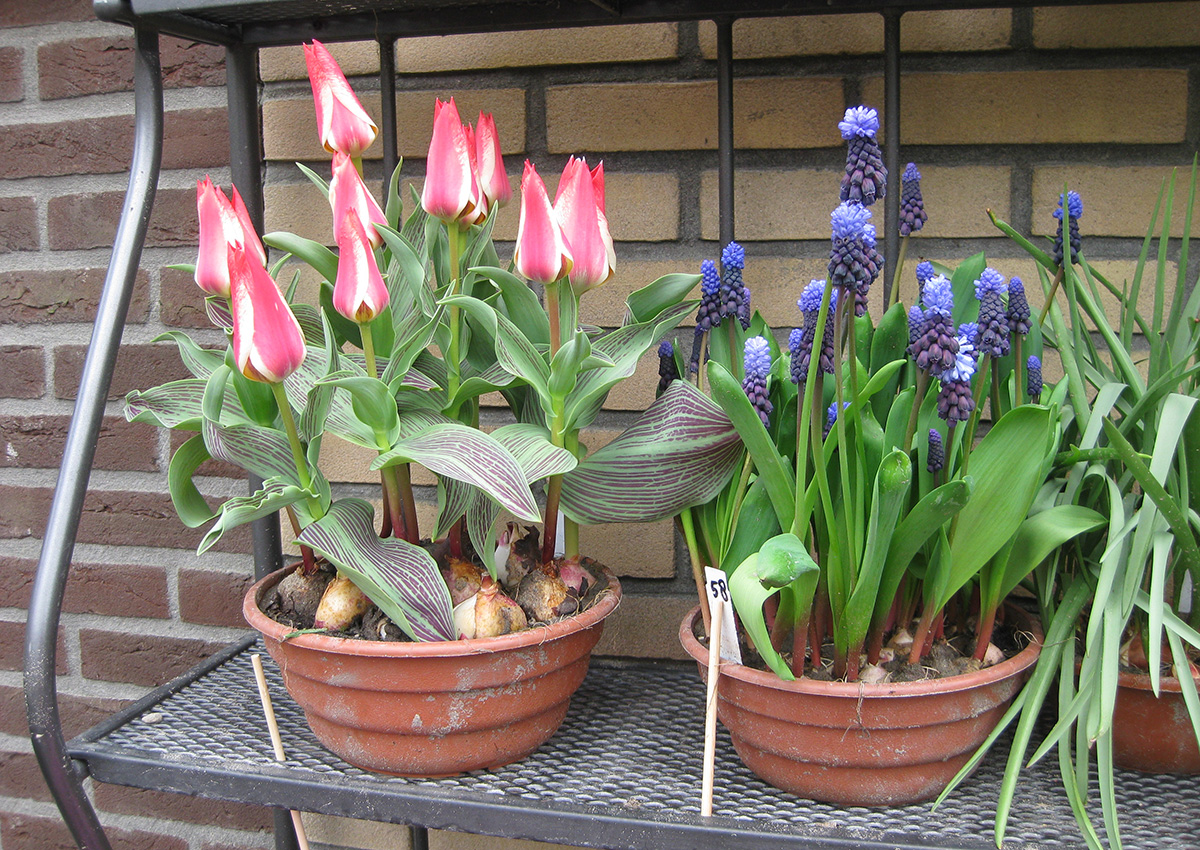
Roots should form quickly and will ultimately be visible coming out of the drainage holes after eight to 10 weeks. When the tips of the bulbs start showing some active growth after 12 weeks or so and the bulbs are firmly rooted in the pot, they are ready to be shifted into your home after one more step. These pots should come into an environment of 50° to 65°F (10° to 18.3°C) with some degree of lighting for three to seven days. Once they acclimate and begin to grow actively in this transitional setting, bring them into a spot indoors that receives some direct sunlight or bright, indirect light. Rotate the pots to even the available lighting on the quickly growing bulbs, checking for watering needs. Flowering typically occurs a couple of weeks after removal from the original chilling stage. Once done blooming, bulbs can ultimately be left to go dormant, then they can be planted out in the early spring garden, where they will likely adjust in a year or two and get back on track with blooming from there. For more tips and tricks on bulb forcing, read on here:
—Mark Dwyer, former director of horticulture at Rotary Botanical Gardens in Janesville, Wisconsin, operates Landscape Prescriptions by MD.


Comments
Log in or create an account to post a comment.
Sign up Log in