

-
Photos: Greg Holdsworth
-
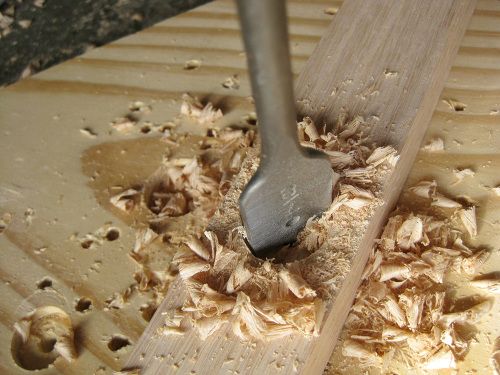
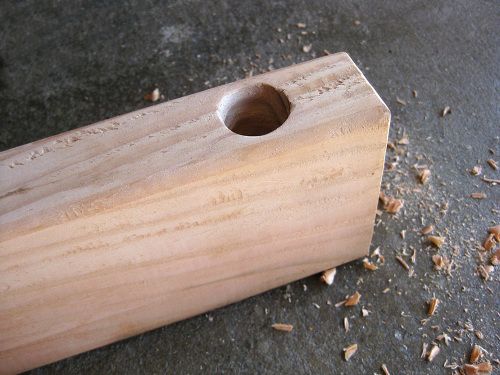
PHOTO A - Tip: when drilling the hole through the furring strip, put a piece of scrap board lumber under it. It will make for a cleaner cut hole.
-
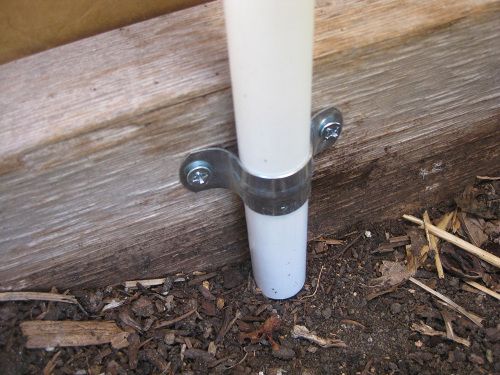
PHOTO B - The metal pipe clamp holds the PVC pipe in place, and prevents it from moving around in the ground.
-
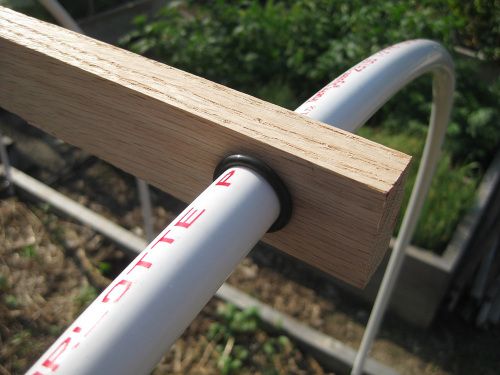
PHOTO C - The two rubber o-rings secure the "hoop connector bar" to the PVC pipes
-
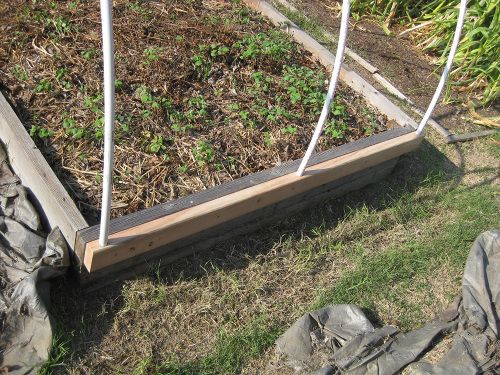
PHOTO D - The PVC pipes secured to the raised bed.
-
PHOTO E - Holes drilled into the 2x4 stud will hold the PVC pipes.
-
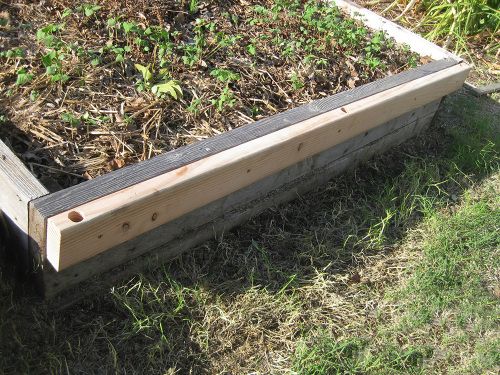
PHOTO F - The 2x4 wood stud attached to the side of the bed.
-
PVC pipes held in place by the 2x4 stud.
-
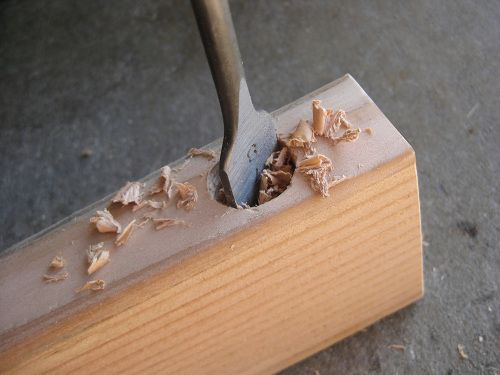
Tip: When drilling the holes with the spade bit, GO SLOWLY. Do not force it and use only light pressure to make the holes deeper.
-
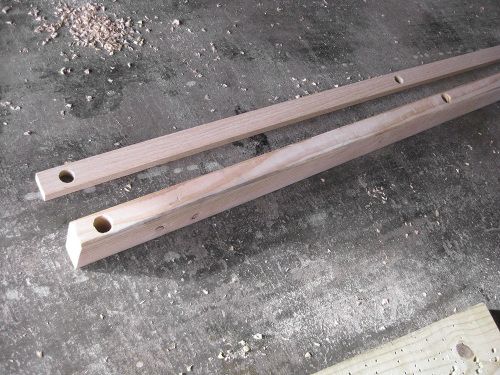
The two wood pieces, with holes, ready for assembly.
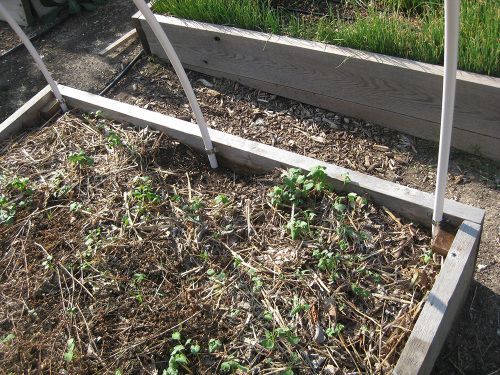
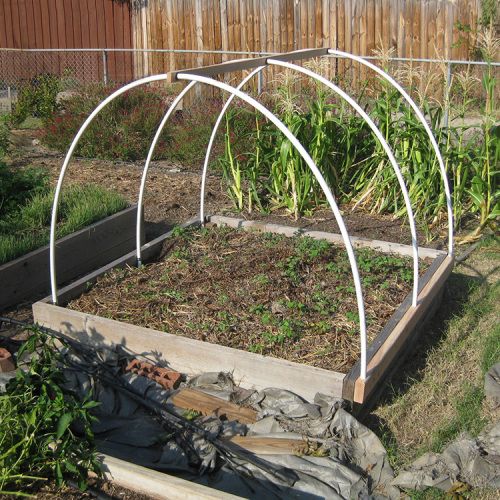
With the winter season closing in on us, it is of utmost importance to have a frost/freeze “defense system” in place to protect and extend the season for our fall veggies. A simple way to do this is to suspend protective cloth or plastic material above the plants—to cover them but not to touch them. Here is a “hoop house” structure, with two ways to connect the PVC pipes to the edge of the raised bed. (I’m calling them “in-bed-mounted” and “outside-bed-mounted” versions.)
Things you’ll need
For in-bed-mounted version:
Supplies
• Three 8-foot lengths of ½-inch PVC pipe
• Six #15 rubber O-rings
• 4- to 5-foot length of 1×2 wood furring strip (get a good-quality dense wood like pine or oak)
• Six ½-inch 2-hole metal pipe clamps
• Twelve 1½-inch #8 wood screws
• Scrap wood board (optional, but recommended)
Tools
• Drill and drill bits
• 7/8-inch spade drill bit
• Tape measure
• Hand saw
• Pencil
For outside-bed-mounted version:
Supplies
• Three 8-foot lengths of ½-inch PVC pipe
• Six #15 rubber O-rings
• 4- to 5-foot length of 1×2 wood furring strip (get a good-quality dense wood like pine or oak)
• 8- to 10-foot length of 2×4 stud
• Six to ten 3-inch wood or deck screws
• Scrap wood board (optional, but recommended)
Tools
• Drill and drill bits
• 7/8-inch spade drill bit
• Tape measure
• Saw (circular saw strongly recommended)
• Tape measure
• Pencil
• Square (metal or fast plastic type)
• Sandpaper or sanding block
Skill level: Easy
Construction
The “hoop connector bar”:
1. Measure the length of the side of the raised bed you’ll be mounting the PVC hoops to. This will determine the length of the 1×2 wood furring strip to cut.
2. Measure 1 inch in from both ends of the piece you cut in STEP 1. Put a mark at these two spots.
3. Measure the halfway point between these two end points, and again mark it.
4. Using a small diameter drill bit (around 1/8 inch), drill pilot holes in each of the marks.
5. Using the 7/8-inch spade bit and the pilot holes as a starting point, drill a hole through the furring strip (PHOTO A).
In-bed-mounted version:
1a. Using the “hoop connecting bar” as a guide, put three marks on the inside edge of the raised bed, at the same spots as the holes in the connecting bar.
2a. Screw three of the 1/2-inch metal pipe brackets to the inside edge of the raised bed frame (PHOTO B). Repeat with three brackets on the opposite side of the bed.
3a. Put one rubber O-ring on each PVC pipe, and position them about halfway down the PVC pipe.
4a. Put the ends of the three PVC pipes into the three metal brackets on one side of the raised bed. Note: you may to loosen/unscrew the metal brackets slightly to allow the PVC pipe to fit in under them.
5a. Put the “hoop connecting bar” on the other/opposite ends of the PVC pipes. Move the bar until it’s near the halfway point down the length of the PVC pipe.
6a. Put one rubber O-ring on the other ends of each length of PVC, and again, position them about halfway down the PVC pipe (PHOTO C).
7a. Put the other/opposite ends of the three PVC pipes into the three metal brackets on the other side of the raised bed (PHOTO D). Adjust the bar as necessary.
Outside-bed-mounted version:
1b. Using the “hoop connecting bar” as a guide, cut the 2×4 stud to the same length. Do this twice, as you will need one for each side of the bed.
2b. Smooth out any rough sides or edges with sandpaper or a sanding block.
3b. Measure 1 inch in from both ends of the 2×4 studs you cut in STEP 1. Put a mark at these two spots.
4b. Using a small diameter drill bit (around 1/8 inch), drill pilot holes in each of the marks.
5b. Using the 7/8-inch spade bit, and the pilot holes as a starting point, drill a 7/8-inch hole in the 2×4 stud (PHOTO E). The holes should be at least 2 inches deep. You can use a pen, pencil, or other object to measure the depth of the holes; they should be about the same depth.
6b. Using the 3-inch screws, mount the 2×4 stud to the side of the raised bed frame, lining it up with the top edge of the raised bed’s frame (PHOTO F). I ended up putting a screw at each end of the 2×4, and then two more, spaced equally along the length of the wood stud.
7b. Follow STEPs 3a–7a above.
At this point, the raised bed’s freeze protection frame is basically finished. This setup should be strong enough to hold up frost cloths, frost blankets, or plastic coverings. They can be held in place with weights on the ground, or with clamps attached to the PVC pipe.


Comments
Log in or create an account to post a comment.
Sign up Log in