

-
Photo/Illustration: Greg Holdsworth (All photos)
-
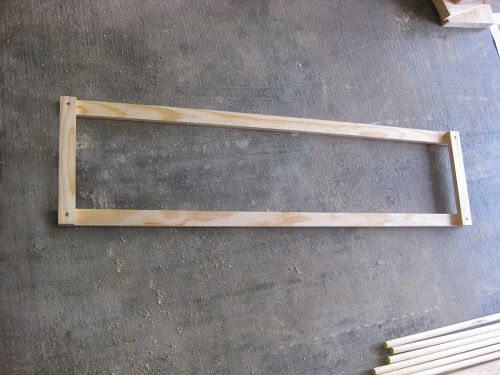
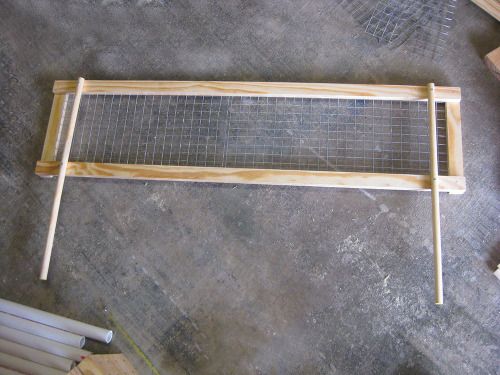
PHOTO A. The completed outside frame.
-
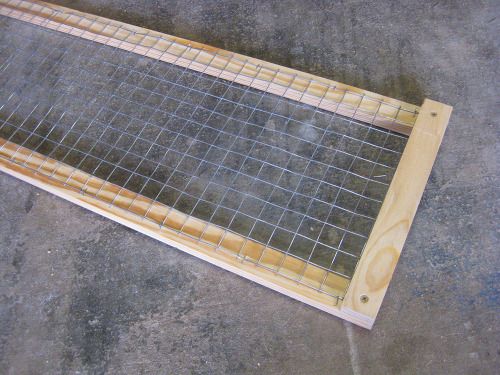
PHOTO B. The frame with the hardware cloth attached.
-
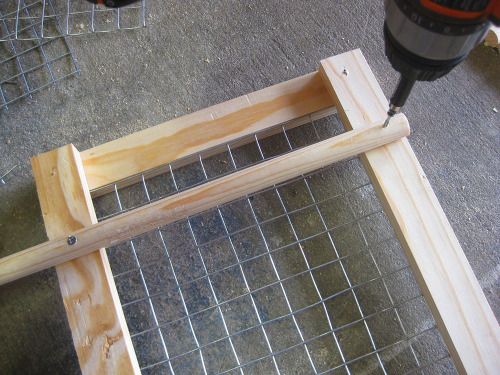
PHOTO C. The wood dowels are now attached.
-
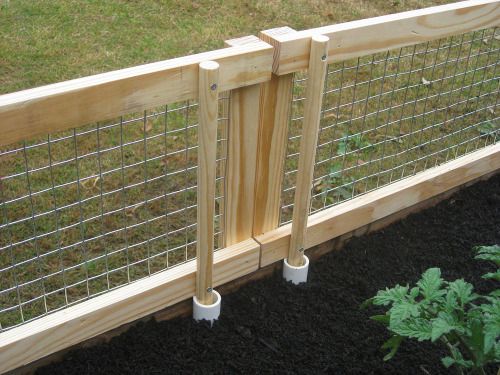
PHOTO D. The finished gate.
-
PHOTO E. PVC pipes attached to the inside of the raised bed with plastic conduit brackets.
-
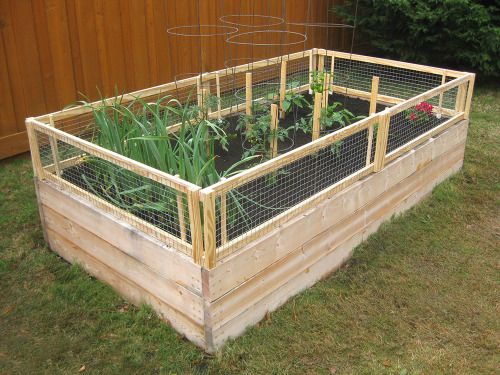
PHOTO F. The gates in place.
-
Gates operational... check!

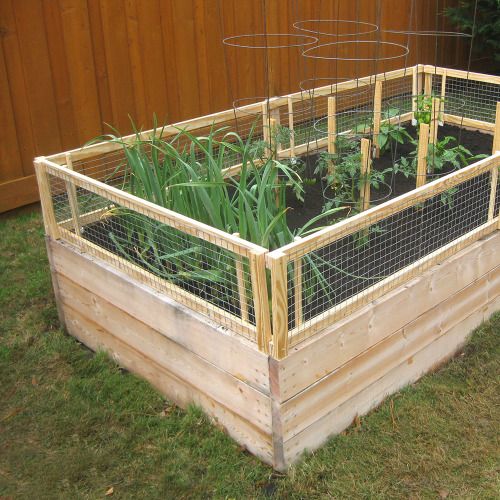
If your garden consists of raised beds, they do offer some level of critter protection, depending on how tall they are. However, for certain animals that are taller, you will need a ‘wall’ around your bed of some sort. With this type of pest protection, it comes at the cost of convenience. This pest ‘gate’ solves that problem by being completely removable. This project will construct a 4-foot wide by 1-foot high gate. If you want to make the gate taller, you can certainly do so.
The list of things you’ll need:
1. Two 1″ x 2″ x 8′ wood furring strips (Pine is standard, but you may opt for a nicer quality wood. You’ll have some extra left.)
2. Two 2-foot wood dowels, 5/8″ diameter (You can also get one 4-foot piece and cut it in half)
3. One 2-foot piece of PVC pipe, 1″ diameter
4. Eight 1 1/2″ wood screws (I would use a #6 or #8)
5. Eight 3/4″ wood screws (I would use a #6)
6. Two-four 1″ plastic conduit brackets
7. 1-foot x 4-foot piece of hardware cloth (You may need to buy a short roll of it. I used the thicker 1″ mesh type.)
8. Electric drill & drill bits (bit size to match screws)
9. Saw (hand saw is fine, but jigsaw is recommended)
10. Tape measure or ruler
11. Metal wire-cutting pliers
12. Staple gun and staples
13. Stain or weatherproof coating (optional)
Skill Level:
Easy to intermediate, depending on your wood-working/cutting skills.
Construction:
1. First, determine how tall you wish to make your removable gate(s). For this project, I built a gate that was 4-foot wide by 1-foot high. You may need a taller gate depending on the existing height of your raised bed and/or the type of critters you’re trying to keep out.
2. From the two 1″ x 2″ x 8′ furring strips, cut out two pieces that are 4-feet long and two pieces that are 1-foot long. After pre-drilling the screw holes, screw the four pieces together. You’ll have a long rectangular frame shape (Photo A).
3. Cut out a 4-foot by 1-foot piece of hardware cloth from a roll or sheet. Attach it to the rectangular frame with staples, about 3″-4″ between staples. This is done on the same side that the two 1-foot long side pieces are on (Photo B).
4. After pre-drilling the holes, screw the two 2-foot wood dowels to the wood frame, an equal distance from each edge of the frame (Photo C).
Your pest gate is essentially finished (Photo D).
5. Cut the 2-foot piece of PVC into two 1-foot pieces.
Construction Note: In this project, I installed the pest gate in a raised bed that already had soil in it. This is obviously more difficult than installing the gates in a newly-built bed that didn’t have soil put in yet.
6. Using the 3/4″ screws, attach the PVC pipes to the side of the bed with the plastic conduit brackets (Photo E). Tip: To position the PVC pipes in the right spots on the side of the raised bed, slip the PVC pipes into the wood dowels of the gate, then place all of those against the side of the raised bed. Then mark where you’ll need to screw in the plastic conduit brackets.
And you’re done! Caution must be taken to avoid getting dirt or debris into the PVC pipes (Photo F). The gate will move a little inside the PVC pipe, since the dowel is 5/8″ in diameter, and the inside diameter of the PVC pipe is about 3/4″. A 3/4″ diameter dowel will fit inside the 1″ pipe. However, DO NOT use this size! I found out the hard way that water and outdoor conditions expanded the dowel to the point that they were literally stuck inside the PVC pipe.
This is a great addition to your raised bed, and hopefully will help keep those critters out!


Comments
These directions and list of supplies are only for 1 gate at 1 end, correct? Then, did you make 4 of them to surround the bed completely, with longer side gates? Or are there 2 on each of the long sides, meaning you made a total of 6??
Log in or create an account to post a comment.
Sign up Log in