
Nanci Kerby sent in these great images of creating a new bed in her Napa, California, garden.
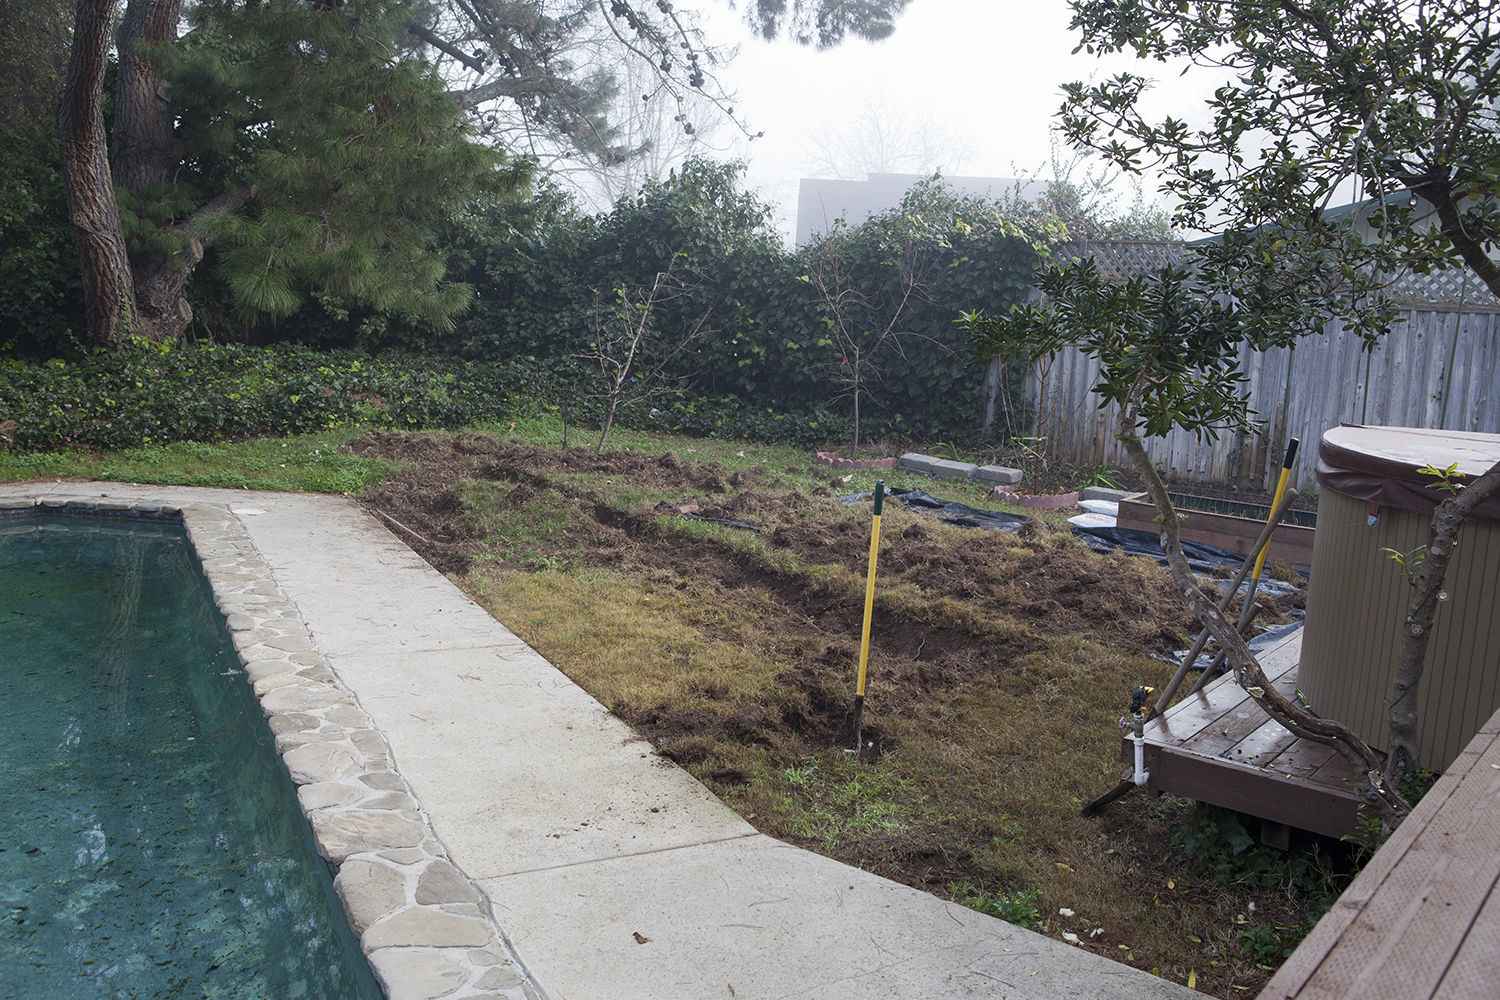
It was a warmish February, so Mike and I decided to start our new daylily project early. We dug down a foot in our clay soil that was riddled with crab grass. While Mike continued digging in preparation for water faucets, I spent a number of days, for a few hours at a time, sifting out the crab-grass roots and root-able segments. I’m happy to say that we have had no crab grass return.
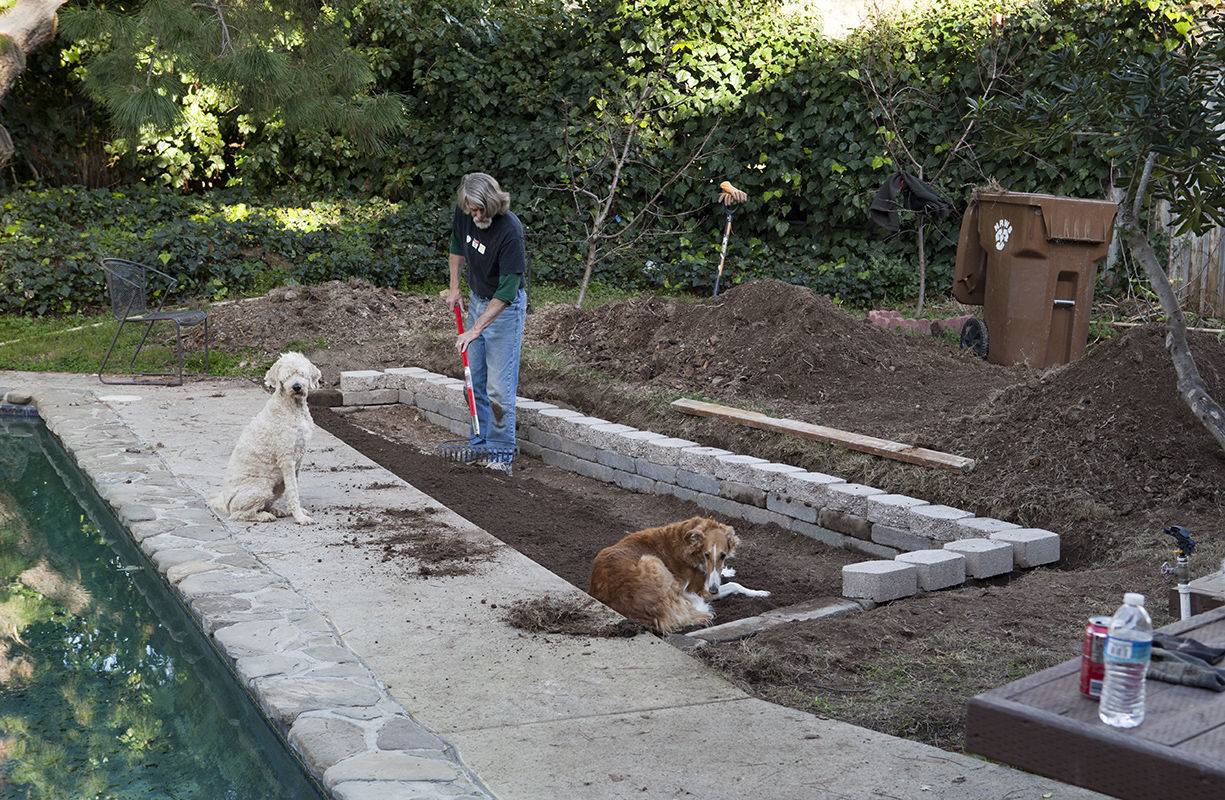
We added many bags of compost and manure and blended it all with the native clean soil. We raked it nicely, and the dogs, curious all along, were quite appreciative of a soft new place to sit that was warm and fresh.
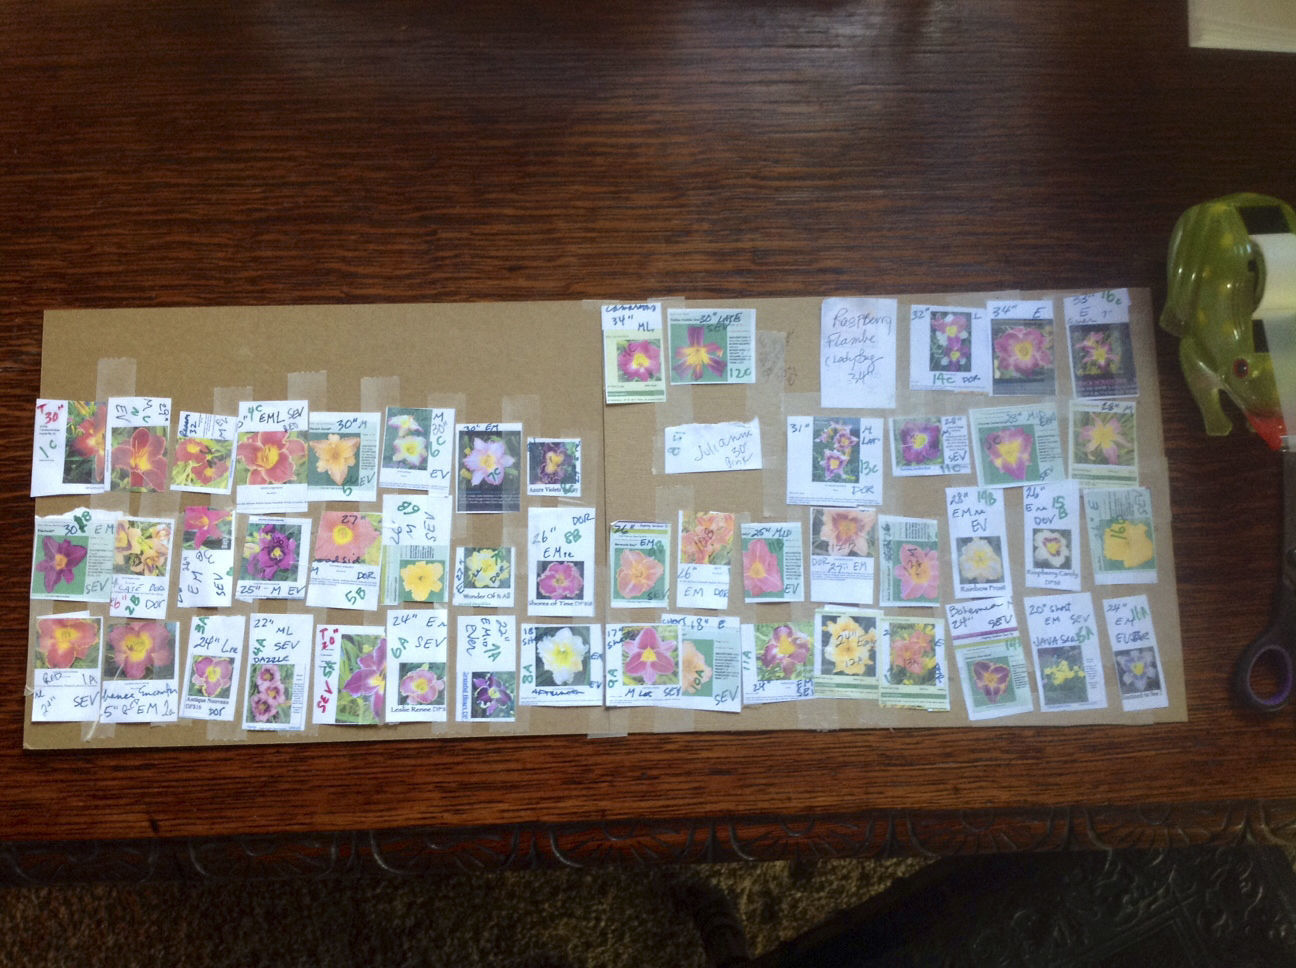
When my bare-root daylilies arrived from several online mom-and-pop sellers, I wanted to be ready to plant them efficiently with some attention to appearance. I accomplished this by making screen shots of each flower I bought so I would see color, pattern markings, and height. I printed the shots small, then taped them to small pieces of card stock. After creating a satisfactory arrangement, I taped them in place. Thank goodness I did, because these daylilies arrive in the mail with no identification of color or anything besides their name, which can be very obscure.
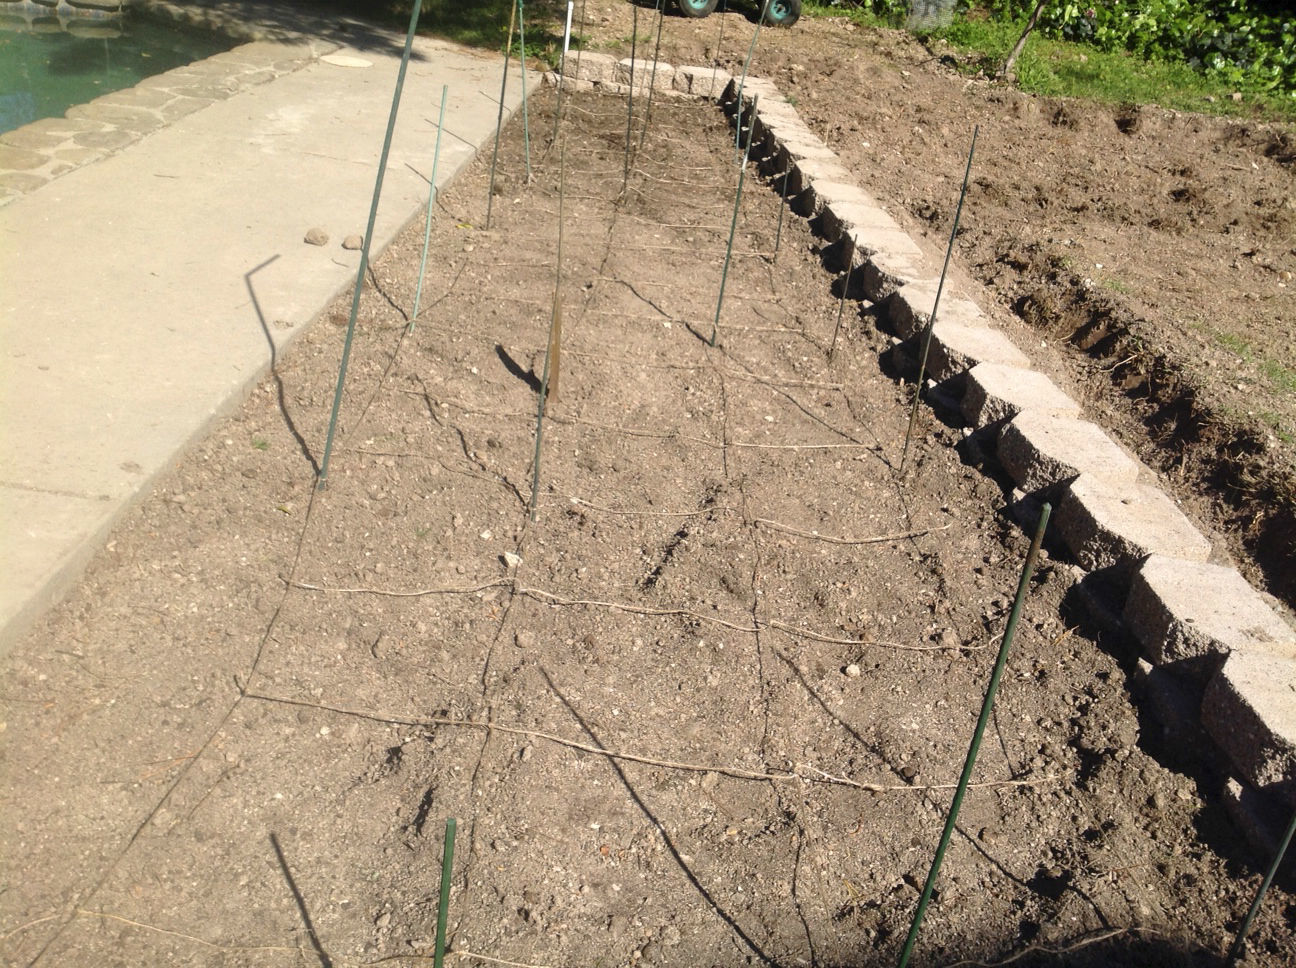
And now for the grid! Using bamboo sticks, I tied twine to make 16 rows, numbered 1–16, and three columns (A, B, and C). When a shipment arrived, the plants all looked the same—just little green two- or three-leaf fans with roots. But I could look at a plant’s name, find its home—say, 3B or 12A—and know where to plant it.
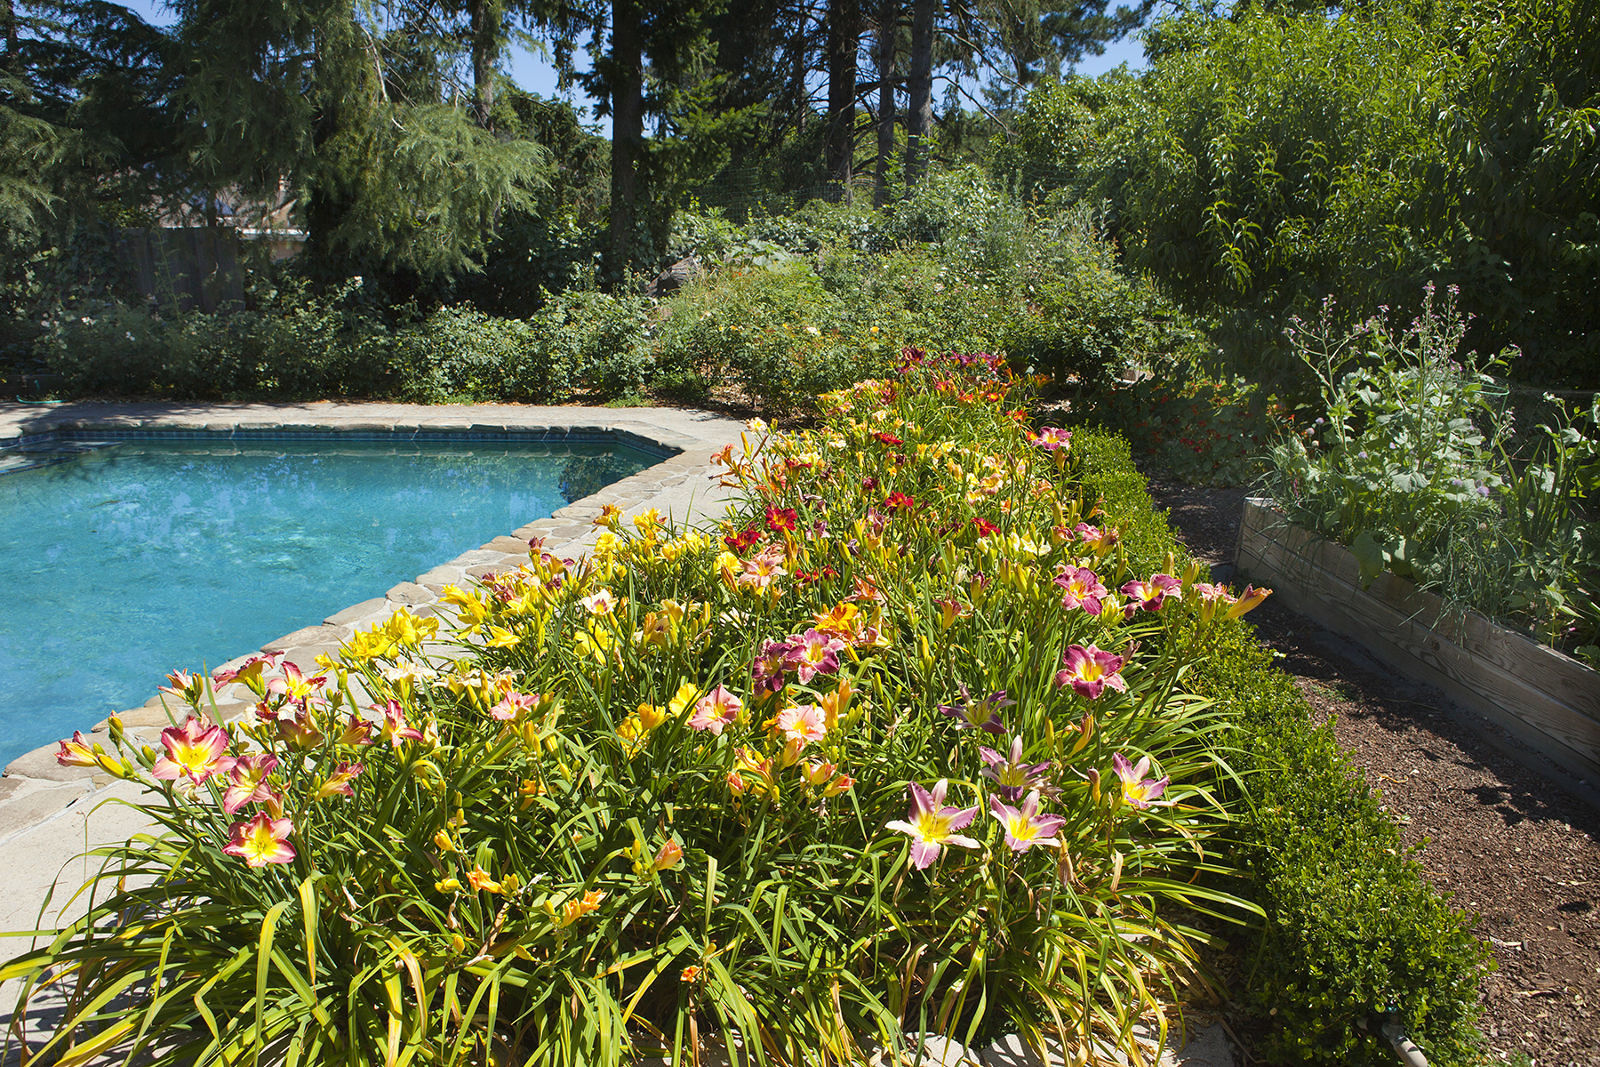
We completed the planting in the first weeks of March and then waited for the May flowers to appear. They bloom at various times, so I put the latest bloomers in the back. They are so pretty in bloom!
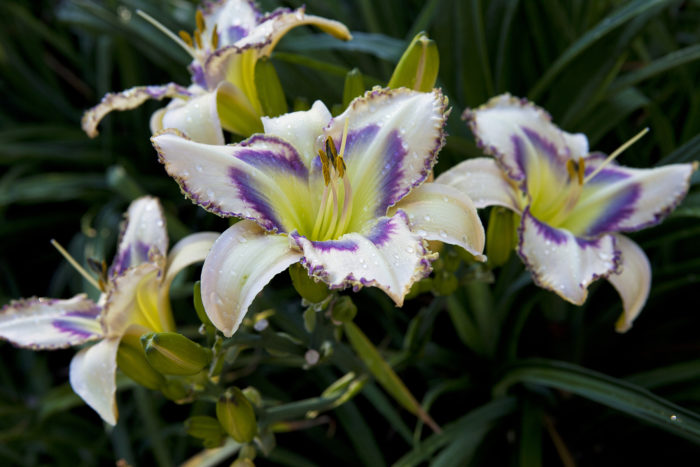
Daylily ‘Destined to See’
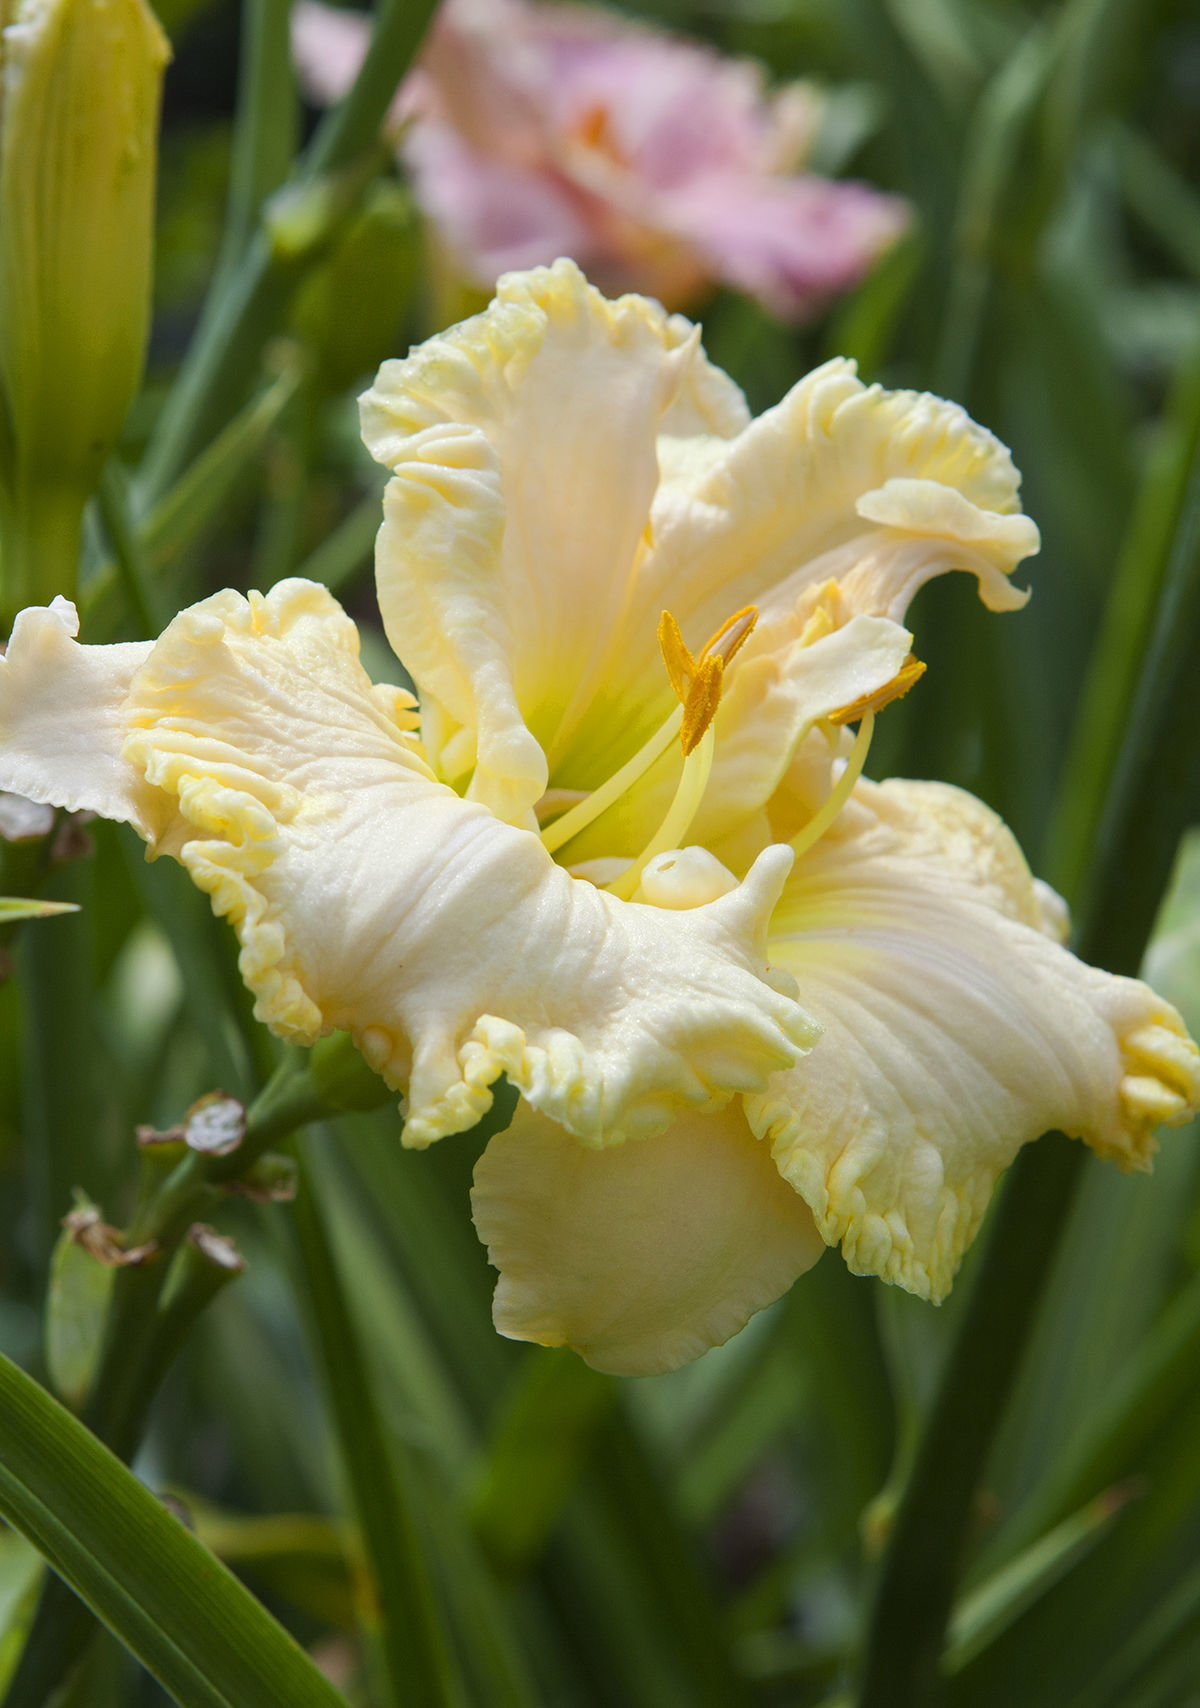
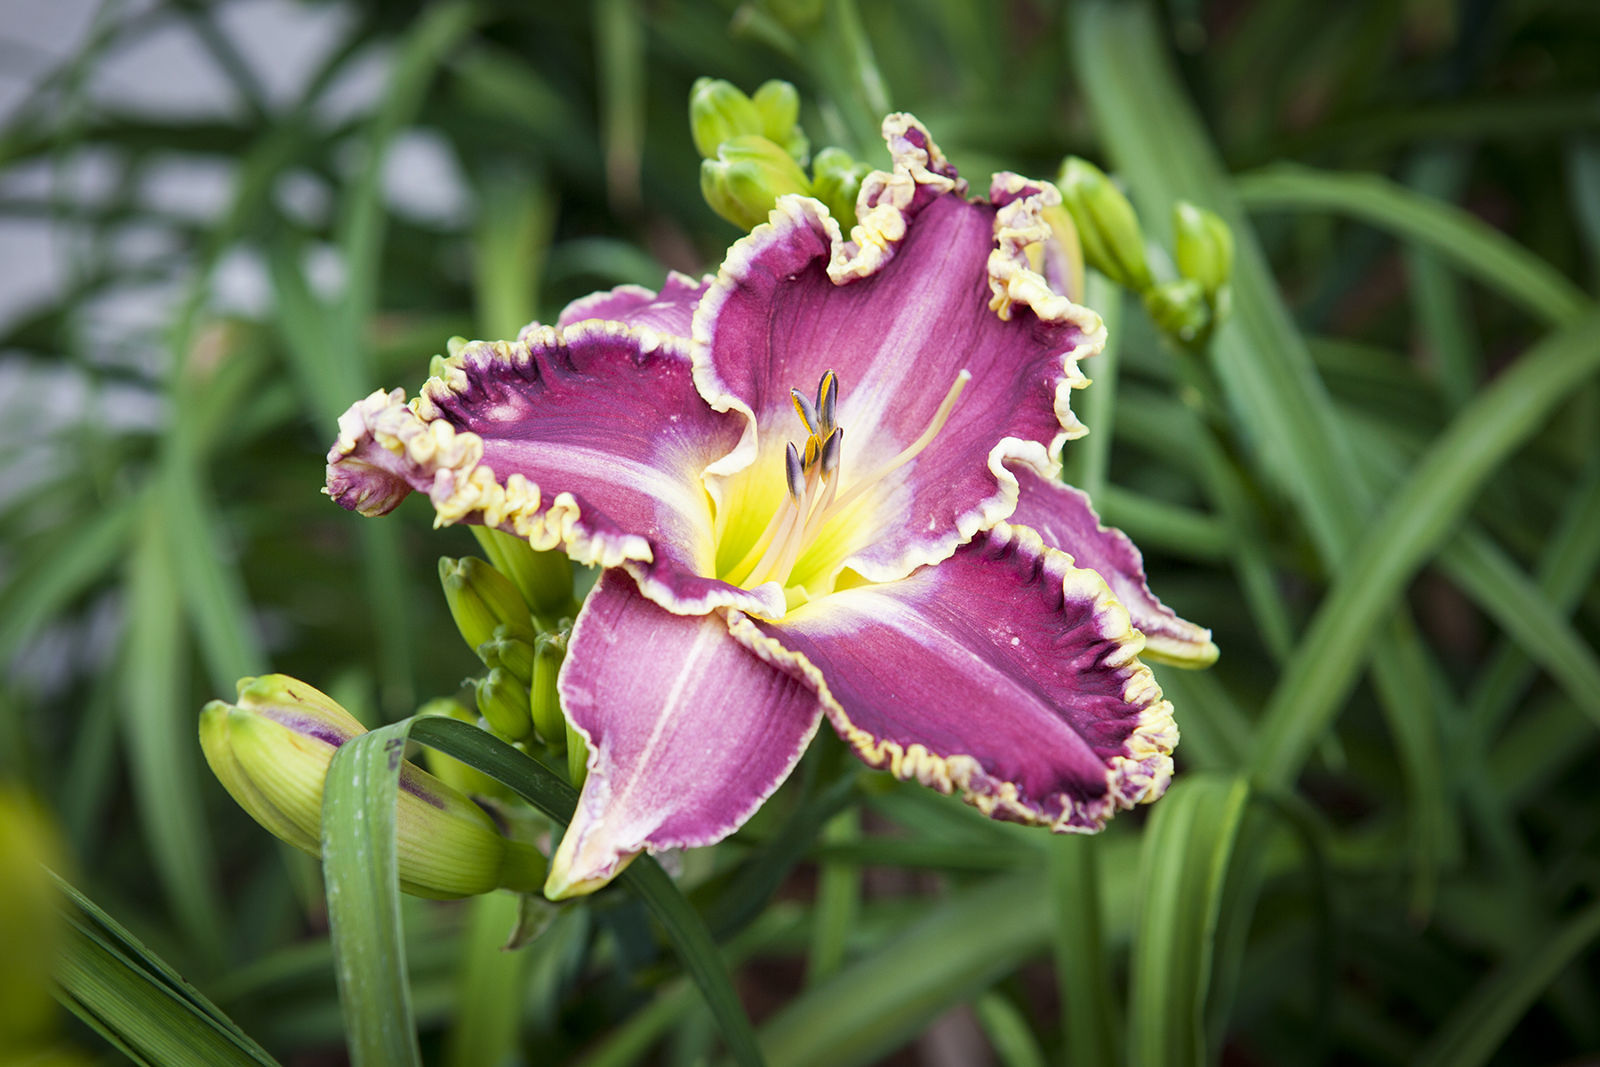
‘Rainbow Frost’
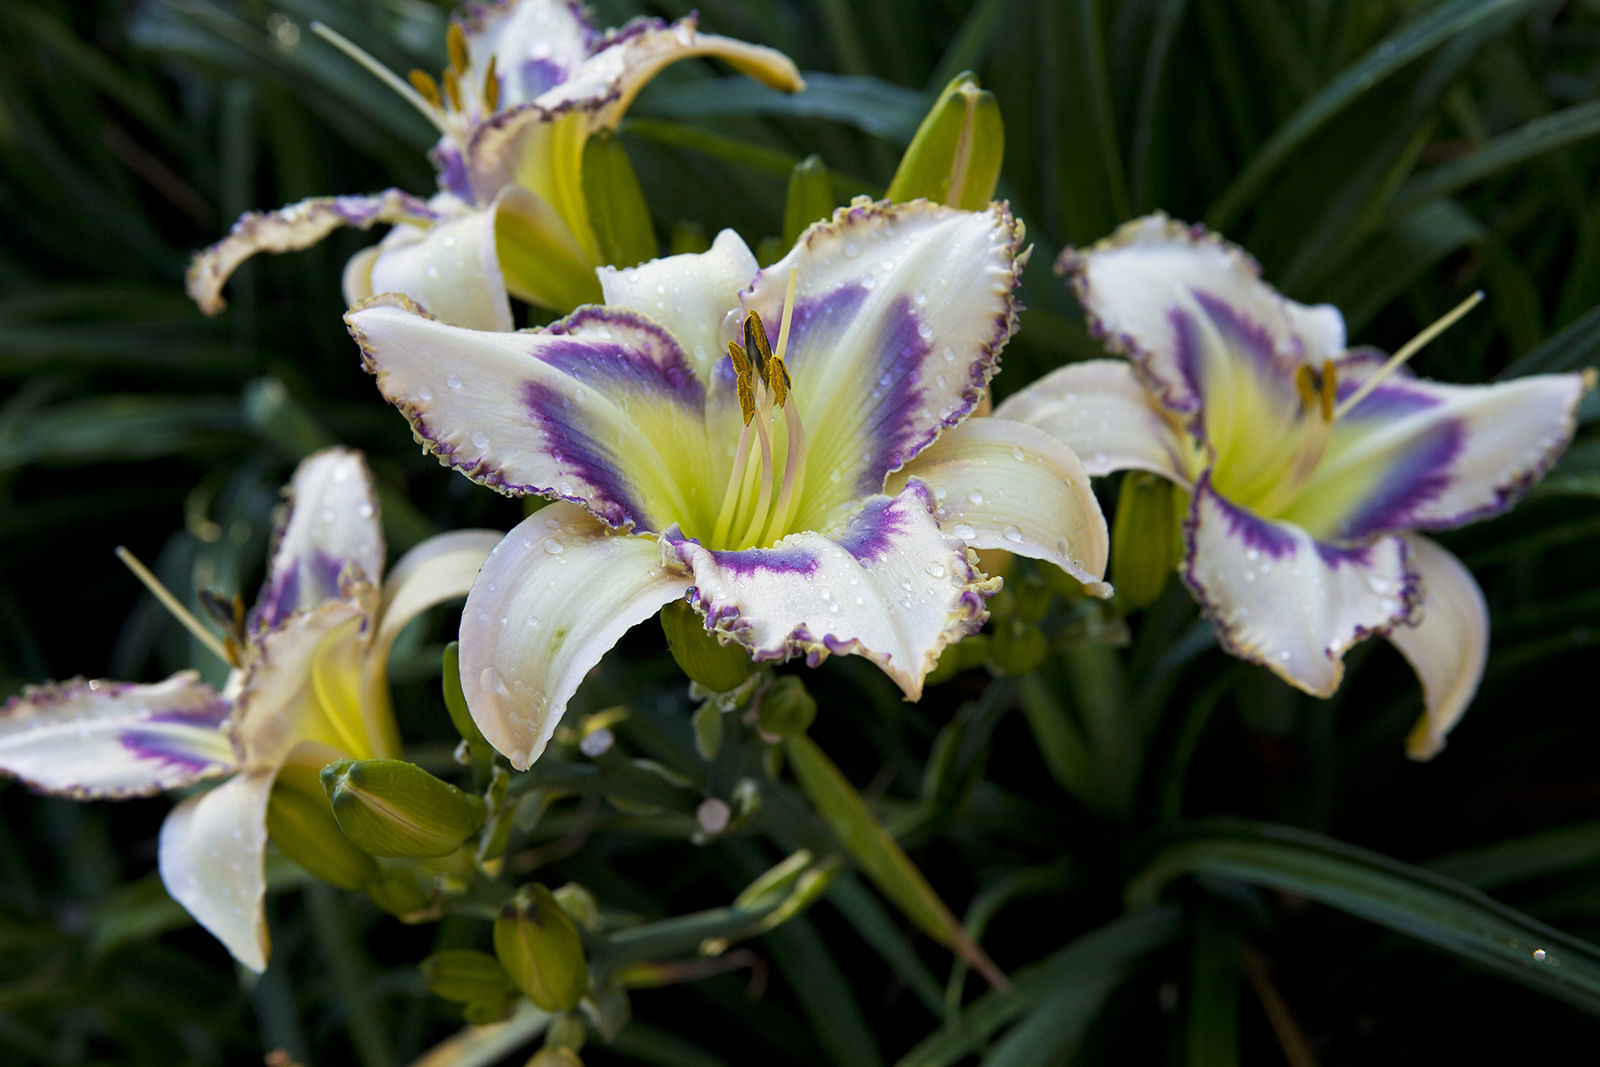
‘Azure Violets’
Have a garden you’d like to share?
Have photos to share? We’d love to see your garden, a particular collection of plants you love, or a wonderful garden you had the chance to visit!
To submit, send 5-10 photos to [email protected] along with some information about the plants in the pictures and where you took the photos. We’d love to hear where you are located, how long you’ve been gardening, successes you are proud of, failures you learned from, hopes for the future, favorite plants, or funny stories from your garden.
If you want to send photos in separate emails to the GPOD email box that is just fine.
Have a mobile phone? Tag your photos on Facebook, Instagram or Twitter with #FineGardening!
You don’t have to be a professional garden photographer – check out our garden photography tips!
Do you receive the GPOD by email yet? Sign up here.


Comments
What a great mini-lesson in day lily gardening. Did I ever enjoy that. The best picture though was with the dogs, one lying right in the soil. A well organized venture and the results look amazing, your efforts have been rewarded.
Glad you enjoyed this! It was really amazing to see how great it turned out. We only figure out the basics, and let it happen from there!
Wow, Nanci, you picked some real beauties for your new daylily bed. I'm particularly partial to the thick crinkly edge of 'Rainbow Frost'...love how much substance and texture it has.And, any of us who garden and have dogs know how they love to "help" by tamping down the fresh soil...with their whole bodies. I hope you enjoying floating in your pool and looking over at all those stupendous blooms.
That observation of yours is a favorite thing to do, looking at the blooms from the underside is fun. A guest marveled this summer at just that. I did not realize daylilies came with ruffled edges. I was just keeping myself busy in a rainy January by looking at flowers, and voile' -a discovery. And colors too boot!
Wow! Love how you laid it all out so purposefully! I wish I had the determination you did. Love that Rainbow Frost too.
Let me tell you that honestly I am not at all organized, and my kids laugh at how I don't know which flower is which. So figured I would surprise them and have a chart this time knowing so very many with non descriptive names were on their way. I have problems marking my dahlias, which I do with each one, but when it comes to dividing them, I don't ever have enough tags to code each one. Hence, I have surprises.
Nanci, your planning, organization, follow through and results are all amazing! It was so good to see the step-by-step pictures - how often do we get to the end of the project and then realize we should have taken pictures! Congratulations to you and your husband on a job exceedingly well done.
Nanci, this was so informative. My husband and I generally create a new bed and then landscape by adding plants as we find something that strikes our fancy. This planned out bed is such a better way of doing things. I hope the fires have stayed far from your home.
Thank you so much. The fire last October 2017 was about half mile up the street and we were evacuated. . I still came back each day to water as much as I could, and aside from the critters all being in shock, we made it through. Like all, I could not imagine so many years of nurturing disappearing. Heavy ash on all the plants. But we are all perfectly delighted it didn't get closer.
Nanci and Mike,
your organized plan for your new bed is something that my husband and I will copy - it is an excellent way of organizing plants. The results are beautiful; the 3 day lilies that you show are each beautiful.
Thank you, it does take two. He does the heavy lifting, and I do some. Knowledge of simple plumbing etc, really helps. I prep, but mostly get to do the plant care part!
I'm very impressed by your organized approach to creating this new bed. It's beautiful! I usually don't have the discipline required to do that. Do you have to worry about critters? That's always an extra step I must take when working on beds.
Fabulous picture story - certain that was a ton of work. Daylillies areone of my favorites. They bloom from May until mid November here. Really enjoyed your post. Beautiful garden !
Thank you so much, I am really thrilled we can share what we do. Most people never have any idea of how something can morph into something even better.
I'm so impressed with your organization skills! And the results speak for themselves. Congratulations on a lovely addition to your garden.
Thank you, great that you enjoyed it too.
Good job!
Thank you very much.
What a wonderful job you've done laying out a bed so purposefully, yet the final product is so naturally beautiful. All of your hard work (and the dogs') was certainly worth it. Kudos!!
Yes, the dogs want to be where ever we are working, and just BE. Most projects I have not photographed because my hands are muddy, but I will start being more aware of shooting it.
Thanks for sharing your adventure in Daylily beds. You did a fine job of laying things out. To help when you have a plant that you share or divide or move to another location, bury a label in the ground. Use a plastic tag using a waterproof pen such as Identapen. A beginners label can be made from an old plastic blind or PVC pipe hammered in the ground near the plant with its name.
Fantastic idea, and I have just come across that about a month ago. Thank you for reminding me. I will be doing that for sure.
I love it! Seeing the process and then the results is a great way to go. I really need to do better at even a simple before and after. Thanks,
Yes, In this case we knew we wanted to record a yard history, since it had very good potential. We had a slope with crabgrass for so many years, it was time to do something prettier.
Log in or create an account to post a comment.
Sign up Log in