

-
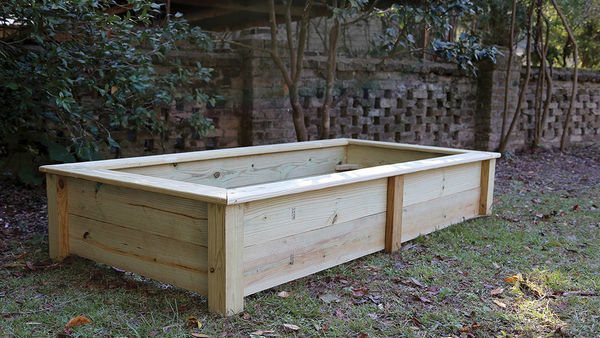
You can build this 4x8 raised bed with basic carpentry skills (see the instructions on page two, at the end of this article).Photo/Illustration: Rosalind Wanke
-
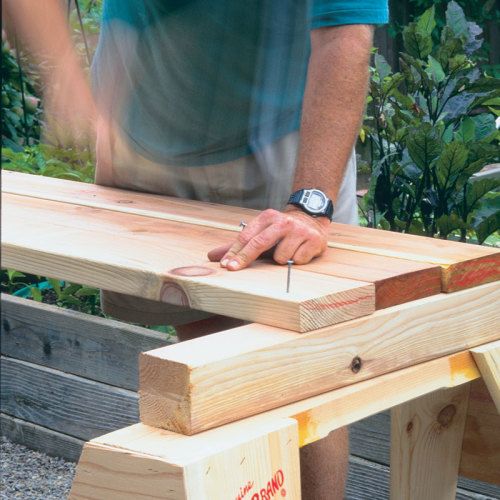
Each raised bed takes about half an hour to build, once you have your materials together.Photo/Illustration: Rosalind Wanke
-
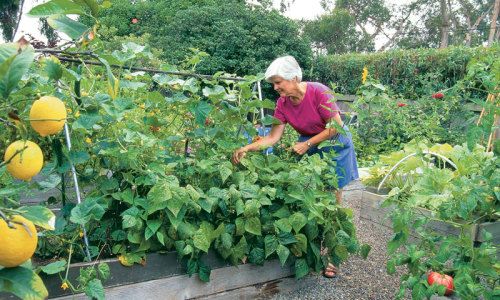
You can reach the center of this 4-ft.-wide bed from either side; the pathways, which are 3 ft. wide, accommodate a wheelbarrow.Photo/Illustration: Rosalind Wanke
-
Photo/Illustration: Rosalind Wanke
-
Photo/Illustration: Rosalind Wanke
-
Photo/Illustration: Janet Jemmott
-
Photo/Illustration: Rosalind Wanke
-
Photo/Illustration: Janet Jemmott
-
Photo/Illustration: Gary Williamson


Raised beds solved many of the garden problems that faced me 20 years ago in our new southern California home. Among the challenges were terrible soil, a concrete-paved yard, arid growing conditions, small children, and a big, exuberant puppy. I found the raised bed solution to be a great success, and only now am I having that first set replaced with new ones.
 |
|
But let me tell you the story of my garden. When we first saw our house-to-be and read the realtor’s description, five words eclipsed all others: Perfect Back Yard for Pool. To a gardener (me), those words meant a warm southern exposure and a sizable empty space in which to plant a vegetable garden.
The sizable sunny space turned out to be about 2,000 sq. ft. of concrete pavement, minus a 3-ft. planted perimeter. True, it was large enough for a decent-size garden. But also true was that what little soil existed was heavily compacted and lacked organic content.
Once before, we had been faced with difficult growing conditions. On a granite ledge with no soil in New Hampshire, my husband had built a raised bed where I grew a small salad garden. Why not design a system of raised beds that would allow me to grow vegetables year-round?
Getting more for less from a raised bed
In addition to the concrete and poor soil, there were a number of reasons raised beds seemed the perfect way to garden. First, my husband, Frank, was an accomplished carpenter and could build the boxes. Second, we could leave the concrete in place and simply break up the portions under the boxes to provide drainage.
 |
|
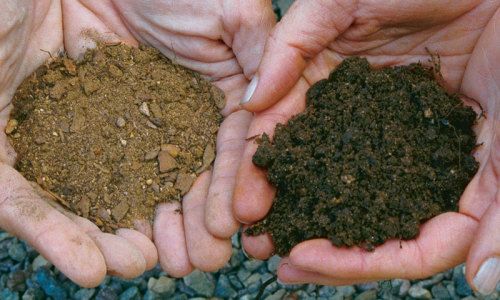
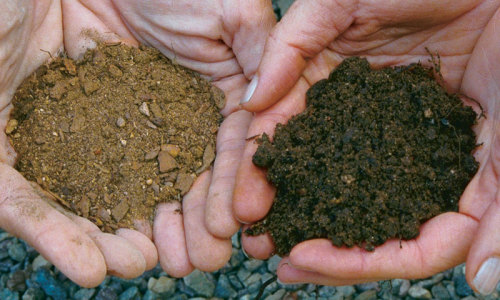
| Dirt poor, the original subsoil (left) became black gold (right) by amending it with chicken manure, compost, and topsoil. | |
Soil quality was a third reason for raised beds. We were able to create soil by using compost from our previous house (we had moved the entire pile). We supplemented the compost with some topsoil and chicken manure, and had a great, easily worked growing medium.
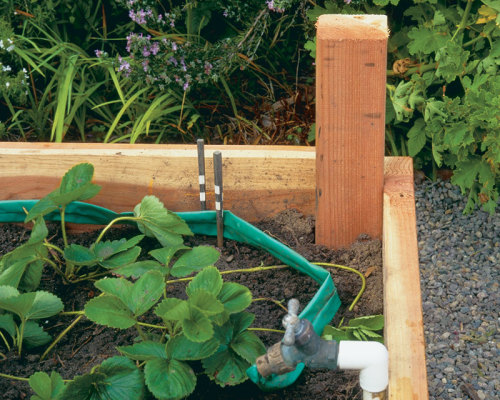
Because we live in a Mediterranean-type climate with less than 10 in. of rainfall per year and almost none between April and November, we knew we would have to irrigate. Raised beds allowed us to set up an irrigation system that included a hose bib in each box. This would allow us to water each bed independently.
It didn’t take long for us to see that our raised beds had several unanticipated advantages. Our golden retriever puppy loved to race around the beds but rarely jumped into them. Our children, Josh and Jessa, could easily ride their Big Wheels around the obstacle course we had unwittingly developed for them. And neither these activities nor my gardening compacted the soil because no one ever walked on it. It remained fluffy and well aerated, allowing plant roots to grow freely.
Deciding on the design
 |
|
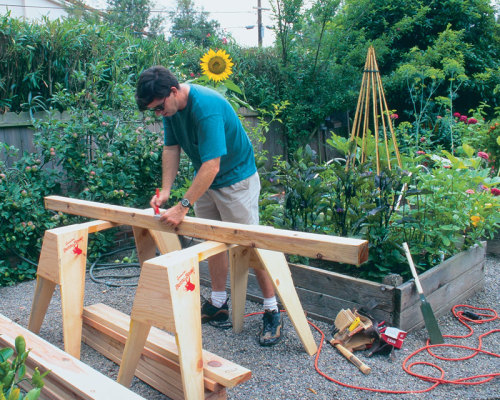
| Redwood is the material of choice for West Coast gardens, and once you have your materials together, the beds take only about half an hour to build. | |
 |
|
| The 4-ft. width of the raised beds allows the author to reach the center from either side. Paths 3 ft. wide accommodate a wheelbarrow. | |
I wanted eight raised beds, and I wanted them made of wood. Construction-grade redwood, which contains knots and some imperfections, seemed like a logical choice, since we knew it would last many years and would cost less than $100 to build the eight beds. But that was 20 years ago. For a recent replacement, the wood and nails for one box alone cost about $90. [Editor’s note: This article was written in 1997.]
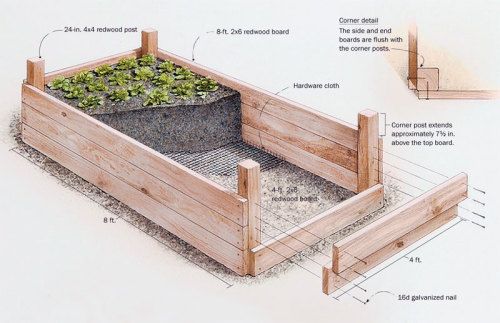
The design of the beds was derived from several practical considerations. The dimensions, 4 ft. by 8 ft., were based on the fact that lumber was available in 8-ft. lengths, so it would require a minimum of cutting and no waste. I could comfortably reach only 24 in. into the beds, so a width of 4 ft. would allow access from both sides to the middle.
I also measured several of our chairs and found they all had a seat height of 16 in. to 19 in. Since we had decided to use 2×6 redwood, we could stack the boards three high and end up with a finished height of 16½ in. (the actual width of a 2×6 is 5½ in.). This made the edge of the box a comfortable height on which to perch and gave more than enough root run for the plants.
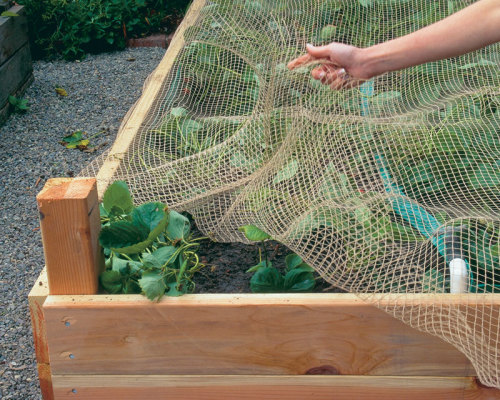
The boards were nailed to 4×4 corner posts that extend nearly 8 in. higher than the sides. I use bird netting during seed germination and clear plastic to warm pepper and melon seedlings. I drape these covers over the posts. The paths between the beds are 3 ft. wide to accommodate a wheelbarrow, which I use to transfer compost from its bin to the boxes.
 |
 |
|
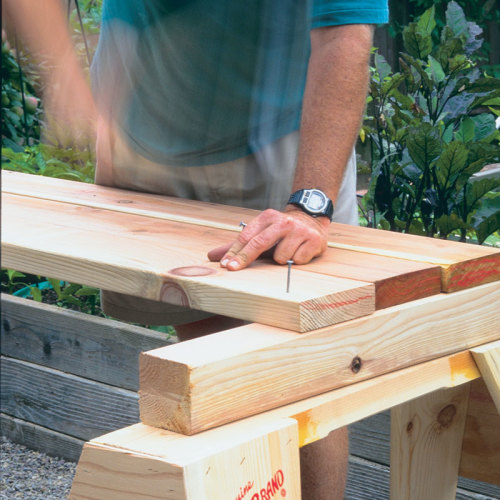
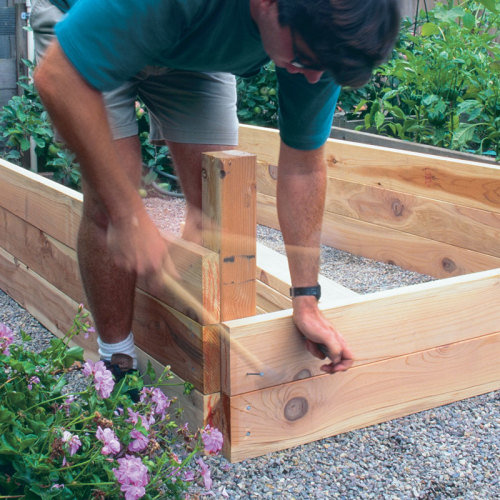
| Two nails per board secure the boards to the post. The bottom board should be flush with the bottom of the post; the top of the post extends about 7½ in. above the top board. | Stand the long boards with posts on the ground, parallel to each other and 4 ft. apart. Complete the bed by nailing the short boards to the posts. | |
Accessorizing your raised beds
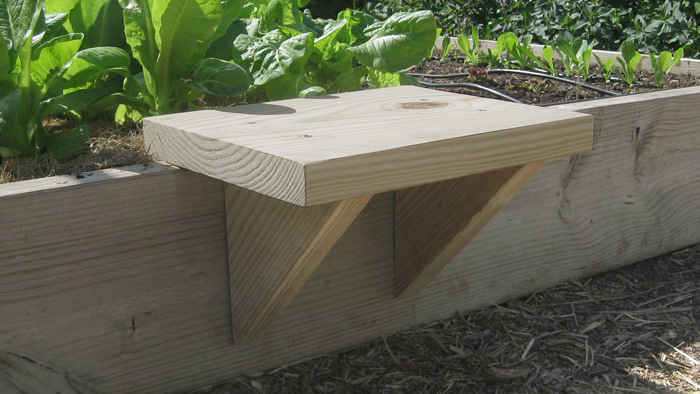
Beds can be custom designed and accessorized. For some clients, I have designed beds that have a 6-in. board or “cap” around the edge to make sitting more comfortable. (This does make it just a bit more difficult to turn the soil, though.) Others have corner posts extended up to 8 ft. to allow attachment of trellises for beans, cucumbers, and other climbers. In gopher-prone areas, beds have hardware cloth tacked across the bottom.
For some beds, I have devised a system of hoops, using PVC irrigation pipe, over which to drape bird netting or row cover to keep cabbage loopers out. Brick or stone raised beds can be used to retain small slopes. Other beds divide gardens into “rooms,” sometimes quite formal in design.
I have experimented with several irrigation products, including micro-emitters, “leaky” pipe, soaker hoses, and drip pipe. I prefer the very flexible soaker hoses available in most hardware and garden stores. They can be snaked in any configuration and are easily removed when it’s time to turn the soil. I use inexpensive chopsticks to keep the hose in place.
 |
 |
|
| Netting draped over the beds keeps birds from helping themselves. | Whimsical but useful, chopsticks hold the soaker hose in place. A hose bib allows controlled watering. | |
Now that redwood has gotten fairly expensive, many clients ask about using less expensive pressure-treated wood. I try to discourage them from making this choice because I’m not comfortable using chemically treated products around food crops.
It has been 20 years since we built the beds, and we are beginning to see signs of wear that indicate we need to begin rebuilding. Certainly, they have been a good value, having held up to blasting sun and year-round cultivation. Where there was once only concrete, the soil is now black and rich and teeming with earthworms. The eight beds make crop rotation easy to track. Everything I’ve grown in the garden has thrived.
Over the years, we have slowly removed the concrete paving between the boxes and replaced it with a thick layer of pea gravel that allows the little rain we get to percolate into the ground. And it crunches delightfully underfoot. Because the vegetable garden is the primary view from our kitchen, it has been an added pleasure to look out on the raised beds with their profusion of vegetables, herbs, and edible flowers spilling over the edges. Thanks to the raised beds, we can enjoy home-grown produce every month of the year.
| Build the bed: plan, instructions, materials, and accessories | |
| To make the corner posts, measure and cut the 8-ft. 4×4 into four 24-in. lengths. To make the long sides of the bed, nail three 8-ft. 2x6s one at a time to two corner posts; you will have boards stacked three high. The bottom board should be flush with the bottom of the post while the top board should end approximately 7½ in. short of the top of the post, as shown in the drawing below. Repeat this step to form the second long side.
Cut the remaining three 2x6s in half so you have six 4-ft. 2x6s for the ends. Stand the two lengths with posts up, parallel to each other, approximately 4 ft. apart. Nail the 2×6 end pieces to the corner posts, three to each end. They should be aligned flush with the posts. The raised bed form is complete. At this point, if you’re worried about gophers, moles, or voles, you can staple a 4-ft. by 8-ft. piece of ½-in. hardware cloth across the bottom of the box. This allows drainage and root growth but keeps the critters out. Resist the temptation to sink the 4x4s into the ground; it’s really not necessary because the soil makes the boxes very stable. Also, buried 4x4s will rot faster. |
|
 |
|
| Click here or on the drawing to enlarge it. | |
| Materials list (per bed)
• One 8-ft. 4×4 redwood post for corners |
Optional accessories
• Soaker hose and hose bib |
Learn more about designing and building raised beds…
by Linda Chisari
April 1997
from issue #8


Comments
Log in or create an account to post a comment.
Sign up Log in