

-
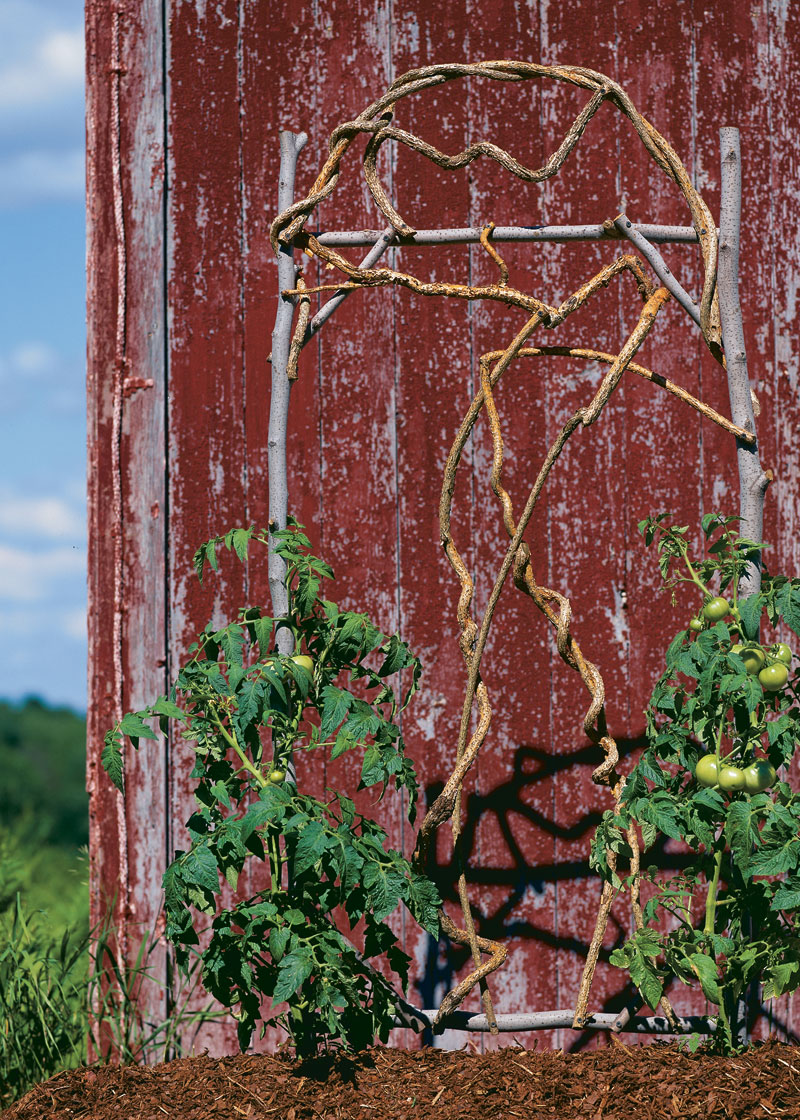
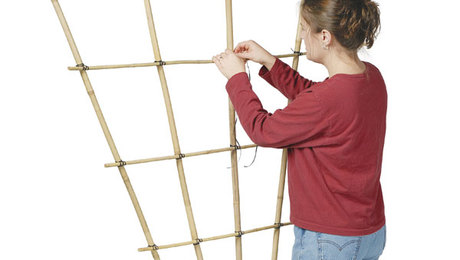
The author with some of her trellises. Built using scavenged vines and saplings, each is a unique construction.Photo/Illustration: John Bray
-
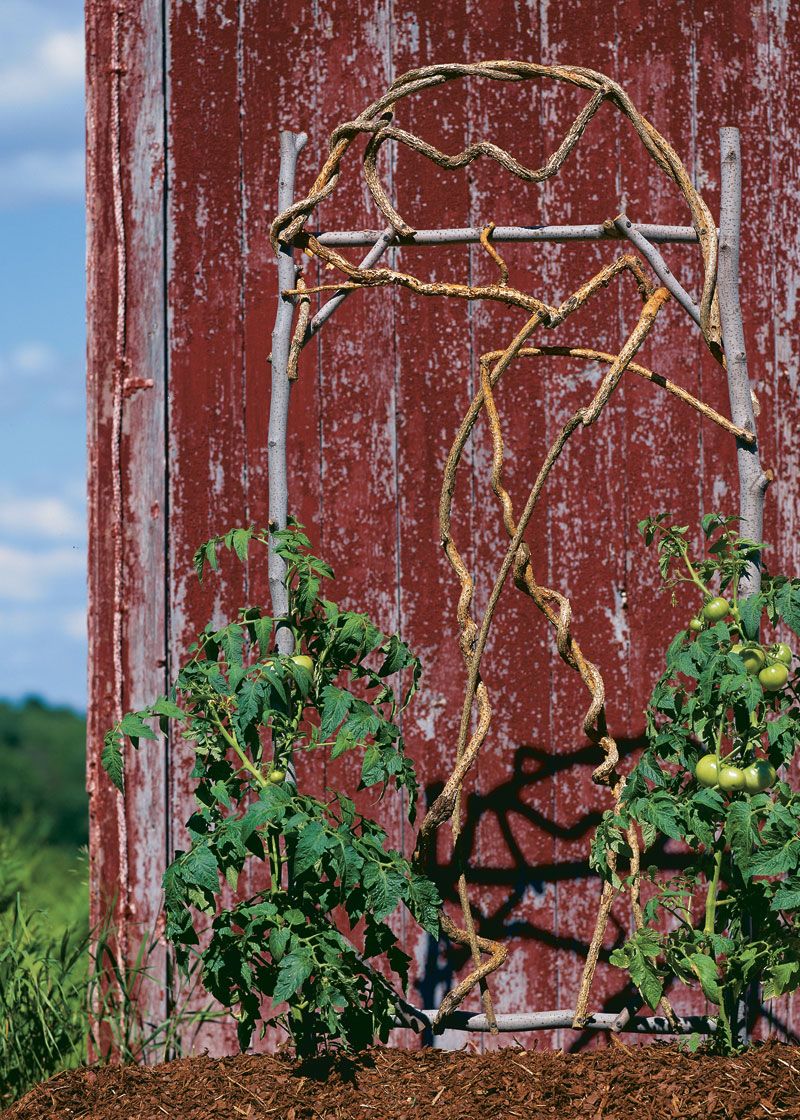
Twisted bittersweet vines create a sculptural look within the sapling frame.Photo/Illustration: Boyd Hagen
-
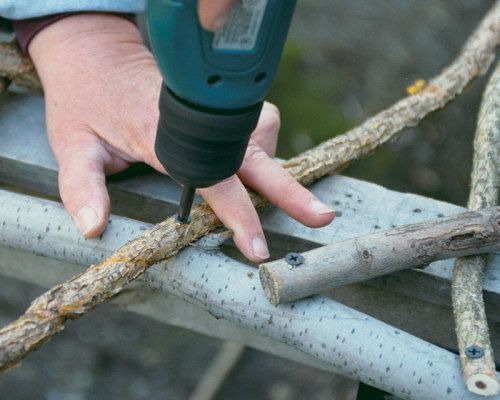
A power drill makes quick work of attaching the vines to the frame.Photo/Illustration: John Bray
-
Photo/Illustration: John Bray
-
Photo/Illustration: John Bray
-
Photo/Illustration: John Bray
-
Photo/Illustration: John Bray
-
Photo/Illustration: John Bray


The question inevitably comes up at every dinner party with new faces. What do you do? When the very successful clothing designer I was seated beside asked, what could I tell him but the truth? I make things with sticks, I said. For the past several years, I’ve been going into woods that are being cleared, cutting saplings and vines, and turning them into trellises. It isn’t a whole lot more complicated than that. Yet the work has fed my soul like nothing else ever has.
I didn’t plan a vocation of making trellises. I went to trade school to become an auto mechanic, and even worked as one for a while. This artistic work sort of evolved from my longtime hobby of making gifts for people.
Go with the flow. I started making the trellises after I saw something similar, except there were no vines involved. I think the vines add an attractive and distinctive touch. Nature does the twisting and turning of the vines, and I get to play with them. That’s why anyone can make this type of trellis. You just need to find a vine that inspires you.
When I spot a vine in the woods, I see right away how it will work on a trellis. I’m inspired 100% by the vine. You can use almost any woody vine, including wisteria and grape vines, but most of the time I use bittersweet. I like the color, and it’s lightweight, flexible, and holds up well.
 |
|
| Framed by braced saplings, bittersweet vines form a decorative pattern. | |
I don’t really enjoy doing representational designs, although the trellises with hearts are the most popular. I prefer to let the course of the vine dictate its use on the trellis. I think the vine is beautiful as it is.
Eight easy pieces frame a trellis. The frame is very simple. All it takes is eight pieces of wood: two long main stems, two shorter pieces for the main frame, and then four bracing pieces. I’m lucky to have a friend with a few nearby building lots where I can harvest my supplies.
You may not be so lucky, but certainly you’ll be able to find a woodland where you can get permission to take a few saplings. You also might check with landscaping or clearing companies for leftovers. My favorite types of wood are maple and beech, which are quite plentiful here in western Massachusetts.
This is hardly an exact science. After all, making things with sticks is making things with sticks. Take an afternoon to be wild and creative and make a trellis that will be a unique blend of nature and your own creativity.
Steps to a trellis
It takes me about 30 minutes to put together a basic trellis once the wood and bittersweet are in hand. But I’ve been doing it for several years. It can be a little awkward manipulating the pieces the first time, and you might want to ask a friend to join in the fun.
| Tools and hardware you’ll need: Power drill with 1⁄8-in. bit Power screwdriver with Phillips-head bit Steel rule Saw Pruning loppers Hammer Drywall screws, 1 in., 1-1⁄2 in., and 2 in. Nails, 3⁄4 in., 16 gauge |
|
Get started by determining the size you want your trellis to be and what role it will play in the garden. If it’s purely decorative, go wild. On the other hand, if you want beans to climb it, make sure the bittersweet configuration will support the plants. You don’t need power drills, but they sure make the job easier.
1. Measure and cut two pieces for the frame sides, two crosspieces, and four corner braces. The sidepieces on this trellis are about 5-1⁄2 ft. long and 1-1⁄2 in. in diameter, the crosspieces about 2-1⁄2 ft. long and 1 in. in diameter, and the braces about 1 ft. long and 3⁄4 in. in diameter. The braces provide much of the trellis’s stability. The sidepieces need to be 10 in. longer than the desired trellis height, so you have enough frame to bury for stability.
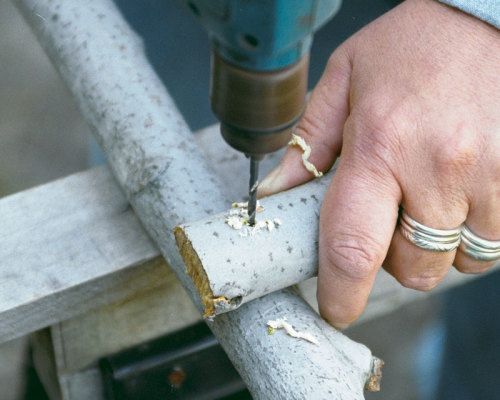
2. Begin building by laying the sidepieces across a pair of sawhorses. Predrill the crosspieces and screw them onto the sidepieces. I use drywall screws of varying lengths to make sure they hold. Attach the bottom crosspiece 12 in. above the bottom of the trellis, which will leave enough length to bury, and the upper crosspiece about 6 in. from the top, which will provide support for attaching vines. Make sure the crosspieces are attached at the same height on both sides; otherwise your trellis will be crooked.
 |
 |
|
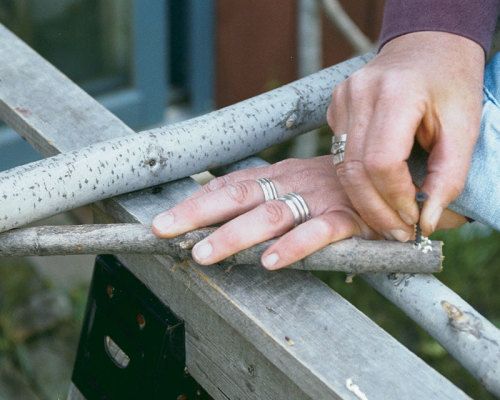
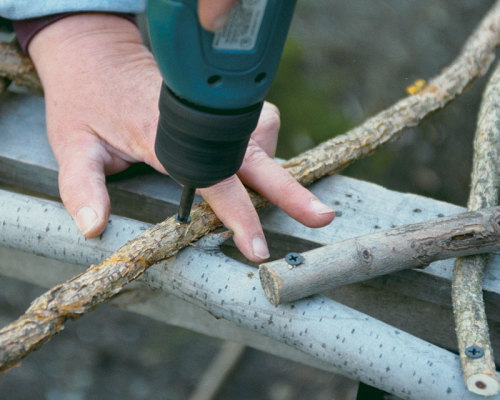
| Predrilling crosspieces prevents splitting and makes it easier to drive screws. This can be done for all but the smallest pieces. | Over and under makes a good fit. Attach the four angled braces at the corners with one end on the back of the sidepiece and the other end on the front of the crosspiece. | |
3. Eyeball the trellis to make sure it’s square before attaching the corner braces. Set the braces so that one end can be attached to the back of the side frame and the other to the front of the crosspiece. Drill the corner brace and attach it to the side frame. Repeat this procedure at all four corners. Turn over the trellis. Again check for square. Drill the other end of the corner braces and attach them to the crosspieces. You’ve completed your frame.
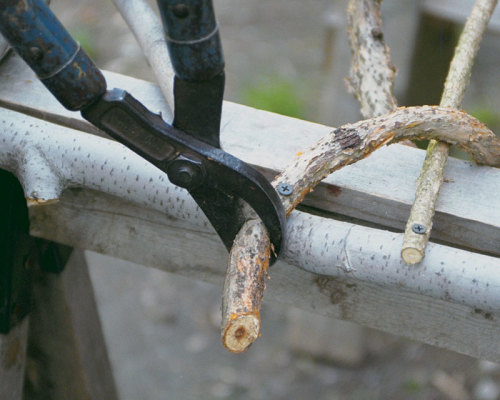
4. The fun begins when you attach the vines to suit your fancy. Predrill holes in the vines and then drive screws into the frame. You can use the same procedure to attach vines to vines within the frame. If you want to use vine pieces that are too thin for screws, you can use small nails to attach them to the frame. Lop off the excess vine and find a place in the garden to stand your trellis.
 |
 |
|
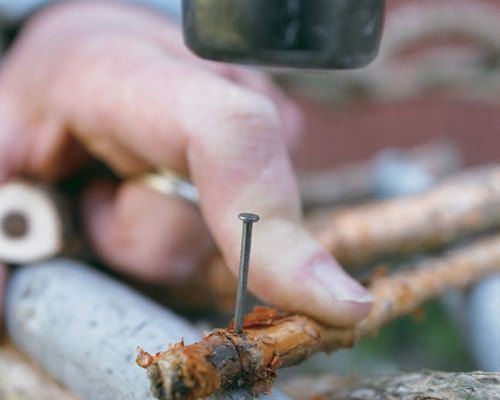
| Turn screws tight. But be careful when using a power drill that you don’t split the wood. | Use a hammer and a nail to attach vines that are too thin for screws. | |
 |
 |
|
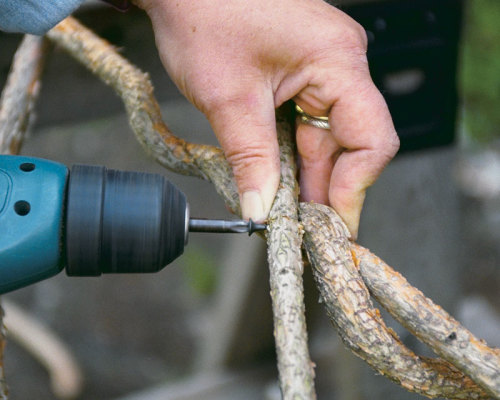
| Fasten a vine to a vine by predrilling the screw hole and driving the screw while supporting the vine with your hand. This is not a technique for beginners. | A little lopping keeps a trellis trim. Excess can be pared from the trellis with pruning shears or loppers. |
| More trellis designs: • Build an A-Frame Tomato Trellis • Three Garden Structures You Can Build • Constructing a Copper Pipe Trellis |
by Janice Shields
October 1997
from issue #11


Comments
Log in or create an account to post a comment.
Sign up Log in