

Of all the merit badges I earned as a Boy Scout, I’m fondest of one called Pioneering, which involved ropes, knots, and the use of logs and lashings in the construction of towers, rafts, shelters, and bridges. What has stayed with me is a simple method for lashing sticks together, a technique I use in the garden when constructing trellises, arbors, tepees, and other plant supports. Everything I learned about lashing is in my 1972 scouting Fieldbook, which says it’s for boys and men, though I’m pretty sure it works for girls and women too.
According to the Fieldbook, “only a fool or a greenhorn figures any old rope or knot will do.” Good advice for a monkey bridge over a rushing creek, but for plant supports you can get away with considerable foolishness. Still, there is no denying that a genuine lashing is a pleasure to tie and is bound to be a sturdy one.
For tying bamboo of a finger’s thickness to a square wooden stake to serve as a tomato trellis, cotton or nylon string works fine. Baling twine makes you feel like a thrifty farmer, but I’ve never had much luck with it. To lash together three stout saplings for a bean tepee, something on the order of thin clothesline works best.
Most of the lashings done by the book start and finish with a clove hitch, though a diagonal lashing starts with a timber hitch. Whether you’re lashing big spars or little—the sticks you lash together are called spars—and whether you’re lashing at right angles or on a diagonal, the key to a taut lashing is to make two or three or even four really tight turns, known as frapping turns, around the rope itself before tying off the lashing.
Clove hitch
 |
 |
1. Pass the rope around the spar and over itself.
2. Pass the rope a second time around the spar, below the first turn, then bring the rope under itself.
3. Push the loops close together and then pull hard on the rope ends to tighten.
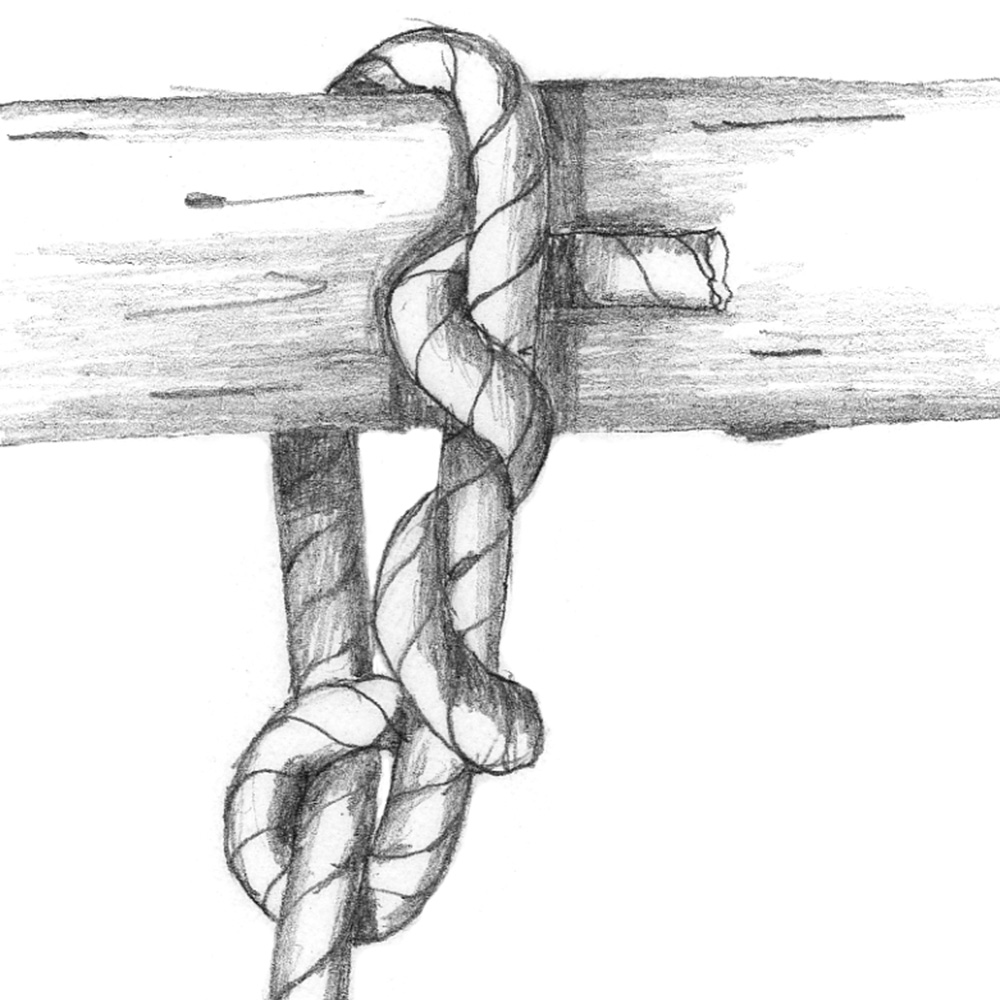
Timber hitch
 |
 |
1. Wrap the rope around the spar, then under itself and over, then pass the rope through the loop that has formed.
2. Twist the end of the rope a few time around the part of the rope to the front of the spar.
3. Push the timber hitch against the spar, then pull hard on the rope to tighten the hitch.
For a slightly different approach, see the video Lashing a Bamboo Trellis.
I have been known to modify the Fieldbook’s square lashing, crisscrossing the rope diagonally around the front of the vertical spar (recalling a drawing I once saw of a Japanese lashing) but I always finish with frapping turns. I cannot over-emphasize the value of frapping turns. If I had to come up with one secret to lashing, frapping turns would be it.
The Fieldbook recommends allowing “1 yard of rope for each inch of the combined diameters of the spars.” I’ve never made precise calculations in the garden, but I can tell you that a sturdy lashing takes more line than you might think. For lashing a roughly 1⁄4-inch-diameter bamboo spar to a 1-inch by 2-inch wood spar, I stretch the string some 5 feet or so before cutting off a piece. All too often I come up short.
The drawings here are based on the Fieldbook and on my 1968 edition of Handbook of Knots & Splices, by Charles E. Gibson. The square and diagonal lashings are fairly intuitive, the tripod lashing less so. Indeed, I think the latter is rather ingenious. Should you ever tire of lashing in the garden, find a copy of the Fieldbook and give the monkey bridge a try.
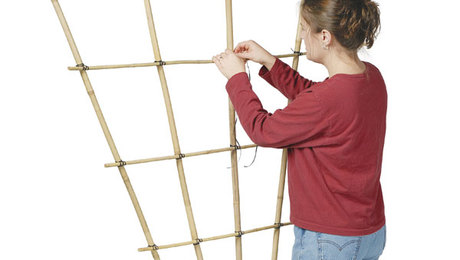
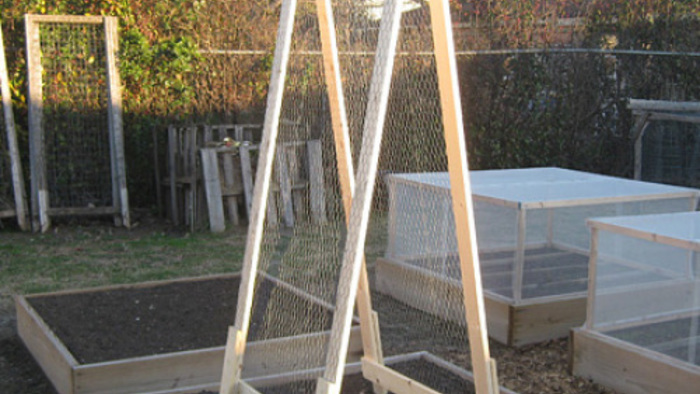
Three trellises you can build: Follow the instructions below, then test your new skills and make some structures for your garden.
Square lashing
 |
 |
| 1. Start by tying a clove hitch to the vertical spar, just below where the horizontal spar will be. | 2. Twist the end of the rope around the vertical part of the rope for a clean look, then wrap the rope around the horizontal and vertical spars, binding them together. |
 |
 |
| 3. Continue by wrapping the rope three of four times around the vertical and horizontal spars. | 4. Make two or three frapping turns between the spars, around the rope itself. Pull these frapping turns very taut. Finished by tying a clove hitch to the horizontal spar. |
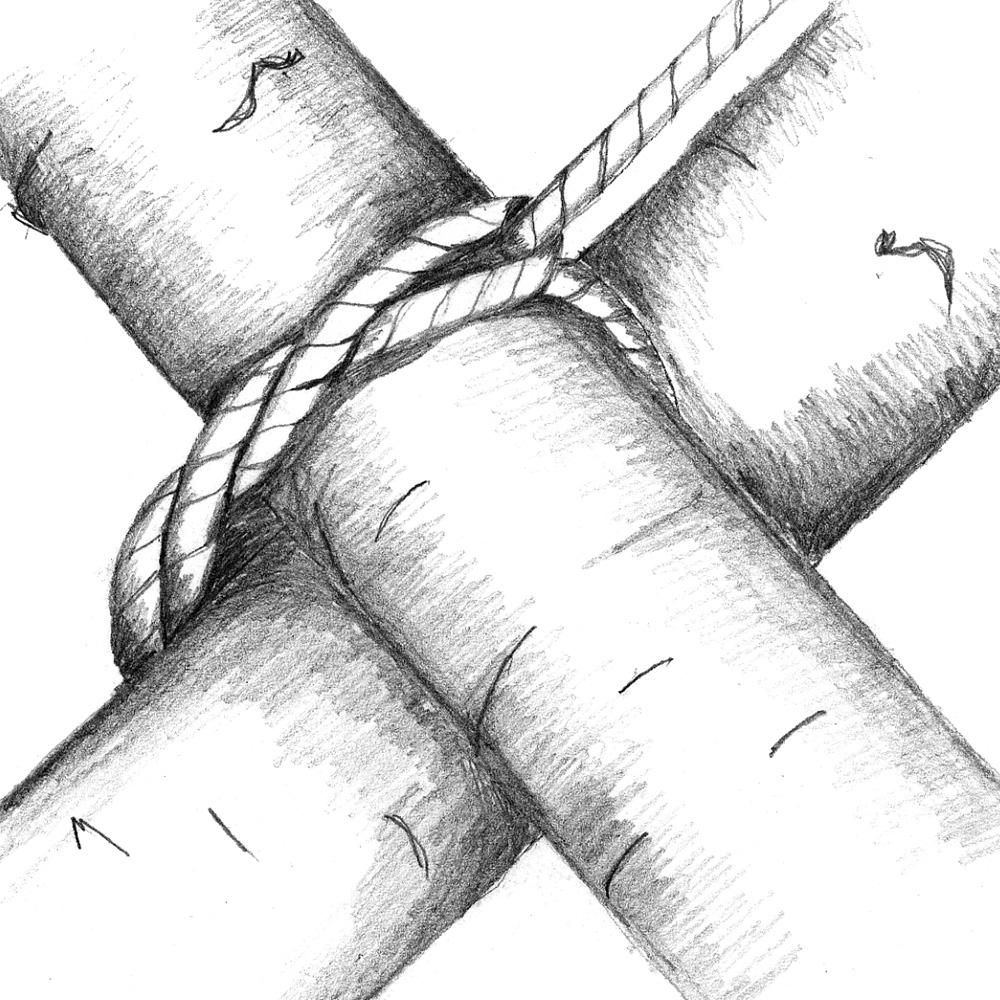
Diagonal lashing
 |
 |
| 1. Start by tying a timber hitch around the crossing of the two spars. | 2. Wrap the rope three times around the spars alongside the timber hitch, placing the rope turns side by side, not on top of each other. |
 |
 |
| 3. Wrap the rope three more times around the spars, crosswise to the first turns. Be sure to pull each turn taut. | 4. Make two or three frapping turns between the spars, around the rope itself. Pull these frapping turns very taut. Finish with a clove hitch tied around the most convenient spar. |
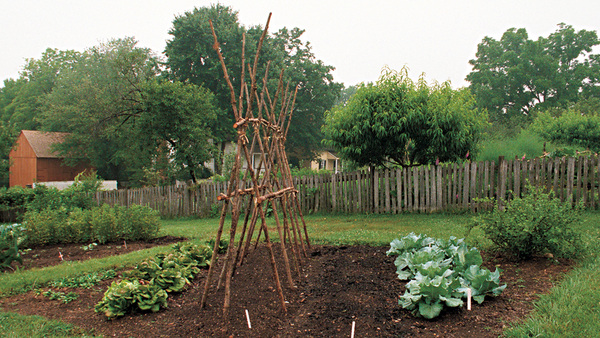
Tripod lashing
 |
 |
| 1. Place three spars side by side. Tie a clove hitch to an outside spar. | 2. Wrap the loop, loosely, seven or eight times around the spars. |
 |
 |
| 3. Next make two tight frapping turns between each of the spars, around the rope itself. | 4. Finish with a clove hitch tied around an outside spar. Stand the spars upright and spread them apart to form a tripod. |
Marc Vassallo is the former editor of Kitchen Gardener.
Illustrations: Kim Jaeckel
From Kitchen Gardener Issue #24, December 1999


Comments
Log in or create an account to post a comment.
Sign up Log in