

The major benefit of root cuttings is the simplicity of the process. Four easy steps can produce a large number of plants without requiring fancy equipment. This method of propagation requires that most of our efforts take place in very late autumn or very early spring, two times when we have a short list of gardening chores. The ensuing growing season will find your new plants filling out, and by the fall, they should be ready for a permanent place in your garden design.
Uncover the roots when the plant is dormant


Root cuttings are most effective if taken when plants are dormant, usually between November and February. This timing maximizes the stored energy in the roots and minimizes the stress on the parent plant. Once a plant breaks bud in the spring, energy begins to move out of the roots and into the plant, reducing the effectiveness of root cuttings. I also make sure the parent plant is well hydrated and was not under drought stress when it went dormant before I take any cuttings.
When collecting roots on smaller plants, such as perennials, I find it easier to simply lift them in their entirety. For shrubs, I unearth some of the roots on one side of the plant, digging in close proximity to the base to ensure I find roots belonging to the right plant. I then trace them out from the plant until I have a sufficient length to take several cuttings.
Choose roots that are pencil thick

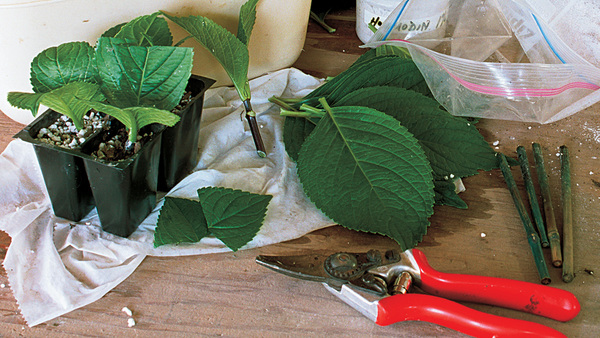
Shrub roots can get quite large and woody, but the best ones for cuttings are those approximately as thick as a pencil. These are young, vigorous roots that are more likely to send up new shoots. With perennial roots, thicker is better. I use a sharp pair of pruners to make a straight cut at the end of the root closest to the parent plant. At the far end, I make a diagonal cut. This helps me maintain the root’s original orientation, critical to the production of new roots and shoots. I always avoid cutting off more than one-third of the roots because this may eliminate too much of the plant’s stored energy.
I then take the long pieces of root I removed and cut them into sections 3 to 6 inches long, making sure to cut the ends closest to the plant straight and the ends farthest from the plant at an angle. The optimal length is 3 to 6 inches because it ensures that there is enough energy in the cutting and, in some cases, enough dormant buds to produce roots and shoots.
After taking the cuttings, I replant the mother plant or cover the exposed roots. Then I water the area thoroughly to remove large air pockets in the soil and settle the roots back into their home.
Place the cuttings in soil, and wait
To get the most out of my cuttings, I treat perennials and woody plants differently at this stage.

Perennials
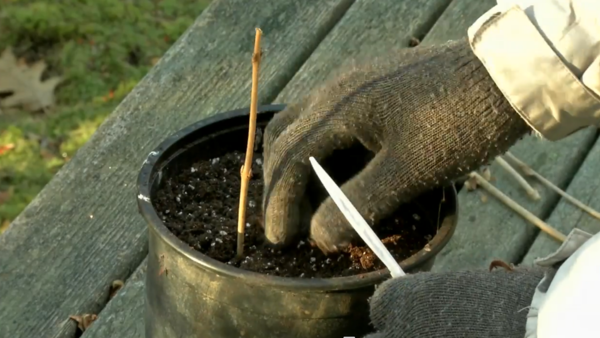
I like to propagate perennial root cuttings in flats because they produce shoots quickly and have the ability to break bud in several places along the root. I place the cuttings horizontally, ½ inch deep, in a flat of moist potting soil (photo, above). To maintain high humidity, I cover the flat with a plastic bag or a pane of glass and place it under lights.


Woody Plants
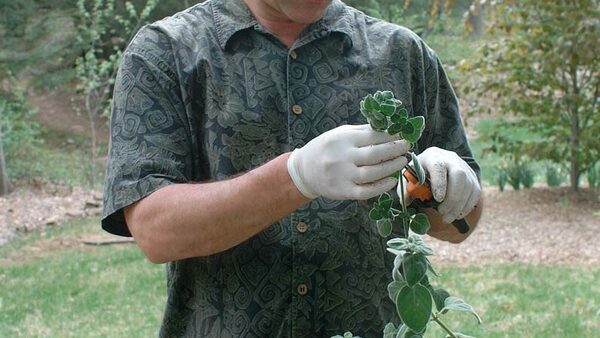
If I’m working with cuttings from a woody plant (photos, below), I tie them in a loose bundle with like ends together. To locate the cuttings after storage, I wrap them with bright marking tape, allowing a few extra feet to hang from the bundle. I dig a hole below the frost level and place a few inches of sand in the bottom to ensure that the cuttings don’t rot from poor drainage. I then place the bundles with the slanted ends facing down in the bottom of the hole and refill it.
Plant new shoots outside, and keep them moist


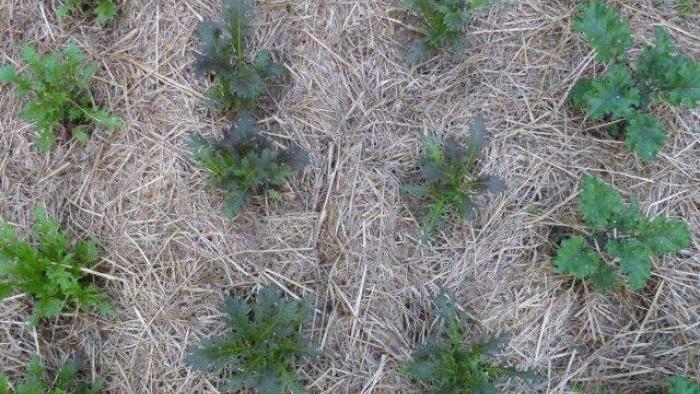
Cuttings stored in the ground should be ready to lift within three to four weeks but can stay buried for much longer if the weather remains too cold for them to be planted outside. When they are unearthed, the cuttings will likely have roots and, occasionally, some small shoots forming on the cuttings. Even if I see neither sign of growth, I still move forward, unwrapping the bundle and separating the cuttings. I plant the cuttings in freshly prepared, loose garden soil, setting them vertically, 12 to 18 inches apart, with the tops of the cuttings (the straight ends) approximately 2 inches below the soil surface. I mark the area well to prevent planting something else in the same place. As the temperatures rise, I make sure the cuttings stay moist. In a few months, new shoots should be apparent, and they will welcome a light solution of water-soluble fertilizer.
Perennial cuttings grown inside can sprout quicker than their outdoor counterparts. After several shoots emerge, I remove the protective covers, feed them with a half-strength solution of liquid fertilizer, and, if the plants are sun lovers, supply ample light. Just like seedlings, these new shoots will need to be gradually introduced to the rigors of outdoor life before they can be planted in a permanent home.


| Woody Plants
Figs (Ficus carica) zones 6–9 |
Perennials
Barrenworts (Epimedium spp. and cvs.) zones 4–9 |


Comments
Any plants can be propagated by "root cuttings"?
how do i get better roots from my seeds
Hi,
I bought a passion fruit plant , but unfortunately stem is damaged by courier transport, only left is some 4 inch root with 2 inch stem , can I make this plant to survive ?
Which issue of Fine Gardening has this article?
Log in or create an account to post a comment.
Sign up Log in