


A compost bin is simply essential in your garden. In my Victory Garden, I’ve been using a very rudimentary yet simple design. Four shipping palettes secured together by old clothes hanger wire and wooden steaks. It’s served its purpose well. Fast forward 10 years. As you can see by the first photo (Photo A), it’s seen better days and needs to be replaced…badly.
In homage to the late Bob Thomson, the early 80’s host of the popular PBS TV series The Victory Garden, this composter is almost entirely based on his simple but efficient design. In my design, however, I’ve replaced nailing the 2x4s together with using wood screws (stronger hold). I’ve also replaced the regular nuts with wing nuts on the “swing out” pieces (faster to remove).
The list of things you’ll need: |
| 12 pieces of 8′ x 2″ x 4″ pressure-treated lumber
20′ x 4′ Roll wire (called “hardware cloth” or “dog wire”). The square size was 2″ x 4″. The roll I bought was 30 feet, which gave me some extra as backup or for a future project. 6 3/8″ x 6″ carriage bolts 10 3/8″ x 4″ carriage bolts 16 3/8″ hex nuts for the above bolts 2 3/8″ wing nuts for the above bolts |
1 Box (50 pcs.) 3″ wood screws
1 Box galvanized staples Saw (circular preferred over jigsaw or manual) Drill (cordless, of course) Staple gun (electric strongly recommended, but a manual one’s fine) Hammer (for hammering in the wood staples further if necessary) |
PRE-TIP #1: On the nuts and bolts, make sure they thread correctly before you buy them. Otherwise you’ll be making another trip to return and replace them.
PRE-TIP #2: Make sure your drills are fully charged before and throughout the project. The pressure-treated lumber I got was a little moist, which made drilling the larger holes “fun”.
Skill Level:Intermediate to challenging, depending on your wood-working/cutting skills. |
Production Cost:$100-130 (assuming you’re only buying the supplies). |
Construction:
1. Cut eight of the eleven 8-foot pieces of 2×4 in half to yield sixteen 4-foot pieces. I had the dude at the home center do this for me to save time.
2. Line the pieces up in the square shape they will take when attached. Mark the two drill holes for each corner with a pencil or marker.
3. Drill the holes through the first piece of each side. Then, screw the wood screws to the point where they poke out of the other side slightly.
TIP: You can “mark” the spots to drill into the second piece of each side by hammering the piece with the screws in it into the piece it’s being attached to. Simply disconnect them and you will see the holes that the screws left. Drill into the second pieces to make putting the screws in easier.
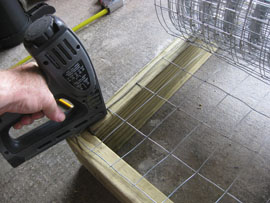
4. After you have screwed the four 4-foot pieces together, you now have one of the three sides ready for the wire (Photo B). Repeat with the remaining 2 sides.
|
|
|


5. Now use two of the 8-foot 2x4s with three of the 4-foot 2x4s to construct the back side of the composter. Same drill here (no pun intended) – you’re just getting a bigger piece here (Photo C).
 |
 |
 |
6. Drill the top and bottom holes (2) in the three side pieces for the carriage bolts. These will eventually secure the side pieces to the back piece (Photo D & E).
|
|
|


7. Drill the top and bottom holes (6) in the back side piece for said carriage bolts.
8. After you’ve picked a good location for your bin that’s cleared and ready (Photo F), move the three side pieces and back piece into position. Use the carriage bolts and nuts to secure it together.
|
|
|


9. Using six of the 4-inch carriage bolts, attach two 8-foot 2×4 pieces to the bottom of the bin, one at the front and one in back (Photo G). These not provide support to the bottom of the bin, but can also act as “sacrificial” pieces you can replace in the future if the wood rots or decomposes. Cool, eh?
10. Cut the final 8-foot piece into two 4-foot pieces, only this time you need to do it at a 45-degree angle. These are the two “movable arm” pieces at the top front of the bin that keep the frame from splaying out as the bin fills up with material. They need to be cut this way to use the same board space, yet also provide support.
11. Attach and secure the movable arm pieces to the side pieces with the carriage bolts and nuts/wing nuts.
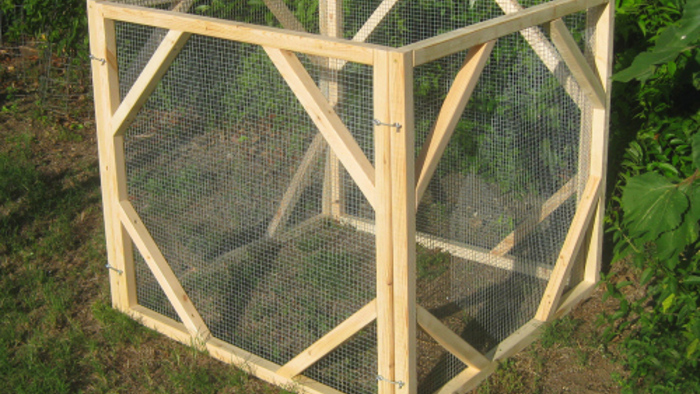
Voila! Your Victory Garden compost bin is ready for action (Photo H). I’d say it’s a nice improvement over the old one next to it (Photo I).
|
|
|


Now what? Read Part 2: Demolishing the old bin. For more on composting, check out these great composting articles for information and instructions.


Comments
Log in or create an account to post a comment.
Sign up Log in