

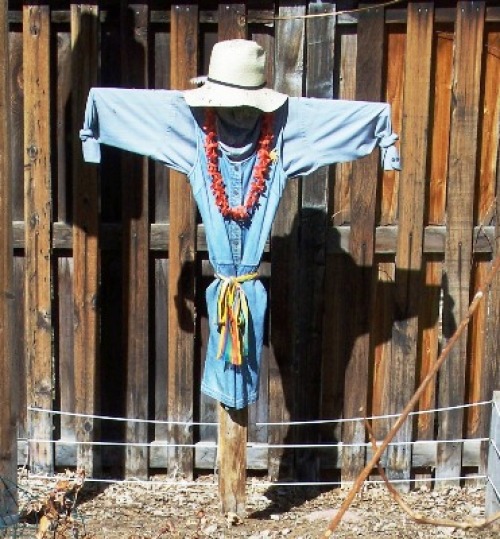
I was inspired to craft an old-fashioned scarecrow after I read about a motion-activated scarecrow sprinkler designed to keep birds and other pests out of the garden. I thought building a scarecrow would be a fun way to follow in the footsteps of generations of growers who came before me.
The Scarecrow from “The Wizard of Oz” was made in Kansas, but farmers around the world have used scarecrows for thousands of years to protect their fields from flocks of hungry birds and other animals.
The most effective scarecrows are those capable of some kind of motion, like moving around a pole in the wind or having parts that flap in a breeze. Loud noises also work to scare birds away, if only temporarily.
I’m not sure if my scarecrow will actually keep the birds out of the vegetable bed or simply give them a convenient place to sit, but I enjoyed the chance to stretch my creative muscles and recycle some old materials all at the same time. I also think this would be a good project for any kids who say they have nothing to do on a lazy summer afternoon.
Here are the basic steps for building a scarecrow of your own:
Scarecrow Materials
- Two pieces of recycled lumber, like an old fence plank or pieces of 2×4 boards; 1 length about 6-7 feet long and 1 length about 3-4 feet long
- Hammer and nails
- Length of rope
- Straw, newspaper or other stuffing material
- Old clothing like jeans, long-sleeved shirt, skirt, dress, gloves, hat, etc.
- Ribbons, cloth streamers, bells, tin pie plates, chimes or other noise makers
- Old pillowcase
- Build a simple scarecrow frame by placing the long piece of lumber on the ground.
- Place the shorter piece of lumber across the first, about 1/3 of the way down the first piece to create “arms.”
- Secure the two pieces of wood together with nails.
- Dress the scarecrow. If using pants, put the long piece of lumber through one leg, stuff both legs with straw or other stuffing and tie the waistband to the board.
- Place the scarecrow in its garden spot and pound the frame into the ground.
- Finish dressing the scarecrow by putting on its shirt and stuffing the arms.
- Fill the pillowcase with straw for the head and slip it over the top of the board; tuck the pillowcase end into the shirt and use rope to secure the head to the frame.
- Add finishing touches, like a face, hat, gloves etc.
- Place ribbons streamers, bells, pie plates or chimes so they’ll move when the wind blows.


Comments
Log in or create an account to post a comment.
Sign up Log in