

-
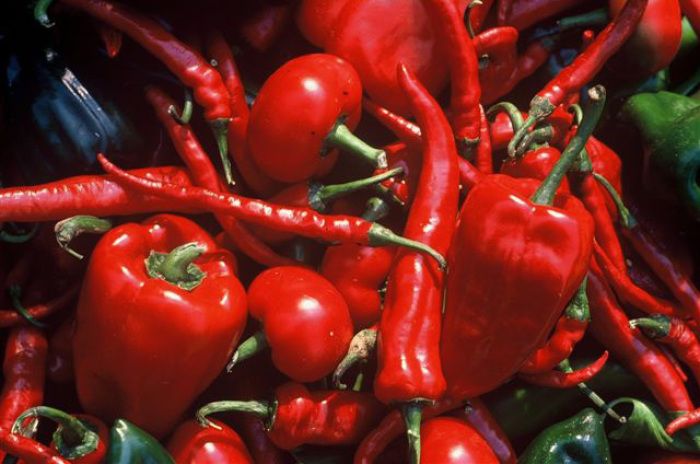
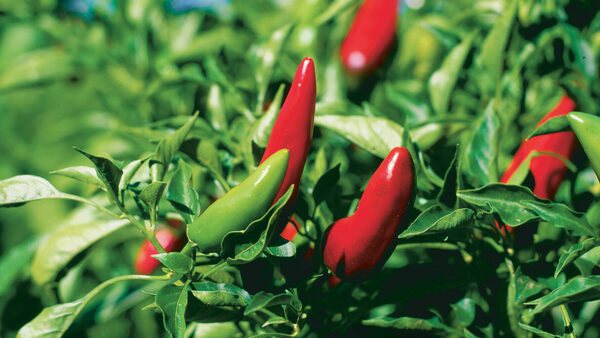
Most peppers, from bell and cayenne to Anaheim and serranos, will turn red if left on the vine to mature. Photo: Susan Belsinger
-
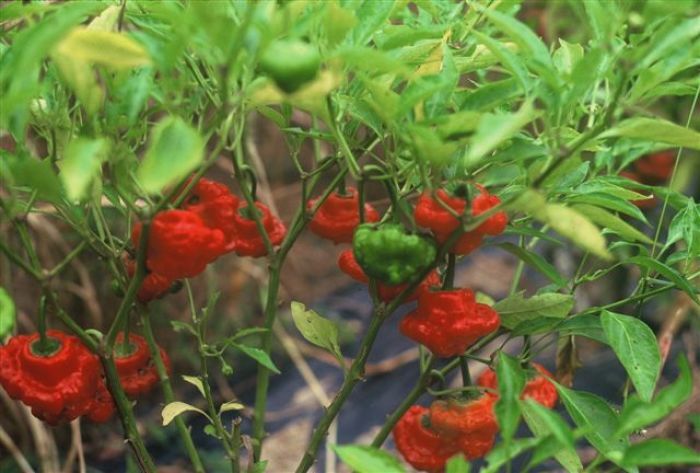
Red ripe rocotillos on the vine ready to harvest.Photo/Illustration: Susan Belsinger
-
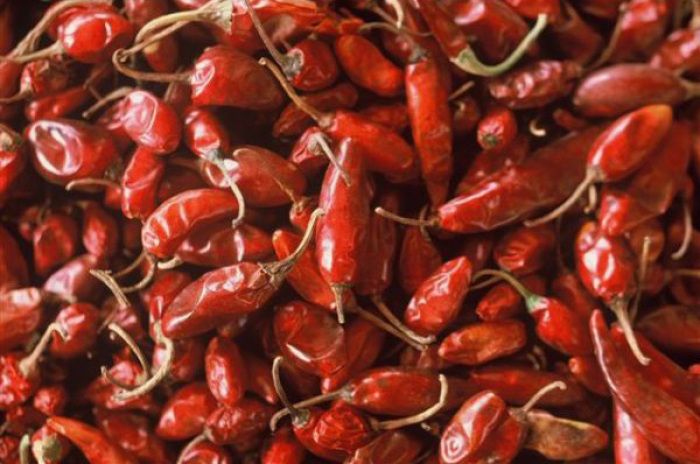
Dried red serranos add great flavor and pungency to beans, soups, stews, chili and vinaigrettes.Photo/Illustration: Susan Belsinger
-
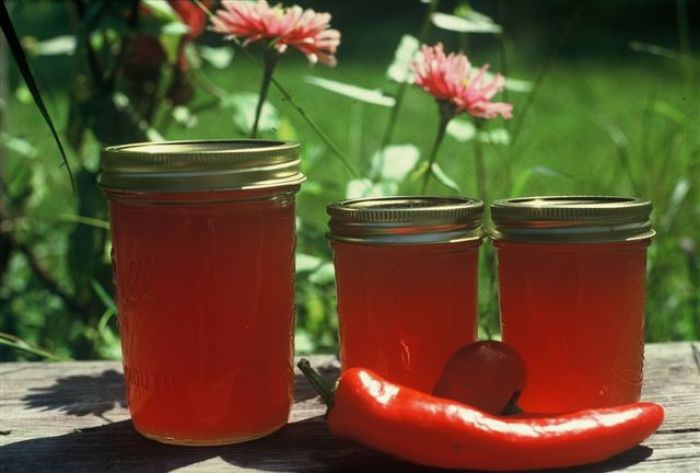
Red pepper jelly is a sweet and hot way to preserve your pepper harvest.Photo/Illustration: Susan Belsinger
-
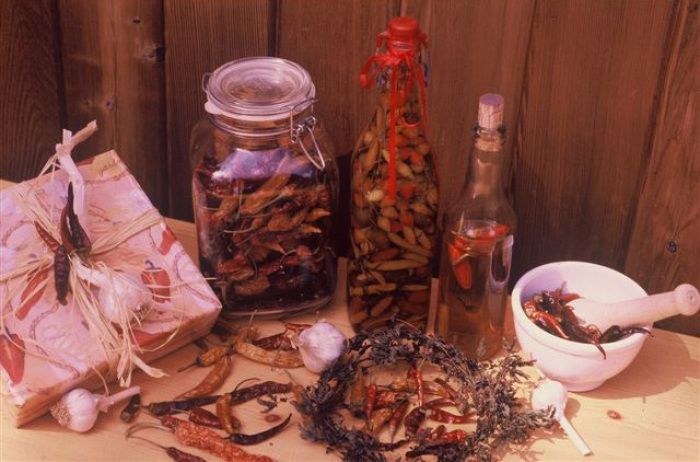
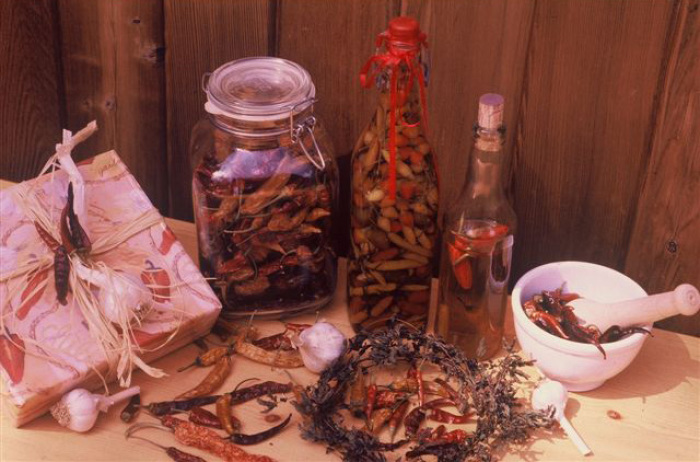
Preserving red chiles: Dry them whole; grind them for powder; infuse them in vinegar or alcohol; and use them for wreaths and ornamentation.Photo/Illustration: Susan Belsinger
-
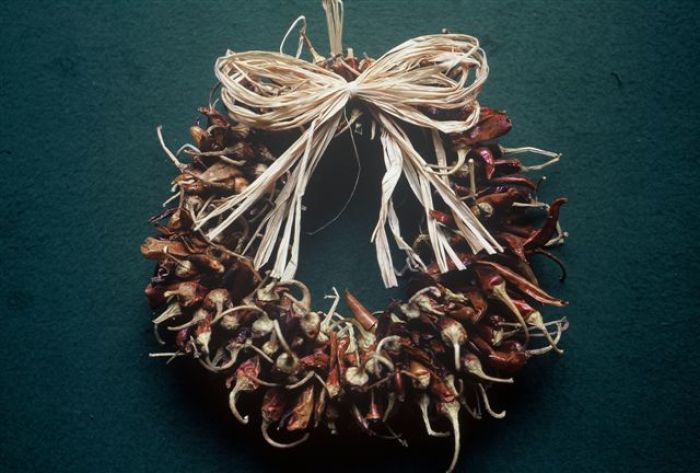
Chile wreath.Photo/Illustration: Susan Belsinger
-
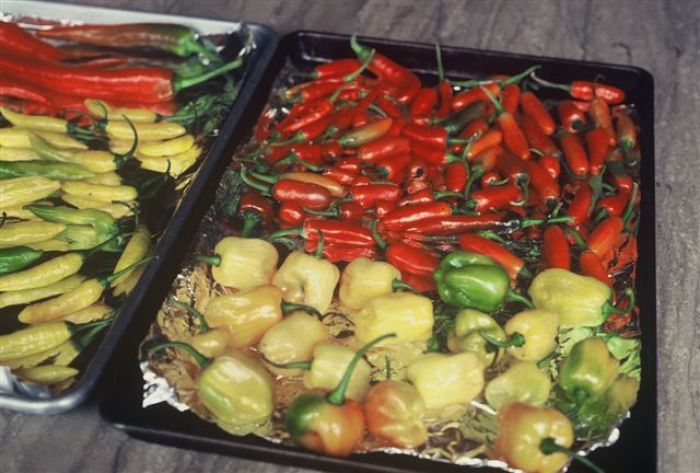
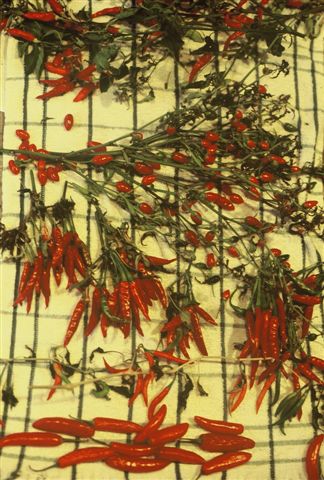
Mature, ripe chiles on tray for oven drying.Photo/Illustration: Susan Belsinger
-
I feel rich once I have captured the essence of the capsicums by drying them. This is truly kitchen wealth.Photo/Illustration: Susan Belsinger
-
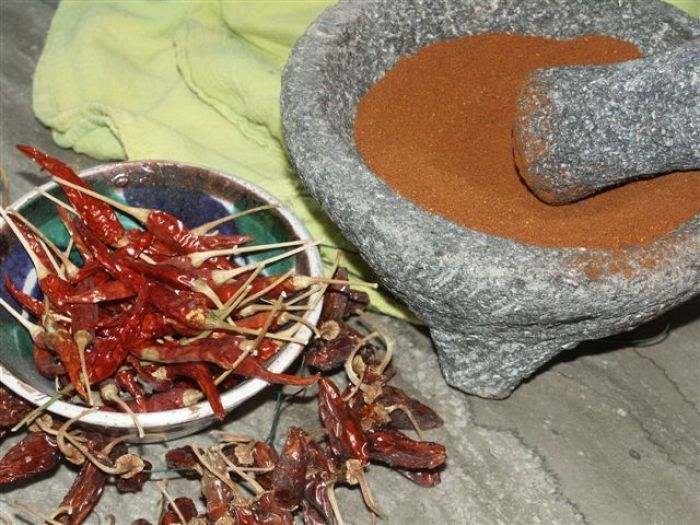
Dried chiles and ground red chiles in molcajete.Photo/Illustration: Susan Belsinger
-
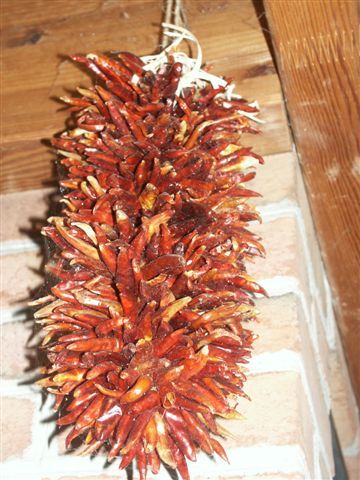
Ristra of small chiles.Photo/Illustration: Susan Belsinger
-
Small chiles waiting to be dried or infused. Though they are little, they pack a powerful heat.Photo/Illustration: Susan Belsinger
-
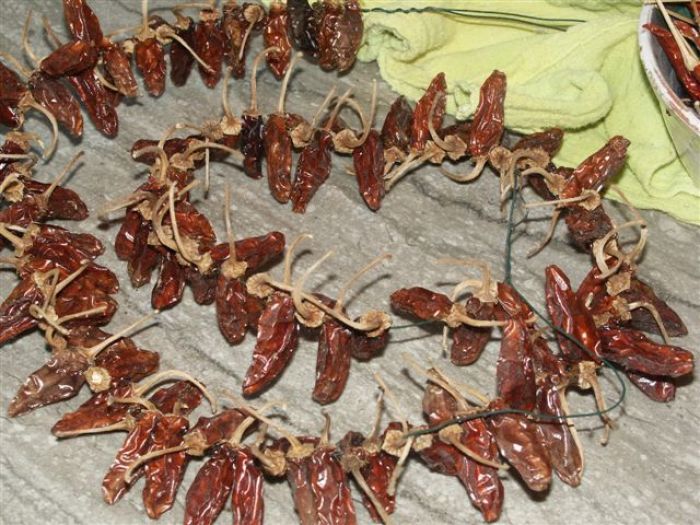
Dried small red chiles. Thread them on thin wire and hang to dry. Pull off as needed.Photo/Illustration: Susan Belsinger


Dried chiles offer completely different flavor experiences than fresh chiles; they are generally earthier and have a chewier texture. Chiles are dried when they are red (sometimes shades of mahogany, deep red-purple, or reddish brown as a pasilla, or orange as a habanero), which is a sign of maturity. Green chiles are not yet mature and do not dry well. Completely mature chiles can be very hot; therefore, wear rubber gloves when working with them.
 |
|
| Preserving red chiles: Dry them whole, grind them for powder, infuse them in vinegar or alcohol, and use them for wreaths and ornamentation. | |
 |
|
| Mature, ripe chiles on a tray for oven drying |
When peppers are in their red ripe stage, it is important to keep a close watch on them, as they become quite perishable at this stage. If you see any moldy or soft, black spots on the peppers, dispose of them immediately. If the weather is wet, try to harvest the peppers as soon as the sunshine dries them, before they begin to mold or rot on the vine. Peppers should be picked while still firm and crisp, before they begin to get soft or wrinkly.
Toward the end of the harvest season, when most of the chiles on the plants have matured to red, it is time to pick and dry them or to pull the plants and hang them to dry. The southwestern United States is the perfect place for drying chiles. Hot sun, dry air, and warm nights with little chance of precipitation provide the ideal conditions. With low moisture and bright, even sunlight, peppers sometimes dry in less than a week. In climates where the temperature and sunlight are uneven and the humidity is high, chiles can be dried in the sun, but they must be brought indoors at night or if it rains. Peppers are likely to mold if they get wet or become damp during the drying process.
Small chiles dry well if the whole plant is pulled and hung upside down in a well-ventilated place. Smaller peppers can also be dried if they are spread in a single layer on screens or in large flat baskets and then turned every day so that they dry evenly. They can also be threaded through the stems with a needle or thin wire and hung to dry.
 |
|
| Ristra of small chiles |
Larger peppers with thicker walls take longer to dry. They can be spread on screens or baskets to dry, or made into ristras. Ristras are large strings of chiles tied by their stems with heavy string or twine and hung in the hot sun to dry. They are common in the southwestern United States and Mexico—heavy, fat strings of deep red chiles hanging outside from rafters and doorways. Ristras are often used decoratively; if they are being dried for kitchen use, once they are thoroughly dried they should be brought inside and hung away from direct sunlight.
A thoroughly dried chile should be free of moisture and feel leathery rather than brittle. Drying time will vary greatly according to the size of pepper, thickness of flesh, and weather conditions. In humid climates, chiles can be partially dried in the sun and finished off in a 150°F oven. To do this, spread them on baking sheets and turn them occasionally. This could take anywhere from one to 48 hours, depending on the size and moisture content of the chiles. It makes the house smell heavenly. I remove the smaller chiles as they dry and the bigger ones are nearly there. Store dried chiles whole in labeled, tightly closed glass jars.
To save seed for next year, remove the seeds from raw, mature peppers, rinse them, and place them on paper towels or a small piece of screen. Place them in the sun in a protected place to dry. When thoroughly dry, pack them into plastic bags, envelopes, or small jars, and label them. Store them in a cool place away from light.
Ground red chile
.JPG) |
|
| Dried chiles and ground red chiles in molcajete |
Pure ground red chile is made from dried chiles and nothing else; it is often called chile molido. This is an essential ingredient in Southwestern and Mexican cooking; it is used in making red sauce for enchiladas, burritos, huevos rancheros, etc. To prepare ground red chile, the peppers must be lightly toasted. (Tiny chiles such as tepins and pequins don’t need to be toasted.) Use a comal, griddle, or heavy frying pan, and toast the chiles over medium heat until they just start to release some fragrance, only about 30 to 60 seconds. Do not overtoast them, or they will have a bitter taste. Stem and seed chiles, and tear the pods into big pieces. Grind the pieces, about ½ cup at a time, in a processor or blender. The fine grinding should be done in small batches in a spice grinder, coffee grinder, or a mortar and pestle. Store the ground chile in tightly closed jars away from heat and sunlight. It can also be frozen for up to one year.
Chili powder
Chili powder is very different from ground red chile. It is an American mixture created in Texas in the late 1800s. It depends largely on dried chiles, enhanced by spices and herbs, mainly cumin and oregano, occasionally black pepper, dehydrated garlic and/or onions. The original chili powders were pure and unadulterated with salt, anticaking agents, or flour that characterize many modern blends. These blends, whose formulas are closely guarded secrets, are still produced today. It is very easy to roast your own chiles, grind them, and experiment with herbs and spices to make your own version of chili powder. Homemade chili powder will keep in a tightly sealed jar out of direct sunlight for six months. A homemade blend makes a great gift for cooks and chileheads.
Small chiles or ornamentals: How to use and dry them
 |
|
| Chile wreath |
Ornamental peppers delight the palate as well as the eye. They add a fiery pungency in cooking and are especially nice on miniature herb wreaths and kitchen swags, or threaded and hung in miniature garlands. Look for them in seed catalogs under such entertaining names as Candlelight, Fiesta, Fips, Fireworks, Holiday Cheer, Holiday Flame, Inferno Mixed, Jigsaw, Midnight Special, Pequin, Tepin, and Treasure Red.
The peppers can be used fresh or, when they ripen to red, can be picked, dried in baskets, and stored in glass jars for future use. Harvesting will stimulate new growth. All of these little peppers are hot; most of them are fiery. Because they are so hot, they are most often used whole—simmered in soups or stews, briefly sautéed in stir-fries, or soaked in a marinade—then removed. The novice should be warned of the pungency of these incendiary little peppers.
Vinegars and infusions
 |
|
| Red pepper jelly is a sweet and hot way to preserve your pepper harvest. |
A surplus of the smaller hot peppers can be pickled or, to add new flavors to the kitchen, infused. Favorite mediums for infusion are vinegar, liquors, and wines such as vodka, tequila, and sherry.
Choose fresh, unblemished chiles or small, bright-colored, dried ones. Wash the fresh chiles, and make a lengthwise slit in each pepper, fresh or dried, with a sharp paring knife (otherwise they will float like a cork). Cutting the fresh chiles in halves or quarters will give more heat to the infusion. Any chiles can be used, but success is assured with the traditional varieties: serrano, cayenne, jalapeño, Santa Fe Grande, red hot cherry, Tabasco, Thai, and the ornamentals.
 |
|
| Small chiles waiting to be dried or infused. Though they are little, they pack a powerful heat. |
To make an alcohol infusion, halve or quarter the chiles and push them down into the neck of the bottle. (You may have to pour out just a little bit of the alcohol if the bottle is full.) Use from two or three chiles to a half dozen, depending on their heat. I generally use two or three habaneros to a liter bottle of good tequila (for medicinal purposes). Two or three green jalapenos are good for flavoring a bottle of sherry, but I like to put five or six red cayennes or serranos in a bottle of vodka (great for bloody Marys or Italian vodka sauce for pasta). Do not heat the alcohol. The chiles will float at first but eventually sink. Allow to stand for three to four weeks before using.
Hot pepper vinegars are made in basically the same way, except the vinegar is generally heated. Place your choice of peppers in a large nonreactive, heavy-bottomed saucepan. If preparing pint jars, use about 1 cup of chiles per jar, and if preparing quarts, use about 2 cups of chiles per jar. Using about ½ cup less liquid than the size of the jar (example: 1½ cups liquid to a pint jar), pour the vinegar over the chiles. Let the contents of the pan come to a simmer, cover, and let stand until room temperature. Transfer the hot chile vinegar into sterile pint or quart canning jars, leaving about ½ inch headspace. At this point you can add a few sprigs of your favorite herbs, such as thyme, oregano, or sage, if desired. Seal the jars with sterile lids and rings, and set them in a pantry or a cool, dark place for two to three weeks before using. These infusions become hotter with age. Vinegars add zest to salads, sautés, and marinades and are essential in making escabeche. Both alcohol and vinegar infusions keep for at least one year.
Now is the time to gather your red hot chile peppers and preserve them for the winter months ahead. Keep in mind that they make wonderful warming gifts—so get busy! For more recipes and preserving information, check out these books:
 |
| I feel rich once I have captured the essence of the capsicums by drying them. This is truly kitchen wealth. |
- Classic Southwest Cooking by Carolyn Dille and Susan Belsinger (Biscuit Books, 1994)
- The Chile Pepper Book: A Fiesta of Fiery, Flavorful Recipes by Carolyn Dille and Susan Belsinger (Interweave Press, 1994)
- Chile Peppers: Hot Tips and Tasty Picks for Gardeners and Gourmets, edited by Beth Hanson (Brooklyn Botanic Garden, 1999)


Comments
Log in or create an account to post a comment.
Sign up Log in