

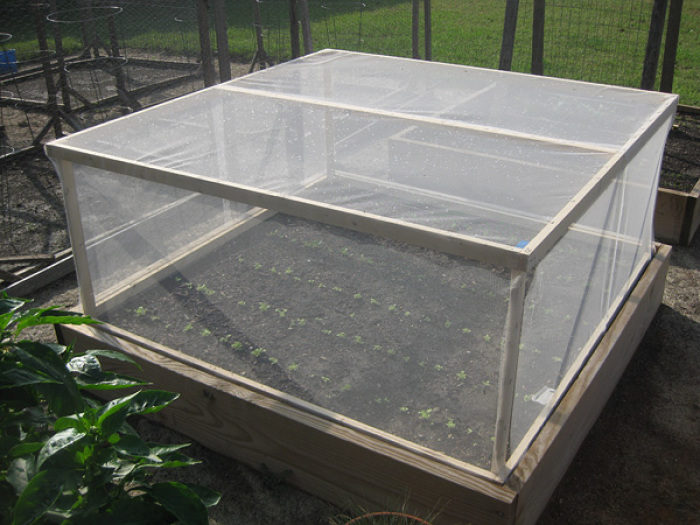
If you have a raised bed garden, here’s an “add-on” you can build to keep most pests from munching on your plants. You’re basically building a “lid” that fits on top and inside your existing raised bed. The idea is simple: if butterflies can’t get to your plants, they can’t lay the eggs on the leaves, which then turn into caterpillars that enjoy having them for lunch.
Here are the supplies you’ll need:
1. Plywood strips 1″ x 2″ x 8′ (The quantity will be determined by how many covers you’re making and how big your raised beds are)
2. Wood screws (I grabbed a box of #8 1-1/2″, 100 in a box)
3. White lace “screen” fabric (you can score some of this at a fabric/cloth store)
4. Thread
5. Screen door handles for easier moving (optional)
And the tools you’ll need:
1. Electric drill
2. Screwdriver (electric or manual)
3. Staple gun
4. Measuring tape
5. Scissors or knife
Building instructions:
Step 1. Before you head to the home center to get the wood strips, measure the INSIDE width and length of your raised bed(s). You don’t need to go right to the edge… leave a little wiggle room. Remember, you will be DOUBLING that length of wood, one for the top of the frame and one for the bottom. Then decide how tall you want the cover. You will be multiplying this length by 4 (for the 4 corners).

The total of these measurements will determine how much wood strips you will need. For example, since my raised beds are 5 feet square, I needed eight of the eight-foot strips; 4 for the top and 4 for the bottom. For each 8-foot piece I cut, I had a 3-foot piece left over. Since I decided to make my cover 2 feet tall, I could use the four 3-foot leftover pieces for the sides.

The photos should make this more understandable if it isn’t at this stage.
IMPORTANT NOTE: Remember to compensate for the thickness of the wood strip when cutting the length pieces. I almost discovered this precaution the hard way.

Step 2. Once you have cut your eight pieces for the top and bottom, drill pilot holes for the screws and screw the four pieces together.
Step 3. Take the “frame” to your raised bed to make sure your measurements were correct. If they’re not, NOW is the time to find this out, rather than after you’ve completely built it (d’oh!).

Step 4. If all is well, you can repeat Step 2 for the second frame.
Step 5. Screw the four side pieces to one of the frames.

Step 6. Turn the frame with side pieces over and line it up with the other frame below it. Again, screw in the side pieces to that one. You should now have the completed frame, ready for covering.

Step 7. This step may be optional for you depending on the size of your raised bed(s). In my case, since the width of the fabric wasn’t wide enough to cover the top and two side areas, I had to do it in two pieces. I needed something to staple/anchor the two sections of fabric to on the top. For this I cut another eight-foot piece and screwed it in halfway between two of the parallel sides on the top.

Step 8. Taking your fabric, cover the top and sides of the cover, anchoring it with staples. As you are stapling it to each side, pull the cloth in order to make a tight fit.
 |
 |
Step 9. Using thread, sew the two sides of cloth together if you need them to overlap. Again, this step may be optional.

Step 10. Attach two screen door handles on the top to assist you in lifting/moving the frame (optional)

Your “pest cover” is now ready for active duty, acting as a shield to protect your plants from bugs, birds, etc. Good luck!


Comments
I made the cover for my raised bed garden with metal planks and welding. It is much more difficult to do, but the construction is much more reliable. Neither wind nor rain are terrible for such a cover. Although, it is very inconvenient to store. This is a huge minus. I think even write a review on my cover for https://makeitcovered.com/. Is he worthy of calling the best cover? I really don’t know. Although, there are a lot of reviews on covers for home. Mine is pretty good enough. Greg, why don't you write about your case? Handmade covers - it's cool.
Log in or create an account to post a comment.
Sign up Log in