
As much as I love gardening, I must admit that I look forward to putting my garden to bed at the end of the season. In the same way my plants need a rest, I like my own dormancy period, which allows me the time to get cozy, hunker down, and neglect my unrealistic winter to-do list. When spring arrives, I will kick myself for not having picked up the book I meant to read, painted the guest bedroom, or finished the scarf that will now have to be next year’s Christmas present to my sister. But the one thing I won’t regret is the time I took in the fall to ready my garden for winter and to get a jump start on spring chores.
My gardening efforts in autumn range from reassessing the design of my beds to cleaning and storing pots. I also protect my vulnerable plants so that I am less likely to have to replace them after winter’s wrath has passed. This proactive approach works well for me because I garden on the go during the hectic spring and summer months. Here are some things I do to get ready for the following year.
Plant, move, and divide
Fall is a perfect time to fill in gaps
For me, the best time to plant, divide, and transplant is in early fall, when my garden layout is fresh in my mind and I can see the holes in my design. It’s also a good time to get reacquainted with my plants and see which ones are dead, which are overgrown, and which need a better spot to succeed. Dividing overgrown perennials provides me with plants to solve design flaws and rejuvenates the parent plants at the same time. Planting and dividing in fall also gives my plants a season to become established, and they reward my efforts with better spring performance.
Root-prune shrubs to be moved in spring
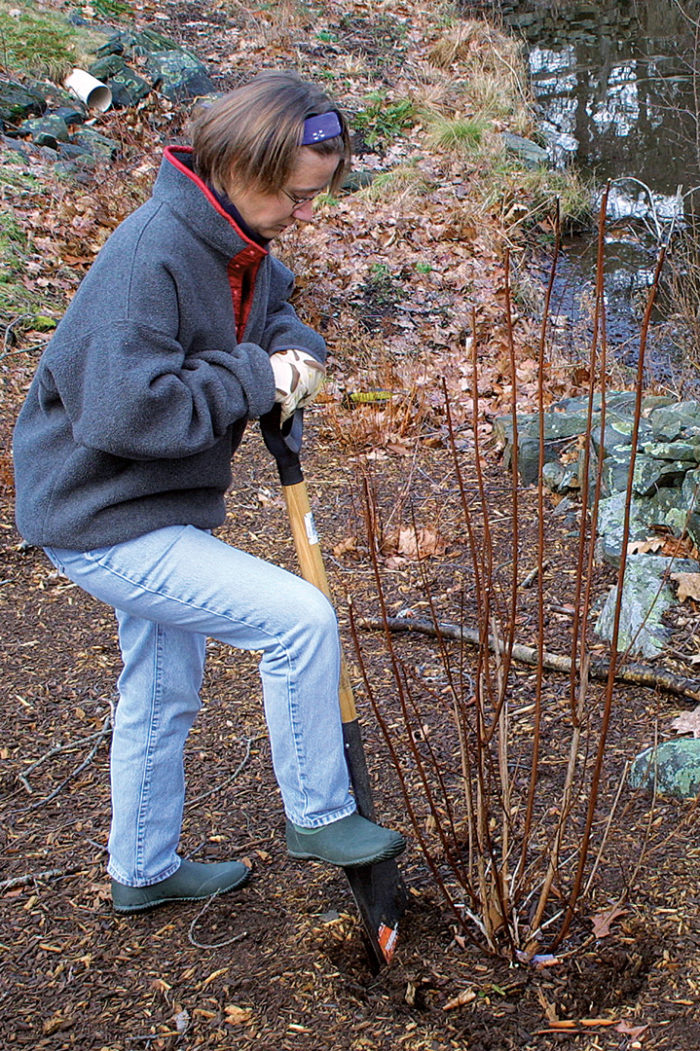
If I run out of time to transplant any woody plants in the fall, I plunge my spade into the soil around the base of the plant in a circle as if I were going to dig it up. This technique, called root pruning, makes it easier to dig up the plant in spring and encourages the plant to generate new roots inside the circle. These roots will give the plant a head start when it’s moved to its new location and help it get established quickly.
Tip: I welcome plants to their new locations by turning a good amount of compost into their planting hole, giving them a light topdressing of a naturally derived fertilizer, and watering them thoroughly.
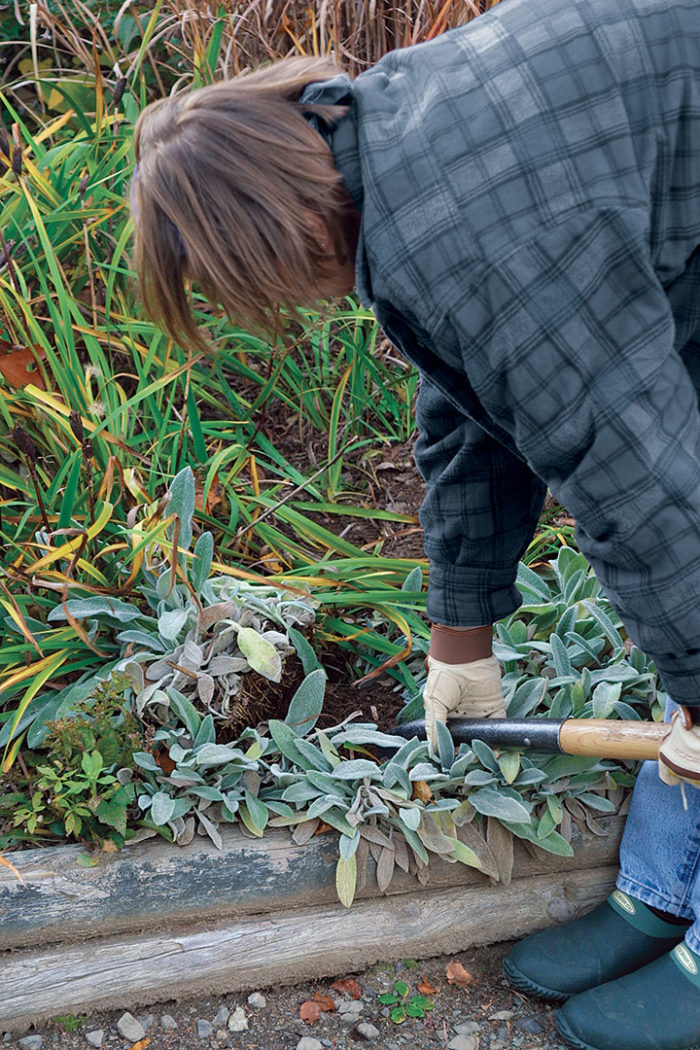
Clean up and cut back
Tidy perennial beds mean healthier plants
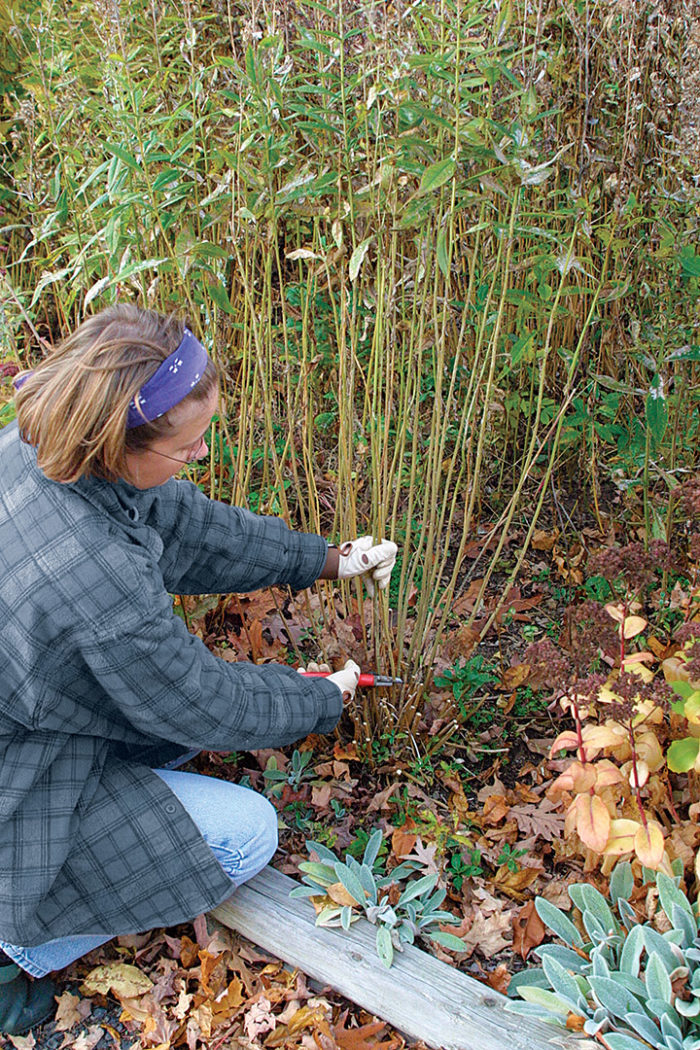
I also concentrate my fall-cleaning efforts on my perennial beds and borders. After a couple of hard frosts, I cut back my perennials to a height of 3 to 6 inches using a pair of hand pruners or, sometimes, a string trimmer. This task not only saves time in spring but also keeps harmful insects and pathogens from finding a cozy place to spend the winter. I spare plants like ornamental grasses, purple coneflowers, and black-eyed Susans because they provide food for wildlife and winter interest for me. Because some plants don’t like being cut back completely (and I can never remember which ones they are), I don’t cut my perennials all the way to the ground until spring. The remaining stubs serve as reminders of where plants are. I deposit the debris into my compost pile, which generates temperatures high enough to kill any pests and pathogens that may be present.
To be on the safe side, any plants infested with a pest or disease—or those prone to such afflictions—do not go into my compost pile. The dead leaves of plants like hostas, for example, can harbor fugitive slugs and snails, while plants like bee balm and garden phlox are often plagued with powdery mildew. The debris from these plants goes straight into the trash to prevent the problems from being reintroduced to my garden.
Tip: If I have time, I will rake out my shrub beds, but I don’t stress if it doesn’t get done. Woody plants don’t seem to be as susceptible as perennials to the insects and diseases that live in the debris, and the leaves provide a layer of insulation against winter.
Wash and store containers
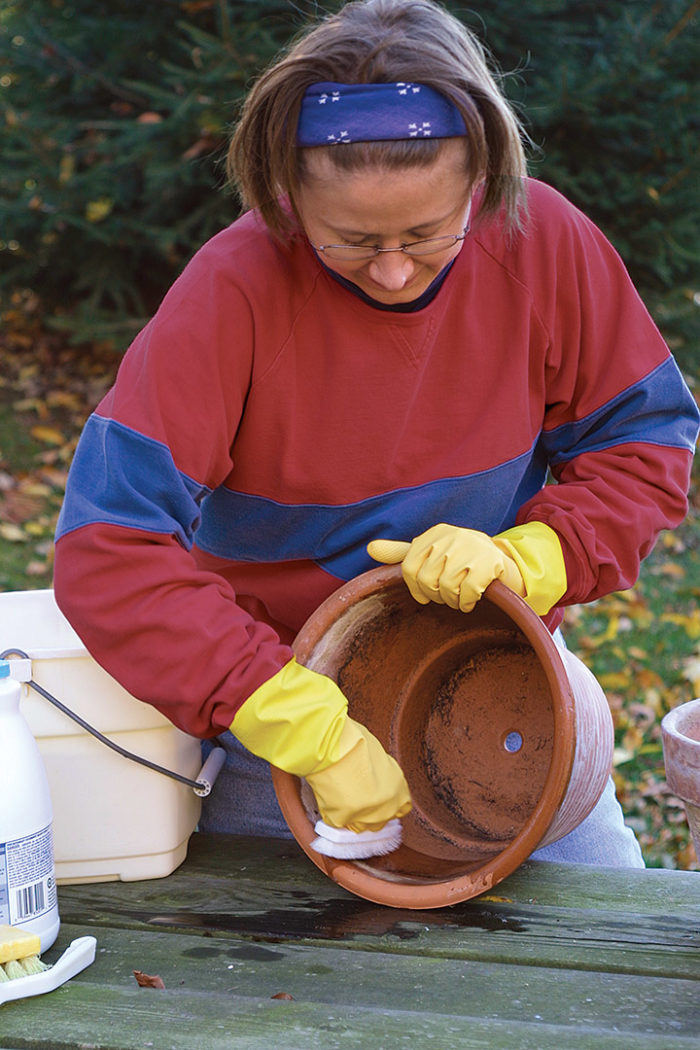
Having a compulsive desire to keep everything neat and organized, I can never call it the end of the gardening season without cleaning up my containers. If they are not bound for the basement to overwinter a treasured tender plant, I dump their contents into the compost pile and sanitize my pots before storing them for the winter. This practice helps prevent any pests or diseases from setting up shop in next year’s plantings. In spring, I just reach for a clean pot when I’m ready to plant.
To clean my containers, I first remove any remaining soil with a dry scrub brush. I then scour the pot inside and out with a solution of 10 parts water to 1 part bleach. Once the pots have dried, I stack them with newspaper or brown paper bags between them so that they don’t stick together or break when moved. If I run out of time to clean my pots, I make sure to store them where they will be protected from harsh winter conditions, such as in a basement, garage, or shed.
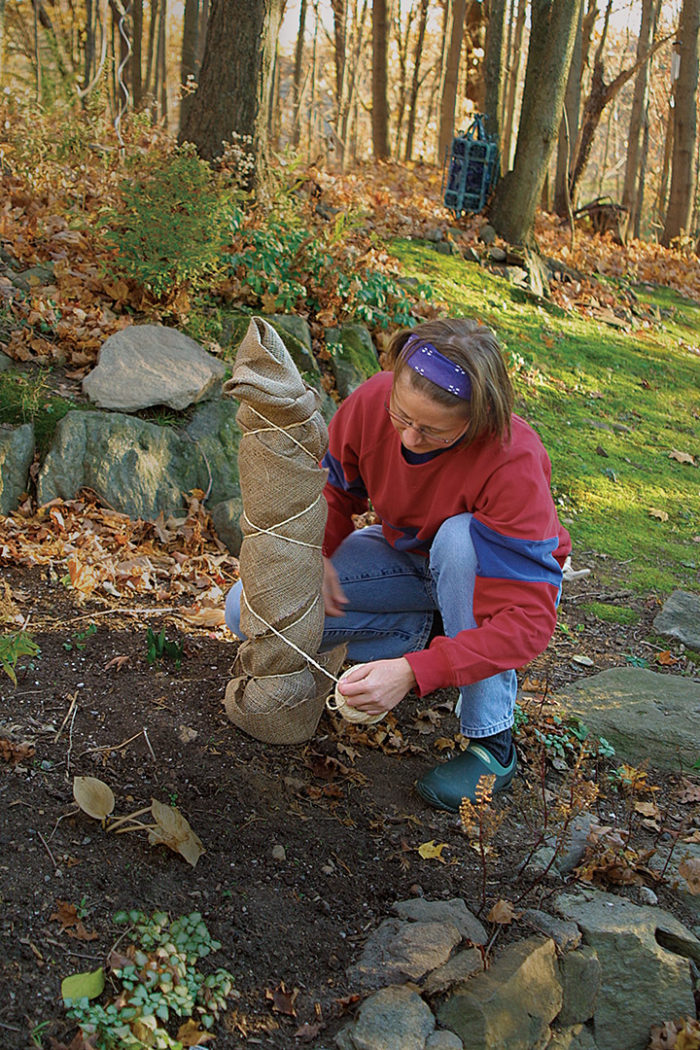
Protect vulnerable plants
Wrap young trees to prevent sunscald
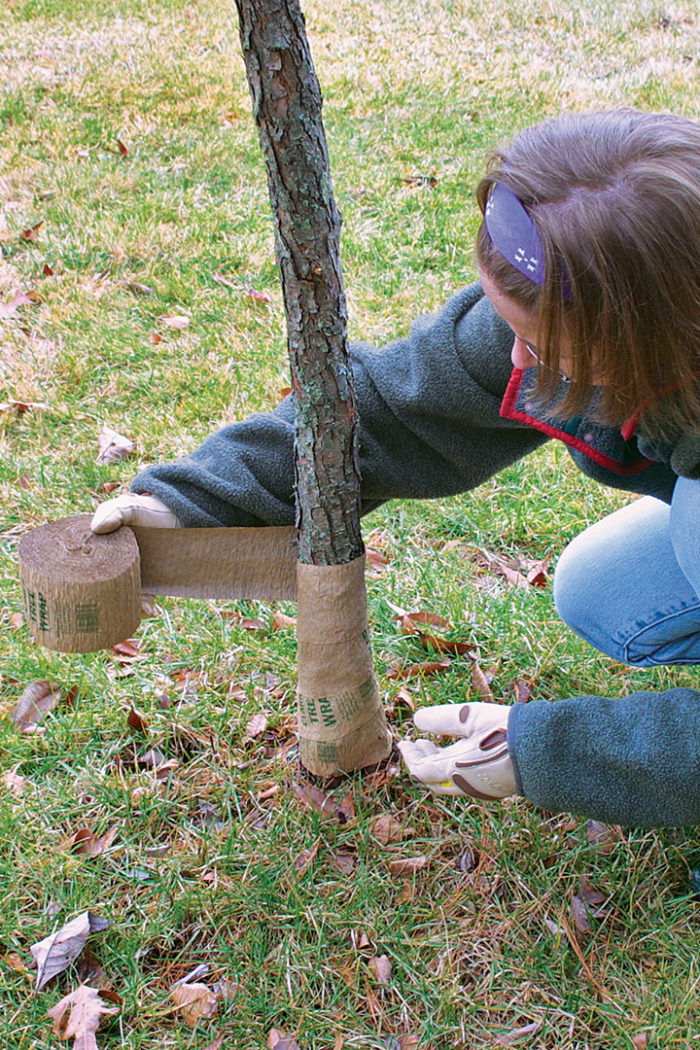
Young trees (those with trunks less than 4 inches in diameter) are prone to sunscald, or cracking caused by warm sun on a cold day. To prevent sunscald, I protect the trunks of young trees with tree wrap. The 4-inch-wide paper strip stands up to water but doesn’t retain moisture, which can induce disease. Starting at the bottom and working my way up, I circle the trunk, slightly overlapping the wrap at each pass. Once I reach the top of the trunk, where the tree’s branches begin, I secure the paper by wrapping it back around itself or tying it off. I remove the wrap when temperatures stop fluctuating severely in early spring. The wrap also protects the tree’s bark from deer or rodent damage.
New additions like a blanket of mulch
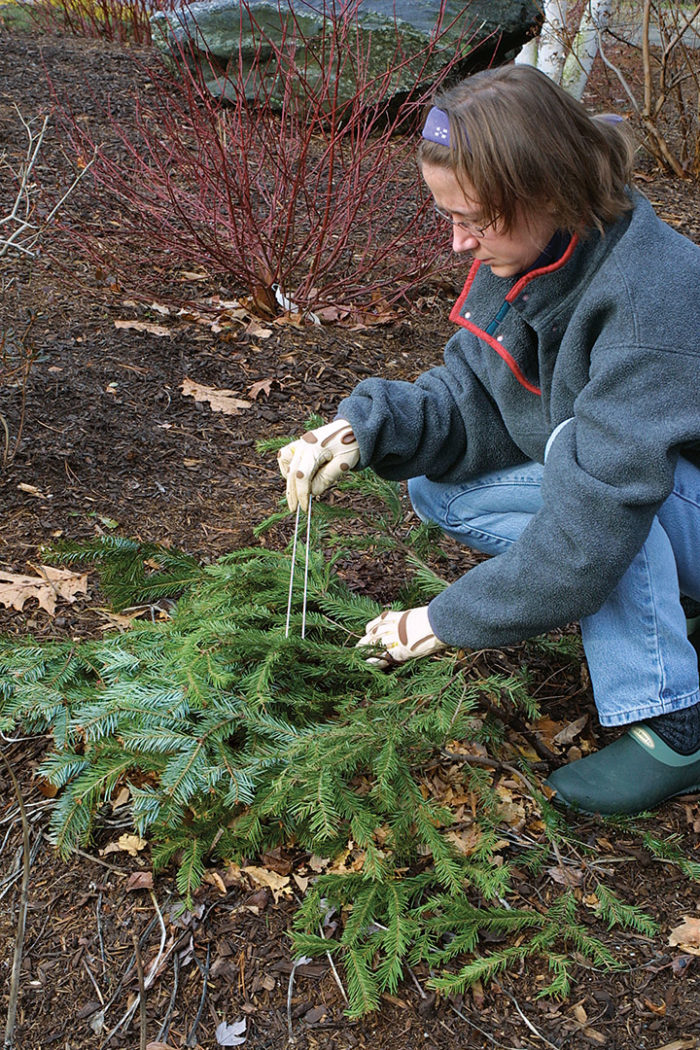
Before my garden drifts off into its winter slumber, I provide some protection for vulnerable plants. Newly planted trees and shrubs get a 3-inch-deep layer of mulch to retain moisture and protect the soil from temperature fluctuations that cause frost heaving, which can expose crowns and roots to harsh winter weather. For my newly planted or shallow-rooted perennials, I wait until at least three hard freezes—when perennials are dormant—and insulate them by covering their crowns with a 2-inch-deep layer of dry leaves. An evergreen bough held in place with an 8- or 10-inch-long anchoring pin or a rock placed on top keeps everything secure. The mulch prevents frost heaving and premature bud break. If I put the leaf mulch on before the plant is dormant, I might smother the plant or encourage disease to develop.
—Jennifer Benner, associate editor, has begun hibernating and won’t be seen again until the daffodils start blooming.


Comments
The first photo shows the author completely wrapping a shrub but the article doesn't describe this kind of protection. I have zone denial and several shrubs that I need to wrap and would appreciate any tips.
Outstanding article - full of great tips and advice. I agree with lijda though - I would really appreciate similar advice regarding burlap wrapping small shrubs: which ones benefit most, how to prep the shrub, materials, method. Thank you!
Log in or create an account to post a comment.
Sign up Log in