

-
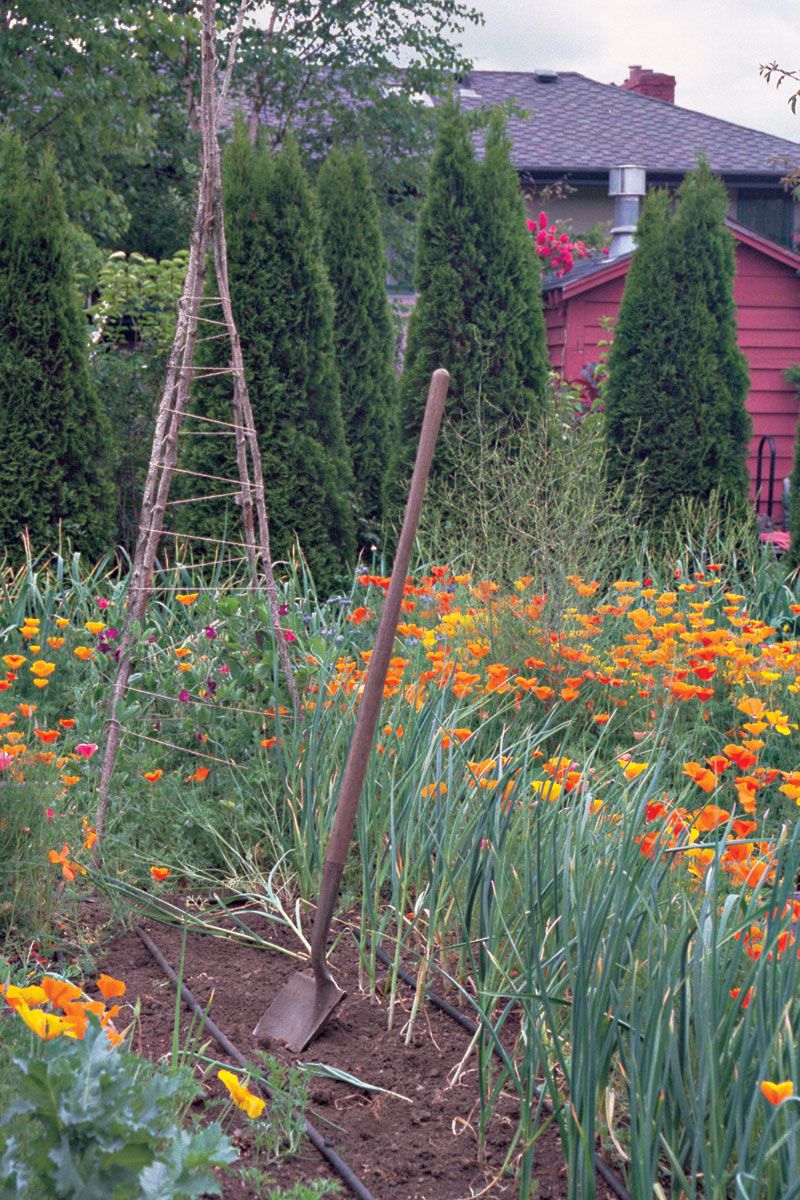
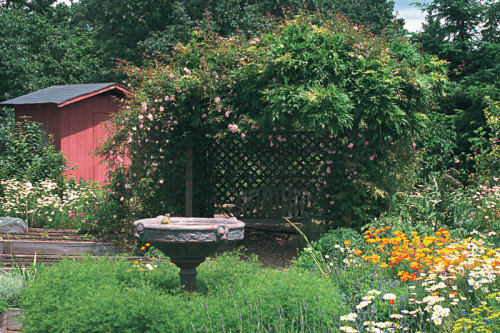
This kitchen garden is attractive and productive.Photo/Illustration: Ruth Lively
-
The main garden entrance is flanked by benches. An arbor supports rose and clematis vines, a classic combination.Photo/Illustration: Ruth Lively
-
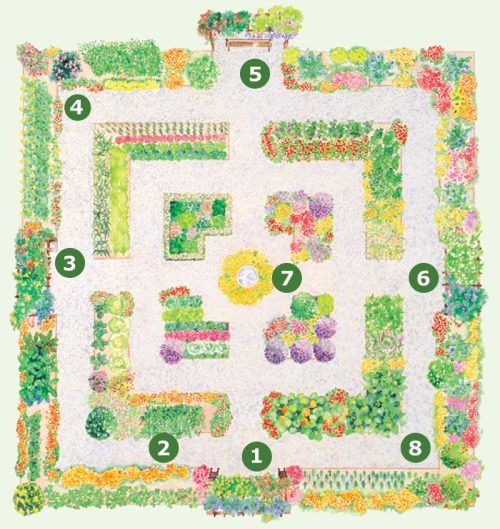
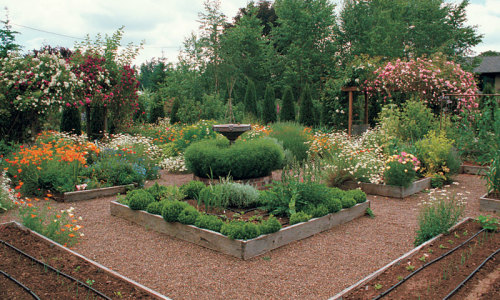
This large formal garden has four sections. Each quadrant contains three L-shaped beds. Paths are 4 ft. wide.Photo/Illustration: Michelle Burchard
-
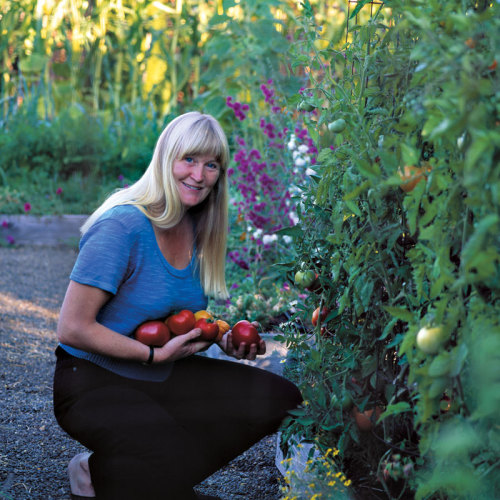
Photo/Illustration: Margaret de Haas van Dorsser
-
Photo/Illustration: Lee Anne White
-
Photo/Illustration: Ruth Lively
-
Photo/Illustration: Ruth Lively
-
Photo/Illustration: Lee Anne White
-
Photo/Illustration: Ruth Lively
-
Photo/Illustration: Ruth Lively


When we purchased our house in a suburb of Portland, Oregon, we acquired a piece of property so large and sunny it was full of potential for creating a variety of gardens. But our most pressing task was to create a vegetable garden. We could hardly wait for the luscious tomatoes, the sweet corn, the basil. Of course, there would be other vegetable crops, along with berries, flowers, and herbs.
The excitement caused me a few sleepless nights as I mused over the possibilities. With my husband, Mark, fast asleep and unaware of my scheming, I began formulating an idea. We would put in raised beds framed in wood. The straight lines of the beds suggested that the design of the garden should be formal. I began planning a square garden, with symmetrically placed beds and a circular bed in the center. The paths would be wide enough to allow easy access with the wheelbarrow, the beds just wide enough to reach the center from either side without stepping into them.

I drew my ideas on graph paper, and a lovely formal design evolved with four equal sections, each containing three L-shaped beds. All paths and beds are an ample 4 feet wide. The outside beds are largest, with each leg of the L measuring 22 feet long. Nestled inside are two progressively smaller layers of L-shaped beds. At the center of the garden, I planned for a birdbath surrounded by a circular flower bed.
I knew structures would be important because they would define the garden as a room and add vertical space to grow climbers. I planned for four arbors, one centered on each side, connecting the outermost beds. Three would frame entrances to the garden, and the fourth would shelter a bench to offer a shady spot to rest and enjoy the view.
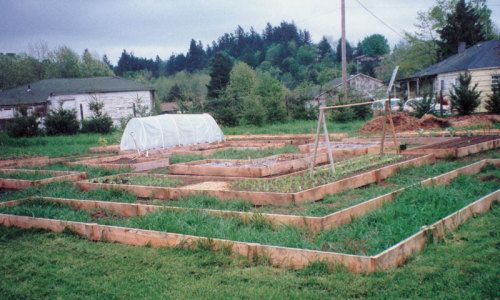
Year one—the beds and paths
We sited our kitchen garden on ground that had been pasture, anticipating the soil there would be fertile. We soon discovered the chosen area to be exceedingly rocky, which made digging a major undertaking. At least half of the “soil” was rock, some the size of cantaloupes. We grossly underestimated how labor-intensive this project would be. Fortunately, what soil there was was actually of good tilth and, with annual amendments of horse manure and cover crops, it has become wonderfully friable and fertile.
We built the raised-bed boxes using pine. We knew this wood would rot within a few years, but we wanted to keep expenses to a minimum. Eight years later, the wood still looks good, except for a couple of boards that need replacing. In retrospect, it would have been a good idea to attach cross pieces midway inside the longer beds to prevent the boards from bowing out. Someday, when we can afford it, we hope to replace the wood frames with brick beds.

Once the frames were constructed, we dug out soil from the paths to add to the beds. Simultaneously, we dug out rocks from the beds to add to the paths. We decided to cover the paths with pea gravel. To minimize weeds (or so we thought), we spread the paths with a 2-inch layer of sand covered with carefully tacked-down landscape cloth before spreading the gravel. The landscape cloth was a big mistake! The ends kept creeping out of the gravel, and I found myself constantly tucking in the ugly bits here and there. After a couple of years of misery, we finally pulled out the cloth, and all was fine.
The pea gravel is an excellent seed bed, so seedlings appeared even when the landscape cloth was in place. I use several methods to keep seedlings off the path. One is to rake with the flat back of a metal garden rake to dislodge the seedlings. Another is to lay transparent plastic over sunny paths for a couple of hours to fry the unwanted plants. his works only in full sun. A gravel path would be an excellent place to use one of those propane-fired blowtorch eeders, too.
Before laying the landscape cloth and gravel, we installed our drip irrigation system. We realize now that we probably should have slipped the tubing that runs between the beds into some PVC pipe to protect it. This drip system, which we have set on timers, is one of the most liberating things in our garden.
Year two—the arbors
In February of the following year, we began building the first of the four arbors. This was where the rocks really hindered us. Mark had to use a pickax to dig the holes for the posts, and got a shoulder injury for his efforts. But we persevered and by the end of July we had four lovely structures just waiting for climbers.
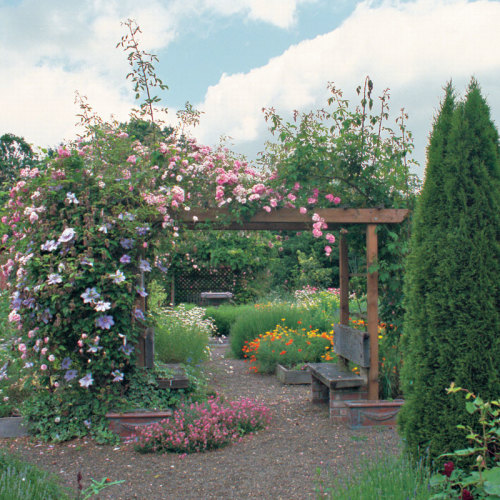
The three entry arbors I planted with climbing roses and clematis. The fourth and largest arbor, which shelters the bench, is festooned with a climbing rose and wisteria. This was one mistake I made. I get eaten alive by the rose during those several times each year that I cut back the wisteria. Clematis is a much better partner to roses.
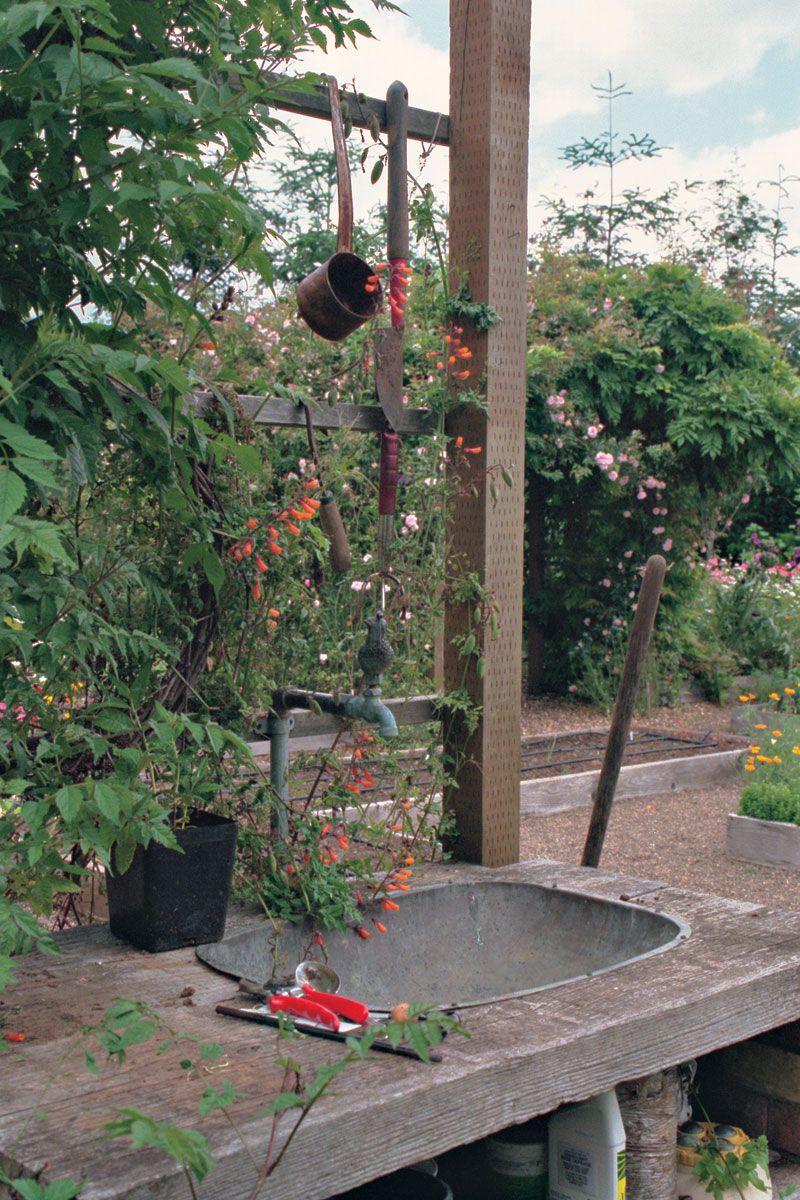
At one of the entry arbors, I decided to install a potting bench with an outdoor sink so I’d have a handy place for working and a wash-up area for vegetables. (See “Plumbing an Outdoor Sink,” right, for how I did this.) I happened to mention this plan to a neighbor, who offered an old copper sink that was just collecting dust in his shed. How lucky we were!
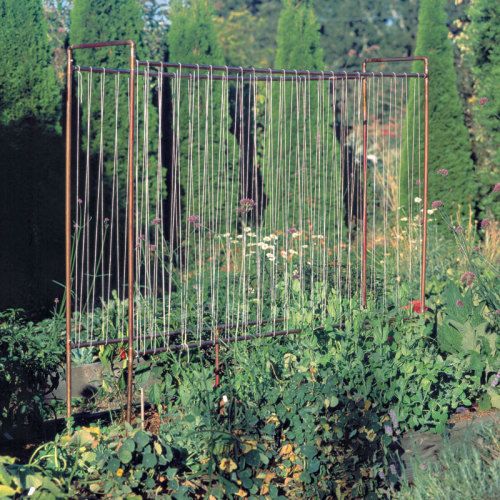
In addition to the arbors, we needed structures inside the garden to support the climbing crops. Copper trellises provide great permanent supports for peas, cucumbers, and green beans. These trellises are easy to build and acquire a beautiful patina with age. For instructions, see Constructing a Copper Pipe Trellis.
Finally, to give our kitchen garden a feeling of seclusion, and to set off the vibrant colors and textures within, we surrounded it with an open hedge of upright, narrow ‘Emerald Green’ arborvitae. The evergreens follow the formal ymmetry of the garden. We spaced the arborvitae to allow glimpses between each, thus preventing the heavy feeling of a solid wall.
| Plumbing an outdoor sink One of the handiest things in our vegetable garden is the outdoor sink and potting bench. In addition to the faucet at the sink, I installed a second faucet to the side of the arbor so I could leave a hose attached to it.Plumbing the faucets wasn’t difficult. I extended the water line from another garden faucet with PVC pipe laid about 12 inches deep. At the elbow where I attached the riser to the sink faucet, I installed a pressure valve, which releases any water left in the line after shutting off the water for the winter. This is important because it prevents frozen-pipe problems. Under the pressure valve, I formed a small dry well, about 6 inches by 6 inches, filled with rocks to make sure the water that was released would have a place to go. The waste water from the sink drains into another, larger dry well situated right under the sink. To make it, I dug a 2-foot by 2-foot hole and filled it with fist-size and smaller rocks. Then I topped it off with pea gravel to blend with the paths. |
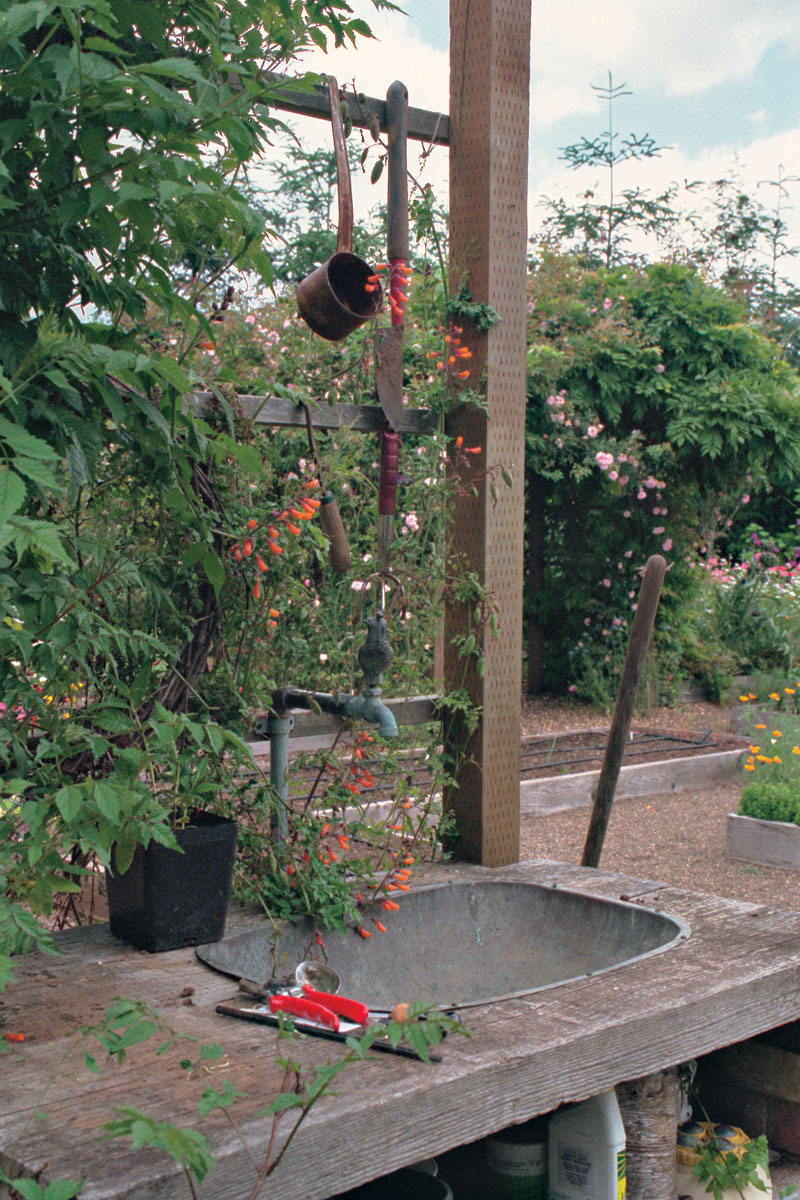
The outdoor sink and potting bench. |
Year three and beyond—the fun stuff
Midway through its second summer, the structural elements of our kitchen garden were pretty much finished. Now the work is fun—planning, planting, harvesting, and of course, eating. The formal layout of the garden serves as a erfect foil for luxuriously bountiful plantings. Plants billow into the paths, softening the straight lines of the beds, but there remains always a sense of order.
 |
|
The outer beds hold taller plantings, including corn and, on the copper trellises, pole beans, ‘Sugar Snap’ peas, and cucumbers. I always find room to tuck in some fragrant sweet peas and bright morning glories on the trellises, too. Also in the outer beds are blueberry and currant bushes. We plant tomatoes, eggplants, and all forms of peppers in the middle rank of beds, using a four-year crop rotation. Two of the innermost beds are home for perennial herbs, and two for annual herbs and lettuce.
Since I had plenty of space, I decided early on that flowers would play an important role in making the garden beautiful. I edge some of the beds with nasturtiums and ‘Lemon Gem’ marigolds, both of which are edible. I also reserve a generous amount of space for annual flowers—delicate Shirley poppies, bachelor buttons, daisies, and California poppies. All of these self-seed year after year, growing happily at the feet of blueberry and red currant bushes.
In June, most vegetable gardens aren’t too exciting, but in ours it’s a lovely time of year, thanks to the flowers. The arbors are smothered with roses and clematis blossoms, and annuals bloom in pastel shades, with pink and blue predominating. Then, in August and September, the palette shifts to warm colors. Golden sunflowers provide a playful backdrop for tomatoes and bell peppers. Deep purple eggplants and bright red chile peppers add visual excitement as well as wonderful flavors to our meals.
In the eight years since we created our kitchen garden, we’ve added many other types of plantings on our land. But the vegetable garden, our first garden, remains a favorite. Exuberant plantings soften the formality of the symmetrical design, and give a sense of generous abundance. The result is a garden that is productive and pretty, classic yet romantic.
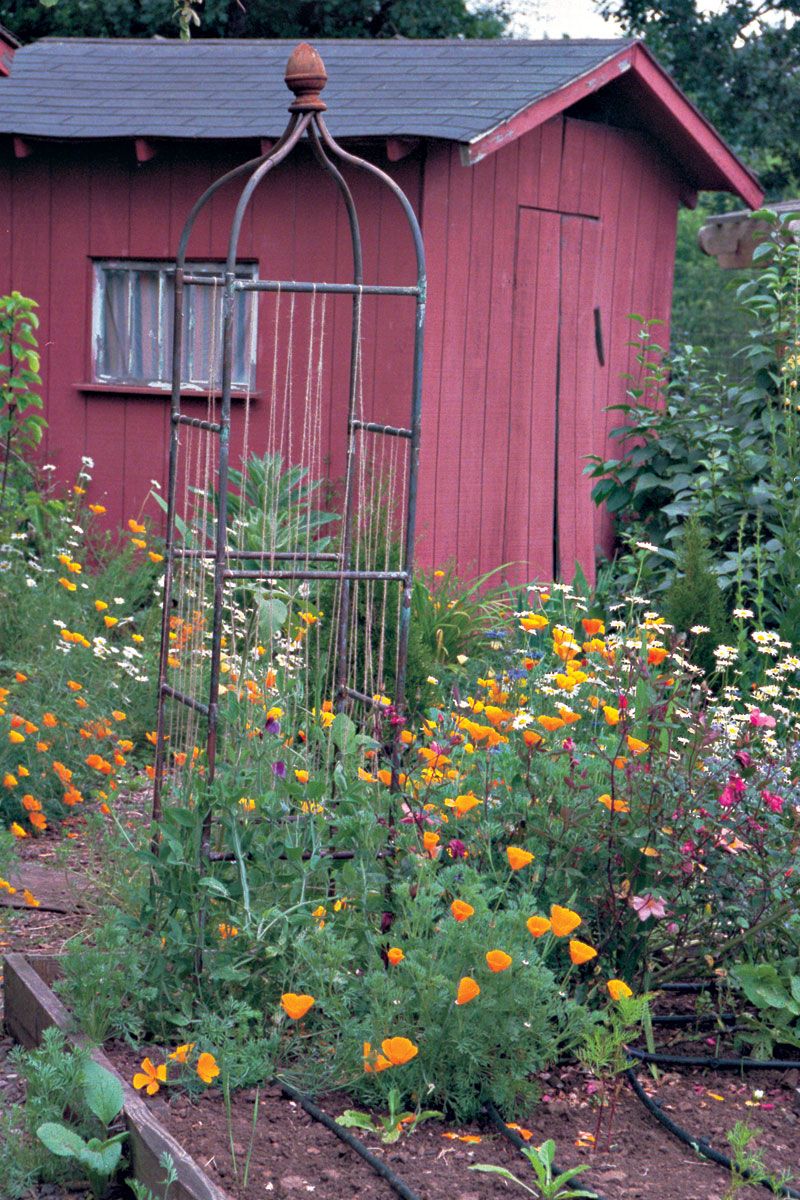
| Movable trellises. At right, a trellis topped by a wooden finial supports sweet peas. The curved top is made from pliable copper refrigerator pipe, shaped by hand. The pea trellis (below) looks ready to make music. Copper trellises aren’t difficult to make. Read Constructing a copper pipe trellis for details. |  |
|
by Margaret de Haas van Dorsser
October 1999
from Kitchen Gardener Issue #23


Comments
Log in or create an account to post a comment.
Sign up Log in